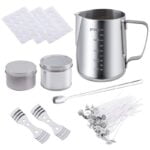
Making Your Own Natural Candles
Candles have been around for centuries, and for good reason. They provide a soft, calming light, and can be used to create a relaxing atmosphere. Not to mention, they make a great addition to any room in your home.
If you’re looking for a way to add some natural ambiance to your space, consider making your own candles. It’s a surprisingly easy process, and you can use a variety of different materials to create your candles.
Here are a few tips for making your own natural candles:
1. Choose the right materials.
When it comes to making natural candles, you have a lot of different options when it comes to materials. You can use beeswax, soy wax, or palm wax, or you can use a combination of different materials.
2. Choose the right wick.
When choosing a wick for your candle, make sure to choose one that is made for natural candles. Cotton or hemp wicks are a good option, and they can be found at most craft stores.
3. Choose the right scent.
One of the best things about making your own candles is that you can choose your own scent. You can use essential oils to give your candles a unique scent, or you can use a scented wax melt.
4. Choose the right container.
The container you choose for your candle will depend on the type of candle you’re making. If you’re using a block of beeswax, you’ll need to use a container with a wide mouth. If you’re using a container made of soy wax, you can use just about any type of container.
5. Melt the wax.
To melt the wax, place it in a saucepan and heat it over low heat. Be sure to stir the wax occasionally so that it doesn’t burn.
6. Add the scent.
Once the wax is melted, add the desired amount of essential oil or scented wax melt. Stir the wax until the scent is evenly distributed.
7. Add the wick.
Once the wax has cooled slightly, add the wick to the center of the container. Be sure to anchor the wick in place before pouring the wax.
8. Pour the wax.
Pour the wax into the container, making sure to fill it to the top.
9. Let the candle cool.
Once the wax has been poured, let the candle cool completely before lighting it.
10. Enjoy your candle!
Once the candle has cooled, light it and enjoy the soft, natural light.
Colonial America Candle Making
In the early days of America, candles were an important source of light. They were used in homes, businesses, and churches. In fact, candles were so important that they were often used as a form of currency.
Making candles was a difficult and time-consuming process. It involved melting tallow, beeswax, or other waxes, and then pouring the wax into molds. The molds were then placed in a hot oven or on a stove. After the wax had cooled, the candles were removed from the molds and trimmed to size.
Colonial Americans developed several ways to make candles. One popular method was to dip the wick into a pot of melted wax. Another method was to pour the wax into a mold, and then use a heated metal tool to create a ridged surface. This ridged surface helped the candle to burn more evenly.
In the early days of America, most candles were made from tallow, a type of animal fat. Tallow candles produced a smoky, unpleasant odor, and they were not very durable. In the late 1800s, beeswax candles began to be used more often. Beeswax candles are odorless and burn for a long time.
Today, most candles are made from paraffin, a type of wax that is derived from petroleum. Paraffin candles are inexpensive and come in a variety of colors and scents. However, they often produce sooty smoke when they are burned.
There are many different types of candles, each with its own unique properties. Some candles are made for burning indoors, while others are made for burning outdoors. Some candles are made for religious ceremonies, while others are made for everyday use.
Whatever your needs, there is a candle for you. So why not try making your own candles? It’s a fun and easy way to get in touch with America’s colonial past.
Just A Couple Of Guys Making Candles
When we founded Just A Couple Of Guys, we were just a couple of guys with a dream to start our own business. We were passionate about candles and loved making them, so we decided to start a candle company.
We started out making candles in our kitchens, and quickly learned that we loved making candles as much as we loved burning them. We started getting requests from friends and family for candles, and before we knew it, we were a full-blown candle company.
We continue to make candles in our kitchens, but we’ve outgrown them. We now have a studio where we make candles for our online store and for wholesale orders.
Our candles are made with care and precision. We use only the finest ingredients, and we never use paraffin or other petroleum-based products. Our candles are made with natural soy wax and beeswax, and we use essential oils and fragrance oils to scent them.
We love making candles, and we hope you love burning them just as much.
Gel Candle Making Supplies Australia
Making your own gel candles is a fun, easy and affordable way to add some personality to your home. You can create any design or scent you like, and gel candles make great gifts, too.
To get started, you’ll need some basic supplies. These include gel candle wax, a gel candle dye or fragrance, a heat-proof container, a wick, and a candle holder.
The first step is to melt the wax. You can do this in a microwave or on the stove. Once the wax is melted, add the dye or fragrance. Stir well to combine.
Next, place the wick in the container. Pour the wax mixture over the wick, making sure to fill the container to the top.
Finally, place the candle holder over the top of the container and allow the candle to cool. Once it’s cooled, light it and enjoy!
Making Gel Candles Color
ful
Making gel candles colorful is easy and a great way to add some fun to your candles. You can use any type of food coloring to do this, but for the best results use gel food coloring.
To make your candles colorful, start by adding a few drops of food coloring to the melted wax. Stir the wax until the food coloring is evenly distributed.
Then, pour the wax into your candle molds. Be sure to add enough wax so that the molds are filled up to the top.
Allow the candles to cool and harden. Once they are hardened, enjoy your colorful candles!

Welcome to my candle making blog! In this blog, I will be sharing my tips and tricks for making candles. I will also be sharing some of my favorite recipes.

