Adapting the Post to Targeted Audiences
Making Whipped Candles: A Comprehensive Guide
Welcome, DIYers of all skill sets! Whether you’re a beginner or an experienced maker looking to learn new techniques, this comprehensive guide will help you make incredibly beautiful and unique whipped candles from start to finish. We’ll cover all the basics and get into some more advanced tips and tricks along the way, so let’s dive right in!
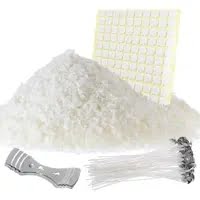
For beginners, we recommend starting with a standard candle-making kit. These kits usually come with instructions on how to create basic poured candles, as well as the tools necessary to get started. If you need additional supplies such as wax, wicks, dyes and molds, they can easily be purchased online or at your local craft store. You’ll also need a heavy-duty hand mixer for the whipping process. Once you have the necessary materials in hand, it’s time to begin!
Create your desired color by melting down candle wax flakes (fractionated or paraffin) and adding in liquid dye drops until you achieve your desired hue. Once your wax is melted and dyed correctly, separate it into two smaller pots and let it cool for about 10 minutes each before moving onto the next step ” whipping. Pour one container of cooled wax into the bowl of your mixer, set it to its lowest speed and slowly add tiny drops of fragrance oil until your desired aroma is achieved. Turn the mixer up to medium speed and continue mixing until the wax turns white and fluffy like beaten egg whites ” this is known as creaming. Then turn up the speed to maximum and beat for an additional 2-3 minutes until stiff peaks form that hold their shape when scooped out (this should take about 5 minutes total). At this point, carefully spoon half of your whipped wax back into one of its original containers” we call this our “base layer”. Now turn off your mixer while we move onto layering our candles!
For any more advanced crafters looking for something extra special that requires further technique – feel free to tint or differently blend shades using multiple types of dyes such as liquid dye drops or powdered pigment before layering them together in meaningful ways in order to create interesting visuals inside your finished candle — like ombre looks or flecks of complimentary hues! Play around with different fragrances too – think essential oils instead of scent additives like natural extracts which are both cost-effective options – try mixing fresh lemon peel with sage for an invigorating scent profile or cedar wood chips with orange peels for a truly calming sensation once lit. Choosing interesting vessels to pour your finished creations into can keep things creative too — like old apothecary jars or vintage teacups that can replicate a warm atmosphere for any room décor setting!
If making whipped candles sounds fun but intimidating ” don’t worry! We hope this comprehensive guide has shed some light on everything from beginning steps through more tailored techniques that suit various levels of skill sets found among experienced crafters alike. Best wishes on creating something uniquely beautiful everyone will enjoy!
Showcasing Different Types of Whipped Candles
Making whipped candles is an easy, yet creative way to spruce up the home for any occasion. The possibilities for decorating with this type of candle are endless. With just a few simple materials, you can create gorgeous and unique designs that will leave any guest in awe.
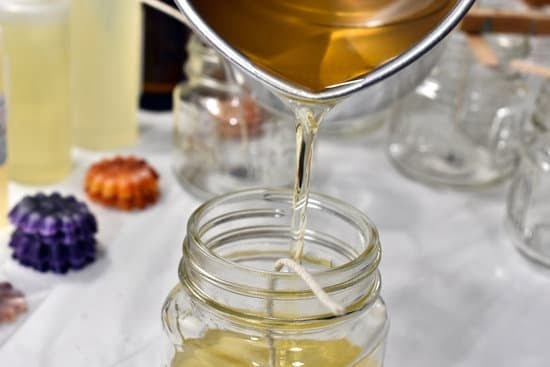
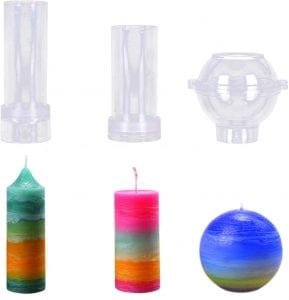
To get started, gather your supplies including paraffin wax, wicks, colors and scents of your choice. To begin making the basic design, start by melting your wax gently in a double-boiler before adding colors and fragrances. Once it’s melted completely and ready to use, turn off the heat source and let cool down very slightly. Then take a spoon of wax and whisk it around quickly until the desired consistency is reached. Pour into molds or containers of your choice to create the candle shape. Next add decorative touches like glitter or embellishments as desired to customize further if desired!
Aside from the basic design variation ideas that can be experimented with are endless ” different colors and scents for different occasions or season; experimenting with macrame techniques to adorn candles and give them a more rustic feel; swirling parallel stripes to mimic frost effects; changing up sizes ranging from tiny tea light holders or big dinner candelabras. You can also add texture elements like sea shells, rocks or pinecones dipped in molten wax or even layer two or three colors into one candle giving it a marbled look which looks beautiful when lit! Finally, once the candles have cooled down completely affix each wick carefully at the bottom using adhesive glue before lighting them up on display & enjoy!
Introducing DIY Projects with Whipped Candles
Whipped candles are a fun and easy craft that everyone can enjoy. Not only are they fun to make, but they look great in any room and make for great gifts. What makes them so special is the ability to customize your project with different aromas, colors, and shapes. With whipped candles you can create something unique every time.
The process of creating whipped candles is not complicated at all. First you will need a double boiler or an electric wax melter to melt your chosen wax. Once melted, add colorants and fragrances as desired. The next step is to add the stabilizer – this will help hold the foam together when it solidifies. Slowly pour the mixture into a container of choice or pre-made molds, then use a hand mixer to whip the mix until you achieve light, fluffy texture ” Make sure not to over-whisk or your structure won’t stay sturdy once cooled! Once the texture appears right, pour the remaining mixture onto parchment paper or an oven safe plate to quickly cool before using your fingers or silicone tools shape/patterns on top for more intricate designs (from floral patterns to feathers) Let it dry overnight and voila ” You’ve just created some awesome homemade whipped candles!
Besides creating”a wonderful sense of pride”from crafting splendid homegrown pieces, making these whipped candles also provides further savings since you’re minimizing costs from premade materials such as wicks and containers (by reusing things like cereal boxes & empty jars) Can you think of anything more sustainable? We’d love to hear about it! Give our DIY projects with Whipped Candles page a visit and get inspired by some amazing ideas that use this crafting technique! We provide photos with step-by-step instructions that’ll guide even beginners through all stages of this creative venture”from gathering supplies up till garnishing them. Do come check us out and start planning on how you want your amazing creations look like!
Offering Gift-Giving Ideas Using Whipped Candles
Whipped candles make great gifts for any special occasion or holiday. They are easy to make and can be personalized with colors and fragrances of your choice. For example, you can make gift baskets filled with variously colored and scented whipped candles that are sure to delight your recipient. You could place small cups of charmed wax in each basket or individually wrap the candles for a sweet presentation. For wedding favors, whip up several batches of versatile light green scented candles and place them in organza bags with ribbons for a romantic touch. Brightly colored whipped candles in yellow, pink, blue and purple are also perfect for hostess gifts when wrapped in attractive decorative paper. Whipped candles wrapped with bow ties, bells, tag words or labels can be displayed together on a tray or platter at the party entrance or given as separate gifts.

Welcome to my candle making blog! In this blog, I will be sharing my tips and tricks for making candles. I will also be sharing some of my favorite recipes.


