Introduction
The House Of Crafts Gel Candle Making Kit is a great way to get started making your own beautiful, unique candles. With this kit, you don’t have to worry about shopping around for all the necessary materials – it’s all conveniently included in one easy to use package. Not only that, but it’s especially great if you’re a beginner who wants to start experimenting with gel candles and related crafts. The kit contains detailed instructions that guide you through the entire process from start to finish so you will have no trouble creating professional-looking results every time. And this fun activity is also a great way to spend quality time with friends or family – as everyone takes part in creating their very own masterpiece!
Overview of Materials
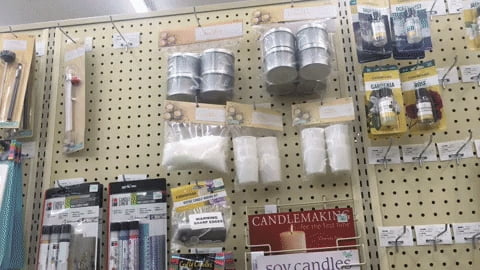
The House Of Crafts Gel Candle Making Kit comes with all the materials you need to make your own gorgeous gel candles. In the kit, you will find:
• 3 x 2 oz packets of Beewax Gel- Mixed Colors (red, yellow, blue)
• Instruction leaflet
• 1 x 10 inch wick
• 1oz of Fragrance Oil – Mountain Air
• 1oz of Natural Mica Coloring Powder
• An empty stirring spoon
Apart from these items, there are some additional items that may be needed for creating the perfect gel candle:
• Container/s (heat-resistant glass/ceramic/metal containers)
• Wick Anchors and Glue Dots (to secure the wick position in the container)
• Thermometer for checking wax temperature during pouring and cooling.
Safety Guidelines
Safety Guidelines:
When working with gel, it is important to wear protective eyewear, gloves and clothing. This will help reduce potential injury should the gel come into contact with skin or eyes. When heating the gel, adequate ventilation must be in place and be careful not to touch any areas with an open flame. Place non-flammable materials such as ceramic, glass, stainless steel or silicone on a heatproof surface only for heating gel candles. Do not add raw wicks directly into the gel mixture as this can create a risk of fire due to the flammability of the wick. Before lighting any candle ensure that it has been placed safely away from anything that can easily catch fire or be damaged by the candle flame, such as draperies or fabrics. Never leave the room when a candle is lit or burning. Always keep candles and wax out of reach of children and pets.
Preparing the Gel
To prepare the gel for your candle, you can add coloring to create a more visually appealing candle. Consider using liquid or powdered food dyes, making sure to mix the dye thoroughly into the gel before pouring it into the mold. You can also add fragrances to the gel by adding a few drops of essential oil like lavender or rosemary – again mixing thoroughly before pouring into the mold. If you want an extra special touch, try adding dried herbs such as lavender buds or rose petals, glitter and sparkles, or even scented wax cubes – these all make great additions to create a personalized dream-candle!
Heating the Wax
There are many types of wax used in making gel candles, such as paraffin wax, soy wax, beeswax, coconut wax, and palm wax. Paraffin is the most common type of wax available and is best suited for general candle making. It has an excellent scent retention as well as giving your candles a good burn time.
Soy wax is an eco-friendly alternative to paraffin and is made from renewable resources. It gives off a clean burn which reduces soot when burning while providing a strong scent throw.
Beeswax is another great option if you want a natural smell when burning your candles. It has excellent hold times and produces less smoke when burned than other forms of wax.
Coconut wax offers similar properties to soy but with a smoother finish and an even cleaner burn providing you with luxurious candles that have a longer burning time.
Palm wax is becoming more popular for its superior crystallization patterns that makes it look like snowflakes within the candles, making them look quite beautiful! It also has good scent retention although it does have a shorter burn time than other types of wax.
Fragrances and Colors
Essential oils are distilled from plant materials including flowers, leaves, bark, resin or other parts of a plant and have natural aromas that can be used in the candle making process. Artificial fragrances are synthetic scents created through chemical processes and tend to be much more potent than essential oils, meaning that only a small amount is needed for making candles. In general, essential oils are more appropriate for the candle because their natural aroma can last longer and make for a more pleasant scent when burning. Artificial fragrances may also be used but it may create an overpowering scent that is not preferred.
Pouring and Cooling the Wax
When pouring wax, it’s important to keep temperatures consistent. One of the best ways to make sure that the wax heats and cools evenly is to use a double boiler. This will provide gentle and even heating. Make sure not to bring the temperature too high – usually around 120 degrees Fahrenheit – or the gel could overheat and become unusable.
Once your wax is melted, slowly pour it into each individual mold carefully and slowly, avoiding creating air bubbles. Carefully place them on a flat surface in an area where they won’t be disturbed until fully cooled, usually about two or three hours. Avoid sudden changes in temperature such as direct sunlight or drafts from open windows as this can cause cracking of the gel candles as it cools.
Adding Decorations
Embeds are decorations that are added to the gel wax while it is still a liquid and then allowed to cool and harden. This option is ideal for adding things such as shells, plastic animals, stones, glitter and other objects of interest. Make sure that whatever object you are adding is made of a material compatible with wax temperatures ” metal and some polymers may melt when exposed to high temperatures.
Dried botanicals like flowers, leaves, buds and herbs not only look beautiful in gel candles but also provide many aromatherapeutic benefits based on the type of botanical selected. To add dried botanicals to the candle simply place them into the heated liquid wax at any point during the cooling process until they become embedded in the surface. The mould can then be allowed to fully solidify before removing your gel candle from the mould.
Burning Candles
When burning your homemade candles, it is important to always take certain precautions. Make sure the area around the candle is free from any flammable materials, such as curtains or furniture. Never leave a burning candle unattended and make sure there is a fire safety tool nearby in case of an emergency. Before blowing out the candle, be sure to keep the flame away from your face and body so you don’t get burned. Allow the wax to cool completely before handling it and do not attempt to move or extinguish a burning candle. Doing so can cause a strong air draft which can result in serious burns or an uncontrollable fire. Lastly, keep all flammable items far away from the candle at all times and never leave children or pets alone with an open flame!
Conclusion
The House Of Crafts Gel Candle Making Kit is a great resource for anyone wishing to create their very own gel candles. This kit is incredibly convenient as it contains all the materials and tools necessary in one place, making it simple to get started without having to purchase individual items separately. It’s also highly recommended for beginners just starting out, providing an easy and guided transit from novice to expert with step-by-step instructions, tips, and safety measures along the way. With this kit, you’ll be able to craft enough candles for your own use or gifts before you know it. Give yourself the gift of creativity by using the House Of Crafts Gel Candle Making Kit – you won’t regret it!

Welcome to my candle making blog! In this blog, I will be sharing my tips and tricks for making candles. I will also be sharing some of my favorite recipes.


