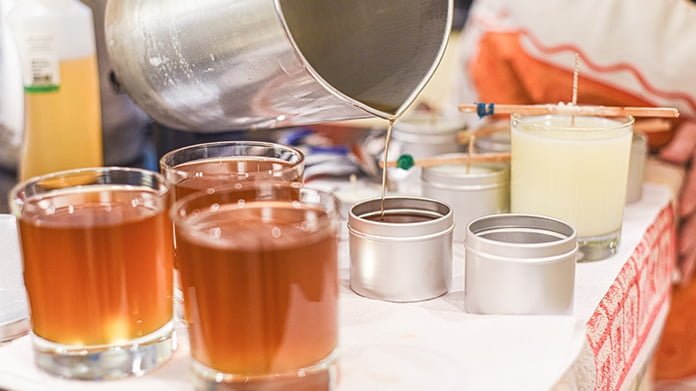
Introduction to Candle Making
When starting out with candle making, it is important to have the right supplies and choose the appropriate wax. There are various types of wax available for candle making, from beeswax to soy wax. Beeswax has a natural yellow color and has a sweet, delicate scent. Soy wax is a popular option as it is affordable, easy to work with, provides even burning and also has great hot and cold scent throw.
Other types of wax include paraffin which is durable, yet tends to discolor easily; palm which produces more light than other options; gel which holds colors well and large quantities of fragrance oil; and blend that helps candles burn longer. Each type of wax presents different opportunities for creativity when creating candles.
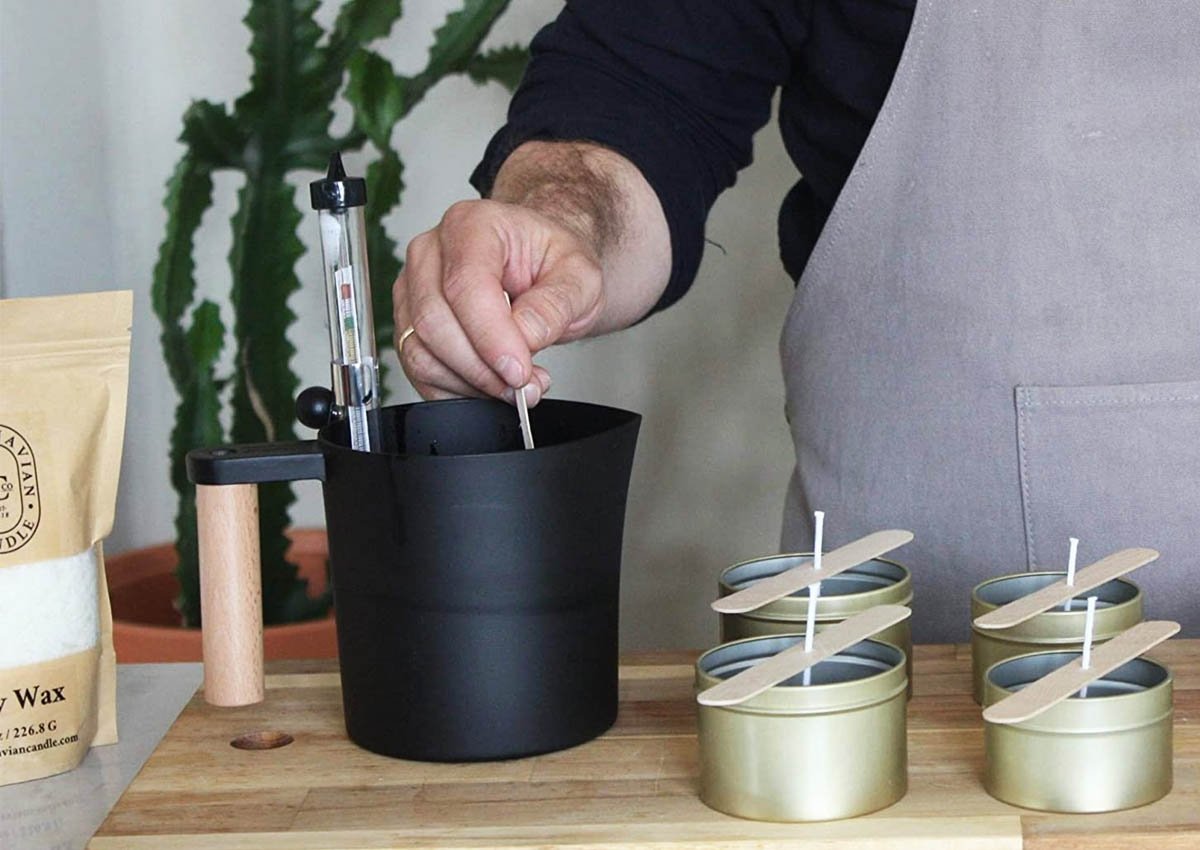
When selecting supplies for candle making you should consider how much space you have to work in as well as your budget. Supplies needed may include tools such as thermometers, stirring rods or paddles, funnels and scales as well as containers such as tins or molds to pour your melted wax into. Wicks should be chosen for their burning speed depending on the size container being used (the larger the vessel the bigger the wick). Safety goggles must also be worn during all phases of candle making especially when melting the waxes together. Finally fragrance oils can be added to your finished product for a pleasant scent that can last long after each use.
Decorative Ideas for Candle Making
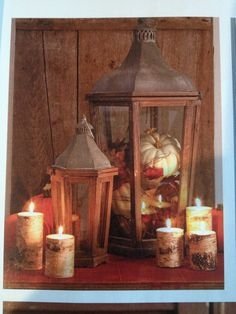
Candle making is a great way to brighten up any space with beautiful décor and soothing scents. There are many techniques and tools you can use to make your candle creations even more special. When it comes to decorative ideas for candle making, the possibilities are endless!
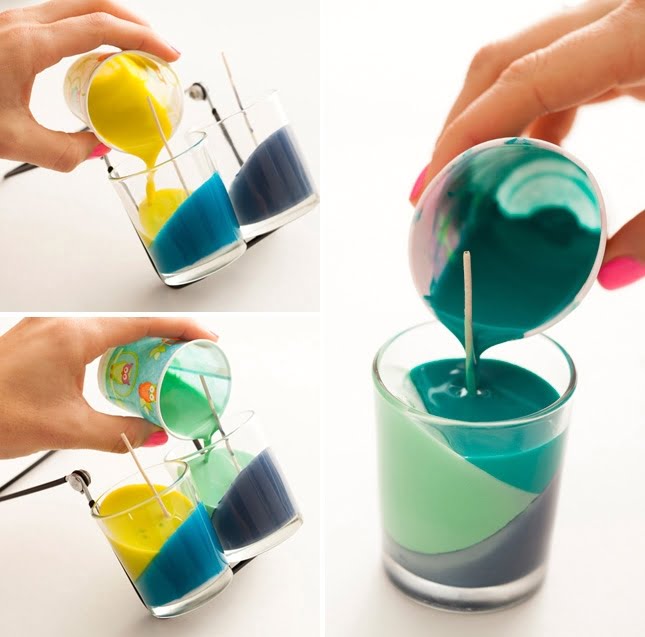
For starters, there’s the art of scent layering, which involves blending different fragrances together to create your own unique aroma. Another technique you could explore is embedding objects like dried botanicals or gemstones into your candles for a pretty effect. You can also add color to your DIY candles using organic dyes or by utilizing heat from a flame in order to achieve unusual visuals and textures.
To get started on your candle making project, be sure to equip yourself with the right tools”such as wicks, waxes, molds ” and supplies ” such as fragrances, pigments or dyes, containers, etc. These will help you easily design your customized candles with perfect finishes and maximum safety. As you gain experience through practice and experimenting with different techniques, you’ll reach a higher level of skill as well!
How to Get Started with Candle Making
Step 1: Gather the Supplies. The most important part of candle making is having the necessary supplies on hand. Be sure to get a wax pot, wicks, fragrance oils, liquid dye and beeswax (or other wax of your choice). If desired, you can also pick up some molds to give your candles a special shape or color.
Step 2: Melt Your Wax. Begin by melting your wax in the wax pot until it reaches a low simmering temperature. Take care to not overheat it as this can cause air bubbles in your finished product. Once melted, add in any desired scent or color to the mixture.
Step 3: Prepare Your Wicks. Cut your wicks to the appropriate size for your desired candle size and attach them securely with a wick sustainer bar if needed. Make sure that the wicks are centered in your container or mold so that they will create an even burn when lit. Feel free to experiment with multiple wick sizes in large candles to create different burning and visual effects!
Step 4: Pour Wax into Container/Mold. Once all of the ingredients are properly mixed together and ready for use, add them carefully into your container or mold of choice! Make sure to fill evenly so that it has an even burn when lit, creating a visually balanced candle!
Step 5: Let It Cool & Harden. After pouring any remaining wax into containers and molds all that is left is cooling and hardening, which can take up to 24 hours depending on where you store it at room temperature or heated area (which will take significantly less time). During this process avoid handling or moving the candles too much as this could cause flaws or an uneven shape in finished product(s).
Maintenance Tips for Sustainability & Safety
When it comes to candle making, safety and sustainability should be your top priorities. Here are some tips to help you keep your candles burning safely and eco-friendly:
• Make sure to use a wick that is made of sustainable materials such as cotton or wood. Avoid plastic wicks as they tend to leave behind soot and debris that can eventually clog up the candle’s flame and emit dangerous toxins.
• Check your wick length before each use. Trimming the wick is important for both safety and sustainability since a too-long wick produces too large of a flame, which can exceed the recommended wax melting point for your candle. Adjusting the length of your wick will also help create optimum diffusion of essential oils if used in scented candles.
• Use only natural, non-toxic dyes and other additives instead of chemical ones in order to make your candles more sustainable and safe for burning. Try using herbs, flowers, spices, fruits or vegetables as decorating agents; these additives not only add beautiful colors to your candles but will also provide an unforgettable aroma when burned.
• Don’t forget to take extra care while pouring hot wax! The temperature of the wax should never be raised above its melting point as this could potentially burn the user while causing significant damage to your candle mold or containers.
• When not in use, always store your candles in airtight containers. This helps ensure that moisture or other environmental factors won’t cause them to evaporate or become brittle over time”drastically shortening their lifespan.
The Advantages of Crafting Your Own Candles
Making your own candles has a variety of advantages. Not only can it be a fun, creative activity – and therapeutic for some people – but it’s also a great way to save money! By crafting your own, you know exactly what each candle is made of and you won’t have to worry about the health risks associated with their commercial counterparts. You can experiment and make different types of candles based on expectations or personal preferences. Furthermore, by making your own, you get to control the shape, color and details that stand out in that particular piece. Candles make great decorations for every occasion, so having a range of your homemade ones will look amazing. Finally, customizing the scent of each candle ensures that it gives off the perfect aroma suited to your liking. From sweet scents like vanilla or lavender, to woody fragrances like cedarwood or sandalwood ” the possibilities are endless!
Common Candle Making Faults to Avoid
One important rule to remember while making candles is to avoid creating air bubbles in the wax. This can happen when the wax is too hot or when it is moving too quickly into the container. Air bubbles can cause weak spots and make the candle look unsightly. To prevent this, stir your wax slowly and carefully as you pour it into its mold or container.
Another common problem with making candles is that of “tunneling” where the wick burns down the middle of the candle leaving an unmelted area around the edge. This can occur due to too large a wick circumference, not enough fragrance oil in your candle, inappropriate burning time for size of your candle or because even when there is sufficient wax in your container not enough heat has been used to melt it all evenly. To prevent tunneling use a smaller wick diameter, ensure you are using sufficient fragrance oil according to your desired strength, burn longer and hotter candles for more shallow containers, and work towards getting more evenness in temperature distribution from within your melting pot before pouring out your wax into its container.
Displaying & Sharing Your Creations
When you have finally finished your candle creations, it’s now time to display and share them with friends, family and possible customers. Firstly, you need to make sure that the presentation of your products is top notch, this means considering the following;
• Wrapping: Depending on whether you are simply gifting the candles or using them for retail purposes, the wrapping is a key factor in delivering a great presentation. Take time to choose appropriate wrap ” ribbon, floral patterns, simple solid colors. Our tip is to use multiple layers because small details can make a big difference when first viewed by potential customers.
• Packaging: Use quality boxes that are large enough not just to hold the candles but also extra items like instructions if they’re needed or scents cards so people can get an idea what kind of aromas they may find while burning their candle. Try to think creatively and utilize packing materials such as tissue paper or foam packaging peanuts for an extra wow factor!
• Labeling: To ensure that everyone else understands how wonderful the candles are, present clear labeling about scent description and ingredients used”this will give customers a better understanding of not only what they may be purchasing but also good information on how to get the most out of their purchase.
We hope this gave you some helpful tips for displaying and sharing your beautiful candle creations! Have fun creating something special ” Your audience will surely appreciate it!
Finishing Your Candle Making Projects with a Personalized Touch
Candle making is a fun and creative hobby. Whether you’re making candles for relaxation, decorative purposes or as gifts, it is important to have the right tools and materials to get the best results. To finish your candle making projects with a personalized touch, you should consider having the following items in your tool bag.
Firstly, wax melting pots are essential for melting wax in order to make molds of different shapes and sizes. It is also important to have several types of wax available such as soy wax, beeswax, paraffin and fragranced waxes if desired. When using scented waxes or oil, use only non-toxic options that will not irritate skin or give off toxic fumes when burned.
Once you have your meltable wax ready to go, wicks are necessary to keep your candle burning and steady. There are several types of pre-made cotton wicks available but if you want more control over how much heat they can withstand then try making them yourself by wrapping thread around a skewer or pencil. Other materials that come in handy when making candles include thermometers which allow you to check the temperature of the melted wax accurately before pouring; colorants which can be used to create colored candles; dyes and paintbrushes for decorating finished candles; various molds for shaping; and containers for storing them in after being made. Finally, using safety protocols when working with hot wax is always advisable due to its flammability ” such as wearing protective gloves and eyewear while working on your project.

Welcome to my candle making blog! In this blog, I will be sharing my tips and tricks for making candles. I will also be sharing some of my favorite recipes.

