Introduction
Candle-making is an enjoyable and creative craft that can be used to make unique and beautiful pieces for yourself or as a gift for someone else. There are numerous benefits to making your own candles, including allowing you to customize the scent and size of the candle, having control over the ingredients used, and providing an affordable way to create decorations or aromatherapy items. While the equipment may cost more upfront, in the long run it’s much cheaper than purchasing ready-made candlesticks. With enough knowledge and practice, anyone can learn how to make their own candles with ease.
Materials Needed:
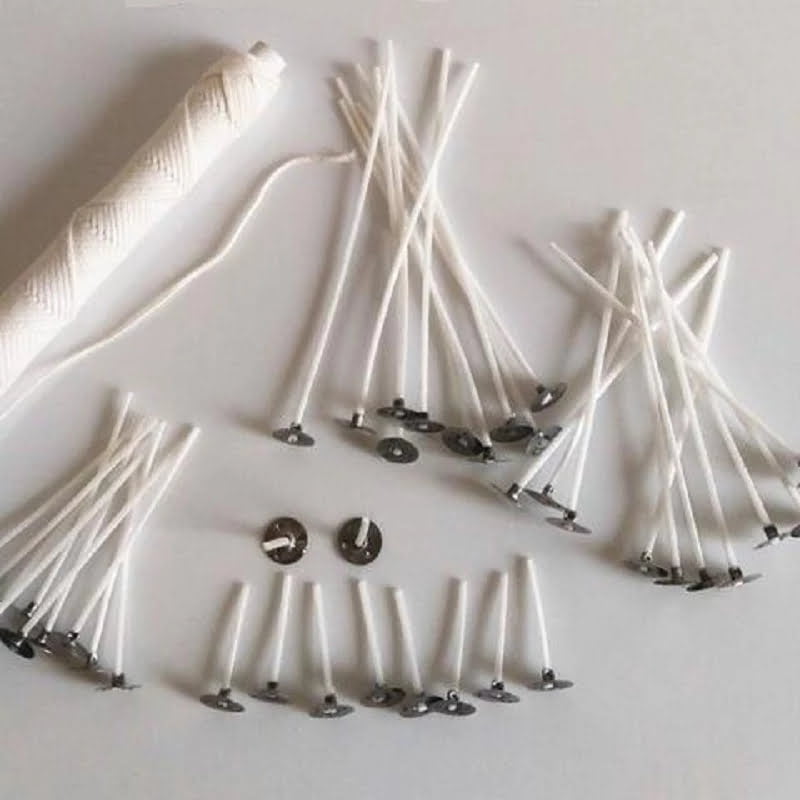
If you want to get started making your own candles today, there are some essential supplies needed. Candle wax comes in various forms including solid blocks of wax or flakes that can be melted down; you will also need a melting pot or saucepan designed specifically for melting wax. Other materials include cotton wick and fragrance oils if desired for scented versions. You’ll also need patience as this is a process that requires time and care when following instructions.
Step 1: Melting the Wax
Once you have all your materials together, it’s time to start melting the wax! Begin by placing your melting pot over low heat on the stove; alternatively you could use an electric hot plate set to low heat for this step. Next, add chunks of wax into the pot until it has completely melted; if using an electric hot plate leave at least 3 inches of space from the flame source to avoid any accidents with hot liquid wax! Once melted, check the temperature of the wax – it should be between 140-160 degrees Fahrenheit (60-70 Celsius).
Step 2: Pouring The Wax
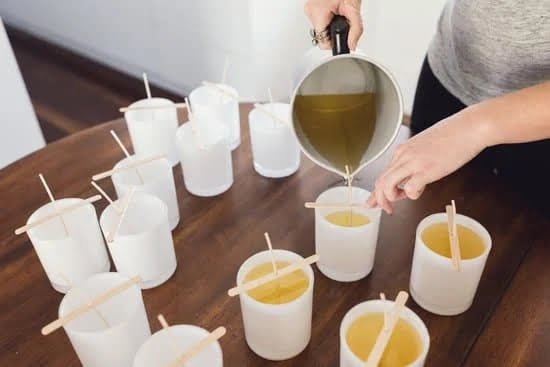
Once your melted wax is at its optimal temperature, begin pouring it into either a pre-made container such as glass or metal molds, or free-form shapes on parchment paper as desired – careful not to burn yourself! Be sure to leave enough room at top where wick can be placed later on. As soon as all of wax has been poured in place wait at least 15 minutes before adding additional decorations such as glitter or beads so they don’t sink too much when added after cooling begins.
Step 3: Adding Wick & Scent
When most of your cooling process is complete (but still soft enough for additions) push your prepped wick into center of candle mold and secure firmly with either double sided tape or clay – keep in mind thatCandles should always be made near a draft free area as drafts could hinder burning process once lit! After securing wick add in any desired essential fragrances stirring oil mixture gently throughout wax (if applicable). Now wait another 10 minutes before moving onto next step…
Step 4: Final Touch Ups & Clean Up
At this stage you are almost finished; take any tools such as stir sticks out from mold ensuring its surface is even without lumps or holes before allowing candle cool completely for about two hours total; remove any hardened bits prior removing from mold before cleaning up material with lukewarm water and soap (be sure not let water mix with remaining molten wax). Finally after fully drying allowA bout 24 hours for candle ‘cure’ prior lighting and enjoy!
Preparing Your Workspace
When making candles, you’ll want to be sure to work in a well-ventilated area that is free of potential flammables like books, newspapers and curtains. You should also have all the necessary tools on hand. This includes a double boiler or large heat-resistant bowl, thermometer, silicone mat or parchment paper wax container-to melt the wax, wicks and your choice of oil based fragrance or scenting material. Additionally, depending on the type of candle you’d like to make it’s important to make sure you have any colorants or molds such as votives or jars ready for use.
Furthermore, when handling hot wax and live flames, fire safety should always be a top priority – so keep a fire extinguisher nearby at all times. It’s also important to wear protective glasses and heat-resistant gloves when working with metal containers and pouring hot wax. Finally, try to avoid using metal utensils as they can cause sparks from static electricity in contact with the metal surfaces.
Gather Your Materials
To make a candle, you will need to gather your essential ingredients. These include wax, a wick, scent (optional), and a container or mold.
Melting the Wax:
The first step in making a candle is to melt the wax. Depending on the type of wax you’re using, you can either use a double-boiler on the stove top or melt it in a microwave-safe container. Once melted, stir the wax gently with a wooden spoon to help even out any pockets of heat that may have formed during melting
Adding Scent & Color (optional):
If desired, add scent and/or color at this point. For scent, be sure to choose something that is approved for candle-making – different materials create different kinds of burning smells when heated. You can also add dye or crayons for color — just be sure not to use anything that contains oil as that affects the liquid state of the wax.
Wicking:
Next up is wicking. This involves dipping one end of your wick into the melted wax and quickly pulling it out before it gets hard again so that it’s saturated with wax and can stay firmly in place when placed in your container or mold. Be sure not to add too much wax as this can cause more smoke while the candle is burning later on down the road!
Pouring:
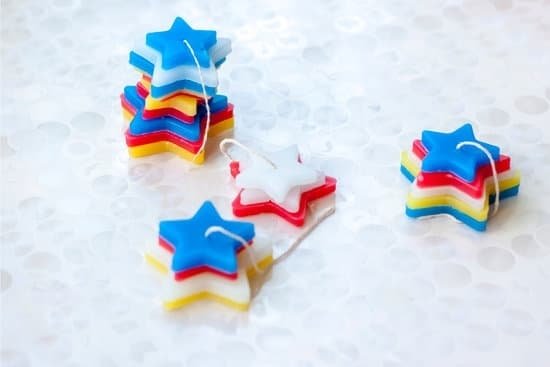
Time to pour! Pour your melted wax into your container or mold slowly and evenly in order to prevent any air bubbles from forming near the wick itself. Try and keep it close enough to fully submerge the wick without covering it completely! If you’re using multiple colors or scents within each candle layer then make sure they are layered smoothly together before they begin solidifying again after each pour.
Setting & Finishing:
Lastly, once everything has had time to cool completely set aside for at least 6 hours before moving onto finishing touches. This includes trimming off excess bits of wick from the outside of your candles by running scissors over them carefully; if you plan on giving away these candles as gifts then adding wrapping paper around them finishes off that extra touch for customization!
Melt the Wax
Making a candle requires that you start by melting your wax. One of the best ways to ensure success is to melt your wax in a double boiler. This prevents the heat from the source from overpowering and burning the wax. It also makes it easier to control the temperature, because the pot of boiling water will take longer to overheat than an open flame or electric burner plate. The ideal temperature for melting wax is between 130°F and 170°F, so moderate the heat source as necessary. Another key factor when making a candle is stirring your melted wax regularly with a wooden spoon or thermometer stirrer to ensure even heating and prevent overheating from one spot in the pot of melted wax.
Pouring the Wax
Once you have melted your wax and added any desired color or scent, it’s time to start pouring the wax in either pre-made molds or custom designs you’ve created. When using a pre-made mold ensure that your pour your wax slowly and evenly, you can use an old ladle or pitcher to gently pour the wax into the mold. When designing a custom candle with no mold it can be quite tricky; most people choose to create a small frame of some sort into which the wax will be poured. It is important when doing this step to make sure that the frame is secure and capable of holding its shape as it needs to be able to contain the hot liquid wax during the curing process without melting. Once this is achieved take extra precautions as not to burn yourself by pouring too quickly, give it an even pour by moving around the outer edge first then continuing inwards ensuring there are no notable voids in your design.
Finishing Touches
Once you have learned the basics of making a candle, there are a few additional steps that can help enhance the colors and scents in your finished product. Many new candle makers avoid experimenting with these enhancement strategies because they feel intimidated by the objects and additives that might be needed. However, these strategies are often quite simple—try them out for yourself and see what a difference they can make to the colorful interior of your candles!
Additional colorants can be purchased from many craft websites or local retail stores. As a general rule, it is better to use liquid pigments as powders will clog wicks, which will impede the burning process. Beeswax candles tend to take on more vibrant colors than paraffin, so choose pigments that match this hue range. To add extra color to your candles pour small amounts (about one teaspoon) of pigment into each mold or container before pouring in the wax mixture. Feel free to mix and match different shades of pigments until you find the desired effect!
Adding scent or aroma can also enhance your finished candle products. Fragrance oils are widely available in most craft stores or online retailers and come in an array of aromas such as lavender, citrus, ylang-ylang and much more. Think carefully about how your chosen scent might affect the fragrance bouquet; for instance, vanilla and jasmine create an invitingly light infusion when combined together! Add at least one tablespoon of oil per pound of wax before melting it down. Consider using several different types of oils if you’re feeling adventurous as this will provide an interesting variety within each batch!
Curing the Candle
Once you have made your candle, the next step is to cure it. Curing a candle is essential for making sure that the candle burns evenly and evenly distributes the scent throughout its burn time. To do this properly, allow the wax to cool in its mold for 8-10 hours before attempting any additional steps. Once cooled completely, carefully remove the candle from its mold and place it onto a heat-resistant surface. Make sure to wear protective gloves as heated wax may cause harm.
Next, wrap the entire candle in a large piece of dark cloth such as felt or velvet as it will need to retain some of its heat while it sets. This will help ensure an even cooling process and better burning results when used at a later time. Another added precautionary step would be to lay down newspaper or cardstock around the cloth-wrapped candle in order to catch any excess drips while it settles. Allow the wrapped candle to sit overnight in order to let all of its layers set correctly before using it or giving as a gift!
Enjoy Your Candle
When it comes to getting the most out of your freshly-made candle, you’ll want to make sure you are optimizing for maximum burn time. Fortunately, there a few simple steps you can take that will ensure you get the most out of each candle.
Firstly, before lighting your candle for the first time, let it burn until the top of the melted wax forms a full pool. This usually takes somewhere between 30-60 minutes – depending on the size of your candle. Failing to do this means that in future uses, wax is likely to form tunnels down the center and around the edges thus reducing the life of your candle.
Secondly, don’t light your wick too short or else it won’t be able to stay lit long enough and will have little to no flame. Optimal length situations varies based on size but generally having a ½ inch is best so that it has enough oxygen to keep burning. We recommend lighting on a regular basis but only burning one hour at a time (or two hours in larger candles) so keep track and blow out when temperature starts to climb as this signals it’s time for even melting across all areas of your candle.
Finally, always make sure you are storing your candles correctly away from direct sunlight and in an area with low humidity . These elements can not only reduce their lifespans but also distort long their wick shape during prolonged exposure making them difficult to light.
Conclusion
When you have your wick and wax ready, it’s time to put it all together. Use a wick holder or something else similar to hold the wick still in the center of the candle. Pour melted wax slowly into your mold or container, making sure to fill it up completely. Allow the wax to cool until hard. After cooling, trim the ends of the wick down to at least 1/2 inch length. You may also need to attach a new wick holder on top or you can make support with aluminum foil or duct tape if needed. Congratulations! Your homemade candle is now finished!
To add your own finishing touches before displaying your newly crafted candle, you can dip it in scented wax for an enhanced aroma. Also consider adding color dye, texture molds, paint, glitter and other decorations for a unique look that reflects your personal style. It’s also possible to use two different colored waxes (one poured over the other) for stunning visual effects in your candles. With just some simple supplies and imagination, you will soon be able to show off your creation with pride!

Welcome to my candle making blog! In this blog, I will be sharing my tips and tricks for making candles. I will also be sharing some of my favorite recipes.

