Introduction
Candle making is a fun and creative activity with endless possibilities. Not only can you customize candles to fit your decor or style, but making them also helps to reduce stress and save money. There are several types of candles which typically rely on a blend of wax, wick, and fragrances. Beeswax and paraffin wax are the most popular base materials for making homemade candles while soy wax is gaining popularity due to its healthier environmental impact. Wickless candles use a patented, self-contained heated pool of scented oil rather than flame. The two primary types of candle holders are containers and molds, both of which come in a wide array of styles and shapes.
For those who want to take their candle-making a step further, layered/swirled or floral injected techniques provide extra flair and pizzazz to any finished product. On the other hand, immersion dyeing involves immersing the entire candle in dyes before melting, creating even more creative options for colors! Candle making kits provide everything needed to create custom scents as well as handmade decorations such as decals or stamps for an added personal touch. With the vast amount of materials available on the market today, you can be sure that you will find something suitable for any project!
Gathering the Supplies
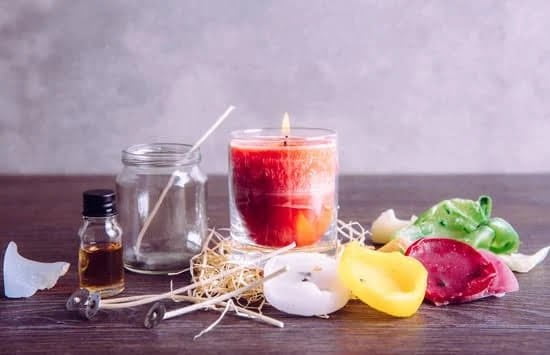
In order to make candles, you will need a few materials and supplies. First, you’ll need to find the right wax for your project. Depending on the type of candle that you are looking to make, different types of wax are available. If creating pillars or votives, consider using paraffin or beeswax. For tarts or containers, it is best to use soy wax flakes. Aside from wax, you will also need wicks and wick sustainers. Wicks come in various sizes and materials; cotton core or flat braid are popular choices for container candles while zinc-core wicks with tabs tend to be the best option in smaller containers like votives. Wick sustainers are also essential because they keep the wick centered and upright as the candle burns evenly.
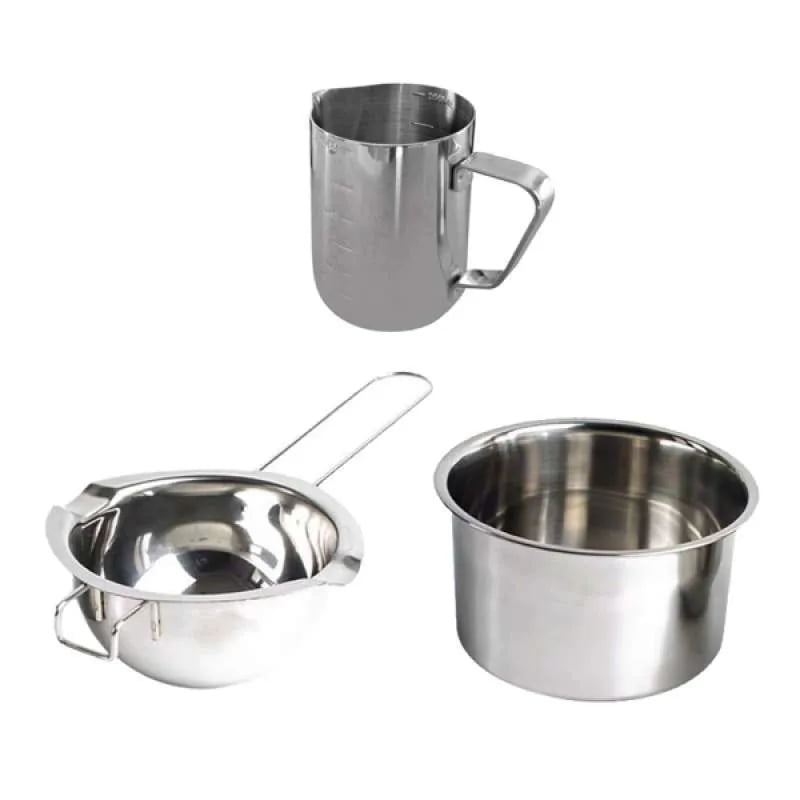
To measure out wax for your candle making project, having a kitchen scales on hand can be very useful as well as some thermometers so that temperatures can be monitored accurately when melting down the wax. Additionally, you’ll need heat resistant containers where your melted wax can be poured into molds during the pouring process (usually metal or silicone). Lastly, before starting your candle making project, have some safety equipment such as oven mitts handy for necessary safety precautions.
Step-by-Step Instructions
1. Prepare Your Materials: Collect all the necessary supplies for making candles, including wax, meltable or pre-tabbed wicks, metal pots for the wax and a heat source (stove or hot plate). If you plan on decorating your candle with dyes, scents or glitters, then make sure to get those items ready as well.
2. Melt Wax: Place the pot containing the wax on top of the stove/hotplate. Turn up the heat until bubbles can be seen forming inside the pot. If you’re using pre-tabbed wicks, make sure to clip them before placing in the pot of melted wax.
3. Pour Wax Into Mold or Container: Once the wax has fully melted and is liquid (the time it takes will depend on how much you have melted), turn off heat and pour the wax into your mold or container of choice – this can be a jar, tin can, teacup, etc…Take care to leave adequate space at top of container to account for any expansion during cooling process.
4. Insert Wicks and Set Up Oil Wick Stick: Insert one end of the prepared wick(s) into master oil wick stick that was included in your kit and press against surface of container/mold so that it sticks firmly and holds itself upright while setting up.
5. Let Cool: Allow your candle mold/containers to cool at room temperature (or close to room temperature). Do not attempt to hasten cooling time by placing them in refrigerator or freezer as sudden changes in temperature can lead to an uneven solidification of candles resulting in cracks on its surface once cooled completely through
6. Decorate Candles: Once cooled down completely and hardened, add desired decorations such as dyes or glitters with a brush for painting or using a spoon for sprinkling respectively onto its surface – making sure that you distribute it evenly across whole surface area without blotting out one section from another! Finally place whatever aroma tokens desired around cleared area near center part of candle – examples being essential oils placed on cotton puffs will create pleasant smelling fragrances when lit!
Customization Ideas
Colours: Candles can be made with many different colours – using either candle dye, or by mixing and matching different waxes. For example, you can use a lighter wax if you want the colour to be more subdued. If you want bolder colours, add some darker waxes which will not only give your candles a distinct colour, but also add texture. Wax beads are also an interesting way to customize candles and create soft spots of contrast along the top surface.
Scents: You can create a scented candle with just one type of scent or combine different fragrances for a truly unique experience. Some popular options include botanical fragrances like jasmine, lavender, rose petals and geranium as well as fruity smells such as orange and lemon zest. Fun scented blenbds include vanilla-scented cookies or sweet apple cinnamon crumbles. For something a little more extravagant, layer two complimentary fragrance oils in such a way that when you light the candle they start out differently and then mix together while the candle burns to create an interesting scent!
Embellishments: If you’re feeling creative there are lots of ways to embellish your finished candles before taking them off the wick holder, including: adding glitter sparkles on top once it has solidified; spraying lightly coloured spray paint around the sides for extra shimmer; or adorning it with dried blooms for an elegant decor accent. You could also use ribbons or cardstock cutouts of words or shapes to make a statement piece!
Safety Tips
When making candles, safety should always be your first priority. Here are some tips to help you stay safe when working with hot wax and flame:
1. Wear clothing that covers your arms and legs: Wear long pants and a shirt with sleeves to prevent burns from splattering hot wax or from coming in contact with the flame of the candle wick.
2. Use protective eye wear: Be sure to wear protective glasses or goggles when handling any hot materials for protection against injury.
3. Keep away from flammables: Make sure to keep any flammable materials such as matches, newspapers, and cleaning supplies at least three feet away from your workstation where you are melting wax.
4. Don’t leave the room while a candle is burning: When you light the wick of a candle make sure to keep an eye on it until it’s completely burned out.
5. Work in a well ventilated area: Make sure to keep windows open or use a fan while melting wax as harmful fumes can build up in small spaces without proper ventilation.
Aftercare Instructions
Storing your candle – In order to ensure the longevity of your candle, be sure that it is stored away from direct heat or drafts. It is also important to keep it away from any sources of humidity. Additionally, it should be kept in a cool, dark place, especially if you are storing multiple candles in one location, as this will prevent them from melting and releasing smoke when burned simultaneously.
Handling your candle – To avoid getting wax residue on furniture and other surfaces when burning your candle, you should use an appropriate candle holder. If possible, place the holder on a heat-resistant surface such as marble or ceramic tile and lit the wick from there. If some wax spills out during use, allow it to cool completely before handling.
Using your candle – When using your new candle for the first time, make sure that you light it for its entire burning time (usually between 2 and 4 hours). This will create an even melt pool and prevent tunneling from occurring; otherwise, wax can accumulate around the wick which may cause wickedness during future burns. For safety reasons make sure that you never leave your burning candle unattended or near combustible materials such as curtains or walls. Lastly, once finished burning let the melted wax fully harden ; do do not attempt to clean or extinguish it until then.
Conclusion
Making candles can be a craft that takes dedication, skill and patience, but when done correctly can become a relaxing activity for you to enjoy. They make great gifts for family and friends or just as decorations for your home. Making candles is also very cost-effective as all of the necessary supplies are easily found online or in craft stores. Candles made at home also have the added benefit of being able to customise the colour, shape and smell according to your desired preference.
The benefits of making candles at home far outweigh those bought from stores; this is because you have complete control over the ingredients used and the look of the finished product. Furthermore, the quality will always be high due to the attention given to each step during the process. To source more information on candle-making, one should visit local art supply stores or look online for books about candle-making techniques and different ideas involving wicks for unique projects. All supplies needed for candle-making, including waxes, wicks, scents, dyes and molds can be purchased from local suppliers or from websites such as Amazon and eBay. With some imagination and a little bit of effort anyone can make beautiful candles that are truly unique pieces of art!

Welcome to my candle making blog! In this blog, I will be sharing my tips and tricks for making candles. I will also be sharing some of my favorite recipes.

