Introduction to Pillar Candles
Pillar candles have become increasingly popular over the years because of their attractive look and the way that they can fit into any décor. They come in various sizes and make for a great centerpiece for any room or special occasion. But before starting your own candle making project, it is important to understand the different types of wax which are available as well as what works best for producing quality pillar candles with layers.
The type of wax used will depend greatly on the desired end result. If you would like a longer burn time, then a vegetable based paraffin wax is best suited due to its slow burning qualities. Soy and beeswax are also good options that are eco-friendly and produce a pleasant scent during burning. Beeswax gives off an amber glow when lit giving off an added ambiance to its surroundings. However, it can be much harder to work with resulting in more depleting your resources (i.e., time and money). For creating lovely layered pillars, there are many specialty wax blends that work best in achieving this look such as soy/palm blend mixes or beeswax/paraffin blends. By exploring these options you’ll end up with beautiful pillar candles that will certainly impress friends and family alike!
Aside from choosing the correct wax for your project, other essential supplies include wicks, dyes, fragrances, moulds and molds releasing agents such as petroleum jelly or cooking spray; all of which can be found at most craft stores or online retailers for candle making materials. With these tools in hand you should have no problem recreating beautiful layered pillar candles for whatever special occasion awaits!
Materials and Tools Needed to Make Pillar Candles with Layers
Materials
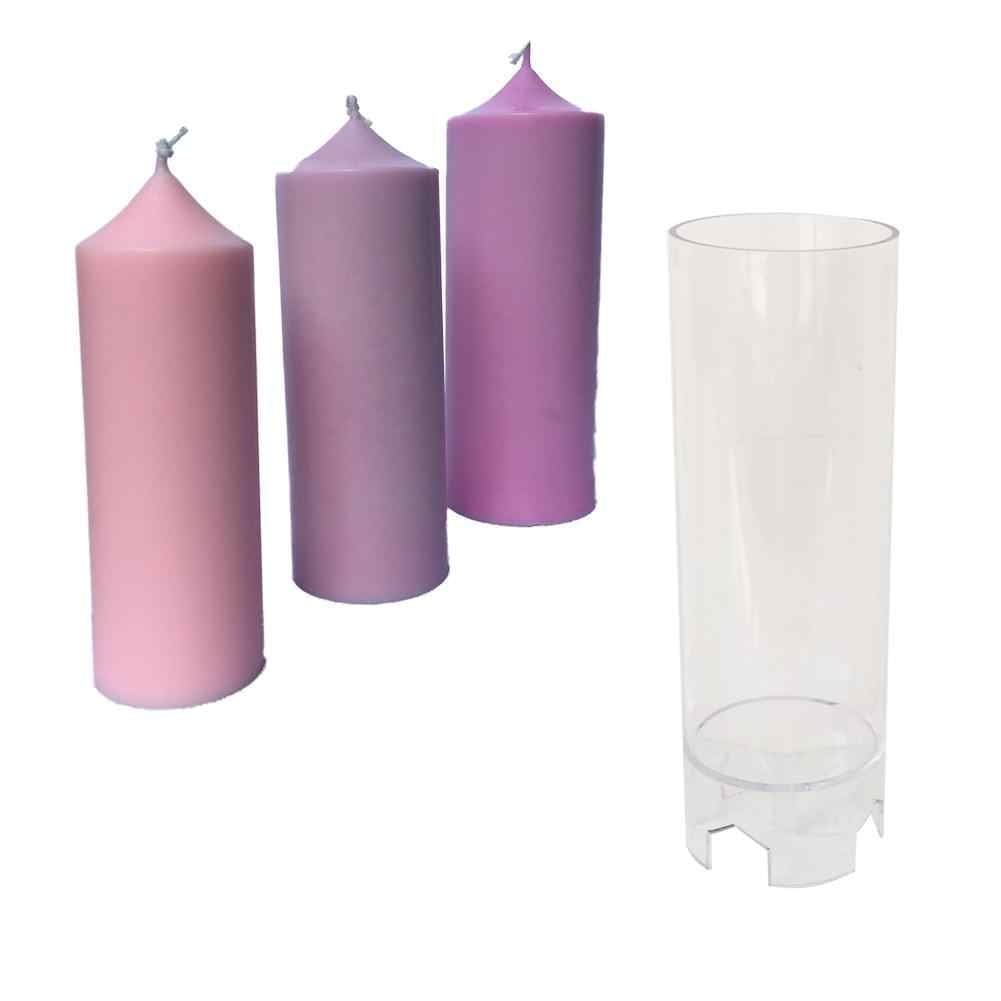
-One 2 inch by 6 inch pillar mold (for an 8 oz. candle)
-Heating source (microwave or double boiler)
-Candle wax(of your choice to fit the scent you’d like and the kind of additives for any color you wish)
-Fragrance oil(optional but suggested for a better and more vibrant scent within the candle)
-A thermometer(to monitor temperature so that nice layers will form throughout the pouring process) Tools
-Stirring utensil such as wooden spoon or heat proof metal spoon.
Safety Precautions
-Always use caution when heating wax, wear correct clothing and glasses to avoid scalds and spills.
-Work on flat surface so that should any wax spill, it can be easily cleaned up.
-Do not leave melted wax unattended, especially when there is a child or pet around.
-Store candles in cool, dry place away from direct sunlight and sources of heat.
Instructions for Preparing Your Wax for Pillar Candle Making
When it comes to melting wax for making pillar candles, preparing the materials correctly will help ensure a good result.
Before you start, make sure the melter is set up properly and all the safety precautions are followed. The wax should be melted in their sealed containers, such as a double boiler or a designated wax melter. A thermometer should always be used to accurately monitor and maintain the desired temperature. The ideal temperature for melting paraffin wax is around 180F – 200F degrees Fahrenheit, although this can vary slightly depending on the type and blend of wax being used. Once the temperature has reached the required level, it’s best to let the wax melt slowly to avoid scorching and burning which can lead to inferior results with tough or even misshaped candles. Once completely melted, keep an eye on the temperature as too hot and any added ingredients could potentially vaporize or melt away.
When layering different colors and fragrances, it’s important to pour each layer separately once cooled above 150F degrees Fahrenheit before adding a new color or scent. This helps keep each distinct layer solid and well-defined as they cool over time together. Be sure to allow sufficient time between pours – approximately, 15 minutes at room temperature –before pouring another layer of your wax mixture into your container mold. Gently tap down any excess bubbles that appear on top during this process. Once all layers have been added you should let your candle cool until it sets properly – which may take up to 24 hours – then carefully cut away any excess material along the edges with a sharp knife before displaying them proudly
Detailed Step-by-Step Guide for Layering Your Pillar Candle
1. Scale out the amount of wax you need for each desired layer, and melt it down in separate containers. A good ratio of wax to scent and dye is between 1-3%. Allow the melted wax to cool until it reaches anywhere from 125-150 degrees.
2. Place your wick into a preheated mold or container. Make sure that the wick is secure on one end and has enough slack so that it can stay centered throughout the process.
3. Pour the first layer of melted wax into your container or mold, at a slight angle and gentle speed. When the layer has reached about 90%, stop pouring and allow the wax to cool for 15 minutes, until it reaches approximately 110 – 120 degrees Fahrenheit. The outer edge should be slightly firm to the touch but still soft enough to accept another pour without forcing holes/cracks in it created by too much heat in the following layers.
4. For further layers, repeat steps 1 through 3 for each color you’d like to add; however make sure not to exceed three layers of wax tones that require consistent cooling time within one candle (the maximum cooling time suggested should not surpass 45 minutes). As soon as you have poured all of your layers, let your pillar candle restundisturbed so in order for it to dry properly – this usually takes anywhere from 24-48 hours until you can move onto the next step of finishing touches such as adding decoration accessories like glitters or embeds (careful not reach temperatures above 150 degree Fahrenheight) .
Tips for Adding Color and Scent to Pillar Candles
Breathe life into your pillar candles by adding a colorful and scented twist to them. Color can really transform the look and feel of a candle, and combining pigment and scent to build layers of color is a great way to create something truly unique!
To start, you’ll need the following supplies: pigments in any mix of colors that you like, essential oils such as rose or lavender, container candles (pillar or columns), paraffin wax, and wicks.
Mix your pigments together with a small amount of paraffin wax in an old pan until it has an even consistency. Then pour the mixture into your containers about one-third full. Take a few drops of essential oil on a spoon and gently stir into layer making sure that the oil is evenly distributed throughout the mixture. Once this layer has cooled you can continue to add more layers using different pigments and shades in whatever design or pattern you desire. Don’t forget to insert your wick into each layer before pouring it too!
You’ll also want to make sure to alternating between different colored layers and allowing time for each one to cool off before adding another layer. This will help maintain contrast between each color which will give your pillar candles that finished look. If desired you can also add extra essential oils over each new layer while its still hot as an added delight while burning.
Finishing Touches and Burning Instructions
When making pillar candles with layers, it is important to be mindful of the finishing touches. For a neat and attractive patio accent or rectangular table center-piece, be sure that each new layer of wax is blended evenly. Once all layers have been melted and blended together, let the candle cool before removing from the mold.
Once the candle has been removed from the mold, there are a few steps to ensure proper usage and maintenance of your pillar candles:
1) Before burning your newly made pillar candle, you should make sure that there is an even, slightly convex surface so that it will not drip when lit. Carefully trim down any high sides with a scissors or craft knife before lighting.
2) Make sure to keep wicks trimmed at 1/4 inch at all times for optimal burning performance and minimal soot. Never let the flame get too close to the sides of the candle as this can cause melting wax and reshaping of the pillar’s profile.
3) Remember to extinguish your candle after four hours of continuous burn time for best results and safety purposes. This will also prevent excess smoke which can accumulate over time if left unattended and unchecked.
4) Last but not least, ensure that there are no strong air drafts beneath where you place the candle as this could interfere with an even burn pattern.
Conclusion
Your beautifully crafted candle creation is ready to be displayed! It’s likely a work of art that deserves its moment in the spotlight. Here are a few fun ways you can share your masterpiece with the world:
1. Take a photo of your candle and post it to your Instagram or other social media accounts. Don’t forget to tag #handmadecandles and #pillarcandles so that others interested in the craft can see the amazing results you achieved.
2. Host a candle-making party and treat your friends to their own awesome pillar candles they made with their own hands! This makes for an unforgettable night filled with creativity and fun!
3. Gift your homemade pillar candles to friends and family as unique, handmade presents. Now they can enjoy beautiful lighting at home while knowing how much time and effort you put into crafting it just for them.
Whichever way you choose to show off, take pride in your hard work, skill, and creativity and savor this special feeling of accomplishment!

Welcome to my candle making blog! In this blog, I will be sharing my tips and tricks for making candles. I will also be sharing some of my favorite recipes.

