Introduction to Rust Paint
Rust paint is a special type of paint used to replicate the look and feel of real rust. It is commonly used on metal surfaces, but also works well with certain types of plastic too. Rust paint can be applied over existing painted surfaces or as part of a fresh coat on metal or plastic objects that have never been painted before, such as candles. The advantage of using rust paint on plastic candles is that it gives them an aged and weathered appearance without damaging the product in any way.
Instructions for Making Rust Paint for Plastic Candles
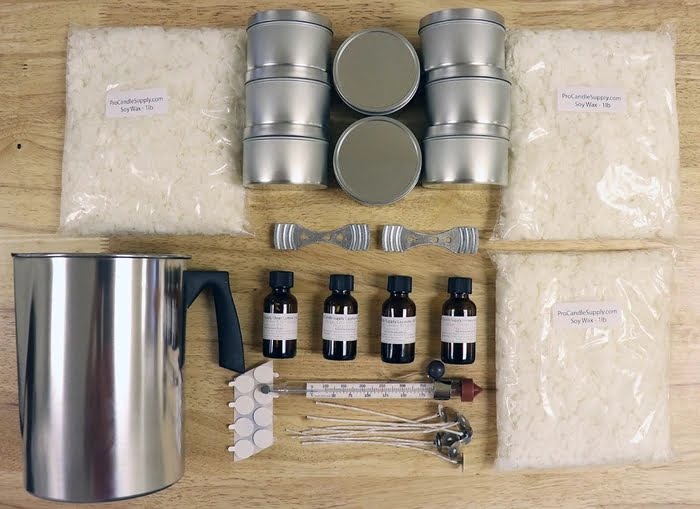
1. Begin by gathering the necessary materials: spray paint made for plastic, fine grain sandpaper, rust-colored acrylic craft paints, rubbing alcohol, and a variety of small paint brushes.
2. Start by lightly sanding the candle with fine grain sandpaper to remove any glossy residue from the surface. This will help the rust paint stick better once it is applied.
3. Use a cloth dampened with rubbing alcohol to thoroughly cleanse the entire candle surface and remove all traces of dust or debris left behind from sanding. Let this layer dry completely before continuing.
4. Place your plastic candle on some newspaper in an area where it can remain undisturbed while you are painting it. Shake up your spray paint can until you hear a faint buzzing sound coming from inside, then apply one thin layer of spray across the entire surface of your candle being sure to keep it at least 8″ away from any other surfaces you are working with so that any overspray does not mess them up too much.. Allow this layer to dry completely before continuing onto step 5 below.
5 Using different sizes and shapes of small brush strokes mix together separate spoonfuls of each color acrylic craft paint (red oxide and oxide yellow) until you create several layers of varying shades that mimic rusty hues about what would naturally come about together over time due to atmospheric weathering processes occurring; apply each experimental mixture onto your painted plastic candle until desired color/texture combinations are achieved., brush through some overlapping areas if needed in order to further blend colors into one another streak free – let this layer dry completely between every brush stroke application unless instructed otherwise by specific project instructions/manual’s directions/instructions which should always be followed above opinions expressed here). Repeat until desired levels are achieved then move onto step 6 when warranted happy with final results seen
6 Once satisfied with level/appearance finish off final touches by feather-edging all brushstrokes through finished areas gently & adding a few accents like tiny scratches near base candles’ feet built into tubular holders.; let project sit overnight in order to cure/dry before handling/using article again
The Benefits of Using Rust Paint on Plastic Candles
Rust paint on plastic candles can give a unique and vintage look to any decor. The application of these paints will protect the plastic from sun damage, dehydration, and fading over time. Furthermore, the special texture of rust paint produces a muted, aged appearance that may be desired compared to the glossy look of new plastic. Rust paint also has an added benefit in that it is weather resistant, which means it won’t become damaged or peeled away easily even when exposed to the elements outside. Also, with this type of paint, you don’t have to worry about cracking or chipping like you would with regular paints due to its rubber-like properties. When finished correctly, rust painted plastics have excellent durability with long lasting shine and color retention. Finally, using rust paint on plastic can add a sense of sentimentality for those who appreciate antique decorations. By adding some rust paint accents onto plain or lackluster light fixtures or candle holders can instantly bring some life and charm into any home decor project.
Understanding Rust Color Theory
If you want a unique, rust-colored hue on your plastic candles, applying the right hue of paint is key. To make rust paint for these objects, you will need to understand the fundamentals of color theory. Certain colors create more realistic rust shades than others.
When making this specific type of paint, use deep reddish-brown and yellowish hues for a darker appearance. These colors should be mixed with possible variations of gray such as white or black. You can also add a tiny bit of green or blue if you would like to lighten the shade overall or just enhance the tone’s depth. For those who are unsure about which colors to incorporate, it is always useful to look at nuances within existing images of rust for reference and visual inspiration.
In addition, remember to adjust the amount of each pigment added until achieving the desired look — either lighter or darker – depending on what you’re aiming for. If you’d like an even more realistic outcome when painting plastic candles with rust colors, consider adding a reflective coating to create varying degrees of shininess across the surface. As long as there is trial and error involved in creating a finished product that resembles real rust, you will end up with something spectacularly stupendous!
Gathering Supplies for Rust Painting
1. Rust paint: Before beginning the rust painting process, you’ll need to purchase some special type of rust paint. This paint is specifically formulated to adhere to plastic surfaces and create a realistic-looking rusty effect. Depending on where you shop, there may be several different brands or forms of this particular type of paint available for sale.
2. Brushes and Palette Knife: Apply the rust paint to your plastic candles with a set of quality artist brushes and a palette knife. This will help ensure an even coverage throughout your project, as well as giving you access to more intricate details that aren’t achievable with regular rust paints.
3. Sandpaper: To achieve an even more rugged look and texture, lightly sand the waxed areas on your plastic candles before applying any rust paint. This will provide plenty of extra grip for the paint so it won’t easily slide off when handled or touched in later steps.
4. Metal Foil: To add extra realism to your rust painting endeavour, consider using metal foil sheets cut out in desired shapes around the object being painted like bolts, nuts or rivets; then layer them with the rust paint. This will give your plastic candles an added “authentic” touch that can take them from drab to fab!
5. Mixing Mediums or Glazes: In order to achieve certain shades or tones of classic rust colors such as orange, yellow, brown and red – try mixing mediums or glazes into the basecoat of your faux-rust painting project. These mediums not only make colors blend better but also help seal any existing imperfections or blemishes in the surface of your objects being painted too!
Preparation
The plastic candle surface must be properly prepared prior to painting with rust paint. Begin by cleaning the plastic candle surface with a damp cloth and mild soap, then rinse it and allow it to dry completely. Once the plastic candle is clean and dry, use sandpaper to lightly scuff up the surface and remove any shine. This will allow the rust paint to better adhere to the plastic. Wipe away any dust from the sanding process using a damp cloth once again and allow the plastic candle surface to dry before applying paint.
Mixing the Rust Paint
To create rust paint for plastic candles, you will need a few supplies: latex based paint (any color other than white), red oxide pigment, and some water. Start by mixing the paint with a paddle or an old paint stirrer until it is smooth. Then add the red oxide pigment gradually. Stir it again until it is thoroughly mixed. Finally, slowly add small amounts of water to the mixture until you reach your desired consistency and color. The goal is to achieve a deep reddish-brown shade of rust that will look great when painted on plastic candles. Once you are satisfied with the color of your rust paint, it is time to start painting!
Painting the Plastic Candles
1. Begin by preparing the plastic candles. Make sure they are thoroughly cleaned by wiping with a cloth and warm soapy water, then rinse and allow them to dry completely before painting.
2. Gather the paints and supplies needed for rust paint: craft acrylic paints in shades of yellow, orange, and brown (such as goldenrod yellow, pumpkin orange, burnt umber), craft brush(es), paper towels, plastic plates or bristle board (for palette).
3. Put a small amount of each color on the palette or plate in separate puddles; this will help you blend and create your own shade of rust paint.
4. Use slightly more yellow than orange or brown, but adjust based on preference for desired shade of rust paint you would like to achieve.
5. Add some water to the palette or plate with the paint puddles; use enough water so that the mixture can be easily brushed or spread onto the candles with minimal effort (it should not be runny). Try out a few drops on scrap wood or other surface before applying onto the candles and adjust if necessary with more water or paint as needed.
6. Use a brush to apply thin coats of the rust-colored paint onto all surfaces of each candle until desired result is achieved; it may take two-three coats to reach preferred color intensity – note that lighter colors may require more accents such as dry brushing – lightly pushing bristled brush over painted surface with very little paint leftover for desired effect – to make color stand out more or highlight particular areas/ridges/designs on candles if any are present . Allow adequate time between coats for drying/curing & use light strokes while brushing off excess if any is present; it is best if brush used has soft bristles in order not to scratch away at underlying candle’s plastic material and cause accidental damage
7. Once finished painting each candle with desired number of coats, allow all to completely air dry overnight before using in decorating project.
Curing and Sealing the Candles
After you have prepared the rust paint for your plastic candles, it is important to seal and cure them for an attractive and long-lasting finish. The best way to do this is by heat-sealing the candles with a blow dryer. This will ensure that the paint fully adheres to the surface of the candle. To start, make sure you place something underneath your work area so any excess paint does not reach other surfaces. Make sure the blow dryer is set on low heat and take your time when heating each candle. Move the blow dryer in slow circles around the entire surface of each candle until it appears evenly heated throughout. Once this process is completed, let the candles cool off before moving on to serve their decorative uses.
Troubleshooting Common Issues
Rust paint for plastic candles can make any craft project look stylish, but it’s important to make sure that the posts of preparation and application are done safely and with care. Here’s a list of tips to help ensure that rust paint is applied with as few mistakes as possible:
• Thoroughly clean and dry the plastic surface before attempting to apply any paint. All oils, waxes and dust particles should be removed before beginning.
• Make sure the temperature of the work environment is ideal for painting. Using too hot or too cold of a temperature could affect how well the paint adheres to the surface.
• Apply thin coats of paint, allowing each layer ample time to dry before adding additional layers. Applying too much at once can cause dripping.
• Consider using a sprayer for evenly distributed coats instead of a roller or brush for a more even finish.
• Ensure that your rust paint has been shaken thoroughly at least 30 seconds before starting in order to mix all liquid ingredients together properly.
• Don’t forget to wear appropriate protective clothing and eyewear while you’re working. Paint fumes can be harmful if inhaled and skin contact should also be avoided where possible.
Conclusion
Making rust paint for plastic candles doesn’t have to be difficult! Using a few simple ingredients, you can create the perfect rust-look that will last. To begin, combine one tablespoon of oil paint with four tablespoons of alkyd paint and three teaspoons of solvent until well mixed. Next, mix in one teaspoon of powdered pigment until it is evenly distributed throughout the mixture. Lastly, take your prepared mixture and brush it onto the candle until the desired effect is achieved. After painting your candle, let it dry thoroughly before using. With this simple recipe, you have now made rust paint for plastic candles that will give any surface the perfect rust finish that won’t budge!

Welcome to my candle making blog! In this blog, I will be sharing my tips and tricks for making candles. I will also be sharing some of my favorite recipes.


