Introduction
Making your own candles is a great way to get creative and customize your space and atmosphere with a personal touch. Whether it’s for a special occasion or just to add an inviting, cozy feeling to your home, creating your own handmade candle is an enjoyable and simple way to bring that extra something special into your life. The process itself is fairly straightforward and requires just a few basic materials to make a really beautiful candle. Here are the necessary steps for making a scented, homemade candle.
Gathering your supplies
To make a candle you will need: a heat source, wax (either beeswax or paraffin), wicks, melting pot, thermometer (optional), molds or containers to pour the molten wax into, and fragrance oil (if desired). The heat source can be either a double boiler on the stovetop, or a dedicated electric wax melting pot, available online or at craft stores. Paraffin wax is the most commonly used type of wax in candle making because it is easier to work with than other types of wax such as soy or beeswax. It also has better scent-holding qualities.
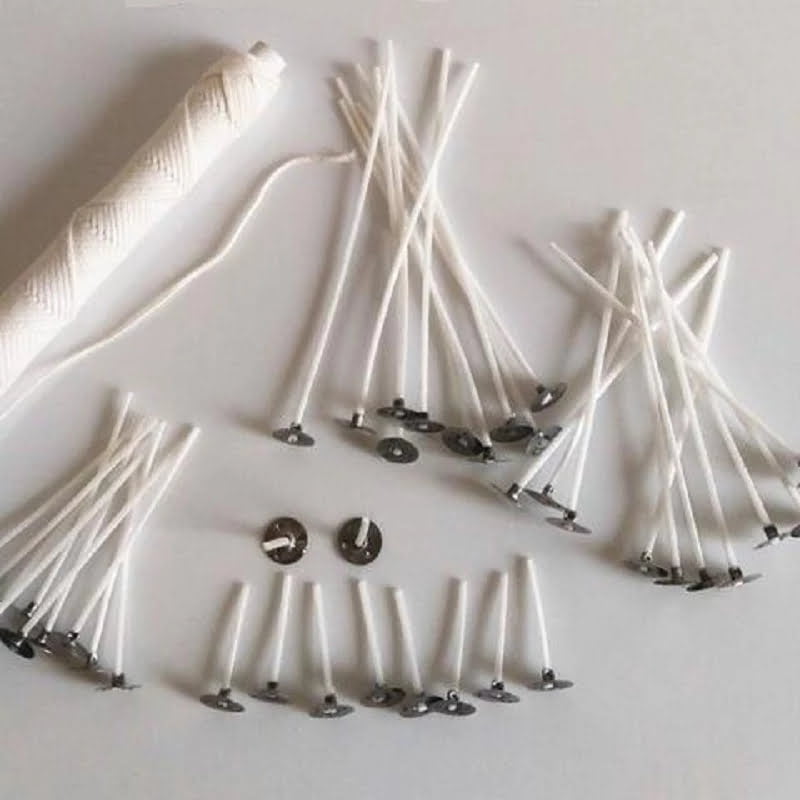
Wicks are available for purchase as pre-tabbed wicks where the tab is already attached to the end of the wick or can be purchased separately with an adhesive such as glue dots. Place your pre-tabbed wick or glue your own into your container prior to pouring the melted wax so that it stays in place.
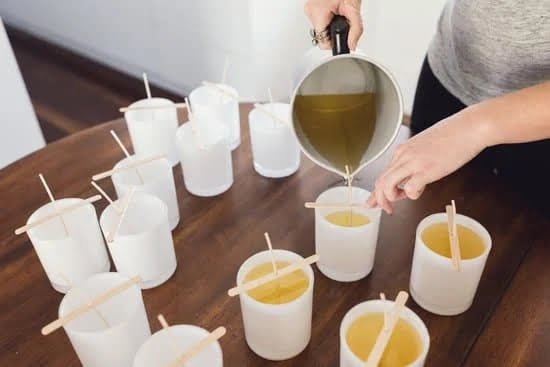
Melt your chosen wax in the melting pot until it reaches 170 degrees Fahrenheit according to thermometer reading before adding your desired fragrance oil and then immediately after color chips if applicable. Pour slowly into glass containers and/or molds until filled, just below Topping Off Point (TOP). Wipe away any excess wax that may have spilled onto the surface surrounding your container and use a lighter to straighten out any kinked wicks before they cool completely.
You can purchase all these supplies online at places like CandleScience, Bramble Berry and Michaels, Hobby Lobby etc., local craft store depending on availability in your area.
Safety precautions
Gather materials – you will need wax, pouring pitcher, wick, wick sustainers, dyes and fragrance. Soy wax is the most commonly used type of wax for making candles. Look for wicks with metal sustainers or tabs on the bottom to make it easier to anchor the wick in place at the bottom of your candle container.
Melt your wax – In a double boiler or a designated melting pot, heat your wax until it reaches a temperature of 180 degrees Profarenheat. Mixing colors and fragrances should be done prior to this step to ensure proper blending of both elements. Stir constantly during heating for even melting and to avoid burning.
Pour your wax – Once the desired temperature is reached careful pour the melted wax into your candle container leaving enough room at the top layerofidero fill any specific decorations that you may want to add such as sequins, nuts or shells.
Anchor the wick – Cut your chosen wick to appropriate length so that it stands just above your poured wax. Make sure all ends are attached securely with a high-heat adhesive or with metal sustainer/tab attached at bottom before pouring hot melted wax over them.
Add design elements – Once poured and secured with adhesives, insert additive products such as glitter stars and star anise seed pods into top layer of still warm melted wax
Allow candle to cool – Allow wax settled in containers 2-to 3 days without disturbing till completely solidified then trimming off excess portion of wicks after which enjoy creating beautiful candles for yourself or family & friends!
Preparing your container
Making the wax mixture – Explain the process of melting the wax and pouring it into the container with precaution.
Adding fragrance oil – Show how to incorporate a few drops of the desired fragrance oil into your wax mixture, meaningfully scenting your candle.
Pouring the melted wax mixture – Demonstrate the best way to slowly pour a measured amount of the hot melted wax into your chosen container.
Adding a colorant (optional) – If you choose to add colorant, explain how to suspend 5-10 drops at a time into your hot melted wax mixture, swirling them in until you reach your desired shade.
Cooling and solidifying – Guide viewers on how to let the molten wax gradually cool by itself, aiding in its solidification process.
Trimming wick length – Once cooled, demonstrate how to trim the wick so it is roughly 1/4″ from the top before using it again.
Melting your wax
Making your wicks – Talk about the various types of wick, such as pre-waxed or un-waxed, as well as wick supports.
Molding your candle – Explain mold types, including metal or plastic forms and molds. Describe how to insert the wick into the mold with a special tool.
Adding scent & color – Discuss various choices of fragrances and dyes that can be added to the wax. Explain appropriate amounts for scents and colors.
Pouring your melted wax – Describe adding any new ingredients and using an eye dropper if necessary to fill small molds. Give instructions on determining proper pouring temperature according to type of wax used.
Cooling and setting your candle – Include proper cooling times based on the type of wax used as well as helpful tips such as maintaining a consistent room temperature while cooling over a few hours or days depending on your recipe.
Cutting off excess wick – Instruct how to do this safely by cutting it at an angle with scissors after completed cooling time period passes so you don’t disturb the mold shape.
Finishing touches – Explain packaging options such as custom labels, etc., as well as other possible decorative touches like ribbons or trinkets for adding final appeal before gift giving or displaying for sale purposes.
Adding fragrance and dye
Making a candle starts with collecting the supplies you will need: wax (either paraffin or beeswax), wicks, candle containers, fragrance oils, dyes and melted wax dye. Once you have gathered all of your materials, the process of making a candle is simple. First, place the wick in the center container and secure it to the bottom. Then, melt the wax according to instructions on the package (typically either heating on a stovetop or melting in a double-boiler) and add color and scent to it as desired. Different types of fragrance oils can be used – essential oils offer natural scents while synthetic fragrances are more durable – and liquid or powdered dyes may be added if you’d like to achieve certain colors. Pour the liquefied wax into the container around the wick and allow it to cool before finishing off by trimming your wick length for a better burn and an even flame. Now you have your own handmade candle!
Pouring the wax
When making candles, one way to add an extra layer of interest is to create a layered effect with different colors and/or scents. To do this, start by preparing the desired wax and gently pouring it into your container. Then, wait for it to cool. Once the cooling has occurred, begin adding a second color or scent of wax in small increments until you have reached your desired effect. Make sure to let each layer cool before continuing with the next layer. Finally, once all layers are complete you will need to insert a wick into the center of your candle and allow it to stand for 24 hours before use. This will give the candle time to properly set and increase its safety when lit. With patience and creativity, you can make beautiful candles with unique designs and sensory experiences!
Curing and finishing touches
Once your candle-making process is complete, it’s time to cure the candle. Curing a candle or allowing it to sit for an extended period of time helps to increase the overall quality of the finished product and can also reduce any visible differences created by layering wax colors. During this curing stage, the scent of the candle will become stronger and last longer. This curing process typically takes at least 24 hours but can last for as long as 1-2 months depending on the ingredients and size of the candle that has been made.
Adding finishing touches such as ribbon or stickers is a great way to personalize your candles and give them some extra flair. You may also choose to add additional fragrances or essential oils to enhance your candles’ aroma. In some cases, you may fabricate a certain shape or design using either cooled molten wax from anotherbatchor from wax chips sold specifically for shaping candles. These techniques are often used for more special occasion candles like elaborate birthday cakes and other 3-D shapes with multiple levels and textures.
Conclusion
Making and decorating your own candle is a fun and creative project that you can do at home with the right materials. By following the steps outlined above, you will be able to create a unique and special candle that you can display, give as a gift, or keep for yourself. Before beginning any candle making project, remember to take safety precautions and use common sense when handling and working with hot wax or fire. When done correctly, this is an overall enjoyable and rewarding experience that involves diverse aspects of personal expression.

Welcome to my candle making blog! In this blog, I will be sharing my tips and tricks for making candles. I will also be sharing some of my favorite recipes.

