Introduction
The history of candle making dates back centuries and its origins are steeped in mystery. Not much is known about how people made the oldest candles, with the first known mention of a process for waxing wicks found in Egyptian documents from 3000 BCE. Candles were seen as a luxury item in many cultures, such as Rome and Greece, but eventually became commonplace during the Middle Ages due to advances in technology, particularly the invention of metal candle molds which allowed candles to be produced more efficiently.
Since then, candle making has evolved into an art form that many craftspeople practice today. Modern candle makers use all kinds of materials, such as soy-based waxes like beeswax or paraffin wax, along with aromas and colors to make unique and beautiful items. The steps of creating a candle can vary depending on the ingredient used and design desired, but all involve melting wax, pouring it into a holder or mould (the second most common method), adding desired color or scent before leaving it to cool. After this process is complete, it’s time for the finished product to be enjoyed!
Types of Candles and Tools Needed to Make Them
Types of Candles:
Pillar – Pillar candles are the most common type of candle and require a mold, wick, wax, and a double boiler.
Taper/Dinner Candle – Taper or dinner candles are made of paraffin wax and require a form to keep the shape. In order to make these candles, you will need a container to melt the wax in, wicks (pre-tabbed or primed), scissors to trim the wicks, and glue to secure the wicks within the containers.
Votive – Votives are smaller than pillar candles and need jars or molds for shaping. Wax, wicks (again pre-tabbed or primed), dye, glucose, fragrances, melting pots not exceeding 200 degrees Fahrenheit, thermometers (candy thermometers work wonderfully for baking), stirring Popsicle sticksall work together to create votive candles.
Container – Container candles consist of soft paraffin-based wax poured into glassware or ceramic pieces. It is important that the container be heat proof as well as have high sides so that it can contain all the hot liquid wax without spilling during pouring. They also require longer length pre-tabbed and/or primed wicks which must be secured into place with glue before pouring in melted wax.
Tools Needed To Make Them:
The very basic tools needed for making any type of candle include safety glasses/goggles, respirator mask when dealing with scents/dyes/chemicals, heatproof gloves (for protection against hot melted wax), potholders (to protect your workspace from heat), ruler (for measuring dimensions) and scissors (also for trimming). Depending on the type of candle being made you may also need containers in various shapes and sizes such as glassware or ceramic pieces if making container style candles; molds if making pillar or votive style; forms if making tapers; double boilers; pencils for securing tall molds; electronic scales for weighing ingredients for larger batches; paraffin based melts; dye chips or blocks; glucose or beeswax beads; fragrance oils or essential oils; thermometers as well as suitable hand tools such as stirring Popsicle sticks.
Step-by-Step Guide for Making Scented and Decorative Candles
Step 1: Gather Supplies: Collect all the items needed for candle making, such as wax, wicks, fragrance oil, dye, molds and other decorations.
Step 2: Melt the Wax: Pre-measure wax pellets into a microwave safe container or double boiler. Melt the wax until it reaches an evenly liquid state.
Step 3: Add Fragrance Oil/Dye: Use a dropper to incorporate fragrance oil or dye at this stage. Stir the wax vigorously so that both ingredients are blended together perfectly.
Step 4: Insert Wicks Into Molds : Carefully drop each wick into its designated mold and ensure that it’s centered in the middle of it. Attach the tab portion at the top of the candle to secure it in place.
Step 5: Pour Hot Wax Into Molds : After making sure any bubbles have been eliminated from the hot melted wax, slowly pour it into each mold to fill them up completely.
Step 6 : Allow Cooling Time : Let your candles cool down for at least 12 hours before trying to remove them from their molds or adding any decorative embellishments.
Step 7 : Slice Off Excess Wick Portion : Take an X-acto knife and slice off any excess portion of wick not needed for burning purposes once your candles have cooled down completely
Step 8 : Decorate and Package Candles For Sale : Add glitter, stickers or other adornments onto your finished candles and package them up neatly either with paper carton box containers or cellophane bags with sticker labels.
Exploring the Science of Candle Making
The process of making a candle begins by heating wax until it becomes liquid. The type of wax used in the process is usually paraffin wax, which is solid at room temperature and has to be melted to form the base for your candle. Once the wax reaches its melting point, any coloring or scent you wish to add to your candle can be stirred in at this stage. Next, absorbent wicks are added and held up in position using fixed pins. The molten wax is then poured into the molds containing the wicks where it cools and hardens. When finished, clip off the excess wick and package your freshly made candles with labels and decorations as desired.
During the candlemaking process, it’s important to be aware of factors that can impact a successful outcome such as temperature and humidity levels. For instance, heated containers can cause premature melting since paraffin can absorb some heat around it. Humidity levels should also be monitored because high humidity levels will cause imperfections on the surface of your candle due to trapped moisture evaporating during cooling process. In addition, adding color too soon can also pose a problem since unincorporated dyes may settle onto one side of the mold forming an uneven layer if not dispersed properly within the wax. Ultimately knowledge of these conditions help us understand how minor adjustments of certain processes can result in improved quality throughout our candle-making experience!
Crafting the Perfect Candle Making Diagram For You
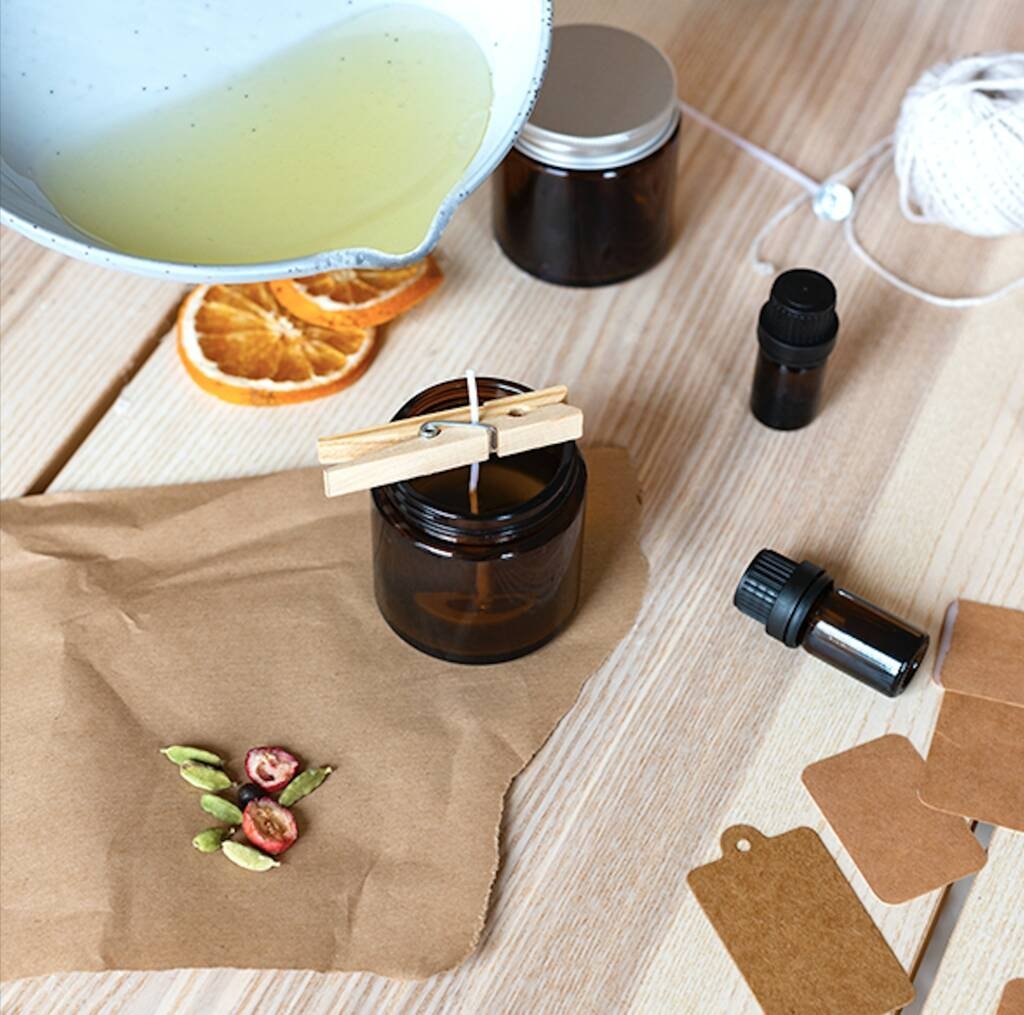
The perfect candle making diagram for you should begin with the materials and tools needed to make your candles. It is recommended to gather each of these items before you get started. This includes things like wax, containers, wicks, embeds (decorative items to add inside the candle), dye or colorant, fragrances, pouring pot/double boiler for melting the wax, thermometer for checking temperatures, wooden stirring spoon and pencils for holding your wicks in place during pouring.
Once you have all of your supplies gathered together, it’s time to get started. Begin by preparing your wicks. This usually involves cutting them to the right length and attaching them to a pencil if necessary so that they stay upright in the container while pouring. Pre-tabbed wicks are also available pre-measured with metal sustainers attached at one end which avoid this step completely.
Next up is combining the wax with any colors or scents that you desire for your candles. Depending on the type of wax being used (soy or paraffin) will determine how high temperature it requires for melting – this is where a thermometer comes in handy! Once melted stir in additional colors and fragrance oils before pouring into your prepared containers or molds.
After pouring allow your candles time to cool and set before trimming off any excess wick that may have pooled around the edges. The last step is adding any special touches such as labels or tags with fragrance names and adding embeds prior to its final cure time. That’s it – now you have beautiful candles ready to enjoy!
Benefits of Choosing the Right Wicks
Choosing the right wicks for candles is important as it can affect the performance of the candle. Proper wick selection allows for a slow, even burn rate and reduces problems such as excess sooting and improper wax pooling. Additionally, it ensures that the flame does not grow too large resulting in a fire hazard. Wicks also play an important role in providing long lasting scent throw when made with fragrance oils. If not properly matched to the wax, scent throw may be reduced. By selecting wicks suited to the specific wax blend being used, it will help optimize candle performance, allowing you to make beautiful candles that burn safely and last longer.
Troubleshooting Common Candle Making Problems
When making candles, there can be a variety of issues that you may come across. The following are some common problems and the solutions to them:
1. Uneven Melt Pool: If your candle is pooling unevenly or burning down in only one area, then it could mean you wick is too large and needs to be trimmed back. Try reducing your wick size and then reuse the remainder by alternating between longer and shorter cycles as the candle burns. This balances out any irregularities in the melt pool.
2. “Mushrooming” Flame: When a flame becomes too tall and has a black sooty smoke coming from its tip, this is known as “mushrooming”. To fix this, trim back the wick size by snipping off 1/4-1/2 inch from its surface at regular intervals to allow for better oxygen intake which helps prevent over fueling of the flames.
3. Messy Tops & Smoky Flames: If your top layer of wax appears raggedy or your flames are smoking heavily then your burn temperature may be too high or too low. Try adjusting your burner settings accordingly; reducing or raising temperature depending on what’s needed will help create smoother tops with cleaner flames.
4. Issues With Scent Release: For candles that have become dull in their scent release, try increasing the amount of fragrance you add when making them next time round; keeping in mind that adding around 1-2 dsp per ounce should do the trick!
Fun Ways to Display Your Candles
There are many creative ways to display your homemade candles. A beautiful candle arrangement can make a great centerpiece or conversation piece in any room. Here are a few ideas for displaying your candles:
• Group several of the same-sized candles together and place them on a metal plate or tray which has been decorated with lace doilies, fine fabrics, and ribbons to form an interesting tablescape.
• Place votive candles in vintage glass jars around the house to add character and charm.
• Arrange pillar candles in a glass hurricane vase along with some decorative stones, sequins, or shells for an elegant look.
• Hang tea light holders from wall hooks or nails for an eclectic touch.
• Make sure to cut wicks short before burning your candles. This will prevent fires and greatly extend the life of your candle creations
Conclusion
The conclusion of the candle making process is a beautiful, hand-made candle that is ready to be lit and enjoyed. This simple process yields attractive results and can even be used for many craft projects. The steps involved are not too complicated, but the end product will impress any onlooker with its lovely glow and pleasant scent. With just a few materials and some patience, anyone can create their own special candle to light up a room or give as a gift.

Welcome to my candle making blog! In this blog, I will be sharing my tips and tricks for making candles. I will also be sharing some of my favorite recipes.


