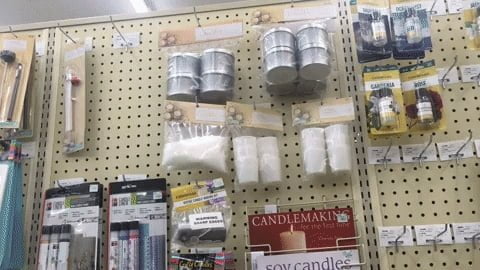
Candle making is a popular and fulfilling hobby that allows individuals to tap into their creativity while experiencing the therapeutic benefits of crafting their own candles. In this article, we will explore the world of candle making supplies and provide you with a comprehensive guide on everything you need to get started in this delightful craft.
For centuries, candles have served a multitude of purposes, from providing light and warmth to symbolizing celebration and spirituality. Today, candle making has evolved into an art form that allows individuals to express their unique style and personality through handmade creations. Whether you are looking for a creative outlet or simply want to create personalized gifts for your loved ones, candle making offers endless possibilities.
Before diving into the various supplies needed for candle making, it is fascinating to understand the history of this ancient craft. Candle making dates back thousands of years and has been practiced by different civilizations throughout time. From using tallow or beeswax to modern-day options like soy wax and paraffin, the types of wax used in candle making have evolved alongside advancements in technology.
In the following sections, we will delve into choosing the right wax for your candles, essential equipment needed for candle making, exploring additives to enhance your creations, different types of candle molds available, selecting the appropriate wick, adding decorative touches with containers and embellishments, as well as crucial safety measures and tips for achieving professional-looking candles. So let’s dive in and unleash our creativity with candle making supplies.
Choosing the Right Wax for Your Candles
When it comes to candle making, one of the most important decisions you will make is choosing the right wax for your candles. The type of wax you use determines not only the quality and appearance of your finished candles but also their burn time and scent throw. There are several different types of wax available on the market, each with its own set of pros and cons.
One popular option is soy wax, which is derived from soybean oil. Soy wax is known for its clean burn, long-lasting fragrance, and eco-friendly nature. It is also easy to work with and has a lower melting point compared to other waxes. On the other hand, paraffin wax, which is derived from petroleum, offers a more traditional look and feel. Paraffin candles have a strong scent throw but may produce soot when burned.
Beeswax is another widely used option that many candle makers appreciate for its natural golden color and subtle honey-like scent. Beeswax candles have a longer burn time and emit negative ions that can help purify the air around them. However, beeswax can be more expensive than other waxes and requires careful handling due to its higher melting point.
When selecting the perfect wax for your project, there are several factors to consider. First, think about the type of candles you want to make and their intended use. Are you aiming for decorative or functional candles? Do you want them scented or unscented? Additionally, take into account your skill level as some waxes may require more experience or specific techniques to work with effectively.
No matter which type of wax you choose, remember that experimentation is key in finding what works best for you. Don’t be afraid to test different waxes and combinations until you achieve the desired results. Choosing the right wax is just one step in creating beautiful handmade candles that bring joy and warmth to any space.
Essential Equipment for Candle Making
Candle making requires a few essential tools and equipment to ensure a successful and enjoyable experience. Whether you are a beginner or an experienced candle maker, having the right equipment is crucial for achieving the desired results. In this section, we will discuss in detail the necessary tools and equipment for candle making.
One of the most important items you will need is a double boiler or melting pot. This is used to melt the wax safely and evenly. The double boiler method involves placing the wax in a container that sits on top of another pot filled with water. This indirect heat source helps prevent overheating and ensures a controlled melting process.
A thermometer is also necessary to monitor the temperature of the wax accurately. Different types of waxes have different melting points, so it is essential to follow the recommended temperature guidelines for the specific type of wax you are using. Using a thermometer will help you achieve optimal results and prevent any issues such as overheating or underheating.
In addition to a double boiler and thermometer, molds are vital for shaping your candles. There are various mold options available, including metal, silicone, and plastic molds. Each type has its pros and cons, so it’s important to consider factors such as ease of use, durability, and desired candle shape when choosing your molds.
Finally, wicks are an essential component of candle making. They provide fuel for the flame and determine how your candle burns. Wick sizes vary depending on the diameter of your candle container or mold. Choosing the right wick size is crucial to ensure proper burn time, flame height, and overall performance of your candles.
| Equipment | Description |
|---|---|
| Double boiler or melting pot | Used for safe and even wax melting |
| Thermometer | Monitors wax temperature for optimal results |
| Molds | Create various candle shapes and sizes |
| Wicks | Provide fuel for the flame and determine burn performance |
Exploring Candle Making Additives
When it comes to candle making, additives play a crucial role in enhancing the overall quality and appearance of your creations. Additives not only add fragrance and color to your candles but also contribute to their performance and longevity. In this section, we will explore the different types of candle making additives and how they can take your candle making experience to the next level.
One of the most popular additives in candle making is fragrance oils or essential oils. These oils are responsible for adding scents to your candles, creating a delightful ambiance in any space. When choosing fragrance oils or essential oils, it is important to consider the different fragrance notes and select scents that complement each other. You can experiment with various combinations to create unique aromas that suit your preference.
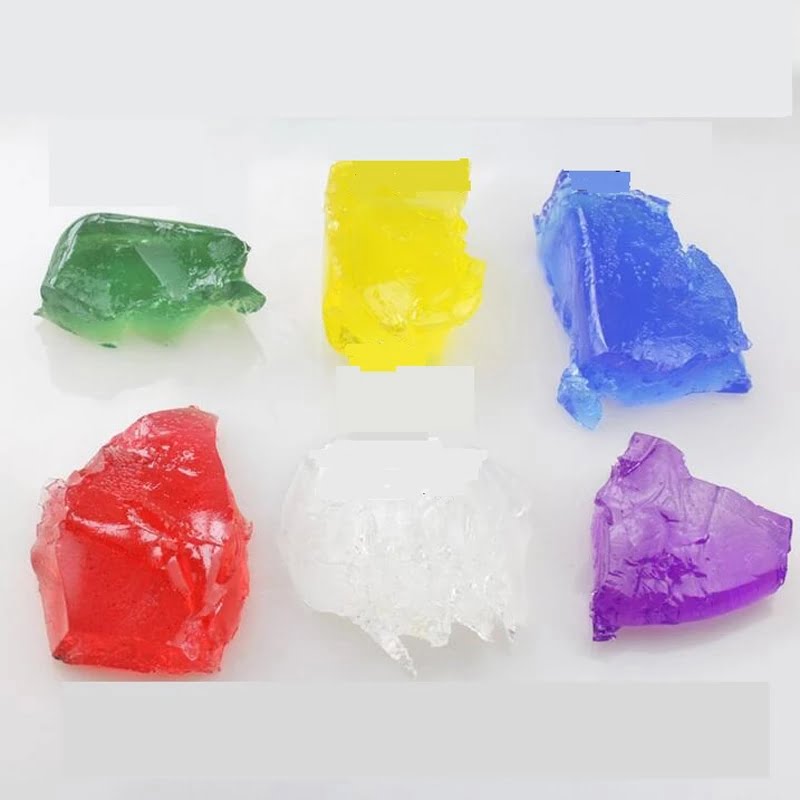
In addition to scent, you may also want to add colorants to your candles for visual appeal. Dye blocks and liquid dyes are commonly used for this purpose.
Dye blocks are available in various colors and can be melted into the wax while liquid dyes can be easily incorporated during the mixing process. It’s important to note that some dyes may alter the composition of certain waxes, so it’s always best to follow the manufacturer’s instructions when using colorants.
Apart from fragrance and color, there are other additives that serve specific purposes in candle making. Stearic acid, for example, can help improve the opacity and hardness of your candles while UV inhibitors can prevent discoloration caused by exposure to sunlight. These additives can be especially useful if you’re looking to create candles that stand up well over time.
By utilizing these various additives, you have the power to create truly unique and personalized candles that not only look beautiful but also smell amazing. Adding fragrances, colors, stearic acid, or UV inhibitors allows you to customize every aspect of your candles according to your preferences or intended use. So don’t be afraid to get creative with these additives and let your imagination run wild in the world of candle making.
The Variety of Candle Molds Available
When it comes to candle making, choosing the right mold is essential for achieving the desired shape and size of your candles. There are various types of molds available, each with its own advantages and considerations. Here is an overview of the different mold options and some tips for selecting the appropriate mold for your candle making projects.
- Metal Molds: Metal molds are durable and can withstand high temperatures, making them suitable for a wide range of candle materials including paraffin, beeswax, and soy wax. They come in various shapes and sizes such as pillars, votives, and tapers. Some metal molds have a seamless design, which eliminates the need for a separate mold release agent. However, metal molds require extra care during the cooling process to avoid warping or denting.
- Silicone Molds: Silicone molds are flexible and easy to release candles from due to their non-stick properties. They are available in a wide array of shapes and designs such as animals, flowers, or geometric patterns. Silicone molds work well with paraffin wax and low melt point waxes like soy or palm wax.
One advantage of silicone molds is that they do not require any additional mold release agents. However, they may be prone to tearing if not handled carefully. - Plastic Molds: Plastic molds are often used for making container candles as they provide a seamless finish on the inside of the vessel. They are lightweight, affordable, and can be easily cleaned after use. Plastic molds come in various shapes like squares, rounds, or hearts, perfect for creating unique container candles. However, it’s important to ensure that the plastic used is heat-resistant and can withstand hotter temperatures without melting or distorting.
- DIY Mold Alternatives: For those on a budget or looking for unique shapes that may not be readily available in stores, there are several DIY mold alternatives you can try. You can make your own molds using silicone putty, plaster of Paris, or even recycled household items like cardboard tubes or milk cartons.
DIY molds allow for endless creativity and customization in candle making, giving you the freedom to create candles in any shape or size you desire.
When choosing a candle mold, consider the type of wax you will be using, the desired shape and size of your candles, as well as your personal preferences and budget. Don’t forget to properly prepare and maintain your molds to ensure successful candle making results. With the right mold, you can take your candle making hobby to new heights by creating beautiful and unique candles that reflect your creativity and style.
A Look at Different Types of Candle Wicks
The importance of selecting the right wick for your candle is often underestimated but can greatly impact the quality and performance of your finished product. In this section, we will explore the different types of candle wicks available, as well as their sizes, materials, and styles. We will also discuss how the choice of wick affects burn time, flame height, and overall performance.
Understanding Wick Sizes
When it comes to selecting the right size wick for your candle, there are a few factors to consider. The diameter of your container or mold, as well as the type and amount of wax you are using, will determine which size wick is best suited for your project. It’s important to choose a wick that allows for an even burn across the entire surface of the candle to prevent tunneling or uneven melting.
Materials and Styles
Candle wicks are typically made from cotton or a cotton-core blend. Cotton wicks are known for their clean burn and minimal soot production. However, if you’re looking for a longer burn time or a larger flame, you may opt for wicks with additional fibers such as braided or twisted designs.
Wicks also come in different styles to accommodate various types of candles. For container candles, pre-tabbed wicks with metal sustainer bases are commonly used as they provide stability and easy placement. Flat braided wicks work well for pillar candles or those with wider diameters.
Troubleshooting Wick-Related Issues
Choosing the wrong type or size of wick can result in several common issues such as excessive smoke, mushrooming (the formation of charred debris on top of the flame), or poor scent throw. To prevent these issues, it’s important to conduct burn tests before making large batches of candles. Adjusting the size or style of the wick may be necessary to achieve optimal results.
If you’re experiencing tunneling (when the candle burns straight down the center, leaving unmelted wax along the sides), you may need a larger wick or to consider using multiple wicks positioned strategically within the container. On the other hand, if your candle is burning too quickly or producing large flames, a smaller wick size may be necessary.
Adding a Decorative Touch
Candle containers and embellishments play a crucial role in enhancing the overall aesthetic appeal of your candles. Not only do they provide a beautiful and unique presentation, but they also offer practical benefits such as protecting the candle from external elements and controlling the burn. In this section, we will explore various creative options for candle containers and discuss the different ways you can embellish your candles to make them truly special.
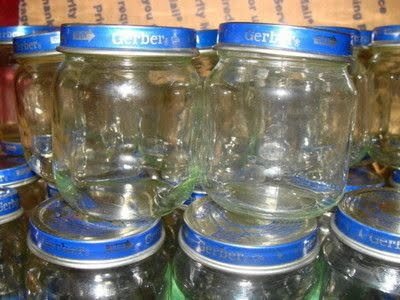
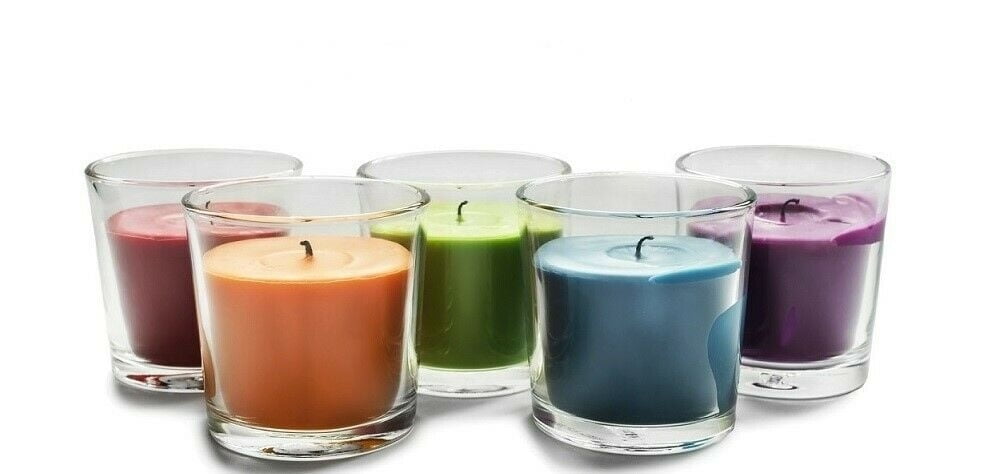
When it comes to candle containers, there are numerous options to choose from. Glass jars are a popular choice due to their transparency, which allows you to see the candle as it burns. They also come in a variety of shapes and sizes, giving you flexibility in selecting the perfect container for your candle.
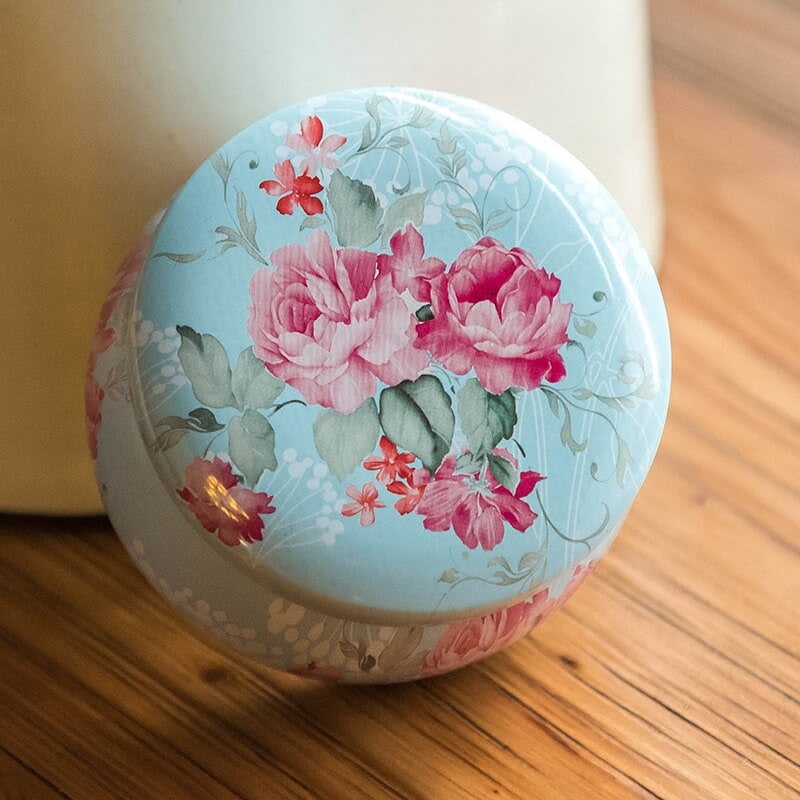
Tin containers offer a vintage or rustic look and are often used for travel candles or smaller-sized ones. Teacups, mason jars, ceramic pots, and even seashells can be repurposed as unique and charming candle containers.
In addition to choosing the right container, you can elevate the design of your candles by incorporating various embellishments. Ribbons are a simple yet effective way to add elegance and color to your candles. You can tie them around the container or attach them with wax adhesive for a more secure hold.
Flowers, dried herbs, and other natural elements can be pressed into the wax before it fully sets or placed on top as decoration. They not only enhance the visual appeal but can also infuse delightful scents when warmed by the flame.
| Candle Containers | Embellishments |
|---|---|
| Glass jars | Ribbons |
| Tin containers | Flowers |
| Teacups | Dried herbs |
| Mason jars | Natural elements |
When choosing the perfect container and embellishments for your candles, it is essential to consider factors such as the candle’s size and shape, overall theme or style, and the intended purpose of the candle. Experimenting with different combinations can yield unique and personalized results that reflect your creativity and style. Remember to keep in mind the safety aspect when selecting embellishments to ensure they do not pose a fire hazard when in contact with the flame.
Essential Safety Measures and Candle Making Tips
Precautions to Follow When Working with Hot Wax and Open Flames
Safety should always be a top priority when engaging in any craft, including candle making. Working with hot wax and open flames can pose certain risks if proper precautions are not taken. Here are some essential safety measures to keep in mind while making candles:
- Work in a well-ventilated area: It is crucial to have good air circulation when working with wax and fragrances. Proper ventilation helps dissipate any fumes or odors that may be released during the candle-making process.
- Use protective gear: To protect yourself from hot wax and potential splatters, it is advisable to wear heat-resistant gloves and an apron or other protective clothing. Safety goggles can also be worn to protect your eyes from any accidental splashes or spills.
- Keep flammable materials away: Ensure that you work on a stable and non-flammable surface, away from flammable materials such as paper, fabric, or curtains. Flammable items should never be placed near an open flame.
- Be cautious of hot surfaces: The containers, molds, and equipment may become hot during the process. Always use oven mitts or heat-resistant pads when handling anything that has been heated.
- Never leave candles unattended: It is important to stay present while candles are lit to prevent accidents or fire hazards. If you need to leave the room briefly, ensure that all candles are extinguished beforehand.
Handling and Storing Candle Making Supplies Properly for Maximum Longevity
Proper storage and handling of your candle making supplies can ensure their longevity and prevent any wastage or damage. Here are some tips for handling and storing your candle making supplies:
- Store waxes properly: Different types of waxes require different storage conditions. Generally, it is recommended to store waxes in a cool, dry place away from direct sunlight. Beeswax, in particular, should be kept in an airtight container to prevent it from drying out.
- Keep fragrance oils in a cool and dark place: Fragrance oils are sensitive to heat and light, so it is best to store them in a cool and dark area, such as a cupboard or drawer. Avoid storing them near windows or other sources of direct sunlight.
- Properly seal containers: When not in use, make sure to tightly seal containers of dye blocks, liquid dyes, additives, and other candle making materials. This helps prevent moisture absorption and keeps the products fresh for future use.
- Label your supplies: To avoid confusion or accidental misuse of supplies, it is helpful to label each item with its name and date of purchase. This allows you to easily identify the age and type of each product when reaching for it later.
- Keep wicks organized: To prevent tangling and ensure easy access to different wick sizes and materials, it is beneficial to keep them organized in separate containers or compartments. This simplifies the process of selecting the appropriate wick for each candle project.
Troubleshooting Common Candle Making Issues
Candle making can sometimes come with its own set of challenges, but with some troubleshooting techniques, many common issues can be resolved. Here are some solutions for addressing common problems that may arise during candle making:
- Sinkholes: If your candles have holes or depressions on the surface after they have cooled down, this indicates sinkholes. To fix this issue, you can heat up additional wax until it reaches a lower melting point (around 140°F) and pour it into the sinkholes to fill them up.
- Tunneling: Tunneling occurs when candles burn straight down without melting wax evenly across the entire diameter. To prevent tunneling, ensure that you allow the candle to burn for sufficient time during the first lighting. Trim the wick to a proper length (around ¼ inch) before each use and ensure that it is properly centered in the candle.
- Uneven burning: If your candles have uneven melting or burning patterns, this can be due to various factors such as wick size, type of wax, or drafty conditions. To promote even burning, ensure that you choose the appropriate wick size for your candle diameter and consistently trim it before each use.
- Extinguishing issues: If you are having trouble extinguishing candles or experiencing excessive smoking when blowing them out, consider using a candle snuffer. This helps to safely extinguish the flame without causing smoke or damaging the wick.
Remember, practice makes perfect, so don’t get discouraged if you encounter any difficulties along the way. With some patience and experimentation, you’ll soon master the art of making beautifully crafted candles.
Conclusion
In conclusion, candle making is a delightful and fulfilling hobby that offers not only therapeutic benefits but also the opportunity to unleash your creativity. Throughout this article, we have explored the essential supplies needed for candle making and the various factors to consider when embarking on this craft.
Choosing the right wax for your candles is an important step, with options such as soy, beeswax, and paraffin each offering their own pros and cons. Additionally, understanding the necessary equipment, including double boilers, thermometers, molds, and wicks, is crucial for successful candle making.
Exploring additives and fragrance options allows you to enhance both the visual appeal and aroma of your candles. Understanding different scent notes and choosing complementary fragrances adds another layer of creativity to your creations. Candle molds come in a variety of shapes and materials, offering endless possibilities for unique designs.
The importance of selecting the right wick for your candle cannot be overstated. It affects burn time, flame height, and overall performance. Likewise, considering containers and embellishments adds a decorative touch to your candles.
By following safety measures and proper techniques, you can achieve professional-looking candles while experimenting with different methods to unlock your full creative potential. Overall, candle making provides a satisfying outlet for self-expression through personalized customization.
Now armed with the knowledge of essential supplies discussed throughout this article, it’s time to gather your materials and embark on your candle making journey. Unleash your creativity by infusing your personal touch into every aspect of this craft. From selecting fragrances that resonate with you to choosing unique containers or upcycling household items as candle holders – there are endless possibilities awaiting you in the world of candle making.
As you embrace this hobby wholeheartedly, take pride in knowing that you are carrying forward a cherished tradition dating back centuries while adding your own contemporary twist. So go ahead and light up not just a room but also ignite that creative spark within you with the joy and satisfaction that comes from crafting your own candles.
Frequently Asked Questions
What supplies do you need to make homemade candles?
To make homemade candles, you will need a few essential supplies. Firstly, you will need wax, which can be either soy wax, beeswax, or paraffin wax. Other necessary supplies include a candle wick, which is usually made of cotton and comes in different sizes. You will also need containers to pour the melted wax into, such as glass jars or tins.
Additionally, you’ll require fragrance oils or essential oils if you want scented candles. Color dyes can be used to add vibrant hues to your candles if desired. A double boiler or a heat-resistant container for melting the wax is needed along with a thermometer to monitor its temperature during the process. Lastly, scissors and adhesive are handy for trimming and securing the wicks.
How do you make candles for beginners?
Making candles as a beginner can be an enjoyable and straightforward process. To begin, gather all the necessary supplies mentioned earlier: wax (such as soy wax), candle wicks, containers, fragrance oils or essential oils (optional), color dyes (optional), a double boiler or heat-resistant container for melting the wax, thermometer, scissors, and adhesive. Start by setting up your workspace with all your materials within reach. Prepare your containers by cleaning them thoroughly and placing the wicks at their center using adhesive to hold them in place if necessary.
Melt the wax using a double boiler or microwave-safe container while monitoring its temperature with a thermometer – ensuring it doesn’t exceed its recommended melting point. Once melted, add any fragrance oils or color dyes according to your preference and mix well. Carefully pour the melted wax into your prepared containers containing wicks and leave them undisturbed until they solidify completely – usually taking several hours to cool down and harden fully. Trim the excess wick length using scissors for safety precautions before lighting them up for use!

Welcome to my candle making blog! In this blog, I will be sharing my tips and tricks for making candles. I will also be sharing some of my favorite recipes.

