Are you looking for a creative and soothing DIY project to try at home? Look no further than peppermint candle making. Whether you are a beginner or an experienced crafter, creating your own peppermint candles can be a fun and rewarding activity.
Not only will you end up with beautiful handmade candles, but you’ll also get to enjoy the therapeutic benefits of peppermint essential oil. In this article, we will dive into the world of peppermint candle making and explore the many benefits of using them for relaxation and aromatherapy.
Peppermint has been utilized for its aromatic and medicinal properties for centuries. From its origins as a natural hybrid between watermint and spearmint to its historical use in ancient civilizations such as Egypt, Greece, and Rome, peppermint has long been valued for its invigorating scent and calming effects. Today, peppermint is widely associated with winter holidays and relaxation, making it a perfect choice for creating candles that promote tranquility and well-being.
Beyond their delightful fragrance, peppermint candles offer numerous health and wellness benefits. From stress relief to improved focus, the scent of peppermint has been shown to have positive effects on mood and cognitive function. Additionally, inhaling peppermint essential oil may help support respiratory health by clearing nasal passages and promoting easier breathing.
So not only can you enjoy the cozy ambiance of flickering candlelight, but you can also reap the rewards of aromatherapy when using peppermint candles. Ready to get started on crafting your own? Keep reading for a step-by-step guide on how to make your very own peppermint candles at home.
The History of Peppermint
Peppermint has a rich history dating back to ancient times, with its usage as a scent and flavor being traced as far back as 1,000 BC. The plant is a hybrid between watermint and spearmint and is native to Europe and the Middle East. Its invigorating scent and cooling properties have made it a popular choice for various purposes throughout history.
In ancient Egypt, peppermint was used in perfumes and ointments due to its refreshing aroma. The Greeks and Romans also valued peppermint for its medicinal properties, using it as a stomach soother and breath freshener.
During the Middle Ages, peppermint became associated with winter holidays, particularly Christmas. It was not just used for its aroma, but also as a key ingredient in festive dishes such as candies and desserts. Its association with relaxation and festivities continued through the centuries, making it an integral part of holiday traditions in many cultures around the world.
The versatility of peppermint as a scent has also led to its use in personal care products such as soaps, shampoos, and candles. Its invigorating fragrance has been long cherished for creating a calming ambiance in homes during the holiday season and beyond. This connection to relaxation has firmly established peppermint’s place in aromatherapy practices today.
- Peppermint traces back to 1,000 BC
- Native to Europe and the Middle East
- Ancient Egyptians used it for perfumes
- Greeks and Romans valued it for medicinal properties
- Associated with winter holidays like Christmas
Benefits of Peppermint Candles
The use of peppermint candles goes beyond their pleasant scent and flickering warmth; they also offer numerous health and wellness benefits. For centuries, peppermint has been utilized for its healing properties, and when used in candle form, these benefits can be easily incorporated into daily life. Peppermint oil is known for its ability to provide stress relief, enhance focus, and even deliver respiratory benefits.
One of the most notable benefits of peppermint candles is their ability to reduce stress and anxiety. The aroma of peppermint has been shown to have a calming effect on the mind and body, making it an ideal choice for individuals seeking relaxation. Whether used during meditation, yoga practice, or simply as a means to unwind after a long day, peppermint candles can help create a soothing environment that promotes mental well-being.
In addition to stress relief, peppermint candles can also improve focus and alertness. The invigorating fragrance of peppermint has been linked to heightened cognitive function, making it an excellent choice for those looking for an extra mental boost during work or study sessions.
The stimulating properties of peppermint can help combat mental fatigue and increase overall productivity. Furthermore, the scent of peppermint has been shown to aid in clearing the sinuses and improving breathing-a benefit that can be particularly useful during allergy or cold seasons.
| Benefits | Details |
|---|---|
| Stress Relief | Aroma promotes relaxation and reduces anxiety. |
| Improved Focus | Invigorating scent helps enhance cognitive function. |
| Respiratory Benefits | Aids in sinus clearing and improves breathing. |
Given these numerous benefits, incorporating peppermint candles into daily routines can serve as a valuable tool for promoting overall well-being. With their aromatic allure and therapeutic advantages, these candles are an excellent addition to any home or workspace. For those interested in experiencing the positive effects of peppermint candles firsthand, creating homemade versions through DIY projects can also be a rewarding endeavor.
Step-by-Step Guide to Making Peppermint Candles
Making peppermint candles at home can be a fun and rewarding experience. Not only do they provide a lovely aroma, but they also offer various health and wellness benefits. Here is a step-by-step guide to help you create your own peppermint candles in the comfort of your own home.
Step 1: Gather Your Materials
- Soy wax flakes
- Peppermint essential oil
- Candle wicks
- Wick holder or clothespins
- Double boiler
- Glass jar or container for the candle
Step 2: Melt the Wax
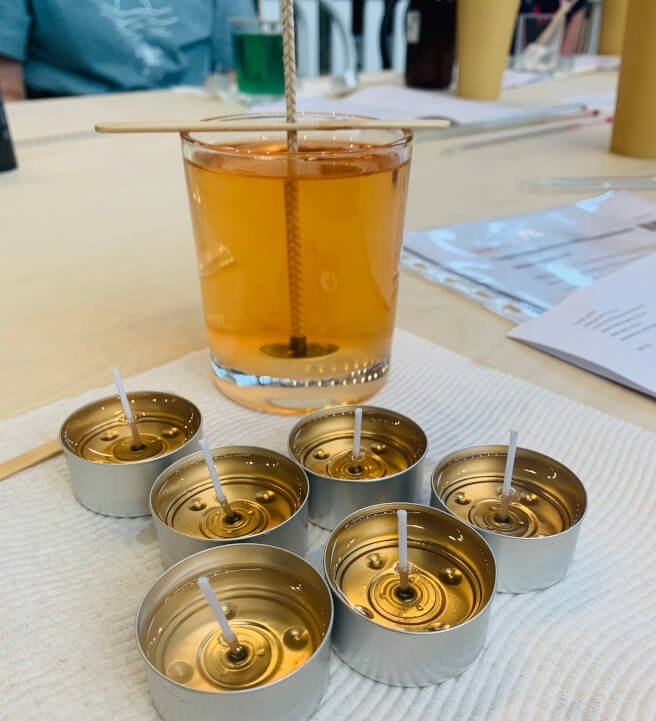
Begin by melting the soy wax flakes in a double boiler. This method helps to evenly distribute heat and prevents the wax from scorching. Stir occasionally until all the wax has completely melted.
Step 3: Add Peppermint Essential Oil
Once the wax has melted, remove it from the heat source and allow it to cool slightly. Then, add several drops of peppermint essential oil to the melted wax. The number of drops will depend on how strong you want the scent to be.
Step 4: Prepare the Container and Wicks
While the scented wax cools slightly, prepare your glass jar or container by securing a candle wick at the bottom using a wick holder or clothespin. This ensures that the wick stays centered when pouring in the wax.
Following these steps will result in beautifully scented peppermint candles that you can enjoy in your home. For an even more comprehensive visual guide, be sure to check out our DIY peppermint candle making video for additional tips and tricks.
Necessary Materials and Tools
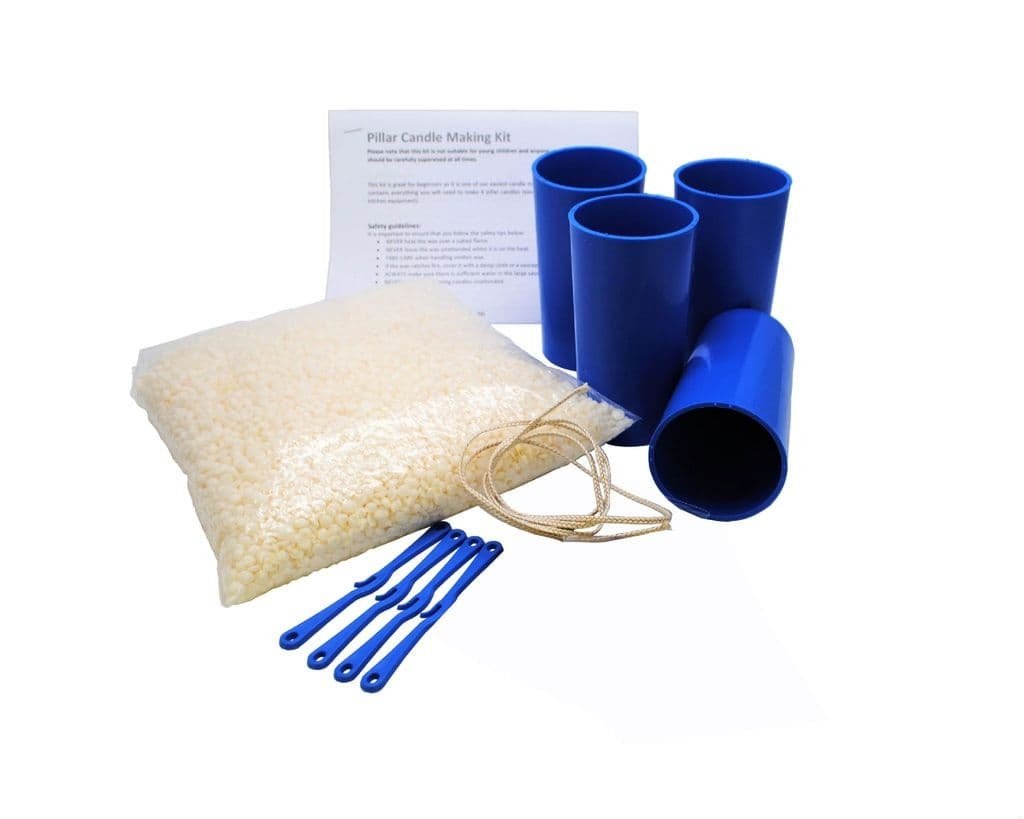
When it comes to making your own peppermint candles at home, having the right materials and tools is essential for a successful and enjoyable crafting experience. Here is a detailed list of all the necessary items you will need to create your own aromatic peppermint candles, along with where you can purchase them.
First and foremost, you will need soy wax or beeswax, which are both popular choices for candle making due to their clean-burning properties. You can easily find these waxes at your local craft stores or order them online from specialty candle-making suppliers. Additionally, you will require candle wicks, which are typically made from cotton and come in various sizes. These can also be found at craft stores or online.
Next, essential oils are a key ingredient in creating peppermint-scented candles. Look for high-quality peppermint essential oil, which can be purchased from health food stores or online retailers specializing in aromatherapy products. For coloring your candles, soy-based or natural dye chips are ideal options that can be found at craft stores as well.
To melt the wax and create your candles, you will need a heat-resistant glass measuring cup specifically designated for candle making. Double boilers or melting pots are also essential for safely melting the wax without direct heat contact. Finally, containers for your finished candles are needed – mason jars or tins work well for this purpose and can be purchased online or at kitchen supply stores.
By gathering all these materials and tools beforehand, you’ll be set up for success when following a step-by-step guide to create your very own soothing peppermint candles at home.
Safety Precautions
When making peppermint candles at home, safety should always be a top priority. Handling hot wax and essential oils requires caution and proper measures to prevent accidents and injuries. By following the necessary safety precautions, you can ensure a smooth and enjoyable candle-making experience.
Handling Hot Wax
When working with hot wax, it is crucial to use a double boiler or dedicated melting pot to melt the wax instead of direct heat. This helps reduce the risk of accidental burns or fires. Additionally, always keep a fire extinguisher nearby in case of emergencies. It is also important to never leave melting wax unattended as it can quickly reach high temperatures and pose a hazard.
Proper Use of Essential Oils
Essential oils are a key ingredient in creating peppermint candles, but they should be handled with care. Always use essential oils in a well-ventilated area to prevent inhaling concentrated fumes. When measuring out essential oils, use a designated dropper or pipette to avoid spills or accidental contact with skin or eyes. It’s also advisable to wear gloves when handling undiluted essential oils to minimize the risk of skin irritation.
Clean-Up and Storage
After completing your peppermint candle making project, proper clean-up is essential for maintaining a safe workspace. Be sure to wipe down all surfaces that came into contact with hot wax or essential oils. Store leftover materials in a secure location away from children and pets, ensuring that they are not within reach to prevent accidents. Proper storage will also help extend the shelf life of your candle-making supplies.
By adhering to these safety precautions when making peppermint candles at home, you can enjoy the process without any worries about potential hazards. Practice caution and mindfulness throughout each step of the candle-making process, and always prioritize safety above all else.
DIY Peppermint Candle Making Video
Creating peppermint candles at home can be a fun and rewarding experience, especially for those who appreciate the benefits of aromatherapy. To enhance the learning process, we have prepared a step-by-step DIY peppermint candle making video that provides a visual guide for readers to follow along. This video will walk you through each stage of the candle-making process, from preparing the materials to enjoying the finished product.
Materials and Preparation
The first step in creating your own peppermint candles is to gather all the necessary materials and tools. Our DIY peppermint candle making video will show you exactly what you need, including wax, wicks, essential oils, and containers. We’ll also provide tips on where to purchase these items if you don’t already have them at home.
Step-by-Step Instructions
Once you have all your materials ready, our video will guide you through each step of the candle-making process. From melting the wax to adding the peppermint essential oil, our easy-to-follow instructions will ensure that you can create your own aromatic peppermint candles with confidence. We’ll also share some insider tips and tricks for achieving a professional-looking finish.
Enjoying Your Peppermint Candles
After following our DIY peppermint candle making video, you’ll be able to sit back, relax, and enjoy the soothing aroma of your homemade creation. Whether you’re using them for stress relief, improved focus, or simply to create a cozy atmosphere at home, your peppermint candles are sure to enhance your well-being. So why not give it a try today?
Conclusion
In conclusion, peppermint candles offer numerous benefits for relaxation and aromatherapy. The historical ties of peppermint to winter holidays and relaxation, combined with its health and wellness benefits, make it an ideal scent for homemade candles. By following a step-by-step guide and watching a DIY peppermint candle making video, individuals can create their own calming and rejuvenating candles at home.
The benefits of using peppermint candles go beyond just the pleasant scent. They can aid in stress relief, improved focus, and provide respiratory benefits. With the right materials and tools, along with practicing safety precautions when working with hot wax and essential oils, anyone can enjoy the therapeutic effects of these homemade peppermint candles.
Encouraging readers to try creating their own peppermint candles at home allows them to experience the joys of aromatherapy firsthand. Whether it’s as a personal self-care activity or to gift to loved ones during the holiday season, making peppermint candles can be a fulfilling and rewarding experience.
So why not give it a try? Watch a DIY peppermint candle making video, gather your materials, and start enjoying the soothing benefits of these delightful creations in your own home today.
Frequently Asked Questions
Can You Put Real Peppermints in a Candle?
No, it’s not safe to put real peppermints in a candle. The sugar in the peppermints can pose a fire hazard and cause the candle to burn unevenly or unpredictably.
Is Peppermint Oil Safe for Candles?
Peppermint oil is safe for candles as long as it is used in the correct concentration. It’s important to follow a recipe and not exceed the recommended amount of essential oil to avoid safety issues.
How Do You Make Peppermint Swirl Candles?
To make peppermint swirl candles, you’ll need wax, a double boiler, peppermint essential oil, candle wicks, red and white candle dye, and a heat-resistant container. Melt the wax, add the dye and essential oil, then pour into the container while swirling colors together. Allow it to cool and solidify before trimming the wick and lighting.

Welcome to my candle making blog! In this blog, I will be sharing my tips and tricks for making candles. I will also be sharing some of my favorite recipes.


