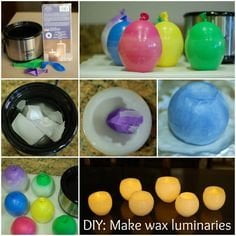
When making candles, it is essential to stick the wick properly. The placement of the wick plays a crucial role in determining the overall quality of the candle, affecting its burn time and performance. In this article, we will discuss the significance of correctly placing the wick when making candles and provide valuable insights on how to ensure its proper placement.
Choosing the right wick is a key factor in achieving a high-quality candle. We will explore the different types and sizes of wicks available and guide you on how to select the most appropriate one for the type of candle you are making. Additionally, we will delve into the process of preparing the container for the wick, including centering and securing it in place to ensure an even and efficient burn.
Furthermore, we will discuss using a wick holder to keep the wick in place while pouring the wax, along with a step-by-step guide on how to pour the wax into the container without disrupting the wick’s position. By following these techniques, you can ensure that your candle maintains its quality throughout its use.
Stay tuned for expert tips on testing and troubleshooting any issues with wick placement, as well as final tips and tricks for proper wick maintenance for longevity.
Choosing the Right Wick
When making candles, choosing the right wick is crucial for achieving the desired burn and overall quality of the candle. There are different types and sizes of wicks available, and selecting the appropriate one depends on the type of candle being made. Here are some factors to consider when choosing the right wick for your candle:
- Type of Wax: Different types of wax require different wicks. For example, soy wax may require a different type of wick compared to paraffin wax.
- Container Size: The size of the container in which the candle will be made also plays a role in determining the right wick size. A larger container may require a thicker wick to ensure proper burning.
- Desired Burn Time: Consider how long you want the candle to burn. Some wicks are designed for longer burn times, while others are better suited for shorter periods.
Once you have considered these factors, it’s important to test different types and sizes of wicks before making a final decision. Conducting a burn test with various wicks can help determine which one performs best in terms of flame size, burning rate, and overall performance.
After selecting the appropriate wick for your candle, it’s important to properly prepare the container for its placement. This includes centering and securing the wick in place to ensure it remains in position during the pouring process and while the wax sets.
Overall, choosing the right wick is a critical step when making candles as it directly impacts how well the candle burns and performs. By considering factors such as wax type, container size, and desired burn time, you can select an appropriate wick that enhances the overall quality of your homemade candles.
Preparing the Container
When it comes to preparing the container for the wick, proper centering and securing of the wick are crucial for ensuring a high-quality candle. This process not only affects how the candle looks but also how it burns. Improperly placed wicks can result in uneven burning, tunneling, and other issues that can affect the overall performance of the candle. To avoid these problems, it’s essential to pay close attention to this step when making candles.
Centering the Wick
Before securing the wick in place, it’s important to ensure that it is centered within the container. This can be done by using a wick centering tool or simply by eyeballing it to make sure it is positioned in the middle. A properly centered wick will allow the candle to burn evenly and prevent any tunneling.
Securing the Wick
Once the wick is centered, it should be secured in place to prevent it from moving during the pouring process. This can be done using various methods such as adhesive stickers, hot glue, or even using a pencil or chopstick laid across the top of the container to keep the wick in place. The chosen method will depend on personal preference and what works best for each individual.
Importance of Proper Prepping
Taking the time to properly prep and secure the wick in place may seem like a small detail, but it makes a significant difference in the overall quality of the finished candle. By ensuring that the wick is centered and secured before pouring wax into the container, you are setting yourself up for success and reducing potential issues with your homemade candles down-the-line.
Using a Wick Holder
When making candles, using a wick holder is essential for keeping the wick in place while pouring the wax. This tool not only ensures that the wick remains centered within the container, but also prevents it from moving or falling into the hot wax. Here are some benefits of using a wick holder:
- Keeps the Wick Centered: A wick holder helps maintain the wick’s position at the center of the container, preventing it from leaning to one side during the pouring process.
- Secures the Wick in Place: By securely holding the wick in position, a wick holder eliminates the risk of it shifting or floating in the melting wax, resulting in an uneven burn once the candle is lit.
- Prevents Wick Submersion: Using a wick holder ensures that the top portion of the wick remains above the wax level, preventing it from getting completely submerged and making it easier to light once set.
To use a wick holder effectively, follow these steps:
- Place the wick through the center hole of the wick holder.
- Position and secure the wick holder at the top of your candle container, ensuring that it sits flat and straight.
- Adjust and tighten as needed to keep the wick taut and centered throughout the pouring process.
By utilizing a wick holder when making candles, you can achieve a properly positioned and secure wick, which is crucial for ensuring that your candles burn evenly and efficiently.
Pouring the Wax
When it comes to making candles, the process of pouring the wax into the container is a critical step that requires careful attention to ensure that the wick remains in its proper position. Disrupting the wick’s placement during this step can lead to issues such as uneven burning or tunneling, ultimately affecting the overall quality of the candle.
In this section, we will provide a step-by-step guide on how to pour the wax into the container without disrupting the wick’s position, ensuring a well-made and high-quality candle.
Preparing the Pour
Before pouring the wax into the container, it’s important to make sure that everything is ready for a smooth and seamless process. This includes having your prepped container with the secured wick in place, as well as having your melted wax at the right temperature for pouring. Additionally, ensure that you have a steady surface to work on and that you are working in a draft-free area to prevent any movement or disturbance to the wick.
Pouring Technique
When it comes time to pour the wax into your container, it’s essential to do so with precision and care. Start by holding your pouring vessel close to the surface of the wax while slowly and steadily pouring it into your container. Aim for a consistent and even flow of wax to prevent any splashing or sudden movements that could disrupt the wick. Be mindful not to overfill the container, as this could also interfere with proper wick placement.
After-Pour Check
Once you have poured the wax into your container, take a moment to double-check that the wick has remained in its proper position. Use a wick holder or gently adjust if necessary before allowing time for the candle to set.
By ensuring that no disruption has occurred during this crucial step, you are setting yourself up for a well-made candle with an even burn and long-lasting fragrance. Throughout this process of pouring, always be mindful of stick “the wick” when making candles.
Testing the Wick
Before the wax sets in your candle, it is crucial to test the wick to ensure that it is properly secured. One way to do this is by gently tugging on the wick to make sure it stays in place.
If it easily moves or comes loose, then it needs to be repositioned and secured before the wax fully sets. Additionally, you can use a wick holder to keep the wick centered and in place while you pour the wax, which will help prevent any shifting or misplacement.
Another method for testing the wick is by lighting it for a brief moment and observing how it burns. The flame should be steady and centered, without flickering excessively or leaning towards one side.
If there are any issues with the flame, such as uneven burning or smoke production, then it is likely that the wick needs adjusting. It’s important to address any problems with the wick before the wax solidifies, as repositioning it once set can be difficult and may result in an imperfect burn.
Properly securing the wick when making candles is essential for ensuring an even and clean burn. If the wick is not securely in place, issues such as tunneling or uneven melting may occur during the candle’s use. By carefully testing and securing the wick before the candle sets, you can prevent these problems and ensure that your candles burn evenly and beautifully every time.
| Testing Method | Key Points |
|---|---|
| Gentle Tug | Check if the wick easily moves or comes loose |
| Lighting Test | Observe how flame burns for any signs of unevenness or instability |
Troubleshooting
When making candles, one of the most crucial aspects to pay attention to is the proper placement of the wick. This not only affects the overall quality and performance of the candle but also ensures safety during burning. However, despite best efforts, issues with wick placement can still occur, leading to problems such as uneven burning or tunneling. In this section, we will explore some common issues that arise with wick placement and provide solutions on how to fix them.
Uneven burning is a common issue that can result from an improperly placed wick. This occurs when the wax does not melt evenly across the surface of the candle, leaving unused wax around the edges.
To fix this issue, it’s important to ensure that the wick is centered in the container before pouring the wax. Using a wick holder during the pouring process can also help maintain the wick’s position, preventing it from leaning towards one side as the wax solidifies.
Tunneling is another problem that can stem from poor wick placement. This occurs when a hole forms down the center of the candle, leaving excess wax along the sides.
To address this issue, it’s essential to choose a wick size appropriate for the diameter of the candle and ensure that it is properly secured in place before pouring the wax. Additionally, pouring at a lower temperature and allowing more time for each layer of wax to set can help prevent tunneling.
Another common problem related to wick placement is mushrooming, where carbon accumulates at the tip of the wick and creates excessive soot during burning. This issue can be mitigated by trimming the wick appropriately before each use and ensuring that it is not too long or too short for the size of the candle being made.
| Common Wick Issue | Solution |
|---|---|
| Uneven Burning | Ensure proper centering and use a wick holder during pouring |
| Tunneling | Choose appropriate wick size and pour at lower temperature |
| Mushrooming | Trim wicks appropriately and avoid using ones too long or too short |
Final Tips and Tricks
In conclusion, the proper placement and securing of the wick when making candles is essential for the overall quality and performance of the finished product. Choosing the right wick, preparing the container, using a wick holder, pouring the wax, testing the wick, and troubleshooting common issues are all crucial steps in ensuring that the wick stays in place.
By following these steps and taking proper care of the wick, candle makers can create high-quality candles with even burning and long-lasting performance.
Additionally, it’s important to note that proper maintenance of the wick is necessary for ensuring the longevity of the candle. Regularly trimming the wick to an appropriate length before each use can help prevent soot buildup and ensure a clean, steady burn.
It’s also advisable to keep an eye on any signs of uneven burning or tunneling, as these may indicate issues with the wick’s placement or size. By being mindful of these factors, candle makers can avoid potential problems and enjoy their candles to the fullest.
In summary, sticking the wick when making candles is not just about placing it in position but also about taking care of it throughout its lifetime. With attention to detail and proper maintenance, candle makers can create beautiful, high-quality candles that burn evenly and last a long time. By following these tips, both novice and experienced candle makers can achieve success in their craft and enjoy creating their own customized candles at home.
Frequently Asked Questions
How Do You Secure a Wick When Making Candles?
Securing a wick when making candles involves using a wick holder or sustainer to keep it centered in the candle mold. The wick is typically placed through the sustainer and secured at the bottom of the mold to keep it in place while the wax is poured.
How Do You Stick a Candle Wick to a Jar?
To stick a candle wick to a jar, first ensure that the jar is clean and dry. Use a small amount of hot glue at the metal end of the wick and quickly press it onto the bottom center of the jar. Hold it in place until the glue sets.
What Kind of Glue to Use on Candle Wicks?
When choosing a glue for candle wicks, it’s important to use one that can withstand heat and flame without releasing harmful fumes. Look for adhesive specifically designed for candle making, such as natural wax or soy-based adhesives, to ensure safety and proper functionality of the candle wick.

Welcome to my candle making blog! In this blog, I will be sharing my tips and tricks for making candles. I will also be sharing some of my favorite recipes.


