Are you interested in learning the art and science of making candles? Whether you are a complete beginner or have some experience in candle making, this article will provide you with all the essential knowledge and tips to get started. From the history of candle making to choosing the right wax and adding fragrance and color, we will cover everything you need to know about making candles 101.
Candle making is an ancient craft that has evolved over time, and it combines both creativity and precision. In this section, we will explore the fascinating history of candle making, from its origins in ancient times to modern techniques. You will also learn about the essential tools and materials needed for making candles, as well as how to choose the right wax for your projects.
Whether you want to create decorative candles for your home or make personalized gifts for friends and family, mastering the art of candle making can be a rewarding and enjoyable experience. In the following sections, we will delve into the different aspects of candle making, providing you with a comprehensive guide to help you become a skilled candle maker.
The History of Candle Making
Over time, candle making techniques evolved and diversified. In the Middle Ages, candle making became a guild craft in Europe and was a major industry. Beeswax, tallow, and other animal fats were commonly used as the primary ingredient for making candles. However, with the discovery of paraffin wax in the 19th century, it quickly became the dominant material for candle making due to its affordability and clean-burning properties.
In modern times, candle making has become a popular hobby and even a small business for many people. With advancements in technology and access to a wide variety of materials and tools, there are endless possibilities for creating unique and beautiful candles at home or on a larger scale.
- Ancient Egyptian torches made from reeds and animal fat
- Roman development of wick candles using beeswax
- Evolution of candle making techniques in Europe
- Discovery of paraffin wax in the 19th century
- Modern popularity of candle making as a hobby or small business
Candle making has truly come a long way from its humble beginnings, with a rich history that spans across different civilizations and time periods. Today, enthusiasts can enjoy exploring traditional methods as well as experimenting with new materials and techniques to create their own personalized candles.
So whether you’re interested in delving into the historical roots of candle making or simply want to try your hand at crafting your own unique designs, understanding the history of this age-old practice can provide valuable insight and inspiration for your future creations.
Essential Tools and Materials for Making Candles
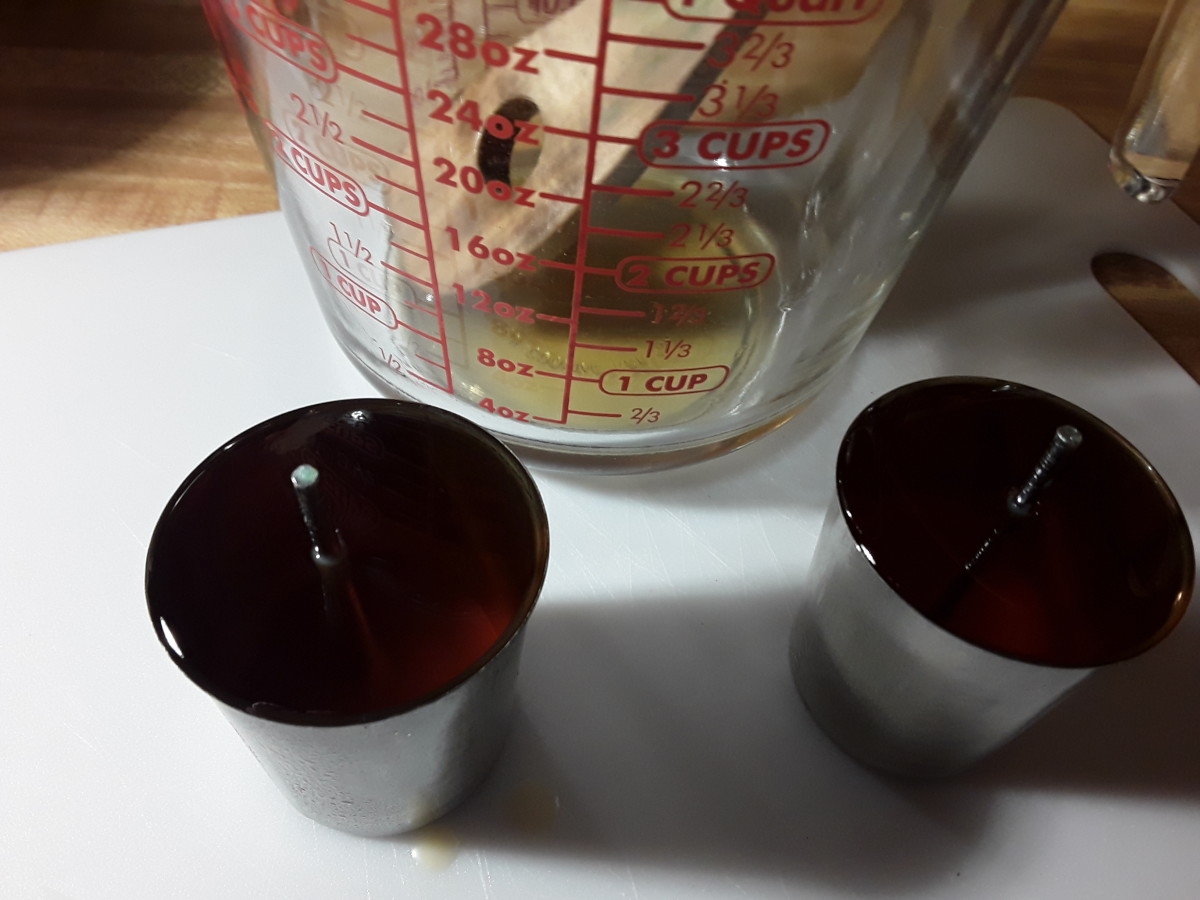
Making candles 101 requires the essential tools and materials to create beautiful and effective candles. The key to successful candle making lies in having the right equipment and high-quality ingredients. Some of the basic tools needed for candle making include a double boiler or melting pot, a thermometer, molds, wicks, and a stirring utensil. Additionally, it is essential to have a workspace dedicated to candle making that is well-ventilated and free from any potential fire hazards.
When it comes to materials, choosing the right wax is crucial. There are various types of wax available for candle making, including soy wax, paraffin wax, beeswax, and palm wax. Each type of wax has its own unique characteristics and benefits, so it’s important to consider factors such as burn time, fragrance throw, and appearance when selecting the appropriate wax for your candles.
Furthermore, fragrance oils and dyes are essential materials for adding scent and color to your candles. When selecting fragrance oils, be sure to choose high-quality scents that are specifically designed for candle making. It’s also important to use dyes that are compatible with the type of wax you are using. By investing in quality tools and materials for candle making 101, you can ensure that your finished products will be both safe and effective.
| Tool/Material | Description |
|---|---|
| Double Boiler or Melting Pot | Used for melting wax evenly without direct heat |
| Thermometer | To monitor the temperature of the melted wax while adding fragrance oils or dyes. |
| Molds | Containers for shaping and setting the molten wax as it cools into a solid form. |
Choosing the Right Wax
When it comes to making candles 101, choosing the right wax is essential in creating a quality product. There are several types of wax to consider when embarking on your candle making journey. Each type of wax has its own unique characteristics and benefits, so it’s important to understand the differences before making your selection.
Paraffin Wax
Paraffin wax is one of the most commonly used waxes in candle making. It is known for its ability to hold a high fragrance load and produce vibrant colors. However, some people have concerns about the potential for toxins released into the air when burning paraffin candles.
Soy Wax
Soy wax is a natural and sustainable option for making candles. It has a lower melting point than paraffin wax, which can result in a longer-lasting candle. Soy wax also has a clean burn and excellent scent throw, making it a popular choice for many candle makers.
Beeswax
Beeswax is another natural option that has been used for centuries in candle making. It has a subtle honey scent and produces a warm, natural glow when burned. Beeswax candles are known for their long burn time and air purification properties.
Ultimately, the type of wax you choose will depend on your personal preferences, as well as any specific considerations such as allergies or environmental impact. Experimenting with different types of wax can be an enjoyable part of the candle making process, allowing you to discover which wax best suits your needs and creative vision.
Fragrance and Color
Adding fragrance and color to your homemade candles is an essential step in making candles 101. Not only does it add a pleasing aroma and visual appeal to your creations, but it also enhances the overall candle-making experience. Here are some tips and tricks for choosing the right fragrance and color for your candles:
Choosing the Perfect Fragrance
When selecting a fragrance for your candles, it’s important to consider the type of wax you’re using and the purpose of the candle. For example, soy wax tends to hold fragrance oils better than other waxes, while beeswax has its own natural honey scent.
Additionally, think about the mood or ambiance you want to create with your candle. For a calming effect, lavender or chamomile scents work well, while citrus or floral aromas are great for adding a refreshing touch to any room.
Adding Color to Your Candles
Adding color to your candles can transform them from plain and simple to vibrant and eye-catching. When choosing colors for your candles, consider the type of dye or pigment that works best with your chosen wax.
Liquid dyes are easy to use and blend well with most waxes, while powdered pigments offer more options for customizing colors. Keep in mind that a little goes a long way when it comes to adding color – start with a small amount and gradually increase until you achieve the desired hue.
Experimenting With Scent Combinations and Color Blends
One of the joys of making candles 101 is experimenting with different scent combinations and color blends to create unique and personalized products. Don’t be afraid to mix fragrances together to create your own signature scent, or blend various dye colors to achieve an entirely new shade. Keep notes on your experiments so you can replicate successful combinations in the future – this will also help you refine your skills as a candle maker.
As you continue on your journey of making candles 101, remember that fragrance and color play an important role in creating beautiful and captivating candles. With careful consideration and experimentation, you can elevate your candle-making craft to new heights.
Step-by-Step Guide to Making Your First Candle
Are you ready to dive into the world of candle making? Whether you’re looking for a new hobby or want to create personalized gifts for friends and loved ones, making candles 101 is the perfect place to start.
In this section, we will walk you through the step-by-step process of creating your first candle. From choosing the right materials to mastering the pouring technique, you’ll be well on your way to becoming a candle making pro in no time.
Gathering Your Materials
Before you begin making your first candle, it’s important to gather all the necessary materials. This includes wax, wicks, fragrance oils, a double boiler or melting pot, a thermometer, and a pouring pitcher. Each of these components plays a crucial role in ensuring that your candles turn out beautifully.
Preparing Your Workspace
Creating a dedicated workspace for candle making is essential for safety and efficiency. Choose a well-ventilated area with a stable work surface. Lay down newspaper or wax paper to protect the area from potential spills or drips. It’s also important to have all your tools and materials within reach so that you can focus on the task at hand without any distractions.
The Pouring Process
Once you’ve gathered your materials and prepared your workspace, it’s time to start making your first candle. Begin by melting the wax in your double boiler or melting pot, stirring occasionally until it reaches the desired temperature. Next, add fragrance oils and color dyes if desired, then carefully pour the melted wax into the prepared container with the wick in place. Allow the candle to cool and solidify before trimming the wick and enjoying your handcrafted creation.
Now that you’ve completed your first candle making project, you can continue to hone your skills and experiment with different techniques and designs as you grow more comfortable with this creative endeavor.
Troubleshooting Common Candle Making Problems
When making candles, it is not uncommon for beginners to encounter various issues that can affect the quality and appearance of their finished products. From uneven burning to air pockets and wick-related problems, troubleshooting common candle-making problems is an essential part of the learning process. By understanding these issues and how to address them, you can ensure that your candles turn out beautifully every time.
One of the most common problems encountered when making candles is uneven burning. This occurs when the wax does not melt evenly across the surface of the candle, leaving unsightly craters or holes. To prevent this, it is important to ensure that your wick is properly centered in the container and trimmed to the correct length. Additionally, choosing the right type of wax with a proper melting point can also help in achieving an even burn.
Another common issue faced by novice candle makers is air pockets or voids within the wax. These pockets can lead to an uneven surface or cause structural weaknesses in the candle. To avoid this problem, it’s crucial to pour your wax at the correct temperature and to gently tap or rotate your mold as the wax cools to release any trapped air bubbles.
Wick-related problems, such as tunneling (when a hole forms down the center of your candle) or mushrooming (excessive carbon buildup on top of the wick), are also common concerns for those new to making candles. Choosing a wick that is appropriate for your chosen wax and container size can help alleviate these issues.
It’s also important to trim your wick before each use and ensure that it is not too long or too short for optimal burning. By addressing these common candle-making problems, you can improve your skills and create beautiful, high-quality candles every time.
| Common Candle Making Problems | Troubleshooting Tips |
|---|---|
| Uneven Burning | Center wicks properly; Choose correct wax type |
| Air Pockets/Voids | Pour wax at correct temperature; Release trapped air bubbles by tapping or rotating mold |
| Wick-Related Problems (Tunneling/Mushrooming) | Choose appropriate wick size; Trim wick before each use; Ensure proper length for optimal burning |
Advanced Techniques
In the world of candle making, there is no limit to the creativity and artistic expression that can be achieved. Once you have mastered the basics of making candles 101, you may want to explore advanced techniques to create unique and decorative candles that stand out from the rest. From intricately carved designs to multi-colored layers, the possibilities are endless when it comes to creating one-of-a-kind candles.
One advanced technique that can take your candle making skills to the next level is the art of layering different colored waxes. By carefully pouring layers of differently colored wax into a mold and allowing each layer to solidify before adding the next, you can create captivating visual effects in your candles. This technique allows for an endless variety of color combinations and patterns, making each candle a true work of art.
Another advanced technique that is sure to impress is the creation of carved or sculpted candles. Using special carving tools, you can intricately carve designs or shapes into the surface of a candle, resulting in stunning and decorative pieces. From delicate floral patterns to geometric shapes, carved candles add a touch of elegance and sophistication to any setting. With practice and patience, you can master this advanced technique and create exquisite hand-carved candles that are truly unique.
For those looking to add a touch of sparkle and glamour to their candles, incorporating embellishments such as glitter, beads, or metallic accents is an advanced technique worth exploring. By carefully adding these decorative elements to your melted wax before pouring it into a mold, you can create dazzling candles that shimmer and shine when lit.
Whether you prefer a subtle hint of sparkle or a bold and extravagant look, adding embellishments is a surefire way to elevate your candle making skills and create show-stopping decorative pieces.
Safety Precautions
In conclusion, learning the art and science of making candles can be a truly rewarding experience. From understanding the rich history of candle making to mastering advanced techniques for creating unique and decorative candles, there is always something new to learn and explore in this craft. By following proper safety precautions, you can ensure that your candle making experience remains safe and enjoyable.
As you venture into the world of making candles 101, it is essential to familiarize yourself with the necessary tools and materials, as well as choosing the right wax for your specific needs. Additionally, adding fragrance and color to your candles can help you create personalized scents and hues that truly reflect your creativity.
Whether you are a beginner or an experienced candle maker, troubleshooting common candle making problems is normal. By understanding these issues and how to address them, you can enhance your skills and produce high-quality candles. Ultimately, taking time to prioritize safety measures will allow you to fully enjoy the process of creating beautiful candles while also ensuring a safe environment for yourself and others. Happy candle making.
Frequently Asked Questions
What Is the 8 10 Rule for Candles?
The 8-10 rule for candles refers to the ideal burn time for a candle. It suggests that you should burn a candle for at least one hour for every inch in diameter to ensure an even melt pool and prevent tunneling.
What Is the 84 Rule for Candles?
The 84 rule for candles is another guideline for proper burning. It recommends that you should not burn a candle for more than four hours at a time and should let it cool down before relighting it. This helps to maintain the quality of the candle and ensures safety.
How Do You Make Candles for Beginners?
For beginners, making candles can be an enjoyable and creative process. Start by gathering the necessary materials such as wax, wicks, fragrance oils, and a double boiler. Melt the wax, add fragrance, pour into containers, place the wick, and let it cool. With practice and attention to detail, beginners can create beautiful homemade candles.

Welcome to my candle making blog! In this blog, I will be sharing my tips and tricks for making candles. I will also be sharing some of my favorite recipes.


