Homemade gel candle making basics are a popular and rewarding craft that allows individuals to create unique and personalized candles for their homes or as gifts. Unlike traditional wax candles, gel candles offer a transparent and modern look that can be easily customized with colors, scents, and decorative elements. In this article, we will delve into the art of homemade gel candle making, exploring the benefits, materials needed, step-by-step guide, safety tips, and more.
The beauty of homemade gel candles lies in the ability to tailor each candle to your preferences and style. Whether you prefer vibrant colors, soothing scents, or intricate designs, gel candles provide a versatile canvas for creativity. By learning the basics of homemade gel candle making, you can not only enjoy the therapeutic process of crafting but also showcase your artistic skills through beautifully handcrafted candles.
In addition to serving as a creative outlet, making gel candles at home offers various benefits. Not only can it be a cost-effective alternative to store-bought candles, but it also allows you to control the quality of ingredients used. With the right materials and techniques, you can create high-quality gel candles that burn cleanly and evenly while exuding delightful aromas throughout your space.
Benefits of Making Gel Candles at Home
Making gel candles at home has become an increasingly popular hobby for many craft enthusiasts. The benefits of creating your own gel candles go beyond just the final product, as the process itself can be therapeutic and rewarding. By delving into the world of homemade gel candle making, you can unleash your creativity and personalize each candle to suit your preferences.
Cost-Effective
One of the main benefits of making gel candles at home is that it can be a cost-effective hobby compared to purchasing them from stores. By buying materials in bulk and reusing containers or jars, you can save money in the long run. Additionally, you have the freedom to customize each candle with different colors, scents, and decorations without having to pay premium prices.
Personalized Gifts
Homemade gel candles make thoughtful and personalized gifts for special occasions. Whether it’s a birthday, anniversary, or holiday celebration, gifting a handmade gel candle shows that you put time and effort into creating something unique for your loved ones. You can tailor each candle to match the recipient’s favorite colors or scents, making it a truly special present that will be cherished.
Creative Outlet
Making gel candles at home provides a creative outlet for individuals looking to express themselves artistically. From experimenting with different color combinations to designing intricate patterns within the candles, there are endless possibilities for creativity. Whether you enjoy simple and elegant designs or bold and vibrant creations, homemade gel candle making allows you to unleash your imagination and create one-of-a-kind pieces that reflect your style.
Materials Needed for Homemade Gel Candle Making
When it comes to making gel candles at home, having the right materials is essential to ensure the success of your project. The key ingredient you will need is gel wax, which is a clear, rubbery material that gives gel candles their unique appearance.
Additionally, you will need a double boiler or a microwave-safe container to melt the gel wax safely. Other materials include a thermometer to monitor the temperature of the wax, fragrance oils or essential oils for scent, and dye chips or liquid dye for color.
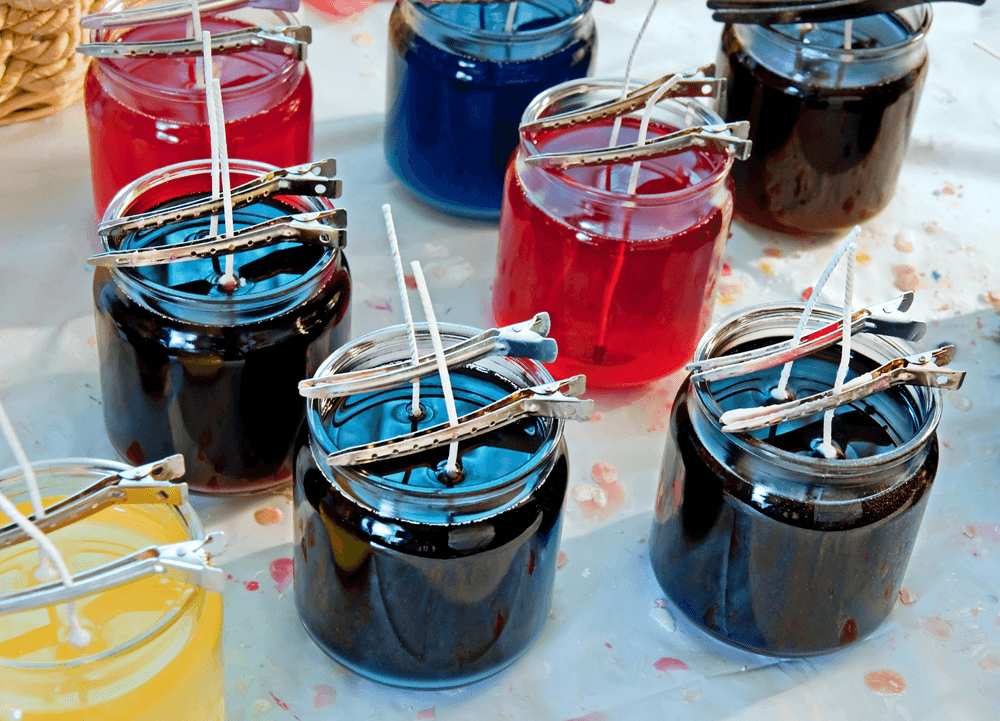
To create beautiful and customized homemade gel candles, you will also need glass containers or molds to pour the melted gel wax into. These containers come in various shapes and sizes, allowing you to create different designs and styles of candles. Make sure to choose containers that are heat-resistant and suitable for candle making. In addition to this, you will need wicks specifically designed for gel candles, as they differ from wicks used in traditional paraffin wax candles.
In order to add a decorative touch to your homemade gel candles, consider incorporating embellishments such as dried flowers, seashells, glitter, or beads. These can be placed at the bottom of the container before pouring the wax or sprinkled on top once the candle is partially set. Get creative with your decorative elements to make each candle unique and visually appealing. Remember that safety should always be a top priority when working with gel wax and other candle-making materials.
| Materials Needed | Examples |
|---|---|
| Gel Wax | Clear Gel Wax |
| Double Boiler | Stainless Steel Double Boiler |
| Fragrance Oils | Lavender Fragrance Oil |
| Dye Chips/Liquid Dye | Red Dye Chips |
Step-by-Step Guide to Melting Gel Wax Safely
Melting gel wax is a crucial step in homemade gel candle making, as it allows you to shape and create your unique candle. Here is a step-by-step guide on how to melt gel wax safely for your DIY candle projects:
Prepare Your Workspace
Before you begin melting the gel wax, make sure to clear a clean and flat surface in a well-ventilated area. Protect the surface with newspapers or a heat-resistant mat to catch any spills or drips.
Use a Double Boiler Method
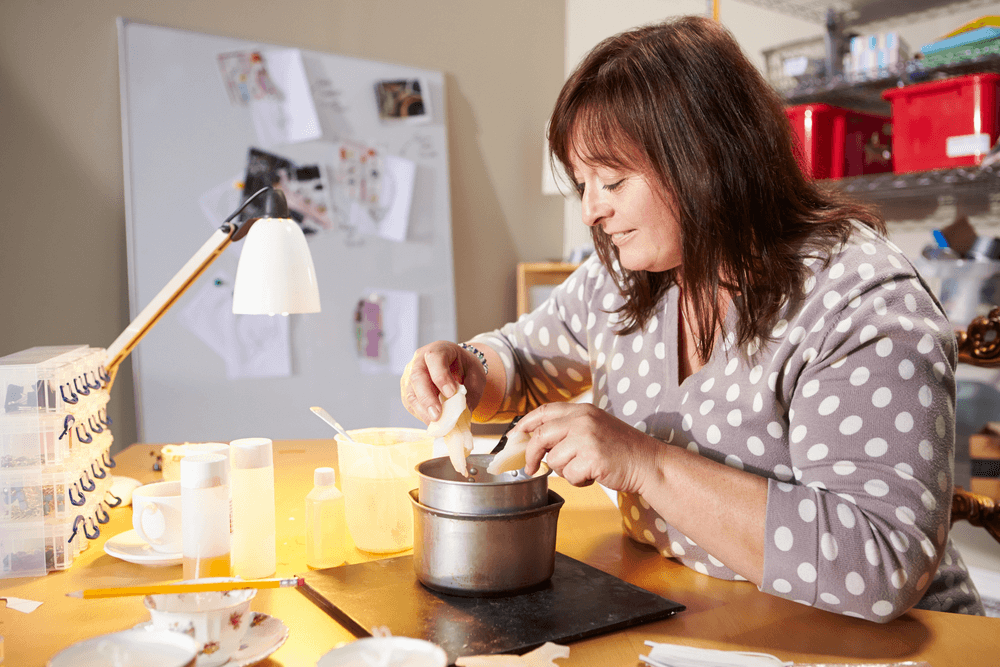
To melt gel wax safely, it is recommended to use a double boiler method to prevent direct heat contact with the wax. Fill the bottom pot with water and place a smaller pot or metal pouring pitcher on top. Place the desired amount of gel wax into the top pot or pitcher.
Heat the Wax Slowly
Turn on the heat source to low-medium heat and allow the gel wax to melt slowly. Stir occasionally with a metal spoon or skewer to ensure even melting. Do not leave the melting wax unattended, as it can easily overheat and pose a fire hazard.
By following these steps and using caution throughout the melting process, you can safely melt gel wax for your homemade gel candle making projects. Remember always to prioritize safety when working with hot materials, especially when creating beautiful candles from scratch at home.
Adding Colors and Scents to Your Gel Candles
When it comes to making homemade gel candles, one of the most exciting parts is adding colors and scents to customize your creations. The color and scent of a candle can set the mood in any room, making them perfect for gifts or personal use. Whether you prefer calming lavender scents or vibrant red hues, there are endless possibilities to enhance your gel candles.
To add color to your gel candles, you can use liquid dye specially formulated for gel wax. These dyes come in a variety of shades that can be mixed to create unique colors for your candles.
It’s important to remember that a little goes a long way with dye, so start by adding small amounts and gradually increase until you reach your desired hue. Experimenting with different color combinations can result in stunning visual effects once the candle is lit.
In addition to color, adding scents to your gel candles can elevate the overall experience. Fragrance oils designed for candle making are ideal for gel candles as they are specifically formulated to disperse well in the wax. From soothing vanilla to refreshing citrus, there are countless scents available to suit every preference.
Remember to follow the recommended guidelines for fragrance concentration to ensure optimal scent throw without overpowering the candle. With a harmonious blend of colors and scents, your homemade gel candles will not only look beautiful but also fill your space with delightful aromas.
| Benefits of Adding Colors and Scents | Homemade Gel Candle Making Basics |
|---|---|
| Customization | Creating personalized candles |
| Mood Enhancement | Elevating ambiance with colors and scents |
| Aromatherapy Benefits | Promoting relaxation and well-being with fragrances |
Choosing the Right Wick for Your Gel Candles
When it comes to making homemade gel candles, choosing the right wick is crucial for ensuring a successful and safe burn. The type of wick you select can impact how well your candle burns, the amount of smoke it produces, and how long it lasts. Here are some key factors to consider when choosing the right wick for your gel candles:
- Size: The size of the wick is important because it determines how much wax the flame can melt and evaporate. A wick that is too small may cause tunneling, where only the center of the candle melts, while a wick that is too large can lead to excess smoking and soot.
- Material: Wicks are typically made from cotton or wood. Cotton wicks are most common and work well with gel wax, providing a clean and steady burn. Wood wicks offer a unique crackling sound when lit but may require special trimming techniques.
- Coating: Some wicks come pre-coated with wax or other substances to improve burning performance. Consider using a coated wick for easier lighting and consistent burning throughout the life of your gel candle.
Experimenting with different wick sizes and materials can help you determine the best option for your homemade gel candles. Conducting test burns before making a large batch can also help ensure that your chosen wick performs optimally in terms of flame height, wax consumption, and overall candle appearance.
It’s important to follow manufacturer recommendations when it comes to selecting wicks for your gel candles. Additionally, consider factors such as container size, fragrance load, and desired burn time when making your decision. By choosing the right wick for your homemade gel candles, you can create beautiful and long-lasting creations that enhance any space with their warm glow and inviting scents.
Incorporating Decorative Elements Into Your Gel Candles
Decorative elements can truly elevate the beauty of homemade gel candles, adding a personal touch and creating a unique piece for your home or to give as a gift. Here are some creative ideas on how you can incorporate decorative elements into your gel candles:
- Embedding objects: You can add small objects like seashells, beads, or dried flowers within your gel candle for a beautiful effect. Make sure to place them strategically so they are visible but also safe from the flame.
- Layering different colors: Create visually stunning gel candles by layering different colored gel wax. This technique allows you to play with shades and create vibrant patterns within your candle.
- Using textural elements: Add dimension to your gel candles by incorporating textural elements like sand, glitter, or even small pebbles. These elements will not only enhance the look of your candle but also provide an interesting sensory experience.
Don’t be afraid to get creative and experiment with different decorative elements to make your homemade gel candles truly one-of-a-kind. The possibilities are endless when it comes to customizing your candles according to your own style and preferences.
Remember that safety should always be a top priority when incorporating decorative elements into your gel candles. Make sure that any object you use is non-flammable and won’t pose a risk when the candle is lit. Enjoy the process of adding decorative touches to your homemade gel candles, and watch as they become not just functional items but pieces of art in their own right.
Safety Tips for Making and Burning Homemade Gel Candles
When engaging in the art of homemade gel candle making, it is crucial to prioritize safety throughout the entire process. Working with hot wax and open flames can pose potential hazards if not handled carefully. Here are some safety tips to keep in mind when making and burning your homemade gel candles.
First and foremost, always work in a well-ventilated area when melting the gel wax. The fumes released during the melting process can be harmful if inhaled for an extended period of time. Additionally, ensure that there are no flammable materials near your workspace to prevent any accidents.
Another important safety measure is to use a double boiler or a dedicated wax melter when melting the gel wax. Never melt the wax directly on a stovetop or in a microwave, as this can lead to overheating and potential fires. Keep a close eye on the temperature of the wax and follow the manufacturer’s instructions carefully to avoid any mishaps.
Furthermore, when choosing a container for your gel candles, opt for heat-resistant vessels that can withstand the high temperatures of melted wax. Glass containers are typically recommended for gel candles, as they allow for a beautiful display of colors and textures while providing stability during the burning process.
Always place your candles on a heat-resistant surface before lighting them to prevent any damage to surrounding furniture or surfaces. By following these safety tips, you can enjoy the art of homemade gel candle making without compromising your well-being or the safety of your home.
Conclusion
In conclusion, homemade gel candle making is a truly rewarding and creative hobby to explore. By understanding the basics of this craft and investing time in perfecting your technique, you can create beautiful and unique gel candles that make wonderful gifts or decor for your own home. The process of making gel candles at home allows you to customize them according to your preferences, from choosing colors and scents to incorporating decorative elements that reflect your personal style.
Furthermore, the benefits of making gel candles at home go beyond just the creative aspect. It can also be a therapeutic activity that helps reduce stress and anxiety as you focus on the soothing process of creating something from scratch. Additionally, homemade gel candles can be a cost-effective alternative to store-bought ones, especially when you consider the freedom to experiment with different designs and ingredients without breaking the bank.
As you delve into the world of homemade gel candle making, remember to always prioritize safety by following proper guidelines and precautions. Whether you are melting gel wax or lighting your finished candles, being cautious will ensure a smooth and enjoyable experience throughout. So, embrace the art of homemade gel candle making with enthusiasm and creativity, and enjoy the beauty of your handmade creations illuminating your space with warmth and elegance.
Frequently Asked Questions
How Do You Make Gel Candles Step by Step?
Making gel candles step by step involves gathering the necessary materials such as gel wax, fragrance oil, color dye, wick, container, and thermometer. The first step is melting the gel wax to the right temperature and adding color and fragrance.
Then, placing the wick in the container and pouring the gel wax carefully. Finally, let it cool and trim the wick before lighting.
What Are the Ingredients in Gel Candle?
The main ingredient in gel candles is the gel wax itself, which is made from a combination of mineral oil and polymer resin. Additionally, fragrance oils are added for scent and dye colors for customization. These ingredients create a unique transparent appearance that sets gel candles apart from traditional wax candles.
What Kind of Wicks to Use for Gel Candles?
Choosing the right wicks for gel candles is crucial for proper burning and safety. Zinc core wicks are commonly recommended for their stability and minimal mushrooming.
Eco-friendly cotton or wood wicks can also be used for a more natural option. It’s important to match the size of the wick to the diameter of the container to ensure an even burn throughout the candle’s life.

Welcome to my candle making blog! In this blog, I will be sharing my tips and tricks for making candles. I will also be sharing some of my favorite recipes.


