Are you looking to add a personal touch to your space with a soothing ambiance? Look no further. In this article, we will provide you with detailed instructions for making soy candles at home. Soy candles are becoming increasingly popular due to their numerous benefits over traditional wax candles. Not only are they eco-friendly and sustainable, but they also burn cleaner and longer, making them a perfect choice for those conscious of their carbon footprint.
Soy candles are made from natural soybean oil, unlike paraffin wax candles that contain petroleum and other harmful chemicals. This makes soy candles a healthier option for both you and the environment.
Additionally, soy candles have a lower melting point, meaning they burn cooler and last longer than traditional candles. As we delve into the step-by-step guide on making soy candles, you will discover how easy it is to create your own personalized scented and colored candles in the comfort of your home.
By following our comprehensive instructions and using the right materials, you can craft unique soy candles that suit your preferences and style. From selecting the appropriate soy wax to adding fragrance oils and choosing the perfect container, we will guide you through every step of the candle-making process.
So why not embark on this creative journey and enjoy the therapeutic benefits of DIY soy candles while enhancing your living space? Let’s dive into the world of soy candle making together.
Materials Needed
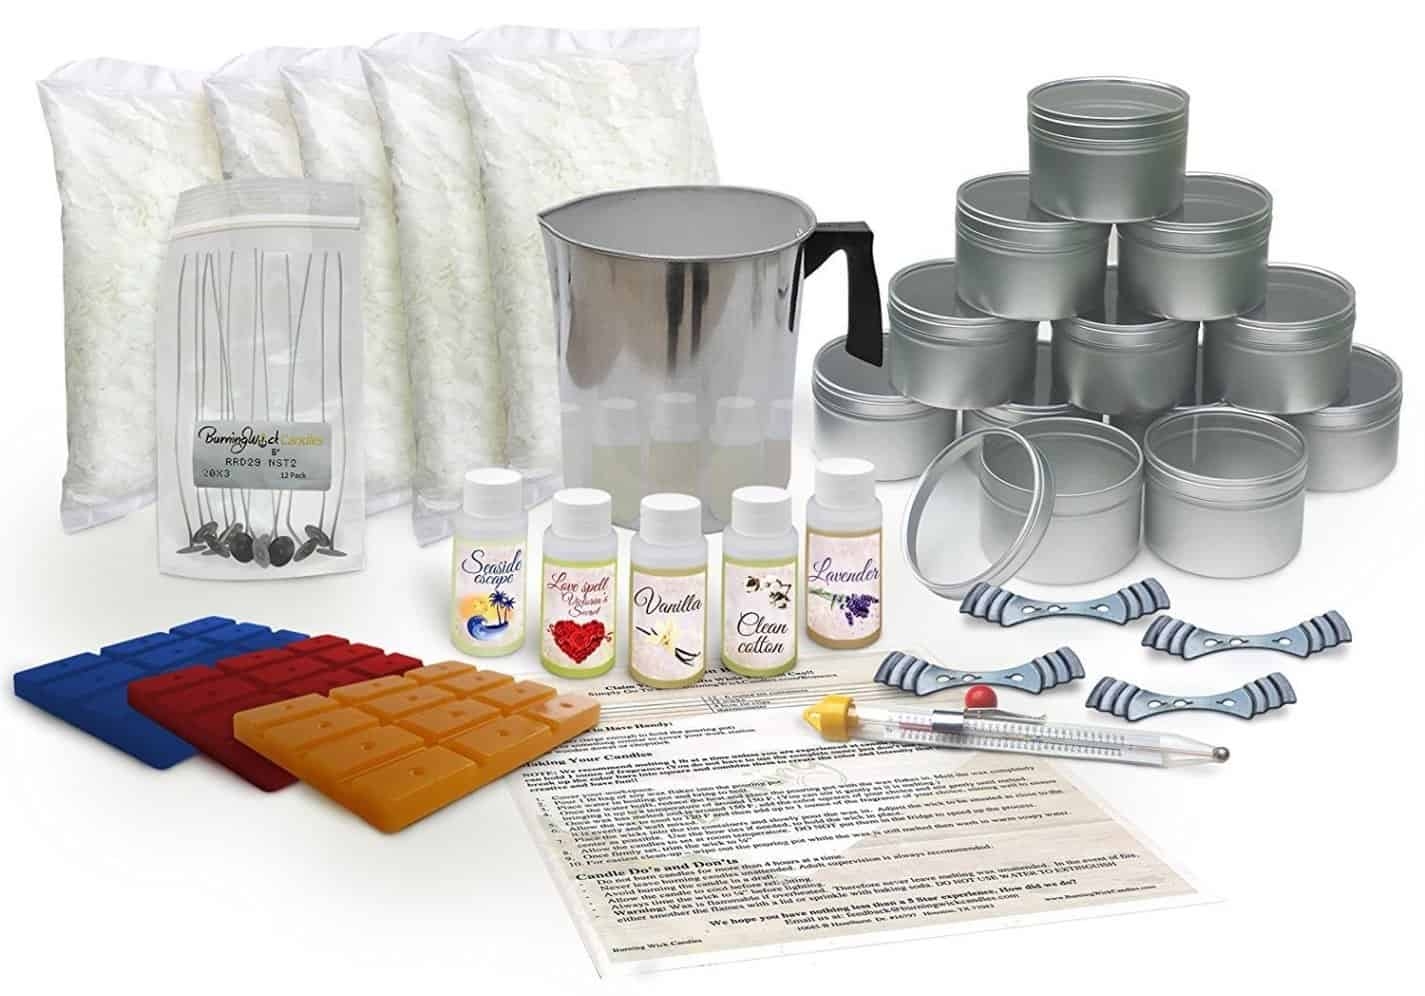
When embarking on the journey of making soy candles at home, it is essential to have all the necessary supplies handy. Here is a comprehensive list of materials needed to successfully create your own soy candles:
- Soy wax flakes or pellets
- Candle wicks
- Fragrance oils or essential oils
- Candle dye or color blocks
- Double boiler or microwave-safe container for melting wax
- Stirring utensil (such as a wooden stick or spoon)
- Thermometer
- Container for pouring the melted wax into (such as glass jars or tins)
- Labeling materials (optional for personalizing your candles)
It is crucial to ensure that you have all these materials prepared and organized before starting the candle-making process. Having everything within reach will make the experience smoother and more enjoyable.
In addition to these basic supplies, you may also consider investing in additional tools like a heat gun for smoothing out any imperfections on the surface of your candles, as well as a scale for measuring precise amounts of soy wax and fragrance oils. With these materials in hand, you are ready to dive into the art of creating beautiful and fragrant soy candles right in the comfort of your home.
Step-by-Step Guide
Soy candles are becoming increasingly popular due to their numerous benefits over traditional wax candles. Not only are they eco-friendly and sustainable, but they also burn cleaner and longer. Making soy candles at home can be a fun and rewarding experience that allows you to customize the scents, colors, and containers to suit your preferences. Follow these step-by-step instructions for making your own soy candles:
1. Prepare Your Materials: Before starting, gather all the necessary supplies for making soy candles. You will need soy wax flakes, wicks, containers, a double boiler or microwave-safe dish, fragrance oils (optional), colorants (optional), a thermometer, and a stirring utensil.
2. Melt the Soy Wax: Begin by melting the soy wax flakes in a double boiler or microwave-safe dish until it reaches approximately 185°F (85°C). Stir occasionally to ensure even melting and use a thermometer to monitor the temperature.
3. Add Fragrance and Color: Once the soy wax is fully melted, you can add fragrance oils and colorants if desired. Be sure to follow the recommended usage rates for the fragrance oils and mix well to evenly distribute the scent and color throughout the wax.
4. Prepare Containers and Wicks: While the wax is cooling slightly, prepare your containers by securing wicks in the center using adhesive or by dipping them in melted wax and placing them in position. Make sure the wick is centered to ensure an even burn.
| Materials Needed | Instructions |
|---|---|
| Soy Wax Flakes | Melt in a double boiler or microwave-safe dish. |
| Wicks | Secure in containers using adhesive or dipping in melted wax. |
| Fragrance Oils | Add to melted wax according to recommended usage rates. |
These are just preliminary steps on how you can create your own soy candles at home following this guide on how you can do so easily for beginners without any difficulty as shown above.
Choosing the Right Soy Wax
When it comes to making soy candles, choosing the right soy wax is essential to ensure a successful and high-quality end product. There are several types of soy wax available in the market, each with its own set of pros and cons. Understanding the differences between them can help you make an informed decision for your candle-making project.
Types of Soy Wax
One of the most popular types of soy wax used for candle-making is container soy wax. This type of wax is specifically designed to adhere well to the sides of the container, making it ideal for creating jar candles. Another common option is pillar soy wax, which is formulated to hold its shape and support the weight of added fragrance oils or dyes, making it suitable for making pillar or votive candles.
Pros and Cons
Container soy wax is known for its excellent scent throw and smooth finish when poured into containers. It also has a lower melting point compared to other waxes, which helps reduce the risk of burning the fragrance off. However, one drawback is that it may be more challenging to work with when creating intricate designs or shapes due to its softer consistency.
On the other hand, pillar soy wax is perfect for creating sturdy candles that stand on their own without any support. It has a higher melting point, which makes it more suitable for warmer climates where candles might be at risk of melting. However, pillar soy wax may require additional additives to enhance its scent throw and color retention.
Choosing the Right Type
When selecting a type of soy wax for your candle-making project, consider factors such as the desired end product (jar vs. pillar candles), fragrance load requirements, and intended use. Experimenting with different types of soy wax can help you discover which one works best for your specific needs and preferences. By choosing the right soy wax, you can create beautiful and fragrant candles that bring warmth and ambiance to any space.
Adding Fragrance
When making soy candles at home, adding fragrance can elevate the overall experience and create a more pleasant ambiance. Before selecting a scent for your soy candles, it’s essential to consider personal preferences and the intended use of the candles. From calming lavender to invigorating citrus, there is a wide range of fragrance oils available for candle-making that can suit various moods and occasions.
To personalize your soy candles with the perfect scent, start by choosing high-quality fragrance oils specifically designed for candle-making. These oils are formulated to disperse evenly throughout the melted wax and provide a long-lasting aroma when the candle is burning.
Additionally, it’s crucial to follow recommended guidelines for how much fragrance oil to add based on the amount of wax you are using. Overloading your soy candles with scent may affect their burn quality and overall performance.
Experimenting with different fragrance combinations can also be a fun way to create unique soy candles that reflect your individual style. Whether you prefer floral, fruity, or woody scents, blending different fragrances can result in custom creations that cater to specific preferences or special occasions. Remember to keep detailed notes of your scent combinations so you can recreate your favorite blends in future candle-making projects.
| Scent Selection Tips | Instructions |
|---|---|
| Consider personal preferences and intended use | Choose fragrance oils designed for candle-making |
| Follow recommended guidelines for oil-to-wax ratio | Experiment with different scent combinations |
Coloring Options
When it comes to coloring your soy candles, there are several options available to achieve the desired vibrant hues. Whether you prefer a more natural approach or want to experiment with vibrant dyes, the choice is yours. Here are some methods to consider when coloring your soy candles:
- Natural Colorants: One option for coloring your soy candles is to use natural colorants derived from plant-based sources. Ingredients like beetroot powder, turmeric, and spirulina can be used to create beautiful earthy tones in your candles.
- Synthetic Dyes: If you’re looking for a wider range of colors and more intensity, synthetic dyes may be the way to go. These dyes are specifically formulated for candle making and come in a variety of shades that can add a pop of color to your creations.
Here Are Some Additional Tips for Coloring Your Soy Candles
- Experiment with different ratios of colorants to achieve the desired shade. Start with a small amount and gradually add more until you reach the perfect hue.
- Consider using a double boiler method when melting your wax and adding colorants. This will help ensure even distribution throughout the candle.
Whether you choose natural colorants or synthetic dyes, coloring your soy candles is a fun way to personalize your creations and make them stand out. Don’t be afraid to experiment with different colors and techniques to find what works best for you.
Container Selection
When it comes to making soy candles, selecting the right container is a crucial step in ensuring the final product turns out just as you envisioned. The container not only holds the melted wax and wick but also adds to the aesthetic appeal of the candle once it is finished. There are various factors to consider when choosing containers for your soy candles, including size, material, and style.
First and foremost, consider the size of the container in relation to the amount of wax you plan to use. A general rule of thumb is to fill the container approximately 1/2 to 3/4 full with melted wax. This leaves enough room for the fragrance oils and allows for proper burning without overflow. Remember that larger containers may require multiple wicks to ensure an even burn.
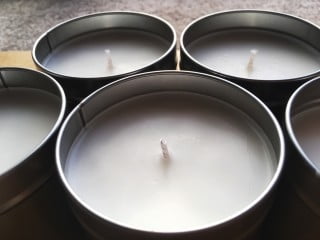
In addition to size, pay attention to the material of the container. Glass containers are a popular choice as they allow for a beautiful glow when lit and showcase any colors or decorations within the candle. Mason jars, apothecary jars, and recycled glass containers are all great options for soy candles. Metal tins can also be used for a more rustic or travel-friendly option. Make sure whichever material you choose is heat-resistant and safe for candle-making purposes.
Safety Precautions
Workspace Safety
When making soy candles at home, it is crucial to set up a safe workspace. Ensure that the area is well-ventilated to prevent inhaling potentially harmful fumes from melting wax and fragrance oils. It is also advisable to cover surfaces with newspapers or disposable tablecloths to avoid any spills or splatter. Keep a fire extinguisher nearby, just in case of emergencies.
Personal Protective Equipment
To protect yourself during the candle-making process, wear appropriate personal protective equipment. This includes wearing gloves to shield your hands from hot wax and chemical exposure. Additionally, consider wearing safety goggles to protect your eyes from any accidental splashes of wax or fragrance oils. It may seem like a simple DIY project, but taking these precautions can prevent accidents and injuries.
Handling Hot Wax Safely
When working with hot wax, exercise caution to avoid burns and accidents. Use a double boiler or a microwave-safe container for melting the soy wax instead of direct heat sources like stovetops, as they can pose a fire hazard. Always keep an eye on the melting wax and never leave it unattended. In case of any spills or burns, have a first aid kit readily available to treat minor injuries promptly.
Troubleshooting Tips
When making soy candles at home, there are common issues that may arise during the process. One of the most prevalent problems is tunneling, where a hole forms in the center of the candle as it burns instead of creating an even wax pool.
This can be caused by not allowing the candle to burn long enough during the initial lighting, which results in a memory ring forming around the perimeter. To address tunneling, ensure that you allow your soy candle to burn for at least one hour per inch of diameter to create an even wax pool.
Another issue that candle makers may encounter is frosting on their soy candles. Frosting appears as a white, powdery substance on the surface of the candle and is a natural characteristic of soy wax due to its composition.
While frosting does not affect the performance of the candle, some individuals may find it undesirable from an aesthetic perspective. To minimize frosting, try pouring your soy wax at cooler temperatures and using a heat gun to smooth out any imperfections on the surface once the candle has fully cooled.
Additionally, some crafters may face problems with air pockets or sinkholes forming within their soy candles as they solidify. These imperfections can occur when there are temperature fluctuations while the candles are setting or if there are air bubbles trapped in the wax. To prevent air pockets or sinkholes, gently tap your containers on a flat surface after pouring to release any trapped air bubbles.
If sinkholes do form, simply reheat some leftover wax and fill in the gaps to level out your candle’s surface for a more polished look. By addressing these common issues with troubleshooting tips, you can enhance your soy candle-making skills and create beautiful handmade products without frustration.
Conclusion
In conclusion, making soy candles at home is not only a fun and creative process but also offers numerous benefits over traditional wax candles. The use of soy wax is eco-friendly, sustainable, and produces cleaner burning candles that last longer. By following the instructions for making soy candles provided in this guide, you can create personalized candles that suit your preferences in terms of fragrance, color, and container choices.
We have covered all the essential elements needed to get started on your soy candle-making journey, from the materials required to safety precautions to troubleshooting tips. Remember to choose the right type of soy wax based on your preferences and budget, as well as carefully select fragrances and colors to achieve your desired candle aesthetic. The process may require some trial and error, but with practice, you will soon master the art of creating beautiful soy candles.
So why wait? Gather your supplies, follow our step-by-step instructions for making soy candles, and unleash your creativity. Whether you’re looking to make gifts for loved ones or simply enjoy a relaxing hobby, making soy candles at home can be a fulfilling and rewarding experience. Start today and enjoy the soothing glow of your handcrafted soy candles in no time.
Frequently Asked Questions
How Do You Make Soy Candles Step by Step?
Making soy candles involves several steps. First, melt the soy wax flakes in a double boiler. Once melted, add fragrance oil and dye if desired. Then, attach the wick to the bottom of the container and pour wax carefully. Let it cool and trim the wick.
What Are the Burning Instructions for Soy Candles?
Burning instructions for soy candles are important for safety and optimal performance. Always trim the wick to 1/4 inch before lighting to prevent soot and ensure an even burn. Keep the candle away from drafts and burn it no longer than 4 hours at a time.
What Is the Ratio of Soy Wax to Candles?
The ratio of soy wax to candle fragrance is crucial for making high-quality candles. A common ratio is about 1 ounce of fragrance oil per pound of soy wax, but this can vary based on personal preference and the strength of scent you desire in your candles. Be sure to measure accurately for best results.

Welcome to my candle making blog! In this blog, I will be sharing my tips and tricks for making candles. I will also be sharing some of my favorite recipes.


