Beeswax dipping candle making is a time-honored tradition that dates back centuries, known for its natural and eco-friendly qualities. Beeswax, derived from the honeycombs of bees, has been prized for its clean burn and sweet aroma when used in candle making. This article explores the art of beeswax dipping candle making, detailing its history, benefits, and step-by-step guide to creating your own beautiful beeswax dipped candles.
The history of beeswax as a candle-making material can be traced back to ancient civilizations like the Egyptians and Romans who valued its purity and association with light. Beeswax is still considered one of the best materials for making high-quality candles due to its slow burn rate and minimal dripping. This natural wax also emits a subtle honey fragrance when burned, adding to the sensory experience of candlelight.
Using beeswax for candle making offers numerous benefits beyond just its aesthetic appeal. Beeswax is non-toxic and hypoallergenic, making it safe for use around children and pets. Additionally, beeswax candles produce negative ions when burned, which can help purify the air in your home by neutralizing pollutants. With this introductory understanding of beeswax dipping candle making, let’s delve deeper into the process and explore how you can create your own handcrafted candles using this versatile material.
History of Beeswax as a Candle-Making Material
Beeswax has been used for candle making for centuries, dating back to ancient civilizations like the Egyptians and Romans. The history of beeswax as a candle-making material is rich and full of tradition. In the past, beeswax candles were primarily used in religious ceremonies, rituals, and for lighting purposes due to their clean and natural properties. Beeswax was a valuable commodity, often reserved for royalty and the wealthy.
One of the main reasons beeswax has been favored over other materials for candle making is its clean-burning properties. Beeswax candles produce very little smoke or soot when burned, making them an eco-friendly option compared to paraffin wax candles. Additionally, beeswax has a subtle honey-like scent that adds a pleasant aroma to any space when lit. This natural fragrance sets it apart from synthetic fragrances that can be overpowering or irritating.
Using beeswax for candle making not only provides a connection to traditional craftsmanship but also supports sustainable practices. Beeswax is a renewable resource that is harvested from beehives without harming the bees themselves. By choosing to make candles with beeswax, crafters can honor the artistry of generations past while creating beautiful and environmentally friendly products for the present and future.
| Beeswax Dipping Candle Making | Benefits of Beeswax Candles |
|---|---|
| Low smoke and soot production | Eco-friendly option |
| Natural honey-like scent | Supports sustainable practices |
Benefits of Using Beeswax for Candle Making
Beeswax has been used for centuries as a popular material for candle making, and it’s not without reason. There are numerous benefits to using beeswax for creating dipped candles that make it stand out from other candle-making materials. One of the primary advantages of beeswax is its natural origin, as it is produced by honeybees in the hive. This natural wax offers a clean and pure burning experience, unlike paraffin wax which can emit harmful fumes when burned.
Another key benefit of using beeswax for candle making is its long-lasting burn time. Beeswax candles tend to burn slower than other types of candles, providing you with more hours of enjoyment from a single dip. Additionally, beeswax has a subtle honey-like scent that adds a warm and inviting atmosphere to any space when the candle is lit. This natural fragrance can help create a relaxing ambiance in your home or during special events.
Moreover, beeswax is known for its bright and beautiful appearance that adds an elegant touch to dipped candles. When properly made and cared for, beeswax dipped candles have a lovely natural color that ranges from creamy white to golden yellow.
The smooth texture and glossy finish of beeswax also give them a polished look that enhances their aesthetic appeal. Using beeswax for dipping candles allows you to create stunning pieces that not only illuminate your surroundings but also serve as decorative accents in your living space.
Step-by-Step Guide to Beeswax Dipping Candle Making Process
Beeswax dipping candle making is a traditional and versatile method that allows crafters to create beautiful and unique candles. The process involves repeatedly dipping a wick into melted beeswax to build up layers and create the desired thickness of the candle. This technique not only results in a visually appealing finished product but also offers a soothing and meditative experience for the crafter.
To begin the beeswax dipping candle making process, gather all the necessary materials and tools. You will need pure beeswax, a double boiler or melting pot, a thermometer, candle wicks, chopsticks or skewers for dipping, a drying rack or newspaper to catch drips, and any desired coloring or fragrances. It is essential to use high-quality beeswax specifically designed for candle making to achieve optimal results.
Once you have set up your work area and prepared your materials, start by melting the beeswax in a double boiler or melting pot over low heat. It is crucial to monitor the temperature of the wax using a thermometer to ensure it does not exceed its flash point. Once the beeswax has reached the ideal temperature for dipping (around 140-160 degrees Fahrenheit), carefully dip the wick into the melted wax using the chopsticks or skewers.
Allow each layer to cool slightly before dipping again to build up thickness gradually. Repeat this process until you have reached your desired candle size. Remember to be patient and take your time with each dip to achieve a smooth and even finish on your beeswax dipped candles.
Tools and Materials Needed for Beeswax Dipping Candle Making
When it comes to beeswax dipping candle making, having the right tools and materials is essential to ensure a successful and enjoyable crafting experience. Here are some of the key items you will need to get started on your beeswax dipping adventure:
Beeswax
The most crucial component in beeswax dipping candle making is, of course, the beeswax itself. Make sure to choose high-quality, pure beeswax for your candles to achieve the best results. You can purchase beeswax in various forms, such as blocks or pellets, depending on your preference and project requirements.
Wick
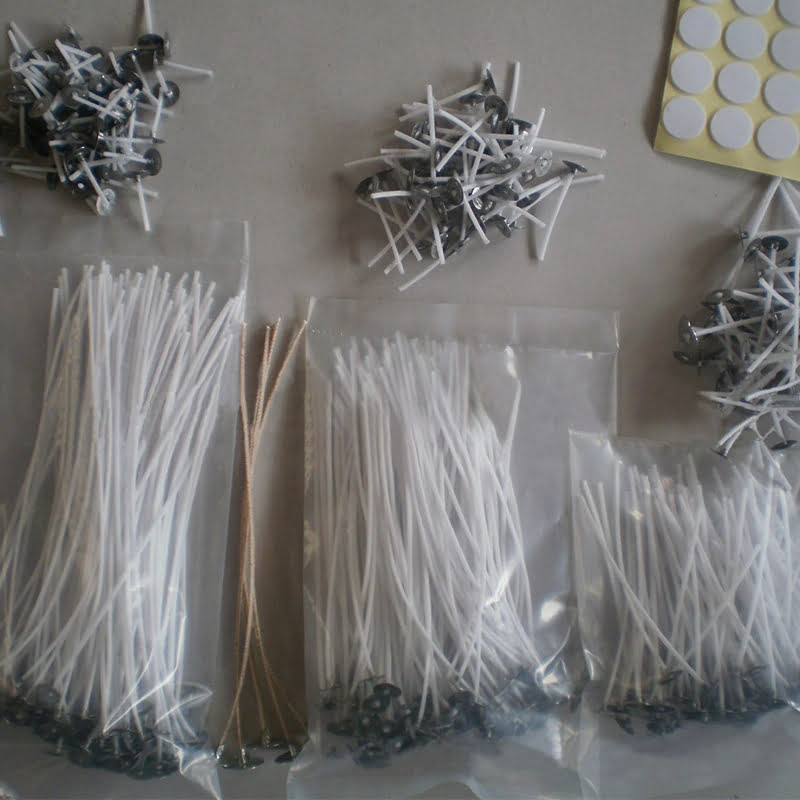
A good quality wick is another essential item for beeswax dipping candle making. Look for wicks specifically designed for beeswax candles to ensure proper burning and optimal results. Make sure to select the appropriate size of wick based on the diameter of the candles you plan to make.
Double Boiler or Wax Melter
To melt your beeswax safely and efficiently, you will need a double boiler or wax melter. Avoid direct heat sources like stovetops or microwaves when melting beeswax as they can pose a fire hazard. A double boiler offers gentle heat that melts the wax evenly without risking burning or overheating.
Thermometer
Using a thermometer is crucial when working with beeswax for candle making. It helps you monitor the temperature of the melted wax to ensure it doesn’t exceed safe levels that could compromise its quality or affect the finished product. Invest in a reliable thermometer specifically designed for candle making projects.
By having these essential tools and materials on hand, you’ll be well-equipped to dive into the art of beeswax dipping candle making with confidence and creativity. Remember to always prioritize safety when working with hot wax and open flames, and enjoy the process of creating beautiful and unique candles with this traditional craft technique.
Tips and Tricks for Achieving the Perfect Beeswax Dipped Candle
Temperature Control
One of the key tips for achieving the perfect beeswax dipped candle is to control the temperature of the beeswax. Beeswax has a low melting point, so it is important to keep a close eye on the temperature during the dipping process.
Too high of a temperature can result in uneven layers or drips, while too low of a temperature can cause the wax to harden too quickly. Using a double boiler or electric wax melter can help maintain a consistent temperature throughout the candle-making process.
Layering Technique
Another essential trick for creating beautiful beeswax dipped candles is mastering the layering technique. To achieve smooth and even layers, allow each dip to cool and harden before dipping again. Building up multiple thin layers will create a more uniform and professional-looking candle compared to thick, single-layer dips. Patience is key when it comes to layering beeswax, as rushing through the process can lead to imperfections in the final product.
Adding Fragrance and Color
For those looking to add extra flair to their beeswax dipped candles, consider incorporating fragrance oils or colored dyes into the wax. When adding fragrance, be sure to use oils specifically designed for candle making and follow recommended usage rates to prevent overpowering scents.
As for colorants, opt for dye chips or blocks formulated for use with beeswax for best results. Experiment with different scents and colors to create unique and personalized candles that not only look stunning but also smell delightful when lit.
Creative Ideas for Decorating Beeswax Dipped Candles
When it comes to decorating beeswax dipped candles, the possibilities are endless. Whether you are making candles for personal use, as gifts, or for sale, adding unique decorations can elevate your creations to a whole new level. Here are some creative ideas to inspire you:
- Dried Flowers: Pressed or dried flowers can add a beautiful and natural touch to beeswax dipped candles. Simply place the flowers on the surface of the candle before dipping it in beeswax to create a stunning botanical design.
- Glitter: For a sparkly and festive look, sprinkle some glitter on your beeswax dipped candles while the wax is still warm. You can choose from a wide range of colors to match any theme or occasion.
- Decoupage: Use colorful tissue paper, napkins, or even pictures cut from magazines to create intricate designs on your beeswax candles. Apply a thin layer of decoupage glue over the paper before dipping the candle in beeswax to seal and protect the design.
Get creative with your decorations and experiment with different materials and techniques to make each beeswax dipped candle unique and special. Remember that there are no limits when it comes to expressing your creativity through candle making.
Additional Suggestions
- Beeswax Carving: Use small carving tools to create intricate patterns or designs directly on the surface of the beeswax dipped candle before sealing it with more wax.
- Embeds: Embed small objects such as seashells, beads, or charms into the warm beeswax before dipping for an interesting texture and visual effect.
- Ribbon or Twine Wraps: Tie colorful ribbons or twine around the base of your beeswax dipped candles for a simple yet charming decorative touch.
With these creative ideas for decorating beeswax dipped candles, you can take your candle-making skills to the next level and produce one-of-a-kind pieces that will delight anyone who receives them. Enjoy the process of experimenting with different decorations and let your imagination guide you towards creating truly unique works of art.
Safety Precautions to Follow When Working With Beeswax for Candle Making
Working with beeswax for candle making can be a rewarding and enjoyable experience, but it is important to prioritize safety throughout the process. Beeswax dipping candle making involves heating the beeswax, which can pose some risks if proper precautions are not taken. Here are some essential safety measures to follow when working with beeswax:
- Always use a double boiler or a dedicated melting pot specifically for melting beeswax. Never melt beeswax directly on a stovetop as it poses a fire hazard.
- Ensure proper ventilation in the workspace to prevent the buildup of fumes from the melted beeswax. Working in a well-ventilated area will also help prevent respiratory issues.
- Wear protective gear such as gloves and an apron to protect your skin from burns and spills during the candle-making process. Beeswax can reach high temperatures when melted, so being cautious is crucial.
In addition to these general safety measures, there are specific precautions to keep in mind when handling hot beeswax for dipping candles:
- Avoid overheating the beeswax, as it can ignite at high temperatures. Use a thermometer to monitor the temperature and remove it from heat once it reaches its melting point (around 145 to 147 degrees Fahrenheit).
- Keep a fire extinguisher nearby in case of emergencies. While rare, accidents can happen, so being prepared with a fire extinguisher can help you react quickly and effectively in case of a fire.
- Never leave melted beeswax unattended on heat sources. Always stay present while melting wax to prevent accidents and potential hazards.
By following these safety precautions and guidelines when working with beeswax for dipping candle making, you can enjoy the creative process without compromising your well-being or the safety of your surroundings. Prioritizing safety ensures that you have a smooth and incident-free candle-making experience while creating beautiful beeswax dipped candles.
Conclusion
In conclusion, beeswax dipping candle making is more than just a craft; it embodies a rich history and tradition that dates back centuries. The use of beeswax as a material for candle making has stood the test of time due to its numerous benefits, such as longer burn time, natural fragrance, and clean-burning properties. Embracing this art not only allows us to create beautiful candles but also connects us to our past and the natural world.
Furthermore, through the step-by-step guide provided in this article, individuals can experience the joy of creating their own beeswax dipped candles from start to finish. By following safety precautions and utilizing the right tools and materials, one can fully immerse themselves in the process of crafting these unique candles. The tips and tricks shared in this guide also offer valuable insights into perfecting the art of beeswax dipping candle making.
Whether you are a seasoned candle maker or someone exploring a new hobby, beeswax dipping candle making offers endless possibilities for creativity and self-expression. From simple dipped candles to intricately decorated creations, there is no limit to what can be achieved with this versatile material. So why not give it a try and embark on a journey that not only yields beautiful candles but also honors tradition and nature through the use of beeswax?
Frequently Asked Questions
How Do You Make Beeswax Hand Dipped Candles?
Making beeswax hand-dipped candles involves melting beeswax in a double boiler, dipping a wick into the melted wax, allowing it to cool, then repeating the process until the desired thickness is achieved. The candles are then hung to harden before trimming the wicks.
What Wick for Dipped Beeswax Candles?
When making dipped beeswax candles, choosing the right wick is crucial for optimal burning. A cotton or hemp wick is recommended for beeswax candles due to their ability to withstand high temperatures and burn cleanly without producing soot. It’s important to select a wick size that matches the diameter of your candle for proper burning.
How Do You Make Drip Beeswax Candles?
Creating drip beeswax candles involves pouring melted beeswax into molds with pre-inserted wicks, allowing them to cool and harden. Once solidified, these candles can be removed from the molds and burned like traditional candles. Drip beeswax candles provide a natural and aromatic light source when lit.

Welcome to my candle making blog! In this blog, I will be sharing my tips and tricks for making candles. I will also be sharing some of my favorite recipes.

