Are you interested in learning the art of candle making? Whether you’re a beginner or looking to expand your skills, understanding the basic candle making instructions is essential. In this article, we will take you through the process of creating your own homemade candles, from the history of candle making to the step-by-step instructions and tips for successful results.
Candle making has been practiced for centuries, dating back to ancient times when candles were used for light and religious ceremonies. Today, making your own candles can be a rewarding and enjoyable hobby.
Not only is it a creative outlet, but it also allows you to customize the scent, color, and design of your candles to suit your preferences. With basic candle making instructions, you can create unique and personalized candles that make great gifts or additions to your home décor.
In this section, we will delve into the basics of candle making. We’ll explore the history of this age-old craft, discuss the benefits of making your own candles, and provide an overview of the candle making process. By understanding these fundamentals, you’ll be well-equipped to embark on your candle making journey and unleash your creativity in this timeless art form.
Understanding Candle Making Supplies
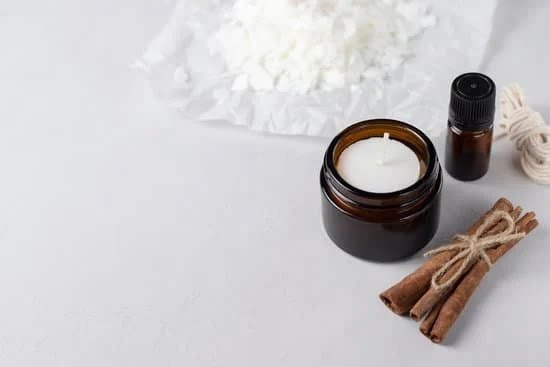
When it comes to making your own candles, understanding the necessary supplies is crucial to a successful and enjoyable experience. The essential materials and tools for basic candle making instructions include wax, wicks, containers or molds, a double boiler or melting pot, a thermometer, fragrance oils or essential oils, and dye blocks or liquid candle dye.
The type of wax used in candle making is fundamental to the outcome of your candles. Common options include paraffin wax, soy wax, beeswax, and gel wax. Each type has its own unique qualities and benefits, so it’s important to choose the right one based on your preferences and needs.
Scent and color can also greatly enhance the appeal of your homemade candles. There are countless fragrance options available in the market such as floral, fruity, herbal, and seasonal scents. Additionally, you can personalize your candles by adding color using different dyes. It is recommended to use specially formulated candle dyes rather than regular food coloring for optimal results.
| Materials | Supplies |
|---|---|
| wax | candle containers |
| wicks | molds |
| double boiler/melting pot | thermometer |
Safety precautions should also be considered while working with candle making supplies. Since you will be working with hot wax and open flames when lighting your candles, it’s important to ensure proper ventilation in your workspace and keep flammable items away from heat sources. Using protective gear such as gloves and an apron is also advisable during candle making process.
Experimenting with various types of supplies will allow you to unleash your creativity in creating beautiful and aromatic homemade candles. Understanding the different materials will enable you to make informed choices that align with your preferences and vision for your DIY candles. With the right supplies at hand, you’ll be well on your way to enjoying this enriching hobby while producing lovely candles for yourself or as thoughtful gifts for others.
Preparing for Candle Making
When it comes to preparing for candle making, there are a few key things to keep in mind in order to ensure a successful and enjoyable experience. Here are some essential steps to take before diving into the candle making process:
- Safety Precautions: Before you begin, it’s important to prioritize safety. Make sure to wear protective clothing, such as an apron and gloves, to avoid any potential burns from hot wax. Additionally, work in a well-ventilated area to minimize exposure to fumes.
- Setting up Your Workspace: Create a dedicated space for your candle making activities. This can be a kitchen counter or table where you have easy access to your supplies and equipment. Lay down newspaper or a protective covering to catch any spills or drips.
- Choosing the Right Molds and Containers: Depending on the type of candles you want to make, carefully select the appropriate molds or containers. Consider factors such as size, shape, and material when choosing these items.
By taking these preparation steps seriously, you can set yourself up for a smooth and satisfying candle making session.
Once you’ve completed these preparations, you will be ready to move on to the next step in the candle making process: actually creating your own candles from scratch.
Step-by-Step Candle Making Instructions
Melting the Wax
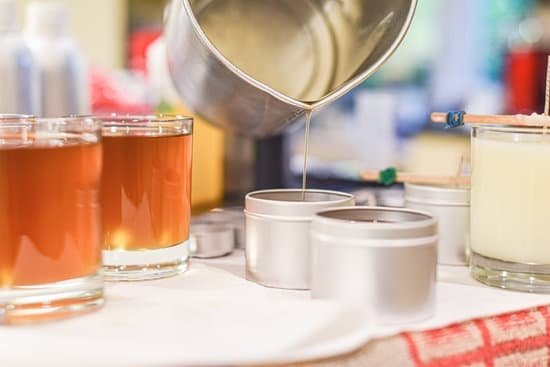
The first step in making your own candles is melting the wax. This can be done on a stovetop using a double boiler method or in the microwave. Be sure to use a thermometer to monitor the temperature of the wax, as different types of wax have different melting points. It’s important to melt the wax slowly and evenly to avoid any issues with the final texture and quality of your candles.
Adding Fragrance and Color
Once the wax is fully melted, you can add fragrance and color to customize your candles. There are various options for scents, from essential oils to candle-specific fragrances. When it comes to coloring your candles, you can choose from liquid dyes, dye chips, or even natural materials like dried flowers or herbs for a more unique look.
Pouring the Wax Into Molds
After adding fragrance and color, carefully pour the melted wax into your chosen molds or containers. Be sure to secure the wick in place before pouring the wax, ensuring that it stays centered as the wax sets. You can use different-shaped molds for creating unique candle designs, such as pillars, tapers, or jar candles. Make sure to leave some extra space at the top of container candles to allow for proper burning later on.
Basic Candle Making Instructions,
you’ll be well on your way to creating your own custom candles at home. With just a few simple steps and some creativity, you can enjoy beautiful handmade candles that make great gifts or additions to your own space.
Cooling and Setting
After pouring the wax into your chosen molds or containers, it is essential to allow the candles to cool and set properly. This step is crucial in ensuring that your candles will turn out as intended and will have a longer burn time. Here are some important things to keep in mind during the cooling and setting process:
- Allow the candles to cool undisturbed: Once you have poured the wax, refrain from moving or touching the containers until the wax has completely solidified. Any disturbance during this stage can cause issues such as uneven texture or air bubbles in your finished candles.
- Check for any imperfections: While your candles are cooling, take this time to inspect them for any imperfections, such as cracks or sinkholes. If any issues are present, you can adjust your technique for future batches of candles.
- Timing is key: The cooling process can vary depending on factors such as the type of wax used and the size of the candles. Generally, it may take a few hours for the candles to fully set, so it’s important to be patient and allow them sufficient time to harden before moving on to the next step.
Once your candles have cooled and set completely, you can then move on to trimming and securing the wick. This final step ensures that your homemade candles will be ready for use and will burn cleanly and evenly.
Overall, proper cooling and setting are critical aspects of candle making that contribute to the quality and appearance of your finished products. By following these steps carefully, you can ensure that your homemade candles will be beautiful, safe, and enjoyable to use.
Unmolding and Finishing
When it comes to candle making, the final steps of unmolding and finishing are just as important as the earlier stages of the process. Once your candles have cooled and set, it’s time to remove them from their molds and give them that professional, polished look.
First, carefully remove the candles from the molds. Depending on the type of mold you used, this may involve gently twisting or tapping the mold to release the candle. If you encounter resistance, try placing the mold in the freezer for a few minutes to help loosen the wax.
After unmolding your candles, it’s time to add those extra special finishing touches. This could include trimming the wick to a suitable length (about 1/4 inch), as well as securing it in place with a wick sustainer or sticker. Additionally, you may want to decorate your homemade candles with labels or ribbons to give them a personalized touch.
Overall, these final steps of unmolding and finishing are what truly elevate your homemade candles from amateur creations to professional-quality products. By following these basic candle making instructions for unmolding and finishing, you can take pride in presenting beautifully crafted candles that are ready for use or gifting.
Tips and Tricks for Successful Candle Making
Troubleshooting Common Issues
When it comes to making candles, there are a few common issues that beginner candle makers might encounter. One of the most frequent problems is tunneling, where a hole forms in the center of the candle as it burns, leaving unused wax around the edges. To prevent this, make sure to use the right size wick for your candle and avoid drafts that can cause uneven burning.
Another issue is frosting, which appears as a white, powdery film on the surface of the candle. This can be prevented by pouring the wax at the right temperature and using high-quality wax.
Creating Custom Scent Blends
One of the joys of making your own candles is being able to create custom scent blends that suit your preferences. You can experiment with different essential oils and fragrance oils to come up with unique combinations.
For instance, you can mix floral scents like lavender and jasmine for a calming effect or blend citrus oils like lemon and orange for an energizing aroma. The key is to start with small batches and keep track of your recipes so you can recreate successful blends.
Experimenting With Different Designs and Techniques
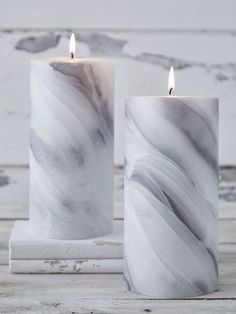
Candle making offers endless opportunities for creativity, so don’t be afraid to experiment with different designs and techniques. You can try layering different colored waxes to create ombre effects or use various molds to make shaped candles. Another fun technique is marbleizing, where you swirl different colored waxes together before they set to create a marbled appearance. With practice and experimentation, you’ll develop your own unique style as a candle maker.
Conclusion and Next Steps
In conclusion, learning the basic candle making instructions can open up a world of creativity and self-expression. By understanding the history, benefits, and process of making candles, you can not only create personalized gifts for yourself and others but also save money in the long run. With the right supplies and preparation, anyone can start making their own candles at home.
Now that you have mastered the basic candle making instructions, it’s time to explore more advanced techniques and expand your skills. Whether it’s experimenting with custom scent blends, trying out different designs and techniques or troubleshooting common issues, there are endless possibilities to take your candle making to the next level.
Additionally, seeking out resources for further learning and inspiration such as books, online tutorials, or joining a local candle making group can provide valuable guidance as you continue on your candle making journey.
In the end, candle making can be a fulfilling hobby that allows you to unleash your creativity while also providing practical and decorative items for yourself and others. So don’t be afraid to dive deeper into the world of candle making – there’s always something new to learn and discover.
Frequently Asked Questions
How Do You Make a Candle for Beginners?
Making a candle for beginners involves gathering the necessary materials like wax, wick, and a container. Then, the wax is melted, fragrances can be added if desired, and the wick is placed in the container before pouring the melted wax.
What Are the Basic Ingredients in Candle Making?
The basic ingredients in candle making include wax (such as paraffin, soy, or beeswax), a wick, and a container to hold the candle. Optional ingredients can include colorants and fragrances to personalize the candle.
What Is the Formula for Candle Making?
The formula for candle making involves melting the wax at the correct temperature, adding any desired colorants or fragrances, and then carefully pouring the liquid wax into a container with the wick centered. The candle must then cool and set before being ready for use.

Welcome to my candle making blog! In this blog, I will be sharing my tips and tricks for making candles. I will also be sharing some of my favorite recipes.

