Introduction to Candle Making
Candle making is a fun and creative way to decorate or add ambience to any room. While the basic techniques are simple, there is an entire spectrum of different methods available to turn a plain candle into something truly unique. From carving and dipping candles to molding and pressing wax, the possibilities are endless when it comes to creating beautiful designs and shapes. Each of these methods provides its own level of challenge and satisfaction.
Carving Candles: A crafty approach that requires patience, concentration, and skill, carving involves using metal tools such as paring knives and chisels to shape patterns in wax candles. It can often be time consuming yet rewarding when done correctly, resulting in a one-of-a-kind piece with intricate detailing.
Dipping Candles: Rather than shaping wax by hand with tools, it’s also possible to dip a whole pre-made candle in hot wax multiple times until the desired thickness is achieved. This method is great for mass production but could take somewhat longer compared to other ways of candle making due to the speed at which the wax must cool between each dip.
Molding Candles: Unlike carving or dipping where you make use of an existing frame for your work , molding requires whipping up your own matching container from either plastic or metal before filling it with melted wax . Often this process takes more precision but results in a perfectly symmetrical end product .
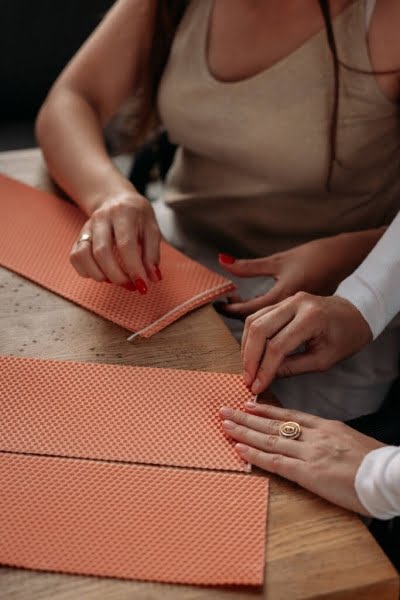
Pressing Candles: To press a candle, you flatten slabs of warm beeswax into shapes between two flat surfaces before cutting them out with cookie cutters or molds . Although slightly more complex than its predecessor , this is ideal for mass production with uniform yet interesting shapes as you can create instant repeats as long as the molds stay intact!
Supplies Needed for Candle Making
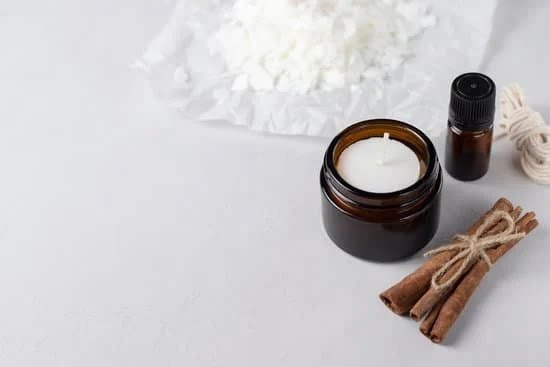
When it comes to candle making, there are several supplies that one needs in order to make beautiful candles. Here are some of the main supplies:
• Wax – This is the base material used to form the shape and structure of your candle. There are many different types of wax available including paraffin, soy, beeswax and others. Depending on the type of wax chosen and the desired finished product, one may choose either a block or a liquid form of wax.
• Wick – This is an important part of any candle as it provides a way for the flame to consume the melted wax and produce light. Wicks come in various sizes depending on the size of your candle; larger candles will require larger wicks than smaller candles. Additionally, there are different types of wicks that can be used such as all-cotton core, cotton/paper composite, stainless steel wire and zinc cored wicks . When selecting a wick take into account whether it can withstand higher melting points as well as its overall burning characteristics such as durability while lit and self-extinguishing when extinguished by compression.
• Molds – These are usually plastic or ceramic openings that give your candle its desired shape. They come in various shapes and sizes depending on what you’re making (i.e., tealights, pillars etc.) Most molds have a pin hole at the bottom which allow for air circulation during burning and prevent air pockets from forming within your candle’s center. Some molds may also include adjustable bases, which allow for greater control when forming intricate designs from thin wax sheets such as those seen with palm candles or rolled beeswax tapers.
• Thermometer – A must-have tool if you’re using high-temperature or specialty waxes such as beeswax because they require careful temperature monitoring throughout every step of production to ensure maximum quality results with minimum time investment. Digital thermometers provide detailed readings quickly while gas cylinder burners often have built-in temperature gauges which provide continuous readings without interruption in this process.
• Additional Equipment – Depending on the complexity of your project there may be other tools and accessories necessary for these tasks such as dye tablets or granules to tint your product; scent additives alongside colouring agents if desired; specialized irradiating equipment if working with gel fuel; pouring pitchers and melting pots for heating up large batches of wax easily; heat guns for precise reshaping techniques; protective gloves/aprons/eyewear for safety when handling hot materials; etc…
Preparing the Environment
Before you begin your candle making session, it is important to ensure that your environment is completely clean and safe. This can be done by clearing away any clutter from the area where you are going to work. Make sure there are no flammable materials left lying around, such as paper or fabric. Ensure that all open flames, such as matches and lighters, are in a secured location away from the work area. Also check for any debris on your countertops that could fall into the hot wax. Once these preparations have been taken care of, you can get started with the candle-making process.
Melting Wax
When making candles at home, it is important to understand the correct temperature settings needed to melt wax successfully. Knowing the optimal temperature for melting wax will help make this process smoother and more successful in achieving a properly melted wax without compromising its quality. Generally speaking, the optimal temperature for melting wax should be lower than boiling point for regular paraffin-based wax as this can help maintain the structural integrity of the candle material. Depending on the type of wax used, it is usually best to use temperatures ranging from between 170-180 degrees Fahrenheit that should produce an even liquid consistency before pouring into candle molds or jars. Additionally, melting small amounts of wax at a time instead of gallons in one go will help ensure higher levels of precision while avoiding long periods of heating that would risk burning or discoloring your wax mixture.
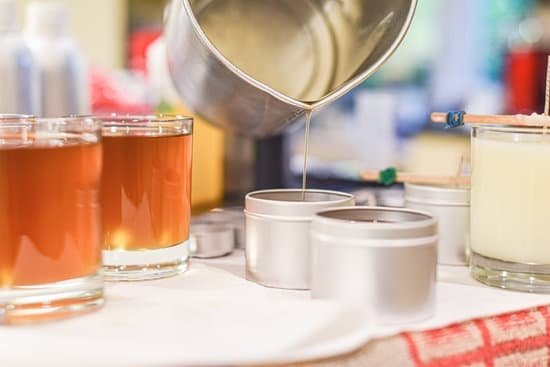
Pouring the Wax into the Candle Container
Candle making requires particular attention in the choice of a proper candle container. Mason jars are a popular choice because of their straight sides, which create sharp corners on their candles and can be easily decorated with ribbons and twine. Other popular container choices for candles include teacups, containers with lids (which help contain the scent), votives, hurricane glasses and terrariums. After selecting the right kind of candle container, you must determine what type of pour technique to use to fill it up. Generally speaking, a smaller-diameter wick will require a double pour method to ensure that wax is evenly distributed throughout and that the entire surface of the candle is covered.
Another preferred technique is called “counter pouring”, whereby hot wax is transferred from one container or pot into another while both containers are simultaneously rotated in opposite directions. Counter pouring allows for complete coverage of both sides of the candle without creating wastage by spillage drips off the edges. Yet another systematic approach involves utilizing a thermometer-monitored “stove top” method with an accurate melting temperature to produce fully melted, properly textured wax within each pour attempt.
Adding Colorants
There a numerous ways to dye and color candles depending on the kind of wax and other materials used in the candle making process. Paraffin wax and Soy/Veg Wax are the two most common types of wax used today, each requiring different methods for adding dyes or colorants. For example, when using paraffin wax, it is often best to add an opaque white block pigment, which contains coloring agents that provide intense hue strength when combined with a liquid dye or gel dye. Liquid dyes generally dissipate quickly during combustion while gel dyes tend to last much longer. When using soy/veg waxes, either a liquid or powder dye may be used with good results. The powder will produce bolder colors than the liquid due to its higher concentration levels, but will also generate more smoke as it is burned. To keep smoke production at a minimum when working with soy/veg waxes, a maxmimum of 0.1% by weight should be added to the total weight of the wax and wick combination. Microcrystalline wax may also contain mineral-based pigments and dyes that provide beautiful colors without leaving the candle containing any unburned material upon combustion. Lastly, beeswax can also be colored by adding small amounts of beeswax crayons into melted beeswax before pouring into molds- creating wonderful and unique effects!
Embellishing the Candle
Candle making can be an enjoyable and creative hobby that allows you to express your personal style. There are lots of different techniques available to explore and a wide range of styles and themes you can use to create aesthetically pleasing candles.
One popular technique is decorating the candle with embellishments such as paint, ribbons, lace, glitter, beads, or even dried flowers. Additionally, you can create decorative wax drippings down the sides of the candle for added texture and depth. Or use wax dye chips to add unique colors and patterns to your wax. If you’d like an elegant look there are also several options that allow you to layer different colored waxes atop one another while the bottom layer is still in liquid form so they bind together when cooled.
There a several other fun decorative techniques that you can explore such as dipping the end of a cooled candle into an array of colorful dyes or melted wax (i.e., jewel dipping). If you’re looking for a rustic touch try rolling your molten candle in crushed herbs or adding swirls with a wooden skewer just after pouring the hot wax into your mold. You could also try marbling two melted waxes with each other for quilted effect that adds depth and complexity to your finished candles.
As far as themes go, many people like creating candles that correlate with holidays, special events such as baby showers or wedding showers, seasons and more! Since candles are often associated with romance some prefer using romantic scents such as jasmine or sandalwood along with softer colors for their votive sets. Whatever theme you choose it’s easy to find molds in beautiful shapes from traditional pillars and tapers to small containers which make great gift ideas ” they make wonderful home decorations too!
Finishing the Candle
When it comes to finishing the candle, there are certain tips and techniques you can follow to make sure you have a beautiful, fully-finished candle that’s ready for use. The first step is cooling and drying the candle. Allowing it to cool slowly ensures that the wax sets properly without any cracking. Letting it completely air dry for at least 24 hours (or longer depending on its size) helps with minor imperfections and further stabilizes the finished product making it easier to handle.
Once your candle has dried and cooled, take a few minutes to inspect and see if there are any stray wicks or excess wax around the edges of the container. Use an old toothbrush or cotton swabs dipped in rubbing alcohol to carefully clean up these areas ” any access wax will become brittle over time so it’s important to get rid of it at this stage!
After cleaning up the wick, your last step is to give your candle a shine by buffing or polishing it – this makes all the difference in bringing out the natural beauty of your finished work. If you have a soft cloth on hand, gently rub over the surface a few times until you get your desired look. You can also purchase specific wax polish from your nearest craft store ” this can be rubbed into the surface of your candle for an even more polished finish.
Conclusion
The method of making a candle varies generally depending on the type of candle being made. To make beeswax candles, an individual will need to melt the wax and then place it in the desired vessel. Soy candles require heating the wax until it melts and then adding dyes, fragrances or oils as desired. Gel candles take much longer to make due to the multiple layers that form part of the finished product. Lastly, carved candles are done by creating an indentation in a larger piece of wax and letting it harden again.
In conclusion, creating homemade candles relies heavily on know what type of materials you’re working with and understanding key techniques for successful results. Beeswax requires melting the wax to get started, while soy candles need to be melted before adding any further ingredients such as scents, dyes or essential oils. Gel candles require patience and take more time due to their multi-layered structure, while carved candles start by carving an indentation into a larger block of wax before allowing it to harden again. Adhering to these techniques should ensure satisfactory outcomes when making homemade craft products.

Welcome to my candle making blog! In this blog, I will be sharing my tips and tricks for making candles. I will also be sharing some of my favorite recipes.


