Beeswax is a natural and sustainable material that has been used for centuries in the art of candle making. Its unique properties make it an ideal choice for creating beautiful and long-lasting candles.
In this article, we will explore the many benefits of using beeswax for candle making instructions, from its eco-friendly nature to its clean-burning qualities. Whether you are a beginner or an experienced candle maker, understanding the basics of working with beeswax is essential for creating high-quality and environmentally friendly candles.
Sourcing high-quality beeswax is essential for successful candle making. We will delve into various options for obtaining beeswax, including local beekeepers, specialty stores, and online suppliers. Once you have acquired your beeswax, proper preparation and cleaning are crucial steps before using it for candle making. Our step-by-step instructions will guide you through the process to ensure that your beeswax is ready for use.
In addition to preparing the beeswax, selecting the right wick size and type is also important to achieve the desired results. We will provide a comprehensive guide on choosing the appropriate wick based on the size and style of your finished candles.
Furthermore, we will explore how to add fragrance and color to your beeswax candles using essential oils and natural dyes, as well as techniques for pouring and setting to achieve a smooth finish. With safety tips included, this article will equip you with all the knowledge needed to embark on your own beeswax candle making journey.
Sourcing Beeswax
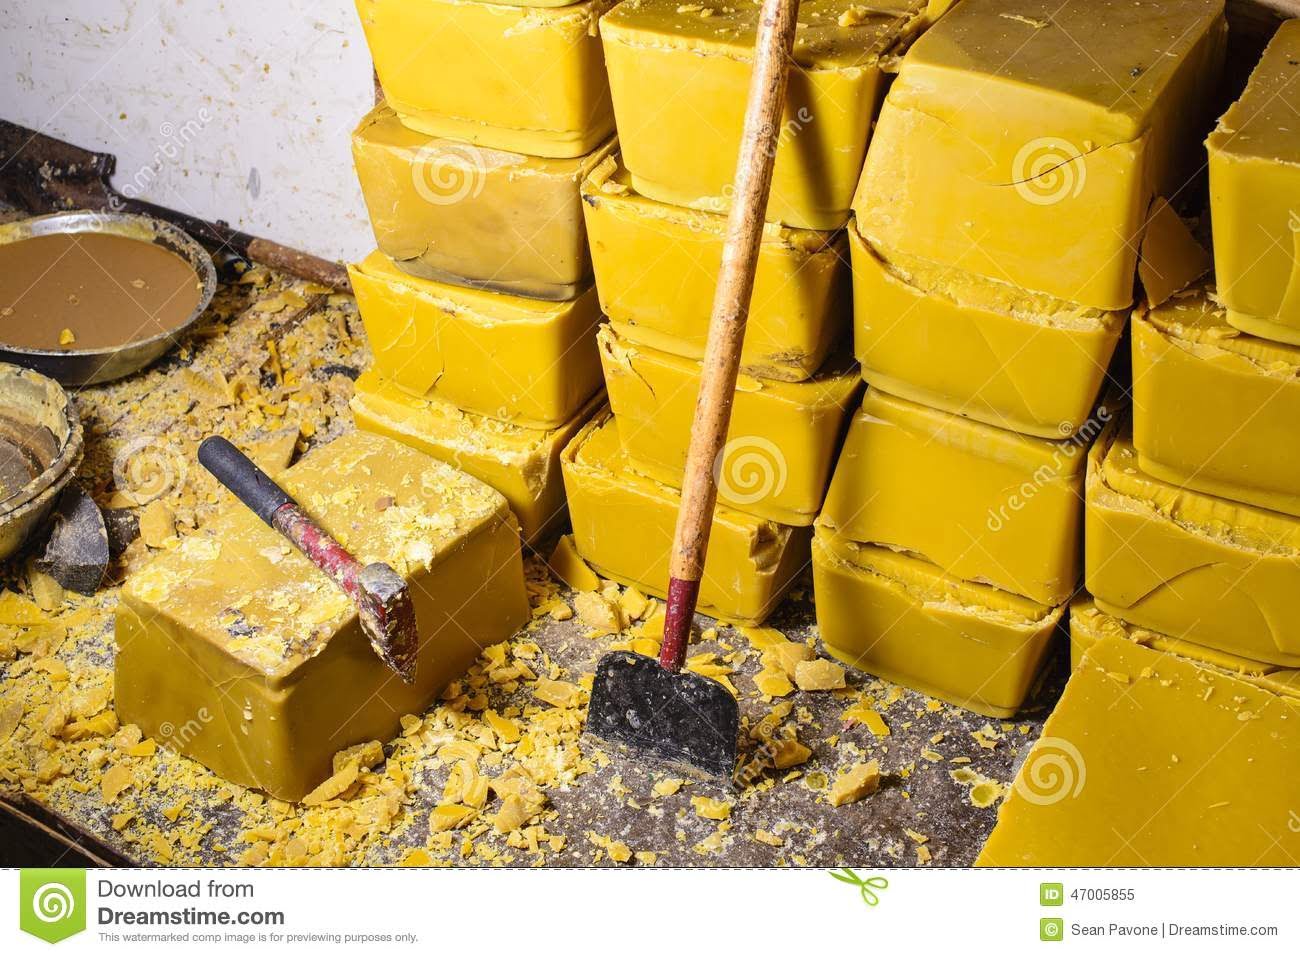
When it comes to sourcing beeswax for candle making, there are several options to consider in order to obtain high-quality beeswax. From local beekeepers to specialty stores and online suppliers, each option has its own pros and cons. Local beekeepers can provide you with fresh, raw beeswax straight from the hive, while specialty stores offer a curated selection of beeswax products. Online suppliers often provide a wide range of choices and the convenience of home delivery.
Local Beekeepers
If you prefer to support local businesses and have access to fresh, natural beeswax, local beekeepers are an excellent source for your candle making needs. By purchasing directly from a beekeeper, you can be sure that the beeswax is produced sustainably and ethically. Additionally, working with local beekeepers allows you to establish a relationship with them and gain valuable insight into the process of beekeeping.
Specialty Stores
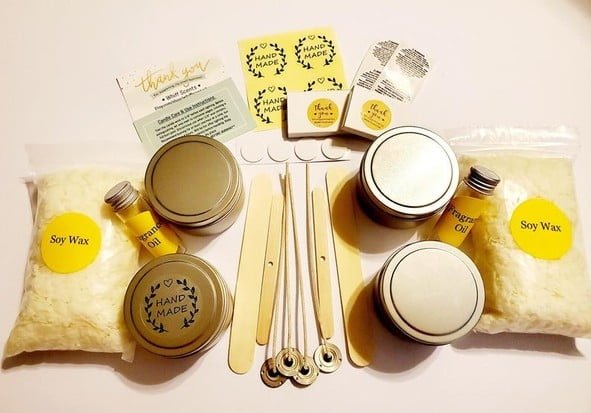
For those who may not have easy access to local beekeepers, specialty stores are an alternative option for obtaining high-quality beeswax. These stores often carry a variety of beeswax products such as blocks, sheets, and pellets. They may also offer other candle making supplies such as wicks, molds, and fragrances, making it a convenient one-stop shop for all your candle making needs.
Online Suppliers
In today’s digital age, online suppliers have become increasingly popular for purchasing beeswax. With just a few clicks, you can browse through numerous options and have the beeswax delivered right to your doorstep. Online suppliers often provide detailed information about their products such as where the beeswax is sourced from and how it is processed. This transparency allows you to make an informed decision when selecting your beeswax.
No matter which option you choose for sourcing your beeswax, it’s important to prioritize quality and sustainability in order to create beautiful and environmentally-friendly candles. Whether you decide to go directly to a local beekeeper or explore the offerings at specialty stores or online suppliers, obtaining high-quality beeswax is crucial for successful candle making.
Preparing Your Beeswax
Gathering Your Supplies
Before you begin the process of preparing your beeswax for candle making, it’s essential to gather all the necessary supplies. You will need beeswax, a double boiler or melting pot, cheesecloth or a fine strainer, and a clean and dry work surface. It’s also helpful to have a sharp knife, cutting board, and gloves for handling the wax.
Cleaning the Beeswax
To clean raw beeswax, start by removing any debris and impurities from the wax. Use a sharp knife to carefully scrape off any dirt or debris from the surface of the beeswax. Next, break or cut the wax into small pieces to make it easier to handle and melt.
Filtering the Beeswax
Once your beeswax is cleaned and broken into smaller pieces, it’s time to filter it to remove any remaining impurities. Place the beeswax in a melting pot or double boiler and heat it gently until it melts completely. Then, pour the melted wax through a layer of cheesecloth or a fine strainer into a clean container. This will help remove any remaining particles or impurities from the wax.
By following these step-by-step instructions for preparing your beeswax for candle making, you can ensure that your candles turn out beautifully and that your finished products are free from impurities. Taking the time to properly prepare and clean your beeswax will result in high-quality candles with a clean burn and long-lasting fragrance.
Choosing the Right Wick
When it comes to beeswax candle making, choosing the right wick is crucial for ensuring a successful and high-quality finished product. The size and type of wick you select will depend on the size and style of the candle you wish to create. Here’s a guide to help you navigate the process of selecting the appropriate wick for your beeswax candles.
Factors to Consider
Before choosing a wick for your beeswax candles, there are several factors to consider. These include the diameter and height of the candle, as well as any additional materials such as fragrance oils or natural dyes that may affect the burning process. It’s essential to take these factors into account in order to achieve an even and consistent burn with minimal sooting.
- Diameter of Candle: For smaller diameter candles, such as tea lights or votives, a smaller wick size will be appropriate. Larger diameter candles, such as pillars or container candles, will require a larger wick size to ensure proper combustion.
- Height of Candle: Taller candles require wicks that can withstand the increased heat and provide sufficient fuel delivery up the length of the candle.
- Additional Materials: If you plan to add fragrance oils or natural dyes to your beeswax candles, these can affect the burning characteristics of the candle and may require adjustments to the wick size.
Types of Wick
There are various types of wicks available for beeswax candle making, each designed for specific purposes and styles of candles. When selecting a wick type, consider factors such as burn rate, flame height, and self-trimming capabilities.
- Cotton Wicks: These are a popular choice for beeswax candles due to their clean burn and low soot production.
- Wooden Wicks: Ideal for creating a crackling flame and unique aesthetic, wooden wicks are suitable for larger diameter container or pillar candles.
- Zinc Core Wicks: Designed for longer burning times and improved scent throw in scented beeswax candles.
By carefully considering these factors and understanding the different types of wicks available, you can confidently select the right wick size and type for your beeswax candles, ensuring a beautiful and functional finished product every time.
Adding Fragrance and Color
Beeswax candles are not only known for their natural and sustainable properties but also for their ability to hold fragrance and color. This makes them a popular choice for candle makers who want to create beautiful scents and vibrant hues in their candles.
Choosing the Right Fragrance
When it comes to adding fragrance to your beeswax candles, essential oils are the way to go. They are natural, highly concentrated, and come in a wide variety of scents. Whether you prefer calming lavender, invigorating citrus, or warm vanilla, essential oils offer plenty of options for creating the perfect ambiance with your candles.
Incorporating Natural Dyes
While beeswax itself has a natural golden hue, you may still want to add some color to your candles. Natural dyes like plant-based powders or dried flower petals can be used to achieve subtle or bold shades in your beeswax candles. Keep in mind that because beeswax is naturally pigmented, achieving vibrant colors may require some experimentation and patience.
Tips for Adding Fragrance and Color
When incorporating essential oils into your beeswax for candle making instructions, it’s important to use them sparingly. Beeswax can hold up to 10% fragrance load, so measure carefully to avoid overpowering scent. Additionally, when using natural dyes, start with small amounts and gradually increase until you reach the desired color intensity. Remember that less is often more when it comes to both fragrance and color in beeswax candle making.
Pouring and Setting
When it comes to making beeswax candles, the pouring and setting process is crucial in ensuring a smooth and even finish. Here are detailed instructions on the best techniques for melting, pouring, and setting your beeswax candles.
First, you’ll need to melt your beeswax using a double boiler or a dedicated wax melting pot. It’s important to heat the wax slowly and gently, as excessive heat can cause discoloration and affect the fragrance of the beeswax. To maintain the natural properties of beeswax, it’s recommended to keep the temperature below 185°F (85°C).
Once the beeswax is completely melted, it’s time to pour it into your chosen candle molds or containers. Be sure to secure the wick in place before pouring and ensure that it remains centered throughout the process. Slowly and steadily pour the melted beeswax into each mold, taking care to avoid air bubbles that can create an uneven surface.
After pouring, allow the candles to cool and set at room temperature. Avoid moving or disturbing the candles during this time to prevent any imperfections in their finish. Depending on the size of your candles, this process typically takes several hours, but allowing them to set overnight is often best for optimal results. Once fully set, trim the wicks to about half an inch (1.27 cm) before lighting for a clean burn.
| Beeswax | Candle Making |
|---|---|
| Sustainable | High-quality |
| Natural properties | Melting techniques |
| Even finish | Pouring process |
Finishing Touches
When it comes to beeswax candles, there are numerous creative ways to make them stand out and add a unique touch to your space. One of the most popular ways to enhance beeswax candles is by adding decorative features such as carved designs, embedded botanicals, and unique containers. These creative touches can elevate the appearance and ambiance of your candles, making them even more special.
Carved designs are a beautiful way to add intricate detailing to your beeswax candles. With the use of special carving tools, you can create stunning patterns and motifs on the surface of the candle, adding a personalized and artistic flair. Whether it’s simple geometric shapes or intricate floral designs, carving beeswax allows you to express your creativity and make each candle one-of-a-kind.
Another way to enhance your beeswax candles is by incorporating embedded botanicals into the wax itself. This could include dried flowers, herbs, or other natural elements that not only add visual interest but also infuse a lovely scent when the candle is lit. By strategically placing these botanicals within the wax as it sets, you can create a stunning effect that is both visually appealing and aromatic.
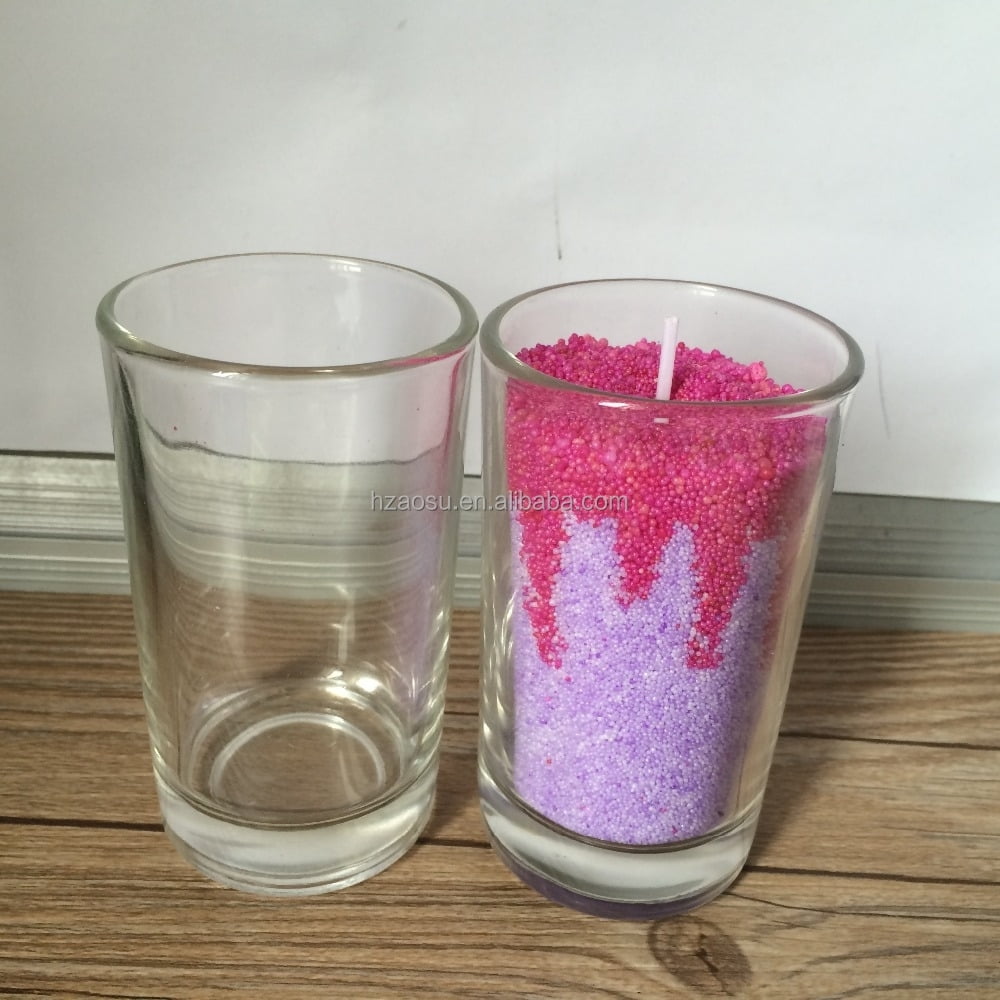
Unique containers also offer an opportunity to make your beeswax candles truly standout. From vintage teacups to rustic mason jars, there are endless possibilities for finding interesting vessels for your candles. The container not only adds style and personality but also serves as a functional aspect of the candle-making process.
It’s important to ensure that whatever container you choose is safe for holding hot wax and has enough stability for the finished product. Incorporating these creative ideas into your beeswax candle making process will not only result in visually stunning candles but will also allow you to express yourself through artistry and design while providing enjoyment through scent and light.
Safety Tips
When it comes to making your own beeswax candles, safety should always be a top priority. Proper ventilation is crucial when working with hot wax and fragrances, as inhaling these fumes can be harmful to your health. It’s important to work in a well-ventilated area or use a fan or open window to ensure that the air is constantly circulating and the fumes are being dispersed.
Temperature control is another key aspect of safe candle making. Beeswax has a higher melting point compared to other types of wax, so it’s essential to use a reliable thermometer to monitor the temperature while melting the wax. Overheating can lead to fires and burns, so it’s crucial to maintain a safe and consistent temperature throughout the entire process.
Handling hot wax requires caution and attention to detail. Always use protective gloves when working with molten beeswax, as it can cause severe burns if it comes into contact with your skin. Additionally, be sure to have a designated area for cooling down candles after pouring them, away from any flammable materials or surfaces.
Practicing these safety tips will not only protect you from harm but also ensure that your beeswax candle making experience is an enjoyable and rewarding one.
| Safety Tips | Importance |
|---|---|
| Proper Ventilation | Crucial for dispersing fumes from hot wax and fragrances |
| Temperature Control | Prevents overheating and potential fire hazards |
| Handling Hot Wax | Use protective gloves and designate a safe area for cooling down candles |
Conclusion
In conclusion, beeswax is undoubtedly the ideal choice for candle making due to its natural and sustainable properties. From sourcing high-quality beeswax to preparing it for candle making, choosing the right wick, adding fragrance and color, pouring and setting, to adding finishing touches, this article has provided comprehensive instructions for creating beautiful beeswax candles.
Embarking on a beeswax candle making journey is not only a creative and fulfilling hobby but also an opportunity to support sustainable beekeeping practices. By sourcing beeswax from local beekeepers or specialty stores, you can contribute to the preservation of honeybee populations while indulging in a timeless craft.
If you’re new to candle making or looking to expand your skills, using beeswax as your primary material can elevate your creations with its natural beauty and long-lasting burn. So why not give it a try? Follow these instructions on using beeswax for candle making and start creating your own unique and environmentally-friendly candles today.
Frequently Asked Questions
How Do I Use Beeswax to Make Candles?
Using beeswax to make candles is fairly simple. You’ll need to melt the beeswax in a double boiler, then add essential oils for fragrance if desired. Then, pour the melted wax into candle molds with a wick and allow it to cool and harden.
What Is the Ratio of Beeswax to Oil for Candles?
The ratio of beeswax to oil for candles can vary depending on the desired scent and consistency. A common ratio is about 1 part oil to 8 parts melted beeswax, but you can adjust this based on personal preference and the type of oil being used.
What Is the Best Way to Melt Beeswax for Candles?
The best way to melt beeswax for candles is by using a double boiler on low heat. This will ensure that the wax melts slowly and evenly without burning. Avoid using direct heat, as beeswax has a high melting point and can easily scorch if heated too quickly.

Welcome to my candle making blog! In this blog, I will be sharing my tips and tricks for making candles. I will also be sharing some of my favorite recipes.


