Candle Making At Home For Beginners
Candles have been around for centuries, and for good reason. They are a simple and affordable way to add a touch of elegance to any room. Not to mention, they provide a soft, calming light that can be soothing for the soul.
If you’re looking to get into candle making, there are a few things you need to know. The first is that there are a variety of different types of candles, each with their own unique properties and uses. The most common types of candles are made from paraffin wax, beeswax, or soy wax.
Paraffin wax is the most popular type of wax for candles, because it is inexpensive and easy to work with. It is also a good choice for candles that are meant to be burned for long periods of time, because it is a slow burning wax.
Beeswax candles are made from beeswax, which is a natural wax that is derived from honey. Beeswax candles are popular because they are eco-friendly and they produce a very clean burning flame. They are also a good choice for people who are allergic to paraffin wax.
Soy wax candles are made from soy wax, which is a renewable resource. Soy wax candles are popular because they are eco-friendly and they produce a very clean burning flame. They are also a good choice for people who are allergic to paraffin wax.
The second thing you need to know about candle making is the importance of wick size. The wick size is important because it affects the way the candle burns. The most common wick size for candles is size 6.
The third thing you need to know about candle making is the importance of temperature. The temperature of the wax is important because it affects the way the candle burns. The most common temperature for candles is 190 degrees.
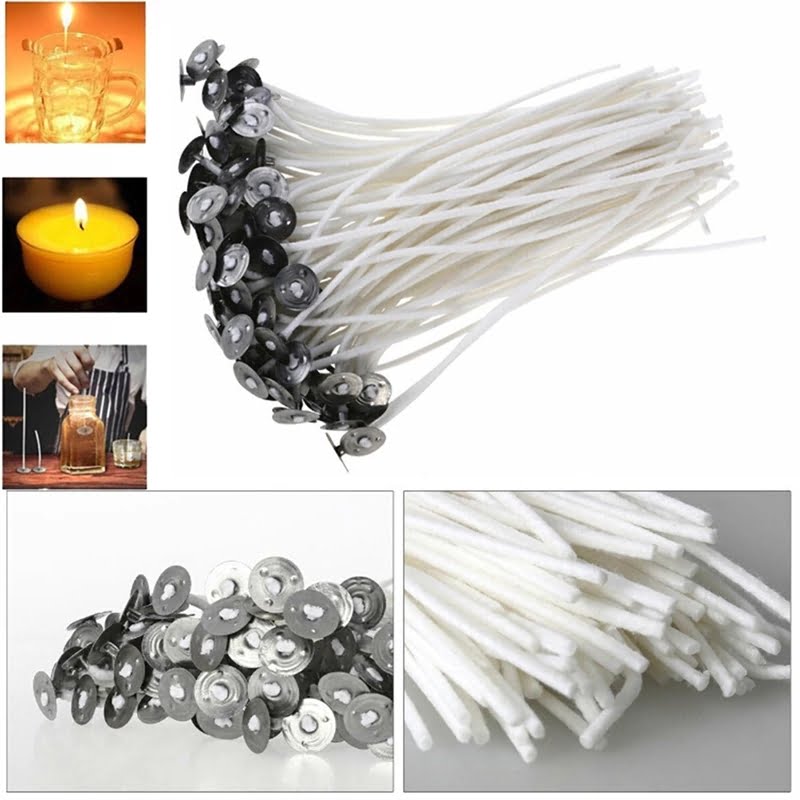
Now that you know the basics of candle making, it’s time to get started. The first step is to gather the supplies you need. The supplies you need will vary depending on the type of candle you are making, but the most common supplies are wax, wicks, and a heat source.
The next step is to prepare the wax. The wax should be melted in a double boiler. Once the wax is melted, you can add the fragrance and the color.
The next step is to attach the wick to the jar. The wick should be centered in the jar and the excess should be trimmed. The wick should then be secured to the jar with a little bit of wax.
The final step is to pour the wax into the jar. The wax should be poured slowly and carefully to avoid air bubbles. Once the wax has been poured, the candle should be allowed to cool and harden.
Now that you know how to make candles, you can experiment with different types of wax, fragrances, and colors to create the perfect candle for your home.
Candle Making For Beginners At Home
Looking to get into candle making but don’t know where to start This guide is for you!
Candle making is a fun, easy, and affordable hobby that can be enjoyed by people of all ages. Not only is it a great way to relax and unwind, but it can also be a great source of income.
In order to get started, you will need the following supplies:
-Candle wax
-Wick
-Stearic acid
-Fragrance oil
-Container
First, you will need to decide the size and shape of your candle. You can use any container you like, but it is important to make sure that it is heat-resistant.
Next, you will need to melt the wax. You can do this using a double boiler or a microwave.
Once the wax has melted, add the stearic acid and fragrance oil. Stir until the ingredients are well combined.
Finally, insert the wick into the container and pour the wax mixture over it. Allow the candle to cool and harden before lighting it.
That’s it! You are now a candle making expert!
Making Candle At Home
Candles are a great way to make any room feel cozy and inviting. Not only do they provide light, but they also emit a pleasant aroma. You can buy candles at the store, but they can be expensive. Plus, many of the candles available for purchase are made with artificial fragrances and colors. If you want to save money and avoid artificial ingredients, you can make your own candles at home.
There are many different ways to make candles, but the most basic method is to use a jar, wax, a wick, and a heat source. The first step is to melt the wax. You can do this in a pot on the stove, or you can use a microwave. Be sure to use a container that is safe to use in the microwave.
Once the wax is melted, you can add any desired fragrances or colors. You can also add essential oils to create a therapeutic effect. Next, you need to thread the wick through the hole in the lid of the jar. The wick should be centered in the jar, and it should be long enough to extend out of the top of the jar by at least 1 inch.
Once the wax is melted and the fragrances and colors are added, you can pour the wax into the jar. Be careful not to pour too fast, or the wax could splash out of the jar. Once the wax has cooled, you can light the wick and enjoy your candle.
Making Candles At Home Supplies
: -Candle wax -Wick -Double boiler or a pot and a bowl that will fit inside the pot -Essential oil or fragrance oil -Scissors -Heat-resistant container like a glass jar -Paintbrush (optional) -Pencil -Stove Instructions: 1. Start by cutting the wick to the desired length. It should be about 1″ taller than the height of your container. 2. If you’re using a double boiler, set it up so that the water is simmering in the pot and the wax is in the bowl. If you’re using a pot and bowl, put the wax in the bowl and place the bowl inside the pot. 3. Add your essential oil or fragrance oil to the wax. The more oil you add, the stronger the scent will be. 4. Carefully melt the wax. Be sure to keep an eye on it so that it doesn’t get too hot and start to smoke. 5. Once the wax is melted, use a paintbrush to coat the inside of the container with wax. You may also want to use a pencil to make a wick holder. This will help keep the wick in place while the wax hardens. 6. Put the wick in the center of the container and hold it in place. 7. Pour the melted wax into the container. Be careful not to get the wick wet. 8. Allow the wax to cool and harden. Once it’s hardened, you can light it up and enjoy your candle!
Candle Stand Making At Home
Candles are a beautiful way to add ambiance and warmth to any room. They also make great gifts. Making your own candles is a fun, easy and affordable way to enjoy candles. Not only will you save money, you will also have the satisfaction of knowing that you made them yourself.
There are many different ways to make candles. The most popular way is to use a hot wax method. This method uses a wax that is melted and poured into a mold. When the wax cools, it hardens and the candle is ready to use.
Another popular way to make candles is to use a cold wax method. This method uses a wax that is not melted. Instead, the wax is broken into small pieces and combined with an oil. This mixture is then poured into a mold. When the wax hardens, the candle is ready to use.
Both the hot wax and cold wax methods can be used to make candles with or without wicks. If you want to make candles with wicks, you will need to use a hot wax method.
The supplies you will need to make candles include wax, a mold, a heat source, a stirring spoon, a thermometer (optional) and a wick.
The type of wax you use will determine the type of candle you make. The most popular types of wax for making candles are beeswax, paraffin wax and soy wax.
Beeswax is a natural wax that is made from the honeycomb of bees. It is a soft wax that has a high melting point. Beeswax candles are fragrant and have a long burning time.
Paraffin wax is a man-made wax that is made from petroleum. It is a hard wax that has a low melting point. Paraffin wax candles are not fragrant and have a short burning time.
Soy wax is a natural wax that is made from soybeans. It is a soft wax that has a low melting point. Soy wax candles are fragrant and have a long burning time.
The type of mold you use will determine the shape of your candle. The most popular types of molds are cupcake molds, ice cube molds and soap molds.
The type of heat source you use will determine the size of your candle. The most popular types of heat sources are a microwave, a stovetop and a hot plate.
The type of spoon you use will determine the size of your candle. The most popular types of spoons are a tablespoon and a teaspoon.
The type of thermometer you use will determine the temperature of your wax. The most popular type of thermometer is an oven thermometer.
The type of wick you use will determine the size of your candle. The most popular type of wick is a cotton wick.
The first step in making a candle is to choose the type of wax you want to use. The most popular types of wax for making candles are beeswax, paraffin wax and soy wax.
The second step in making a candle is to choose the type of mold you want to use. The most popular types of molds are cupcake molds, ice cube molds and soap molds.
The third step in making a candle is to choose the type of heat source you want to use. The most popular types of heat sources are a microwave, a stovetop and a hot plate.
The fourth step in making a candle is to choose the type of spoon you want to use. The most popular types of spoons are a tablespoon and a teaspoon.
The fifth step in making a candle is to choose the type of thermometer you want to use. The most popular type of thermometer is an oven thermometer.
The sixth step in making a candle is to choose the type of wick you want to use. The most popular type of wick is a cotton wick.
The seventh step in making a candle is to melt the wax. The most popular way to melt wax is to use a microwave.
The eighth step in making a candle is to pour the wax into the mold. The most popular way to pour wax is to use a spoon.
The ninth step in making a candle is to insert the wick into the wax. The most popular way to insert a wick is to use a pair of tweezers.
The tenth step in making a candle is to wait for the wax to cool. The most popular way to wait for wax to cool is to use a fan.
The eleventh step in making a candle is to remove the candle from the mold. The most popular way to remove a candle from a mold is to use a knife.
The twelfth step in making a candle is to trim the wick. The most popular way to trim a wick is to use scissors.
The thirteenth step in making a candle is to light the wick. The most popular way to light a wick is to use a lighter.
The fourteenth step in making a candle is to enjoy your candle!

Welcome to my candle making blog! In this blog, I will be sharing my tips and tricks for making candles. I will also be sharing some of my favorite recipes.


