Introduction
The aroma of rain has a unique, calming scent that many candle makers attempt to replicate in their craft. This light, refreshing scent is said to be like the smell of freshly cut grass after a spring shower. It is considered to be one of the most desirable scents for candles and lamps because of its ability to instantly relax anyone who smells it. For this reason, attempting to capture the scent of rain in your candle making can result in plenty of compliments and customer satisfaction. With a few supplies and some practice it’s possible to create your own version of the relaxing aroma of rain.
Suitable Candle Making Containers or Molds
When making a candle with the scent of rain, it is important to select the right container or mold. The type of material used will add to the overall fragrance and look of the finished product. Different materials provide different levels of heat retention, which affects how long your candle lasts, as well as its ability to hold fragrance oils effectively. Popular materials include glass jars, ceramic molds, aluminum tins, silicone molds, and polycarbonate containers. Glass jars are available in an array of sizes and shapes and work well for large candles. Ceramic molds offer a more unique look and are generally heat-resistant, while aluminum tins will ensure even heat distribution throughout your entire candle when lit. Silicone molds may be necessary when you want a specific elegant shape and intricate patterns in your candles. And lastly, polycarbonate containers are usually shatterproof and translucent for allowing visuals of the burning wax within. When selecting a container or mold for scented rain candles, be sure to opt for one that can handle both higher temperatures when melting wax as well as lasting through several uses over time with minimal wear and tear.
Overview of Essential Aromatherapy Oils and Blending Strategies
Candle making can be an enjoyable and rewarding project, especially when creating a scent of rain. To create a beautiful candle that invokes the pleasing aroma of fresh rain, an understanding of essential aromatherapy oils and how to blend them properly is needed. Common essential oils used to create a scent of rain include watermelon, kaffir lime, rosemary, peppermint, bergamot, cypress and lavender.
Using these seven primary oils as the base, other complementary or accenting ingredients such as ylang-ylang, jasmine or lemon may be added if desired in order to further enrich the flavor palette. Blending these aromatherapy oils together into an oil blend can produce a variety of unique scents meant to evoke experiences associated with rain. In order to achieve the best results with candles containing an aroma of rain, it’s important to first decide on the desired strength and personality of the fragrance before proceeding with oil blending techniques.
Using a trial-and-error approach is particularly effective for mixing different essential oil blends until one that is just right is created. Applying various percentages of each key oil in order to find small nuances in the final scent helps ensure satisfying results when making candles with a fragrant hint of rain. Upon discovering an aromatic blend that works well for particular uses like candle making purposes, keep careful track of measurements so that reference is easily accessible for future batches.
Step-by-Step Guide to Melting the Wax and Adding the Scent of Rain
1. Start by gathering your supplies: wax, wick, container, and scent of rain fragrance oil.
Set up your work station with a double boiler, some spoons for stirring, safety scissors for cutting your wick to the desired length, and a measuring cup for precising the amount of heated wax you’re using.
2. Begin melting your wax in the double boiler over medium heat. You can use either soy or paraffin wax.
3. While the wax is melting, determine the size of your candle. Cut the wick to its desired size ” about two inches longer than the width of the candle mold or container ” and put it aside for later use.
4. Once the wax is completely melted you can add any colors you may be looking for as well as your desired amount of fragrance oil – a little goes a long way! Make sure you are careful when adding in any colors as hot wax can cause scalding burns if not handled properly. Once everything is combined well take it off from heat and wait for 10-15 minutes for it to cool down slightly before pouring it into its final container(s).
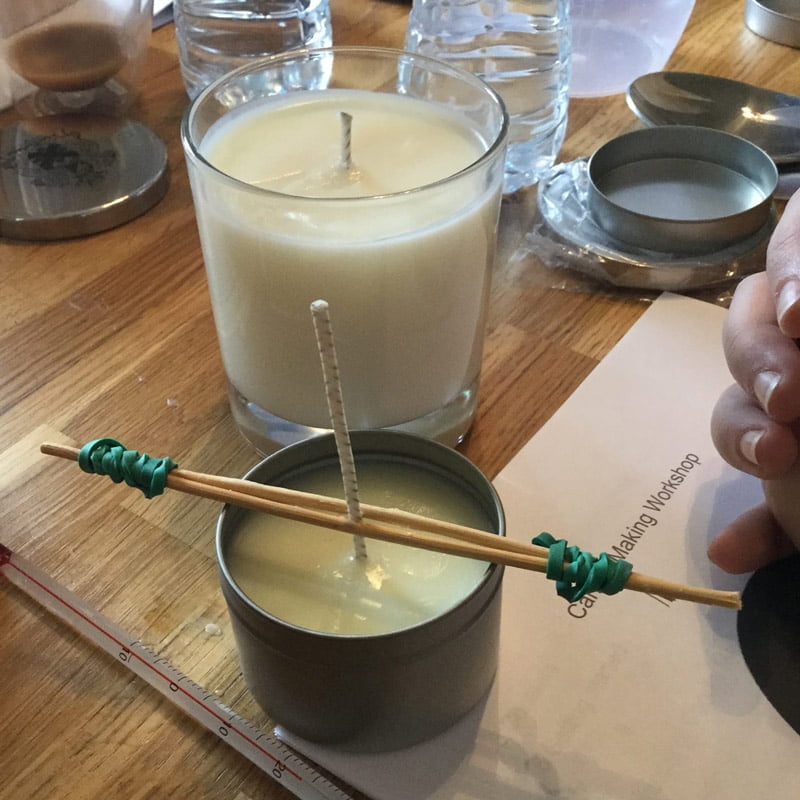
5. Now attach one end of the pre-cut wick onto a metal holder (or removeable adhesive tab) and place this holder in center of candle mold/container keeping its non-tied end extended outwards so it hangs suspended above the will be filled space below it while maintaining an upright position; this will secure that its position stays fixed when pouring hot wax in time to come.
6. When temperature outside has dropped enough pour paracined wax blend evenly into chosen molds/containers taking best care not getting wicks wet or tangled while doing so then wait approximately eight hours before usage or packaging whichever suits requirement better on finish count.
Understanding the Different Types of Wax and Choosing the Right One
When it comes to making candles, the type of wax you use is a key ingredient and can significantly influence your finished product. There are three main types of wax used in candle making: Soy Wax, Paraffin Wax, and Beeswax.
Soy wax is a popular choice among candle makers due to its gentler properties and natural ingredients. Soy wax burns slowly and evenly while producing less soot than traditional paraffin waxes. In addition, soy candles don’t contain petrochemicals like paraffin wax candles do, giving them an edge in terms of environmental sustainability. Additionally, when soy wax is mixed with fragrant oils, it creates delightful scents for any occasion.
Paraffin wax is a petroleum-based wax that is most commonly used to make traditional solid blocks of candle materials. It produces a hot flame and has a good scent hold so fragrances diffuse nicely into the air once burned. The downside to paraffin wax is that it doesn’t burn as cleanly as soy or beeswax and may produce toxic compounds as well as black smoke during burning which is why many people avoid it.
Beeswax makes incredible luxurious candles because of its thick creamy texture and pure aroma. Though more expensive than other types of wax, beeswax candles last two-to-three times longer than other types of candles because they burn slower and cleaner than the others. Because of its rich texture, beeswax also holds fragrance quite well so adding essential oils or scented nuances will contribute significantly to the character of your final product. When using beeswax for candle making, be sure to make use of wick sizes appropriate for the size and shape of your candles as too large of wicks can cause them to burn too quickly as well as inaccurate fragrancing due to unbalanced heat distribution from the flame itself.
How to Achieve the Perfect Burning Point When Melting the Wax
When melting the wax for candle-making, one must pay careful attention to achieve the perfect burning point. This is essential to ensure a safe, successful session and a finished product that will burn evenly and without smoke or soot. Begin by accurately measuring out the appropriate amount of wax into a heat-safe pan or vessel. Place this on the stovetop over medium to low heat, stirring gently until it is completely melted. Keep an eye on it ” if it begins to bubble or show any signs of boiling, take it off the heat immediately ” as this indicates that your desired temperature has gone too far and risks ruining your mixture altogether. When the edges start to go cloudy with a glossy finish, you’ve achieved your burning point and should be able to begin pouring into your molds or jars before it solidifies again.
Pouring and Shaping the Candle with Specialized Tools
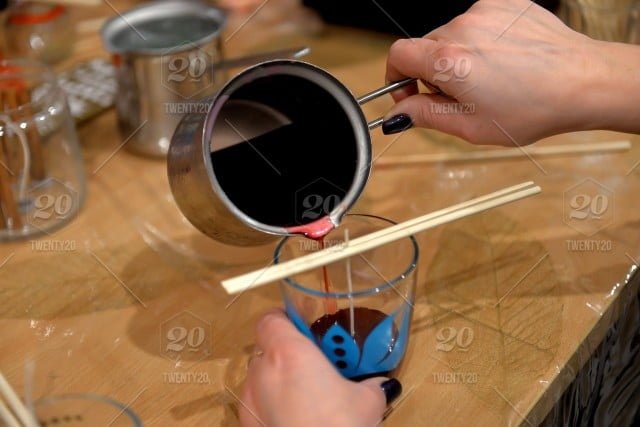
Pour the melted wax into a metal container called a mold. Pour the wax slowly into the mold and fill it up to the desired size. The mold should be centered while pouring, as this will help evenly distribute the wax and allow for an easier removal process. Before the candle hardens, you’ll want to add in any special ingredients such as fragrances, dyes, or glitters. Stir in those specifics quickly with a wooden spoon before the wax solidifies.
Once all of the materials have been added in, you can begin shaping your candle with specialized tools like wick stickers, wick pins, or end seals. Wick stickers are used to secure your pre-cut cotton wick and keep it from moving around within the container. Wick pins are also placed overtop of each wick sticker to ensure it stays firmly secured throughout the process. End seals will create a flat and polished surface for burning directly on when placed around the top and bottom edges of your candle container.
Embellishing the Candle with Natural, Aesthetic Elements
Candle making is a creative and enjoyable form of artistry. An important step in creating the perfect candle is to find the perfect scent. For a truly unique experience, try incorporating the rain scent into your next candle project. This calming, earthy aroma provides a warm, inviting ambiance while also adding a natural aesthetic element to the piece. To make this lovely scent, you’ll need a few items. First, you’ll need wax flakes or paraffin wax (which can be found at most craft stores). Next, find an essential oil which smells like rain ” this is up to personal preference but rosemary and lavender oils work particularly well when blended with other scents such as cedarwood or bergamot. Finally, use interesting materials that evoke thoughts of rainfall such as flower petals or glitter for decoration. To begin making your rain-scented candle, melt the wax flakes in a double boiler before stirring in a few drops of your chosen essential oil into the mixture until it’s sufficiently scented. Pour the mixture into your chosen mould before letting it set in room temperature for 30 minutes – 1 hour. Once set, embellish it with flower petals, glitter or any other natural materials you want to add for an extra special touch. After that’s all done, allow your candle to dry for two days before burning it and indulging in its uniquely beautiful scent of rain!
Lighting the Candle to Achieve the Desired Aroma
When you start your candle-making session, it is important to light the candle before adding any scent oils. By doing this, you can achieve an even heat distribution throughout the wax which will help to spread the desired aroma and create maximum fragrance once you add your fragrance oil. Make sure you place the wick dead center so that the heat is spread evenly in all directions. After lighting and letting the candle burn for a few minutes, blow out the flame and allow it cool for several minutes. Then, you can pour in a few drops of your preferred rain-scented fragrance oil into the warm wax around where the wick is located. Once poured, let the candle rest until all of the wax has solidified. Finally, trim off any excess wick with scissors and enjoy!
Conclusion
Making your own scented candles is a great way to enjoy a unique and custom aroma in your home. Creating the alluring scent of rain can bring calm, relaxation, and peace to any environment. With the right supplies and some careful preparation you can make beautiful and aromatic candles that you’ll be proud of. Not only will your home smell wonderful but you will also have saved money, saved time, and reduced waste by creating an eco-friendly product. The sense of accomplishment makes homemade candles even more rewarding! Enjoy the process from start to finish as every step contributes something special to the finished candle. It’s time to light it up and take pleasure in what you have created!

Welcome to my candle making blog! In this blog, I will be sharing my tips and tricks for making candles. I will also be sharing some of my favorite recipes.


