Introduction
Candle making has been around for hundreds of years. Candles were originally used as a source of light and heat before electricity was invented, but now they are mainly used for decoration, rituals, and creating ambiance. There are various types of candles: dipped, rolled or sheet candles; container candles; votive candles; pillars; novelty tapers; and mold-formed candles. Additionally, different materials can be used to make the wick depending on the type of candle being created such as cotton, linen, hemp cord, paper covered wire or metal core wicks.
When beginning to experiment with candle making it is important to consider the different waxes available in order to get a desired look or scent. For example, paraffin wax is great for container and novelty taper candles while beeswax is often preferred when making votives or pillars because of its higher melting point. Soy wax or Palm wax are becoming more popular as they are natural products that return little soot once burned compared to traditionally used paraffin wax.
Finally, adding fragrance oil to certain types of waxes allows one to create wonderful scents within their candles with essential oils allowing similarly aromatic properties without being overpowering. By having an understanding of the varied elements involved in candle making one can create unique products that have both aesthetic and practical purposes.
Safety Measures
Before starting to make candles, it’s important to understand the potential hazards associated with handling melted wax and open flames. Proper safety measures should be taken when making any type of candle.
Be sure you have adequate ventilation in any area that you will be burning candles. Make sure to place them on a protected surface where they can’t fall over or ignite something else. Wear long sleeves, closed-toe shoes and gloves whenever using hot melted wax, wicks and dyes. Always use caution when lighting or extinguishing candles, as well as keep children and animals away from open flames.
Another important aspect of safety when making candles is prepping all supplies prior to beginning the process. This includes wiping down all containers with rubbing alcohol where the wax will be poured, because even small drops of water can cause air pockets that weaken how well the candles burn later on. Be sure to properly clean clippers after trimming wicks for each candle if cutting multiple ones, otherwise residue from previous trimmings may interfere with subsequent ones. Finally, test any fragrance oils before adding them into your wax mixture.
Types of Wax and Wicks
Candle making is an enjoyable activity that anyone can start up with. Before you begin, however, it’s important to understand the different types of waxes, wicks and dyes best suited for newbies.
There are a variety of different waxes available depending on what type of candle you would like to make, ranging from paraffin wax for container candles to beeswax for natural shaped or shaped candles. Paraffin is the most common type of wax and it comes in both blocks and granulated form that are easy to use. Beeswax is not as readily available in stores and has a softer texture which makes it ideal for shaping or moulding, as well as having a great natural scent when burned. Soy wax is another type of wax mostly used for container candles because it provides a better scent throw than other types of waxes when burned.
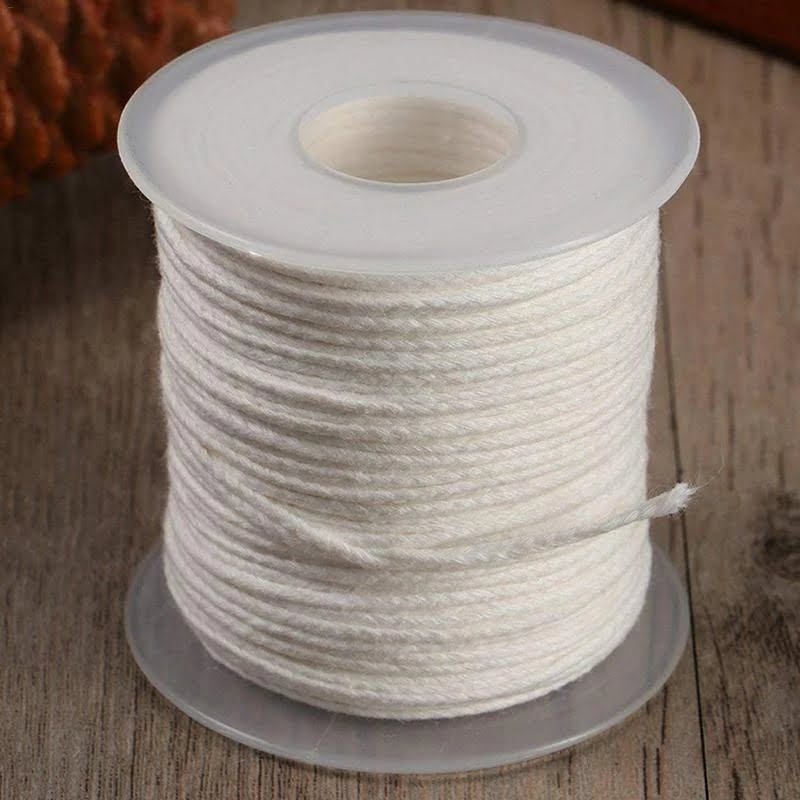
Wicks are important when creating your own candle since they will determine how the candle will burn properly. It’s suggested to use pre-tabbed wick rather than purchasing them separately, which come in different sizes depending on the size of the container or mould you will be using. When referring to dyes, there are pigments made specifically for candles that create vibrant colours while keeping their vibrant hue once burned but there are also natural dyes such as herbs oils or teas that can provide more subtle colour options for container or tin candles.
Overall, candle making is quite simple experiment with if you know the basics ahead of time! With affordable supplies readily available online and at hobby stores, anyone can start creating beautiful handmade candles at home without too much trouble!
Getting the Supplies
Getting the supplies to begin candle making should typically be the first step when starting. It is important to learn about where to buy the necessary supplies for candle making and what kind of budget is needed. Popular sources for obtaining supplies often include craft stores, online retailers, and local suppliers who specialize in candles and waxes. Some recommended items to obtain are candle wax, a wax melting pot, a thermometer, wicks, dye chips or liquid dye for coloration (if desired), fragrances/essential oils, molds/containers for forming candles and wax paper/spill mats. Depending on how many candles one will be creating and how often they plan on making them, certain gear may need replacing more frequently than others. An estimated ballpark budget would be around $50-$60 but it may vary greatly depending on specific items wanted or needed.
Setting Up the Workspace
Setting up the workspace for candle making is a very important part of the process. It’s essential to ensure proper ventilation, since you will be dealing with open flames and strong wax scents. You should find a room, basement, or garage that is well ventilated and has plenty of space for lighting and storing supplies. Additionally, be sure to check the temperature in your workspace as waxes can easily overheat when exposed to extreme temperatures. If you’re using a larger area, consider getting a space heater for cold winter days or an air conditioner for hot summer days so that the wax remains malleable throughout the process. It’s best to keep your supplies away from heat sources as well, such as near windows and heaters. Finally, it is highly recommended that you have an extra fire extinguisher on hand in case of any accidents while melting wax or working with candles.
The Basics of Candle Making
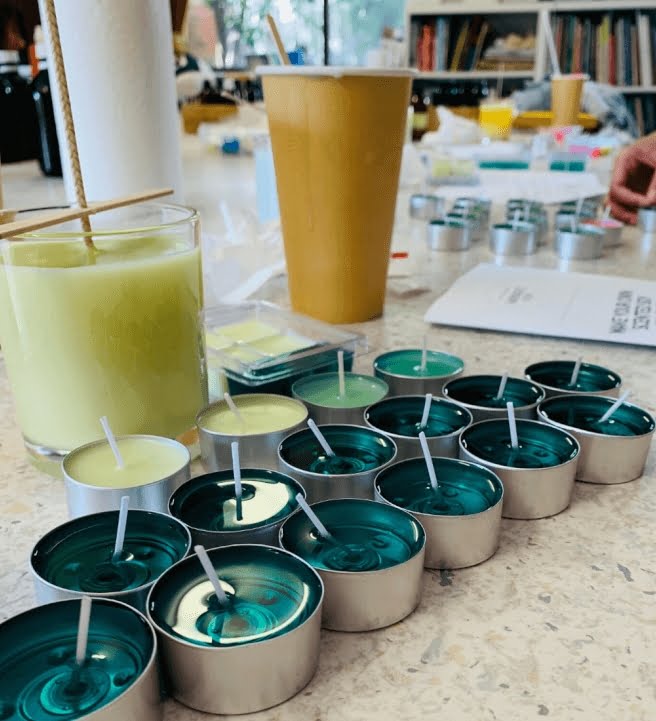
Candle making starts with gathering the necessary supplies, including wax, melting equipment, a mold in desired shape, fragrances and colorants. Then prepare the wax by carefully measuring out the appropriate amount; it should be molten at between 120°F to 140°F. After that, add in fragrances and/or color to create whatever scent or hue is desired for the candle. Once all these components are blended together evenly within a particular container, pour the wax into your prepared mold and let settle. The mold may not need to contain any other foreign materials inside, unless additional design accents are needed (such as embedding an item or creating a pattern). Let cool until a solid block forms; this may take several hours up to half a day depending on size of candle created. For larger batches resulting from bigger molds/containers, an additional step like flipping or inverting them can be considered in order to promote full even surface curing. Lastly readers have learned the basics of how to start making candles.
Troubleshooting Common Candle Making Problems
A common problem that can occur when making candles is not getting a good scent out of the candle. This can be due to a few different things. First, you may be using too little fragrance oil. Follow directions on the scent packaging for recommended levels. If you’re using too much, it will overpower the candle and make it difficult to sense any other scents in the room. Second, if you are using old wax or an incorrect type of wax, that could interfere with the quality of the scent as well. Additionally, if your wicks are too small or don’t fit securely into your container, they won’t be able to adequately absorb and spread the fragrance within the wax pool. Make sure you measure your wick correctly and double check to ensure it fits properly into your container before pouring in the hot wax.
Another problem that often arises is your candle not burning evenly down the sides of your container. This can happen for a few reasons as well. Making sure you’re using enough wick length for your candle size is essential for getting an even burn throughout and also allowing enough space so that heat doesn’t get trapped at the base which can cause residual liquid wax buildup on one side only when burned over time. If there is too much space between your wick and container walls more heat gets released from this gap and causes excess liquification in one area while having no capacity to travel further causing tunneling in other areas. You may need to trim down wick length or adjust accordingly until you notice an even melt all around both walls by burning multiple short test burns along with checking periodically over burn time so adjustments can be made quickly.
Making Unique Candles
If you’re looking to start making your own unique candle designs, it’s a good idea to start by exploring the different wax impressions, molds, scents and materials that are available. It can be helpful to research online for ideas on different design combinations. This will help you get an idea of what works together and what won’t. For example; could you combine a particular wax impression with a certain scent or color? Or perhaps try using two different scents in one candle? There are endless possibilities here that can really help give your candles a personal touch.
You should also visit your local craft store or home specialty shops to check out the range of waxes, fragrances, dyes and other ingredients that you can purchase if needed. You may even discover some hidden gems amongst the products they stock like interesting molds or unusual accents.
When it comes to creating new and exciting candles, why not experiment with an assortment of shapes, sizes and colors until you find something special? As long as you don’t rush the process, you can create unique and stunning candles while putting your own spin on classic designs – all within the comfort of your own home!
The Final Steps
Once you have successfully created your required wax blend and poured it into the molds, it is important to take a few steps to ensure that your candles look as professional as possible.
The first step is to trim off any excess wax that has poured over the edges of the mold. This can easily be done with a sharp knife or scissors.
The next step is to smooth out any imperfections in the surface of your candle so that it looks neat and presentable when finished. This can be done using hot melts, which are small drops of melted wax that can be applied directly onto the surface with a toothpick. Alternatively, you can use a cloth dipped in a little bit of warm water mixed with some rubbing alcohol or mineral oil to gently rub away any scratches or blemishes on the surface.
Once this is complete, leave your candles out at room temperature for an hour or two so that they cool down completely before handling them – otherwise you risk leaving fingerprints all over them! Finally it’s time to remove them from the molds and add finishing touches such as decorative adornments, ribbons and labels if desired.
Marketing Your Candles
Social Media: Social media is a great way to reach potential customers by sharing pictures, videos and descriptions of your products. Utilize platforms such as Instagram and Facebook to spread awareness about your candle-making business. Consider creating an account for each of your candles, displaying different images and descriptions for each one. You can also promote sales through use of campaigns, contests or even giveaways.
Craft Fairs: Participating in craft fairs can help you gain visibility and reach new customers. Spend time selecting the best craft shows that fit with the image you want to project for your business. Research the individual vendors at the shows and take advantage of the opportunity to network and build relationships with other craftspeople. Make sure you create an attractive display that captures customer attention and be prepared to answer questions about your products.
Small Shops: Small shops provide an excellent avenue for selling and marketing your candles. Reach out to retailers who may be interested in carrying your product by sending samples and information about it. Explain the different features, benefits, pricing, discount structure, and shipping options of each candle. Research the store’s current customer base to make sure that it will be a match for what you’ve created. You could also look into local independent boutiques, gift stores or salons where your product will fit right in with their selection
Conclusion
In conclusion, candle making can be a rewarding and enjoyable hobby or business venture that produces great results. To become successful in making your own candles, you will need the following: an understanding of the materials needed to make different types of candles; knowledge of safety precautions when working with wax, heat sources, and fragrance oils; and experimentation with wax, wicks, colors, and scents to find your ideal combination. By taking the right steps and using the right materials, you can make unique candles that fit any budget. The best part is that you get to customize them to suit your style and taste – making each one a special reflection of you. With a bit of effort and dedication, anyone can create beautiful homemade candles ready for use or sale.

Welcome to my candle making blog! In this blog, I will be sharing my tips and tricks for making candles. I will also be sharing some of my favorite recipes.


