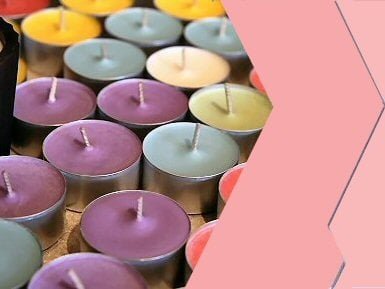
Candle making is not only a craft but also a fusion of art and science. One of the essential elements in creating beautiful and vibrant candles is the use of liquid dye. Liquid dye offers several advantages over other forms of candle colorants, making it a preferred choice among candle makers.
Liquid dye provides ease of use and precision in achieving desired colors for candles. Unlike other dyes, liquid dyes are highly concentrated, allowing for better control when adding color to the wax. The smaller molecules in liquid dye also allow for more thorough dispersion, resulting in consistent color throughout the entire candle. With liquid dye, achieving vibrant and eye-catching hues is easier than ever before.
Choosing the right liquid dye is crucial to obtaining the desired results in candle making. There are various types of liquid dyes available in the market, each with its own set of pros and cons. From oil-based dyes to water-based ones or even synthetic options, understanding their characteristics will help you make an informed decision. It’s important to consider factors such as compatibility with different waxes, stability over time, and lightfastness when selecting your liquid dye.
In this comprehensive article on candle making liquid dye, we will delve into the intricacies of this crucial element. We will explore different types of liquid dyes available in the market and discuss their advantages and disadvantages. Additionally, we will provide step-by-step instructions on incorporating liquid dye effectively into your candle making process, along with valuable tips and tricks for achieving vibrant and consistent color results.
By understanding the art and science behind candle making liquid dye, you can elevate your candle creations to new heights with stunning colors that captivate your senses. So let’s dive into this exciting world of transforming wax into canvases of light and color.
The Different Types of Candle Making Liquid Dye
Liquid dye is a popular choice for candle making due to its ease of use and ability to create vibrant colors in candles. There are several different types of liquid dyes available on the market, each with their own unique properties and benefits. It is important to understand the different types of candle making liquid dyes in order to choose the one that best suits your desired results.
Oil-Based Dyes
One type of liquid dye commonly used in candle making is oil-based dye. These dyes are made by dissolving colorants in oils such as mineral oil or vegetable oil. Oil-based dyes have a high concentration of color and provide intense, opaque hues in candles.
They mix easily with other oils used in candle making and can be added directly to melted wax. However, one drawback of oil-based dyes is that they may cause some wax shrinkage, resulting in uneven surfaces on candles.
Water-Based Dyes
Another type of liquid dye commonly used in candle making is water-based dye. These dyes are made by dissolving colorants in water or another water-soluble solvent. Water-based dyes offer a wide range of colors and provide excellent transparency when used in candles.
They can be mixed with other water-based liquids or incorporated into the melted wax directly. One advantage of water-based dyes is that they do not cause wax shrinkage like oil-based dyes do. However, it’s important to note that water-based dyes may not mix well with oils used in fragrance additives, so it’s recommended to test compatibility before use.
Synthetic Dyes
Synthetic liquid dyes are another option for candle makers who want a wide range of vibrant colors. These dyes are made using synthetic colorants that provide consistent and long-lasting pigmentation. Synthetic dyes can be either oil or water-based, depending on the formulation.
They are often highly concentrated, so only a small amount is needed to achieve the desired color intensity. One advantage of synthetic dyes is that they are less likely to fade or change color over time compared to natural dye options. However, it’s important to read and follow the manufacturer’s instructions when using synthetic dyes, as they can sometimes require special handling or mixing techniques.
When choosing a liquid dye for candle making, consider the type of wax you are using and the desired color outcome. Experimentation may be necessary to achieve the perfect color results, so don’t be afraid to try different types of dyes and mixtures. Remember to always follow safety guidelines and use protective gear when handling liquid dyes. With the right choice of liquid dye, you can create beautiful and personalized candles that showcase your creativity and style.
How to Use Candle Making Liquid Dye Effectively
Using candle making liquid dye effectively is essential for achieving the desired color and vibrancy in your candles. Here is a step-by-step guide on incorporating liquid dye into the candle making process to help you achieve the best results.
1. Choose the right type of liquid dye: Before starting, it’s important to choose the right type of liquid dye for your candles. Consider factors such as the type of wax you’re using and the desired color intensity. There are different types of dyes available, including oil-based, water-based, and synthetic dyes. Each has its own advantages and disadvantages, so make sure to choose one that suits your specific needs.
2. Measure the liquid dye accurately: Accurate measurements are crucial when using liquid dyes in candle making. Use a dropper or pipette to measure out the desired amount of dye according to the instructions provided by the manufacturer. It’s recommended to start with a small amount and gradually increase until you achieve your desired color.
3. Incorporate the liquid dye into your wax: Once you’ve measured out the appropriate amount of dye, add it to your melted wax slowly and steadily while stirring continuously. This will ensure that the dye disperses evenly throughout the wax, resulting in consistent coloring. Make sure to mix well until there are no streaks or clumps of color remaining.
4. Test colors before pouring: Before pouring your colored wax into candle molds or containers, it’s advisable to test it first. Dip a spoon or thermometer into the wax and let it cool for a moment to get an idea of how the final color will look once cooled completely. Adjustments can be made by adding more dye if necessary.
5. Experiment with layering colors: Liquid dye offers great versatility when it comes to creating unique candle designs through layering colors. To achieve this effect, pour one layer of colored wax into your mold or container and allow it to partially set before pouring a different colored wax on top. Repeat this process until you have achieved the desired layers and colors.
Remember, when using liquid dye in candle making, it’s important to start with small amounts and gradually increase to avoid overpowering the color. Additionally, keep in mind that certain dyes may change slightly in hue once they cool completely, so be prepared for slight variations in color.
By following these steps and experimenting with different techniques, you can effectively incorporate liquid dye into your candle making process, allowing you to create vibrant and eye-catching candles that will impress friends and customers alike.
Understanding Color Mixing and Blending Techniques
When it comes to candle making, understanding color mixing and blending techniques is essential for achieving the desired hues and shades. By utilizing liquid dye effectively, you can create custom colors that will enhance the beauty of your candles. In this section, we will explore the basics of color theory as it relates to candle making and provide techniques for creating stunning and unique color combinations.
Color theory is the foundation of understanding how different colors interact and blend with one another. It involves the primary colors (red, blue, and yellow), secondary colors (orange, green, and violet), and tertiary colors (created by mixing a primary color with a secondary color). By utilizing these principles, you can create an array of beautiful candle colors.
Here are some techniques for color mixing and blending using liquid dye in candle making:
1. Gradation: Also known as a “gradation,” this technique involves creating a smooth transition from one color to another. Start by adding a small amount of liquid dye to your melted wax, stirring well until fully incorporated. Gradually add more dye in increments until you achieve the desired shade or hue.
2. Layering: Create depth in your candles by layering different colored wax. Pour a layer of one color into your container or mold and allow it to set partially before pouring in another layer with a contrasting or complementary color. Repeat this process until you have achieved the desired effect.
3. Marbling: This technique creates a unique swirled pattern throughout your candles. Begin by melting two or more colors of wax separately and allowing them to cool slightly. Pour them into your container or mold simultaneously while gently swirling them together with a skewer or toothpick.
4. Custom Blends: Experiment with creating your own custom blends by combining different ratios of liquid dyes. This allows you to achieve unique shades that are not readily available in pre-made dyes.
Remember to start with small amounts of liquid dye and add more as needed to avoid overpowering your desired color. Additionally, keep in mind that different wax types may react differently to dyes, so it’s important to test your colors beforehand.
By using these color mixing and blending techniques with candle making liquid dye, you can create visually appealing and artistic candles that showcase your creative flair.
Troubleshooting Common Issues with Candle Making Liquid Dye
When working with candle making liquid dye, it is not uncommon to encounter certain challenges that can affect the quality and appearance of your candles. In this section, we will discuss some common issues that may arise when using liquid dye in candle making and provide expert advice on how to rectify and prevent these problems.
One common issue that candle makers may face is uneven color distribution. This can result in some parts of the candle being more intensely colored than others, creating a patchy or streaky appearance.
To address this problem, it is important to ensure thorough mixing of the liquid dye with the melted wax. This can be achieved by stirring the mixture vigorously for a longer period of time or using a handheld blender to evenly distribute the dye particles throughout the wax.
Another challenge that may occur is fading or dullness of color over time. This can be particularly frustrating after spending time and effort creating vibrant and eye-catching candles. One possible cause for this issue is exposure to excessive heat or sunlight, which can cause the color pigments to break down and fade. To prevent fading, it is advisable to store finished candles in a cool and dark place away from direct sunlight.
In addition to uneven color distribution and fading, another common issue is difficulty achieving the desired shade or intensity of color. This may happen when trying to achieve pastel colors or very dark shades. The key to overcoming this challenge lies in understanding how different dyes interact with different waxes and their limitations in terms of color saturation. In such cases, experimenting with different combinations of dyes or increasing/decreasing the concentration levels may help achieve the desired results.
To troubleshoot these issues effectively, it is important to keep detailed records of your experiments, noting down the specific type of dye used, concentrations employed, and any observations made during the process. By carefully analyzing your data and adjusting your technique accordingly, you will be able to identify the potential causes and find suitable solutions to overcome these challenges, ensuring consistently beautiful candles made with liquid dye.
By being aware of these common issues and their remedies, candle makers can enhance their skills and produce high-quality candles that meet their desired aesthetic standards. The next section will focus on the safety measures that should be taken when using candle making liquid dye, ensuring a safe and enjoyable candle making experience.
The Safety Measures When Using Candle Making Liquid Dye
When working with candle making liquid dye, it is important to prioritize safety measures to ensure a smooth and accident-free process. Liquid dye can be potentially hazardous if not handled properly, so taking precautions and using protective gear is essential. Here are some safety measures to keep in mind when using candle making liquid dye:
- Ventilation: It is crucial to work in a well-ventilated area when using liquid dye. This will help prevent the accumulation of fumes and promote air circulation. Open windows or use fans to maintain a constant flow of fresh air.
- Personal Protective Equipment (PPE): Always wear appropriate PPE when handling liquid dye, such as gloves, goggles, and a lab coat or apron. This will protect your skin, eyes, and clothing from potential splashes or spills.
- Read the Safety Data Sheet (SDS): Before using any liquid dye product, thoroughly read the SDS provided by the manufacturer. The SDS contains crucial information on safe handling practices, potential hazards, and first aid instructions in case of accidental exposure.
- Avoid Ingestion and Eye Contact: Liquid dyes are not meant for consumption and can be harmful if swallowed. Ensure that you do not eat or drink while working with liquid dye. In case of accidental ingestion or eye contact, rinse thoroughly with water and seek immediate medical attention.
- Cleanliness and Organization: Maintain a clean workspace by tidying up spills immediately to prevent slips or accidents. Store liquid dyes in clearly labeled containers away from heat sources or open flames to avoid fire hazards.
By following these safety measures when using candle making liquid dye, you can minimize risks and create candles with peace of mind. Remember that accidents can happen even with proper precautions, so it’s always important to exercise caution throughout the entire process.
Exploring Different Effects and Experiments with Candle Making Liquid Dye
Candle making is not just a craft but also an art form, and one of the most exciting aspects of this process is exploring different effects and experiments with candle making liquid dye. Liquid dye opens up a world of possibilities for creating visually appealing and artistic candles that can truly stand out.
In this section, we will showcase unique techniques such as ombre, marbling, and layered effects using liquid dye, as well as provide inspiring ideas for creating personalized candles.
One popular technique that can be achieved with liquid dye is the ombre effect. This effect involves transitioning from one color to another seamlessly, creating a gradient or fading effect. To achieve the ombre look, start by preparing a few containers with different concentrations of the chosen liquid dye color. Dip your candle into the container with the lightest concentration first, then gradually dip it into containers with increasing concentrations until you achieve the desired ombre effect.
Another interesting technique to try with liquid dye is marbling. Marbled candles have a beautiful swirled or marble-like pattern that adds elegance and uniqueness to any candle design. To achieve this effect, create a mixture of water-based liquid dye and water in a container.
Drop small amounts of different colored dyes on the surface of the mixture and use a toothpick or skewer to swirl the colors around. Once satisfied with the marbling pattern, gently dip your candle into the mixture and remove it slowly to transfer the marble design onto the surface.
Layered effects can also be created using liquid dye to add depth and dimension to candles. This technique involves pouring layers of contrasting or complementary colors one on top of another to create visually stunning designs. Start by preparing several containers filled with melted wax of different colors mixed with appropriate concentration levels of liquid dye.
Pour one layer at a time into your candle mold or container, allowing each layer to cool before adding the next one. Repeat this process until you have achieved the desired layered effect.
Using liquid dye in candle making opens up endless possibilities for creativity and personalization. Whether you want to experiment with different effects like ombre, marbling, or layers, or explore other techniques, the key is to let your imagination run wild. Don’t be afraid to mix colors, try new combinations, and push the boundaries of what is possible with liquid dye. By doing so, you can create candles that reflect your unique style and artistic expression.
| Technique | Description |
|---|---|
| Ombre Effect | This technique involves transitioning from one color to another seamlessly, creating a gradient or fading effect. |
| Marbling | This technique creates a swirled or marble-like pattern on the surface of a candle. |
| Layered Effects | This technique involves pouring layers of contrasting or complementary colors one on top of another to create visually stunning designs. |
Tips for Storing and Preserving Candle Making Liquid Dye
Proper Storage Techniques
When it comes to storing and preserving your candle making liquid dye, it is important to follow some simple guidelines to ensure its quality and longevity. First and foremost, you should store your liquid dye in a cool, dry place away from direct sunlight.
Heat and light can lead to degradation of the dye, causing it to lose its vibrancy and effectiveness over time. It is recommended to keep the dye in a sealed container or bottle to prevent air exposure.
Furthermore, it is crucial to keep your liquid dye away from any moisture or water sources. Water can cause the dye to clump or separate, rendering it unusable for future candle making projects. To avoid this issue, make sure that the storage area is free from any leaks or dampness.
Maximizing Shelf-life and Preventing Degradation
To maximize the shelf-life of your candle making liquid dye and prevent degradation, there are a few additional measures you can take. One important tip is to avoid exposing the dye to extreme temperature changes. Fluctuations in temperature can cause chemical reactions within the dye that may alter its color properties or even render it ineffective.
Another useful tip is to minimize excessive air exposure when working with your liquid dye. This can be achieved by keeping the bottle tightly sealed when not in use and minimizing the amount of time the dye spends outside of its container during the candle making process.
Lastly, always check the expiration date of your liquid dye before using it. Most dyes have a recommended period for optimal performance, so using expired products may not give you desired results. By following these storage techniques and maintaining proper handling procedures, you can extend the lifespan of your candle making liquid dyes and continue creating beautiful candles for years to come.
Suggestions on Storage Containers
Choosing the right storage containers for your candle making liquid dyes is crucial in preserving their quality. It is recommended to use containers that are made of materials compatible with the dye, such as high-density polyethylene (HDPE) or glass. These materials are known to be resistant to chemical reactions and do not leach harmful substances into the dye.
If you prefer using glass containers, make sure they are dark or opaque to prevent light exposure. For HDPE containers, opt for ones with lids that provide a tight seal to limit air exposure. Additionally, it is a good practice to label your storage containers with the name and expiration date of each liquid dye for easy identification and tracking.
By properly storing and preserving your candle making liquid dyes, you can ensure consistent and vibrant colors in your candle creations. Taking these precautions will not only help you achieve the desired results but also save you money in the long run by prolonging the lifespan of your liquid dyes.
Recommended Candle Making Liquid Dye Brands and Products
When it comes to choosing the right liquid dye for your candle making projects, it is crucial to select a brand that offers high-quality products with a wide range of colors. To help you in your search, we have compiled a list of recommended candle making liquid dye brands and products that are popular among candle makers.
One top-rated brand in the market is XYZ Liquid Dyes. They offer a comprehensive selection of vibrant colors that are highly concentrated, ensuring that you achieve intense and long-lasting hues in your candles. The XYZ Liquid Dyes are known for their easy incorporation into different types of wax, whether it be soy, paraffin, or beeswax. Additionally, these liquid dyes come in convenient dropper bottles, allowing for precise measurements and easy dispensing.
Another trusted brand is ABC Candle Supplies. Their liquid dyes are renowned for their outstanding color range, offering both primary and secondary colors as well as metallic shades. The ABC Candle Supplies dyes are oil-based, which means they effortlessly blend with various waxes without affecting the overall quality and performance of the candles. With their superior pigmentation, these liquid dyes can be used sparingly to achieve rich coloration.
For those searching for water-based liquid dyes, DEF Artisan Dyes may be the perfect choice. These dyes are specifically formulated to dissolve easily in water-based waxes such as gel wax and palm wax. The DEF Artisan Dyes boast an impressive assortment of vivid colors that remain true and consistent when mixed with compatible waxes. Moreover, these water-based dyes are non-toxic and eco-friendly.
When selecting any specific product or brand of candle making liquid dye from this list or elsewhere on the market, it is essential to match your needs and preferences with the features offered by each brand. Consider factors such as ease of use, compatibility with different types of wax, color range, and value for money. By choosing a trusted brand that meets your requirements, you can be confident in achieving the desired results in your candle-making endeavors.
Conclusion
In conclusion, candle making liquid dye is a powerful tool that allows candle makers to unleash their creativity and personalize their creations. Throughout this article, we have explored the art and science behind liquid dye, the different types available in the market, how to use it effectively, color mixing and blending techniques, troubleshooting common issues, safety measures, unique effects and experiments, tips for storing and preserving liquid dye, as well as recommended brands and products.
Liquid dye offers numerous advantages over other forms of coloring agents in candle making. Its ability to blend seamlessly with wax ensures vibrant and consistent color results. Additionally, liquid dye provides greater control over the intensity of color by allowing precise measurements. Whether you want to create bold and vibrant candles or achieve subtle pastel shades, liquid dye is essential for achieving your desired results.
It is important to remember that experimentation is key when working with candle making liquid dye. By incorporating various techniques such as ombre, marbling, or layered effects, you can create visually appealing and artistic candles that are sure to impress. Don’t be afraid to mix different colors and explore your creativity – the possibilities are endless.
In conclusion, liquid dye opens up a world of possibilities for candle makers. It allows us to add our personal touch to our creations and elevates them from ordinary candles to unique works of art. So go ahead, embrace your creative side and let candle making liquid dye inspire you to craft beautiful candles that reflect your individuality.

Welcome to my candle making blog! In this blog, I will be sharing my tips and tricks for making candles. I will also be sharing some of my favorite recipes.

