Introduction
Candle making with metal molds is a creative and enjoyable crafting activity that can be done either for your own personal enjoyment or to make gifts for friends and family. Working with these molds provides you the opportunity of having complete control over what kind of shape, colour, scent, and even embellishments that you want your candles to have!
Benefits: Metal molds offer some unique advantages compared to other methods of candle making; they allow for more intricate details than plastic molds due to the way the wax shrinks when it’s melted. This means you can create beautiful complex designs without having to add a lot of extra steps during the creation process. Metal molds also produce candles that burn at an even rate; this helps them last longer and ensures no dipping or guttering in your wax.
Secrets: One important thing to remember with metal molds is that they tend to get very hot while being used, much hotter than plastic molds. To ensure a safe environment (and protect your hands!), use oven gloves while dealing with hot metal molds or always use tongs when handling them. Additionally, after pouring the hot wax into the mold it can take up to 4-6 hours for it to fully set so patience is key!
Tips: Make sure not to overcrowd the metal mold with additional additives such as glitter or dye; adding too much will cause difficulty removing your finished candle from the mold later on. And if you’re using liquid colorants instead of dyes consider using one drop less than what is usually advised as liquid colourants are usually more concentrated and can discolor your end result. With these tips in mind go out there and enjoy playing around with metal molds for your next creative candle making project!
What Types of Metal Candle Molds are Available?
Candle making metal molds come in a range of shapes, sizes, and styles. Many different metals are used to make them, including aluminum, brass, copper, tin plated steel, stainless steel and nickel. Molds can be of one piece or two pieces depending on the effect desired; they may also have handles that allow for easy removal. Common shapes include round, oval, star and heart shaped. For larger candles, cylinders or blocks are a popular option. Smaller molds may be designed for votive candles as well as rustic-style mason jars and decorative tumblers that can hold pillar candles. Metal molds give you plenty of options for creating unique candle designs with impressive results!
The Science Behind Metal Candle Making
When making candles with metal molds, the science behind it is important to understand. It all starts with melting the wax at a controlled temperature. This allows for a precise mix of all the ingredients in order to get the desired end product. To create different shapes and sizes, these molds come in a variety of styles. Once the candle has been made, it must be allowed to cool so that the wax will retain its shape after being removed from the mold. Care must be taken when doing this to ensure that no air bubbles or other imperfections are present.
The second part of creating beautiful candles is adding scents or colors to customize each candle creation. In terms of fragrances and colors, these can range from floral notes like lavender or jasmine, to more earthy tones such as sandalwood or cedarwood. Fragrances can also be chosen based on an individual’s favorite smell or simply something that could evoke a certain emotion for those around it when lit. For colors, one can opt for either solid dyes or color chips which will melt when heated up within the mix of melted wax material and provide a colorful touch to each candle creation! With regards to customization, such options allow for infinite possibilities depending on what look one wants to go for in their candles! Last but not least, metal molds provide an easy way for wax pouring since some molds come with spouts at their bottom which help with smooth pouring and even distribution within the cavities of each mold chosen.
What Gives Metal Candle Molds Their High Quality?
Metal candle molds have established a reputation as one of the best materials for making candles. The qualities that make them such a desirable choice are their durability, fire-resistance, and temperature resistance. Metal candle molds can withstand the high temperatures generated from wax melting without any damage and last significantly longer than those made from other materials such as plastic or silicone. This makes them much more cost effective in the long run as they will not need to be replaced as frequently. In addition, metal molds tend to release both wax and finished candles with greater ease, meaning fewer mistakes and an even smoother finish for your final product. Furthermore, metal molds provide great stability when pouring melted wax due to their weight; this helps prevent spills or accidents from occurring during the process. Finally, these molds come in many different shapes and sizes so you can find exactly what you need with plenty of room to explore new ideas and expand on existing designs.
Benefits of Using Metal Candle Molds Versus Other Materials
Using metal candle molds for making candles has a variety of benefits. Metal molds are some of the most durable and reliable materials to use for candle-making, lasting longer than other types. They also retain their shape when used properly and can be stored easily without any damage. Additionally, metal molds stay cool during pouring which standardizes the temperature each time. This makes it easier to create consistent and even candles without interruption from different temperatures causing inconsistencies in shape and color. Moreover, metal holds its shape much better than plastic which allows for more intricate designs using thin walls inside the mold. Overall, these advantages make metal molds a great choice for making perfect candles every time with less effort.
Unique Shapes & Sizes of Metal Molds
Candle making metal molds come in a variety of unique shapes and sizes. Whether making container candles, beeswax or poured candles, these high quality molds will make sure that your finished product is nothing less than spectacular! Metal molds can be used with almost any type of wax, including paraffin, soy, and beeswax, allowing you to experiment with different kinds of wax according to your preferences. The unique shapes of the metal molds ” ranging from simple rectangular blocks all the way up to intricate floral designs ” will provide endless possibilities for candle creation. Moreover, due to their durability and non-flammability, metal molds are a great tool for both novice and experienced candle makers alike. They are also reusable a number of times, so you won’t have to buy new molds for each new project. With metal molds you can really let your imagination run wild and create stunning artistic creations that would otherwise be nearly impossible without them!
Selecting the Right Wax for Your Metal Molds
When you are designing and producing candles using metal molds, it’s important to select the right wax for your needs. Different types of wax can produce different degrees of hardness or softness, as well as resists melting at different temperatures. Paraffin wax is a popular choice among candle makers and is often used when making candles in metal molds because it generally has a higher melting point than other types of wax. However, some people may prefer to use other types of wax such as soy or beeswax because they are either more natural or woven with richer colorings and scents. When selecting the right type of wax for your metal molds, it’s important to consider how you will be using the candle (i.e., indoors or outdoors) and what temperatures the candle will be exposed to, since this can influence which kinds of wax hold up best. Additionally, feel free to experiment with different types of waxes to see their effects on your finished product – having several samples on hand can lead to interesting results!
How to Prepare the Metal Mold for Candle Making
To prepare a metal mold for making candles, you will need some materials to begin with. These materials include: the metal mold itself, a double boiler or electric melting pot, low-viscosity candle wax, thermometer, and a pouring container. Start by measuring out enough wax for your project and add it to your melting pot. heat over low heat until melted (usually about 160 F). Once your wax has melted, insert the thermometer into the wax to check its temperature and make sure it is over 150 F but below 170 F. Once the correct temperature is reached, pour the wax slowly into your prepared metal mold using a pouring container. Gently place your metal mold on a level surface to allow any air bubbles in the wax to disperse naturally. Allow the candle to cool completely before unmolding it so that it doesn’t warp or crack while cooling. If desired, you can use remove any excess wick by gently pressing it away from the sides of your molds. Finally, carefully remove your candle from its metal mold upon cooling and enjoy!
How to Pour & Set the Wax
Candle making metal molds are one of the most popular materials to use when pouring your own wax candles. To ensure the best results, it is important to follow a few simple steps when pouring wax inside the mold.
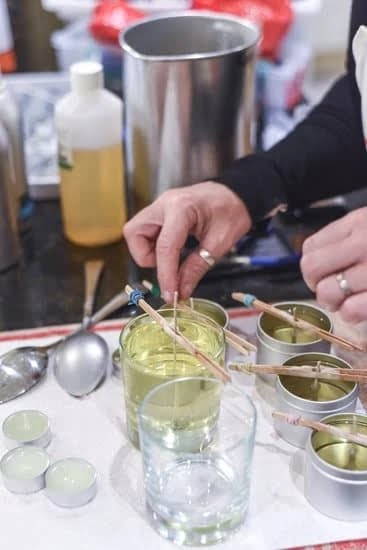
First and foremost, make sure the wick lanyard for the candle is properly secured in place before you begin. This will prevent any shifting of the wick once you pour in your wax mixture. Next, carefully measure out your desired amount of wax and prepare it according to the instructions on your wax container. Depending on whether you are using paraffin, soy or beeswax, it may require melting or a special combination of different waxes, fragrances and other additives for best results. If you are heating up your wax mixture, be sure to do so in an area that is away from any flammable material or other unsafe areas of concern.
After preparing the mixture and ensuring it’s at an optimum working temperature, you can pour it into the metal mad using a ladle or other appropriate utensil. Carefully fill each section of the mold until all cavities are full then allow time for your candles to cool and settle completely before removing them from their molds. You may also want to use a thermometer while pouring candle wax into metal molds as this can help ensure that its heat does not exceed temperatures beyond what is safe for candle making applications-which should not exceed 180 degrees Fahrenheit (or 82 degrees Celsius). Additionally, if any bubbles arise during your cooling process, let them dissipate before removing from their molds as this will create a smoother looking finished product later on down the line after adding stains or fragrances.
How to Cool & Remove the Finished Candle from the Mold
After pouring your hot wax into the metal mold, allow for at least one hour for the wax to cool and set properly. To remove the finished candle from the mold, start by lightly tapping its sides which should loosen the wax around its edges. If necessary, make use of a flat object such as a butter knife or a screwdriver to separate or release parts of the candle from its mold.
Then, place your hands on either side of the cooled and solidified candle while gently unsnapping both halves as you pull them apart. If there’s any difficulty in removing it, run some cold water over your mold too before attempting to remove it again. Lastly, clean off any wax particles that were left behind in between cracks before making use of the same candle-making metal molds once more.
Care & Maintenance Tips for Your Metal Molds
Candle making metal molds offer candle makers the opportunity to be creative and produce candles with beautiful shapes and intricate designs. However, proper care and maintenance of your molds is essential for the longevity of the product. Here are some tips to help you keep your metal molds in top condition:
• Store molds away from direct sunlight or extreme temperatures. Sunlight and high temperatures can cause the metal to warp or crack. Similarly, avoid humid environments as this can also cause warping or rusting of the metal over time.
• Wash your molds regularly using a soft cloth soaked in warm soapy water, rinse off with clean water and ensure that all soap has been removed before use. Then dry with a soft cloth for best results.
• Try not to use strong detergents on metal molds as they may damage the integrity of the product and impact performance.
• If wax gets stuck inside the mold cavities, let them cool completely before wiping any remaining residue away gently with paper towels or kitchen roll. Do not scrape or use abrasive materials as this may damage them.
• Avoid exposing metal molds to harsh chemicals such as bleach which can corrode metal over time.
• Metal molds should also be regularly oiled with food-grade lubricant like vegetable oil or petroleum jelly as these help keep your metal products supple, minimise corrosion and extend their life expectancy significantly.
Crafting Professional Candle Molds for a Professional Look
Candle making metal molds offer a professional look for those who want to make candles at home. They are usually made of lead-free alloys, such as aluminum or tin, and come in a variety of shapes and sizes. Metal molds provide an even temperature distribution throughout the entire length of a candle, which results in high-quality finished products. Additionally, they are strong and durable so they can be used more than once with minimal wear and tear. With metal molds, users have greater control over the shape and size of the candles that they create ” from distinctive holiday shapes to teardrop votives. Furthermore, the clean lines created by metal candle molds minimizes wax seeping into surfaces during candle production. Specialty finishes like polishing or plating can also be applied for a truly custom look. Lastly, candle making metal molds is generally the most cost-effective option due to their ability to be reused many times.
Cost-Saving Alternatives to Investing in Metal Molds
Candle making metal molds are a cost-effective way to produce custom designed candles for business purposes. Investing in candle making molds can be expensive, but there are some cost-saving alternatives to consider. One option is to purchase pre made plastic molds, which come in a variety of shapes and sizes and can often be found at craft stores or online retailers. These molds can be more economically friendly than metal ones, but they may require additional work on your part as they don’t come with the same level of detail that metal molds provide. Another option is to use materials you already have around the house such as wax paper, aluminum foil, or cardboard. Wax paper can be cut into any shape desired and then dipped into melted wax to create intricate shapes and patterns. Aluminum foil and cardboard can also produce unique designs, though neither of these materials will last more than one usage due to their low durability levels. Ultimately, investing in metal molds may be necessary for high volume concentrated production; however, there are alternatives that can help save money without sacrificing quality.
Conclusion
Making candles with metal molds is a popular and creative craft that can be enjoyed by both beginners and experienced crafters. For those who are fairly new to candle making, metal molds provide quality results with convenience and ease of use. Experienced crafters have the opportunity to design unique candles using their own creativity combined with the convenience of metal molds. Metal molds are also very durable and can withstand high temperatures, allowing intricate designs and elaborate shapes possible. The creativity combined with the quality of products achieved using metal molds is unmatched in any other type of candle making process. Metal mold candle making is a great way to bring life to your space no matter what level you’re starting at. With just a few materials, some inspiration, and a bit of patience anyone can create quality candles suitable for every occasion!

Welcome to my candle making blog! In this blog, I will be sharing my tips and tricks for making candles. I will also be sharing some of my favorite recipes.


