Answered
Candle making is a centuries old art form that is still popular today. There are many different ways to make candles, and many different types of candles. The most important part of making candles is to use the right ingredients and to follow the proper steps.
The first step in making candles is to gather the ingredients. The most important ingredient in candles is wax. There are many different types of waxes that can be used in candles, but the most common type is paraffin wax. The next most important ingredient is the wick. The wick is the part of the candle that burns, so it is important to choose the right wick for the type of candle you are making. The other ingredients in candles depend on the type of candle you are making.
The next step in making candles is to melt the wax. The best way to do this is to use a double boiler. The wax should be melted until it is just melted, and it should not be overheated. overheating the wax can cause it to become brittle and to break apart.
The next step is to add the scent to the wax. There are many different types of scents that can be used in candles, and the type of scent depends on the type of candle you are making. Some scents are better for certain types of candles than others.
The next step is to add the dye to the wax. The type of dye that is used depends on the type of candle you are making. Some dyes are better for certain types of candles than others.
The next step is to add the wick to the wax. The wick should be centered in the wax and it should be straight. If the wick is not straight, it will not burn properly.
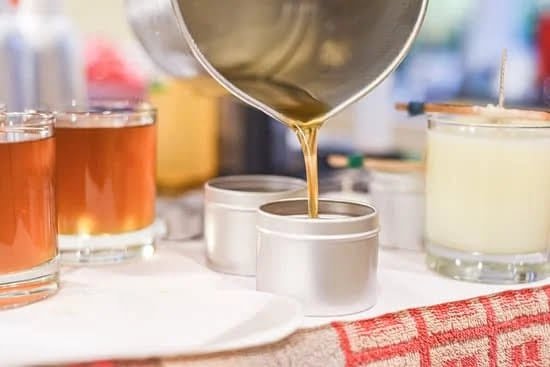
The next step is to pour the wax into the mold. The mold should be at the right temperature so that the wax will not harden too quickly. If the wax hardens too quickly, it will be difficult to get the wax out of the mold.
The next step is to let the wax cool. The wax should be allowed to cool completely before removing it from the mold. If the wax is not allowed to cool completely, it may break apart when it is removed from the mold.
The final step in making candles is to trim the wick. The wick should be trimmed to about 1/4 inch. If the wick is too long, it will not burn properly.
Now that you know how to make candles, you can try making your own candles at home.
What Is The Best Wax To Use In Candle Making
?
The type of wax you use in your candles is important – it affects the burning time, the scent throw, and the appearance of your candles. Different types of waxes also have different melting points, so you need to choose the right wax for the type of candle you want to make.
The most popular type of wax for candle making is paraffin wax. It has a high melting point, so it’s good for making candles that will be burned for a long time. It also has a good scent throw, and it produces a bright, clear flame.
If you’re making candles that you want to scent with essential oils, you should use a beeswax/paraffin blend. Beeswax has a low melting point, so it’s good for making candles that will be burned for a short time. It also has a strong scent throw, and it produces a warm, yellow flame.
If you’re making candles that you want to decorate with color, you should use a soy wax. Soy wax has a low melting point, so it’s easy to work with. It also produces a creamy, opaque candle.
Making Silicon Candle Molds
Candles have been around for centuries, and their popularity is only increasing. People use candles for many reasons: to create a relaxing or romantic atmosphere, to provide light, to scent a room, or to celebrate a special occasion.
There are many different types of candles, but the most popular by far are soy and beeswax candles. Soy candles are made from soybean oil, and beeswax candles are made from beeswax. Both types of candles are natural, burn cleanly, and last a long time.
If you want to make your own soy or beeswax candles, you’ll need to make silicon candle molds. Silicon is a non-toxic, heat-resistant material that is perfect for making candle molds. You can find silicon at most hardware stores.
To make a silicon candle mold, you’ll need:
– Silicon
– A mold form (such as a cup, bowl, or cake pan)
– A heat gun (or a stove)
– Candle wax
– A wick
1. Begin by spraying the inside of your mold form with a light coating of silicon.
2. Melt your candle wax in a pot or double boiler.
3. Cut your wick to the desired length.
4. Dip the wick in the melted wax, making sure to saturate it completely.
5. Suspend the wick in the center of the mold form.
6. Pour the melted wax into the mold form, being careful not to get the wick wet.
7. Allow the wax to cool and harden.
8. Remove the candle from the mold form.
Congratulations! You have just made your own soy or beeswax candle!
Candle-Making Sutter Fort
Candle-making was a popular activity at Sutter Fort. The process was started by melting tallow or beeswax in a pot over a fire. The molten wax was then poured into a mold, which could be made of anything from a tin can to a specially carved wooden mold. After the wax had cooled and hardened, the candle was removed from the mold and trimmed to the desired length.
The wick was then attached to the candle. The best way to do this was to soak the wick in a pot of hot wax, then press it into the top of the candle. Finally, the candle was ready to be lit.
Candles were used for a variety of purposes at Sutter Fort. They provided light in the evenings and early mornings, and they were also used to heat food and to keep people warm on cold winter nights.
Pitcher For Candle Making
When you’re looking for the perfect candle, sometimes the standard candles just don’t cut it. You want something with a little more personality, something that really shows off your unique style. Well, why not try making your own candles? It’s a fun and easy process, and with the right supplies, you can create candles that are perfect for any occasion.
One of the most important supplies for candle making is the pitcher. This is the container that you’ll use to melt the wax and pour it into the mold. It’s important to choose a pitcher that is made from a heat-resistant material, such as glass or ceramic. You don’t want the pitcher to melt or warp when you’re heating up the wax.
Another important consideration is the size of the pitcher. You’ll want to choose a pitcher that is big enough to hold the amount of wax that you need. If you’re making a large candle, you’ll need a pitcher that is at least 1 quart in size. If you’re making a smaller candle, you can use a smaller pitcher.
When you’re shopping for a pitcher for candle making, be sure to look for one that has a wide mouth. This will make it easier to pour the wax into the mold. The pitcher should also have a spout so that you can easily control the flow of the wax.
If you’re looking for a quality pitcher for candle making, be sure to check out the selection from Candlewic. They offer a variety of pitchers made from heat-resistant materials, and they come in a variety of sizes to suit your needs.

Welcome to my candle making blog! In this blog, I will be sharing my tips and tricks for making candles. I will also be sharing some of my favorite recipes.


