Are you a beginner interested in exploring the art of candle making step by step at home? Whether you want to create custom candles for personal use or as gifts for loved ones, this beginner’s guide will walk you through the process. From essential materials and tools to safety precautions and storage, this article will cover everything you need to know to successfully create your own homemade candles.
Candle making can be a rewarding and enjoyable hobby, allowing you to unleash your creativity while producing beautiful and useful items. With just a few key materials and some basic knowledge, you can begin crafting your own unique candles from the comfort of your home.
In this guide, we will take you through the step-by-step process of creating handcrafted candles, from choosing the right wax to adding scent and color, all the way to decorating and packaging your finished products.
Whether you’re looking to make simple unscented candles or experiment with complex designs and fragrances, this guide will provide you with the fundamental knowledge needed to get started. Get ready to dive into the world of candle making as we explore the essential materials and tools, selecting the right wax for your candles, adding fragrance and color, as well as safety precautions and storage for your handmade creations.
Essential Materials and Tools for Candle Making
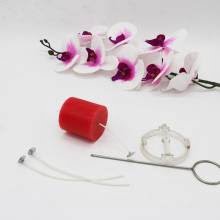
When it comes to candle making step by step at home, having the right materials and tools is essential to ensure your candles turn out beautifully. Here are the essential items you will need:
- Double boiler or a large heatproof container and a saucepan
- Candle wax (soy, paraffin, beeswax, or a blend)
- Fragrance oil or essential oil for scent
- Candle dye or crayons for color
- Candle wicks
- Heat-resistant containers or molds
- Thermometer
- Stirring utensil (such as a wooden stick or spoon)
- Wick holder or chopsticks/tape to hold the wick in place
It’s important to invest in good quality materials to ensure that your candles burn evenly and safely. Additionally, having the right tools on hand will make the candle making process much smoother.
Choosing the Right Wax for Your Candle
The type of wax you choose for your homemade candles will greatly affect their appearance, burn time, and fragrance throw. Here are some popular options to consider:
- Soy wax: Known for its clean-burning properties and ability to hold scent well.
- Paraffin wax: Provides a strong scent throw and has a smooth and shiny appearance.
- Beeswax: A natural option with a subtle honey-like aroma and a beautiful golden color.
Each type of wax has its own unique qualities, so it’s essential to consider your preferences and needs when choosing the right wax for your candle making project. Remember that experimenting with different types of wax can also be part of the fun in candle making.
Choosing the Right Wax for Your Candle
When it comes to making candles at home, one of the most important decisions you will make is choosing the right wax for your project. The type of wax you choose will affect the burn time, scent throw, and overall quality of your candle. There are several types of waxes commonly used in candle making, each with its own unique characteristics.
Here are some popular options for candle making wax:
- Paraffin Wax: This is one of the most commonly used waxes for candle making. It is known for its excellent scent throw and vibrant colors. Paraffin wax also has a smooth and glossy finish.
- Soy Wax: For those looking for a natural option, soy wax is a great choice. It’s derived from soybean oil and produces a clean burn with little soot. Soy wax also has a slower burn time compared to paraffin wax.
- Beeswax: Another natural option, beeswax has a sweet and natural honey scent. It has a high melting point and provides a long-lasting burn.
Before deciding on the type of wax to use, consider factors such as your desired fragrance throw, color preferences, and burning characteristics. Keep in mind that different waxes require different pouring temperatures and handling methods when making candles at home.
Ultimately, the right choice of wax will depend on your personal preferences as well as the specific requirements of your candle making project. Experimenting with different types of waxes can be an exciting part of the candle making process, allowing you to create unique and personalized candles that suit your individual style.
Adding Scent and Color to Your Candles
Now that you have gathered all the essential materials and tools for candle making, it’s time to add some flair to your homemade candles by incorporating scent and color. Adding fragrance to your candles not only enhances the overall experience but also allows you to customize the aroma to your preference. Similarly, choosing the right colors can make your candles visually appealing and complement any decor or occasion.
When it comes to adding fragrance, there are various options available, including essential oils, fragrance oils, and botanicals. Essential oils are natural plant extracts known for their therapeutic properties and come in a wide range of scents such as lavender, citrus, and eucalyptus.
On the other hand, fragrance oils are synthetic but offer a broader selection of scents like vanilla, cinnamon, and ocean breeze. Botanicals like dried flowers or herbs can also be added for a decorative touch as well as a subtle natural fragrance.
In terms of adding color to your candles, there is a multitude of options such as dye chips, color blocks, liquid dyes, and even natural alternatives like spices or herbs. Dye chips and color blocks are specifically formulated for candle making and offer vibrant hues that blend seamlessly with the wax.
Liquid dyes provide more precision in achieving custom shades while natural alternatives can produce unique earthy tones. It’s important to experiment with different combinations to achieve the desired scent and color intensity for your candles.
Step by Step Guide to Candle Making
When it comes to candle making step by step at home, one of the most important aspects is preparing the workspace. Before you start any candle making project, it’s essential to set up a clean and organized area where you can work safely and efficiently.
First, choose a well-ventilated and heat-resistant area for your candle making workspace. This can be a kitchen with good airflow or a dedicated crafting space with ample room to move around. It’s also advisable to cover your workspace with old newspapers or a plastic tablecloth to protect it from any potential spills or drips.
Next, gather all the necessary materials and tools needed for your candle making project. This includes your chosen wax, fragrance oils, colorants, a double boiler or melting pot, thermometer, pouring pitcher, wicks, and containers for your candles. Having everything within reach will help streamline the candle making process and make it easier to create beautiful homemade candles.
Lastly, ensure that your workspace is free from any clutter or obstacles that could pose a safety hazard during the candle making process. Remove anything flammable from the area and keep a fire extinguisher nearby as an added precaution. By taking the time to properly prepare your workspace before diving into candle making step by step at home, you’ll set yourself up for a successful and enjoyable crafting experience.
Step by Step Guide to Candle Making
Melting the Wax
Once all necessary supplies are gathered and the workspace is properly prepared, it’s time to start melting the wax. The type of wax you have chosen will dictate the method for melting. For most types of candle wax, a double boiler setup works best to prevent scorching or overheating. Simply place the wax in the top pot or bowl of the double boiler and heat over medium heat until fully melted.
Adding Fragrance
After the wax has completely melted, it’s time to add fragrance if desired. There are various options for adding scent to your candles, including essential oils, fragrance oils, or even dried herbs. For every pound of wax, it is recommended to add around one ounce of fragrance oil. However, this can be adjusted based on personal preference and the strength of the fragrance oil being used.
Tips for Adding Fragrance
One important tip when adding fragrance oil to your melted wax is to do so at the right temperature. Most fragrance oils should be added when the wax is between 150-180 degrees Fahrenheit. This allows for better integration of the scent into the wax and prevents it from evaporating too quickly. It’s also essential to stir gently but thoroughly to ensure an even distribution of fragrance throughout the candle.
By following these steps for melting wax and adding fragrance, you’ll be well on your way to creating beautifully scented candles that are perfect for gifting or enjoying in your own home. Experiment with different scents and combinations to find what works best for you and enjoy this creative and rewarding process of candle making step by step at home.
Step by Step Guide to Candle Making
Pouring the Melted Wax
Once the wax has been melted and mixed with your preferred fragrance and color, it is time to carefully pour it into the prepared containers. Be mindful of the temperature of the wax as you pour, as pouring wax that is too hot can cause the container to crack. If you are using multiple small containers, make sure to pour an equal amount of wax into each one to ensure uniform candles.
Setting the Wick
Before the wax completely solidifies, it’s important to place the wick in the center of the candle. You can do this by gently holding the wick in place while the wax cools and hardens around it. Alternatively, you can use a wick holder or chopsticks to keep the wick in place while the candle sets. It’s crucial to make sure that the wick is straight and centered so that your candle burns evenly when lit.
Cooling and Final Touches
After pouring the wax and setting the wick, allow your candles to cool and harden for at least 24 hours before lighting them. This will ensure that they fully solidify and set properly. Once cooled, trim the wick to about half an inch above the surface of the candle for optimal burning.
You can also get creative with decorative touches such as ribbons or labels before packaging your homemade candles for personal use or gifting. Always remember to follow safety precautions when handling hot wax and never leave a burning candle unattended. With these steps, you now have beautiful homemade candles ready to light up any space with warmth and fragrance.
Tips and Tricks for Decorating and Packaging Your Homemade Candles
Once you have successfully made your own candles at home using the candle making step by step at home guide, it’s time to add those extra special touches that will make your homemade creations stand out. Decorating and packaging your candles can be a fun and creative process that allows you to personalize each one to your liking. There are several tips and tricks that can help you elevate the presentation of your homemade candles.
One simple way to decorate your homemade candles is by adding embellishments directly onto the surface of the candle. This could include dried flowers, herbs, or even glitter for a touch of sparkle. Be sure to use non-flammable materials and adhere them securely to the candle with glue designed for candle making. Additionally, consider experimenting with different techniques such as layering colored waxes or creating marbled effects for a unique and eye-catching look.
When it comes to packaging your handmade candles, there are countless options available to suit your personal style and preferences. Consider using glass jars, tin containers, or even vintage tea cups as holders for your candles.
To add a professional touch, create custom labels with the name of the scent or design of the candle, along with any safety information that should be included. Adding ribbons, twine, or decorative paper can also enhance the overall presentation of your homemade candles when giving them as gifts or selling them.
Finally, consider creating a personalized experience for recipients by including a handwritten note or instructions for best practices when burning the candle. This small gesture can make your homemade candles feel even more special and thoughtfully crafted. By incorporating these tips and tricks into the decorating and packaging process, you can take pride in presenting beautifully finished products that showcase your creativity and attention to detail in every aspect of candle making at home.
Safety Precautions and Storage of Your Handmade Candles
In conclusion, making candles at home can be a fun and rewarding experience for beginners. By following the step by step guide to candle making and using the essential materials and tools, anyone can create their own handmade candles with unique scents and colors. With the right knowledge of choosing the right wax, adding scent and color, as well as safety precautions, candle making at home can become a delightful hobby.
When it comes to safety precautions and storage of your handmade candles, it is crucial to always keep in mind that hot wax can be dangerous if not handled properly. It is important to work in a well-ventilated area, use protective gear such as gloves and aprons, and keep a fire extinguisher nearby just in case. Additionally, when storing your finished candles, make sure to keep them away from direct sunlight and heat sources to prevent melting or discoloration.
Ultimately, with the right materials, tools, and knowledge of candle making step by step at home, anyone can create beautiful homemade candles for personal use or even for gifting purposes. Whether it’s adding decorative elements or packaging them creatively, there are endless opportunities to explore in the world of candle making. So gather your supplies and start crafting your own custom-made candles today.
Frequently Asked Questions
What Do I Need to Start Candle Making?
To start candle making, you will need wax, a wick, a heat source for melting the wax (like a double boiler or microwave), fragrance or essential oils (optional), dye (optional), containers for the candles, and a thermometer to monitor the temperature of the wax.
How Do You Make a Candle in 5 Steps?
Making a candle in 5 steps involves first melting the wax, then adding fragrance and dye if desired. Next, you need to prepare your container with the wick and pour in the melted wax. Finally, let the candle cool and trim the wick before lighting.
What Are the Best Ingredients for Homemade Candles?
The best ingredients for homemade candles include natural soy wax, beeswax, or paraffin wax as a base. For fragrance, essential oils are commonly used while for coloring, natural dyes or colored pigments specifically made for candles work well. High-quality wicks designed for specific types of wax are also important for successful homemade candles.

Welcome to my candle making blog! In this blog, I will be sharing my tips and tricks for making candles. I will also be sharing some of my favorite recipes.


