Introduction
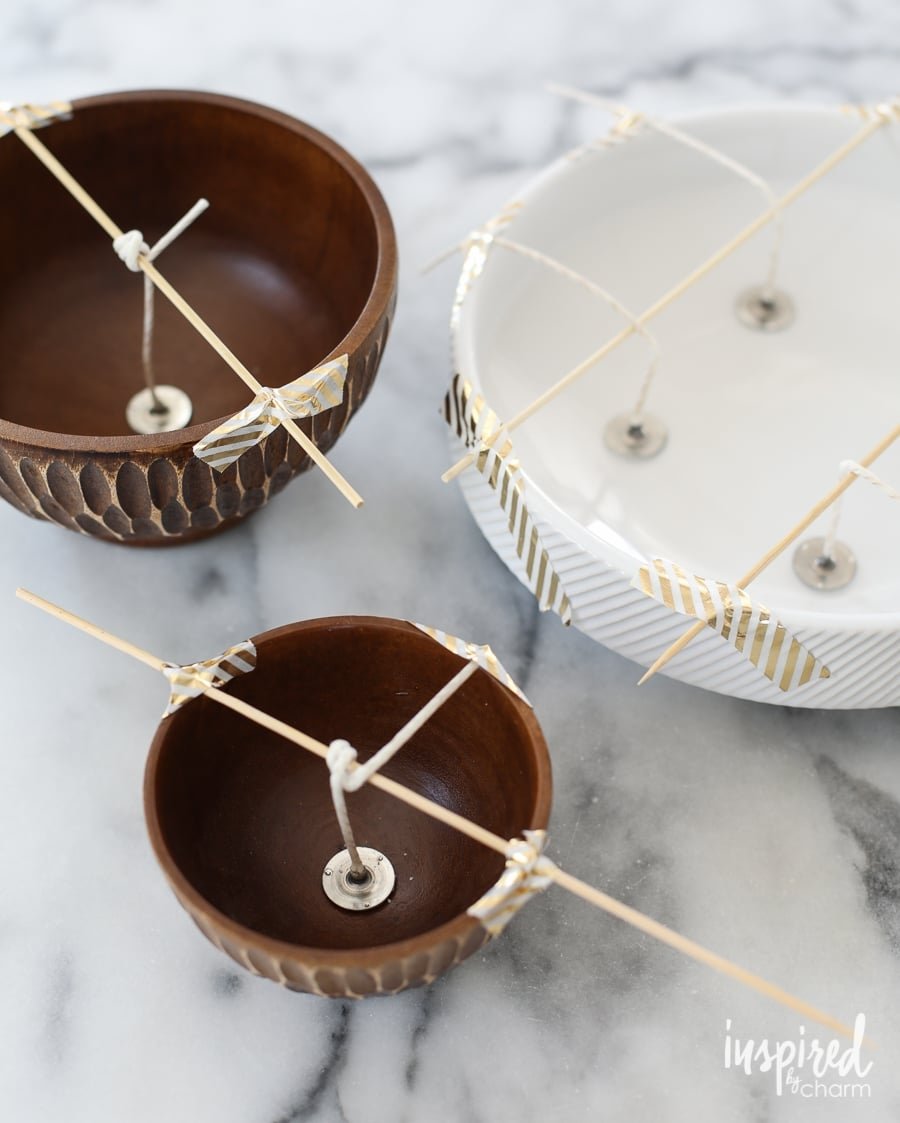
Candle wick making is an important part of the candle-making process and can make a huge difference in the outcome of your candles. The wick is responsible for drawing up the liquid wax from the container and turning it into a burning flame which gives off beautiful light and smells. It is therefore essential that the type of wick used is suited to your specific requirements. For instance, some candles (such as beeswax or soy) require a larger diameter wick for it to correctly support the burning fuel and not create excess soot around them. In contrast, many paraffin based candles require a thinner type of wick to properly burn without creating large pools of molten wax around them. Additionally, different fragrances may need higher or lower heat ratings on their wicks to prevent the scent from being burned away while still providing enough heat for an even burn time throughout. Finally, by properly arranging each strand of your wick tab prior to pouring in your wax you can ensure that your candles will always have centered burns with no pooling or tunneling that can often occur when made incorrectly. With all this in mind, we hope this guide will help you make beautiful and professionally finished candles every time!
Gather the Materials
Materials: Long wooden wick spool, cotton wicks, one-pound beeswax, kitchen pot, thermometer, scissors
Tools: Measuring cup, spoon or stir stick
Equipment: Hot plate or small single burner stovetop
Preparing the Wick
There are a few pre-made wick options for candle makers who do not wish to make their own. These include pre-tabbed and treated cotton cord, premade doublerock or paper core wicks with both the cotton and the wax already attached. All of these premade wicks need to be waxed before use, as they have only been partially treated during the manufacturing process.
For anyone wanting to make their own wick, there is also a wide variety of materials available, including cotton threads, cords or braids; heated beeswax; and container wicking (also known as ecosoya or Vybar). While thread can be used without adding any heat, other materials will require some preparation first.
To begin creating your own wick from scratch, you will first need to choose a length of cotton material that suits the size of your candle container. Once this has been chosen, it needs to be thoroughly soaked in hot water for about 10 minutes so that it can expand and become more durable. After soaking, hang the fiber in a warm spot to dry fully before beginning work on waxing it. Next, you’ll want to melt down any beeswax or paraffin wax you plan on using into a liquid consistency and prepare whatever kind of essential oils or coloring agents you wish to add. Once all is ready to go, proceed by dipping your dry material into the liquid mixture until completely saturated. Allow it enough time afterward in order for it to dry properly in the form you desire with at least 3 inches of excess tab above the actual candle container so that proper burning effectiveness can be achieved once lit.
Step-by-Step Instructions
Twisted Candles:
To make twisted candles, you will need some cotton string or rattail cord (which is available from most craft and hobby stores) as well as a lighter or matches. Begin by cutting a length of the cotton string or rattail cord to the desired length for your candle. It should be about two times the height of the candle container, plus an additional two to four inches. Tie one end of the cotton string or rattail cord onto a pen or pencil, and then secure it tightly with tape at either end. Twist the wick together until it forms a tight spiral shape. When finished twisting, light a match or a lighter and quickly pass it over the wick while turning it, which sets it so that when further heated during use, it will stay in its spiral shape instead of unraveling. Trim off any excess strands of wick before using.
Wick Burning Tips
Candle wick making instructions are fairly straightforward, but to ensure optimal performance and safety when burning your candles it’s best to follow some basic guidelines:
• Always trim the wick to ¼ inch before re-lighting each time. This helps prevent smoke and soot from accumulating.
• Place the candle in a draft free area, such as on a side table or similar surface that is not in direct sunlight. Direct sunlight will cause the candle’s wax to burn unevenly and produce an uneven flame.
• Keep the wick centered for even burning. If it moves away from center, you can gently center it with a tweezers or metal tongs before re-lighting.
• Never allow the flame to touch either glass container or metal encasing. Extinguish if this occurs and ensure a larger than necessary buffer of wax once relit so there is no risk of overheating.
• Candles should never be left unattended while they are burning and should always be placed on a heat resistant surface that isn’t flammable, like ceramic dinner plates or tiles in case there is a spill or overflow.
• Finally, make sure to keep combustible materials away from the candle at all times”such as curtains or paper”to avoid any open flames or potential fires!
Troubleshooting Common Problems
If you are having trouble getting your wick to burn properly, there are a few steps you can take. First, make sure the wick is not too long compared to the container in which it will be used. Too much wick length can cause air pockets that restrict oxygen flow and prevent proper burning. Secondly, create a bigger flame by adding more wax below the candlewick. This will help fuel a hot flame and ensure even combustion of the entire surface area of the wick. Last, reduce any buildup of residue on the top or sides of the candlewick as this will impede burning as well. To do this, carefully scrape off any residue with a knife or spatula and then snip off any end fibers at an even angle to create a clean-burning surface.
Candle Wick Care and Maintenance
Candle wicks are referred to as the ‘heart’ of the candle and looking after them properly is essential in order to get the best results. When a brand-new candle is lit, it can emit smoke and off-scent due to impure ingredients used in the wax or wick, which should be avoided all means possible. When burning candles, keep an eye on the flame at all times to make sure that it is stable and not getting too high. This will ensure that there is no risk of smoke or soot caused by uneven burning.
Before lighting your candle again, trimming your wick before each new use is essential for even burning. This will help with reducing smoke and ensure that the flame gets enough oxygen regardless of what type of candle you are using. Cutters specifically designed for trimming a wick are an ideal tool for this task since they precisely crop and reduce extreme length from metal cores on multi-wick candles. Make sure you always use caution when trimming your wick an never leave it unattended while lit.
Once you have finished burning a candle, store it in a cool location away from direct sunlight or any other source of heat since this might damage your wick making relighting difficult if not impossible. Furthermore, allowing extra space around other containers whilst storing candles avoids the risk of melting waxdrip staining fabric surfaces or leaving stubborn marks on furniture and shelves alike when being moved around unexpectedly!
Conclusion and Further Reading
Congratulations! You’ve now mastered the candle wick making process. You started off gathering all the necessary supplies – cotton yarn or string, scissors, a metal skewer or pencil and wax or paraffin. Then you cut the yarn to the desired length, thread one end of it through the metal skewer and loop it over itself to make sure that it stays in place. Finally, you dipped your wick in melted wax and held it for about two minutes before removing it and allowing it to cool.
Now that you have an understanding of how to make your own candle wicks, there are a few other topics related to candle making that may be helpful for you to explore: Candlemaking Safety Tips ” Learn proper safety protocols when working with hot wax; Soy Wax vs Paraffin Wax ” Learn more about differing formulations of wax and their best uses; Fragrances & Essential Oils ” Understand how certain ingredients can add fragrance and flavor to candles; Troubleshooting Common Issues ” Step-by-step guides on troubleshooting common homemade candle issues.

Welcome to my candle making blog! In this blog, I will be sharing my tips and tricks for making candles. I will also be sharing some of my favorite recipes.


