Introduction
Using color dye for candle making is a great way to introduce an element of personalization into your candles. Besides being able to choose the scent and fragrances, incorporating dyes provides another layer of creativity when it comes to candle making. Candlemaking allows you to showcase your artistic skills as well as allow you to craft unique gifts for friends and family. In addition, you can use these same dyes for crafting sand art candles as an alternative idea for decorating or crafting home decor items.
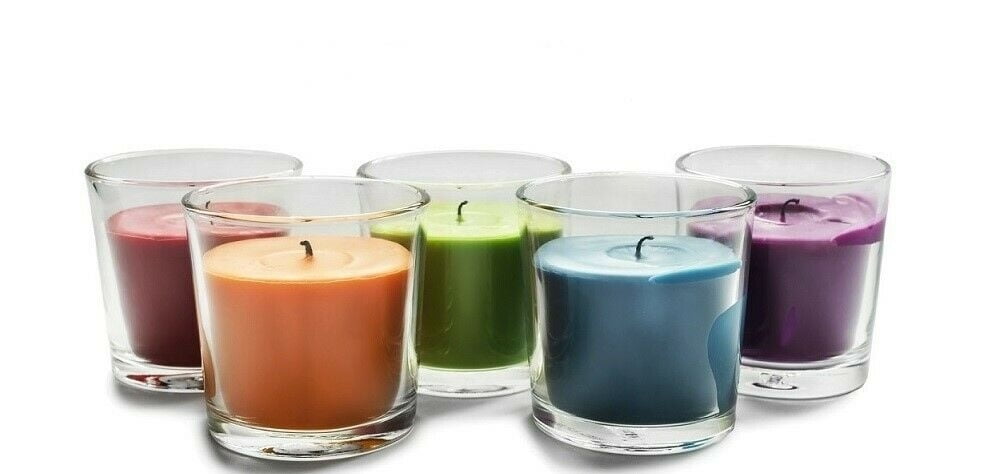
There are a number of benefits associated with using color dyes in candle making. First and foremost, it allows you to customize the look of your candles so they are truly unique. Whether its plain white or a rainbow of hues, you can make the color combinations whatever suits your taste. Additionally, depending on the type of dye used, the color can be blended together to create more earthy and subtle shades as opposed to bright and bold tones often found in synthetic dyes.
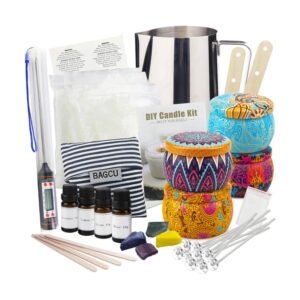
Aside from candle supplies, such as wicks and waxes that are resistant to certain types of dyes, other tools may be needed such as a thermometer while melting waxes or stirring implements like wooden sticks or spoons when mixing ingredients. Furthermore, there are plenty of tutorials available online that show step-by-step processes on how to make various different types of candles or sand art designs with various applications for color dye options along with other products such as fragrance oils, glitter, molds and so forth. This makes working with natural or synthetic colouring agents easier than ever before!
Moreover, using standard drawing supplies (e.g., pencils/markers), one can draw out decorative patterns directly onto wax layers prior to pouring them into molds without necessarily needing any extra dye components except for obvious textural benefits in some instances that come along with certain powdered pigments (e.g., realistic looking flames). Last but certainly not least, adding pigments typically only require small quantities and can therefore be cost-effective yet still bring wonderful effects on their respective finished products!
Types of Color Dye
Natural Dyes – Natural dyes for candle making can be derived from a variety of plants, fruits and vegetables. For example, several shades of pink can be created by mixing beet juice and other root vegetable juices. Additionally, yellow and brown tones can be achieved using turmeric and coffee grounds. Plant extracts like berry juices, walnut hulls, nettle leaves or herbs can also create different shades of color.
Synthetic Dyes – Synthetic dyes are usually brighter and more saturated than natural dyes and come in a wider range of colors. Micronized wax candles offer an alternative method to achieve vibrant tones with synthetic dyes that are pre-mixed into the wax. These dyes are usually labeled according to their affinity level, which may range from pastel to intense colors. Non-micronized solutions permit more flexibility because they consist of liquid dye that can be easily mixed together to create custom shades.
Preparing the Color Dye
When using color dye for candle making, it is important to measure and mix the ingredients properly. First, be sure to measure out the desired amount of wax, typically a teaspoon or so depending on the size of your desired candle. Then, add the color dye according to your chosen shade. Generally speaking, 1/4 teaspoon of dye will be sufficient for one pound of wax. However, if you want a darker color you may need more than that.
Next, it’s time to mix the ingredients together. This process requires heat and stirring to ensure complete incorporation. First melt the wax over low heat until it is completely liquid and free from clumps; then add the color dye along with any additional fragrant oils or botanicals if desired. Stir continuously for about 10 minutes until all ingredients are fully incorporated and evenly distributed throughout the wax and there are no lumps visible in its texture.
Once done mixing, pour your colored wax into prepared molds ensuring that hot spots do not appear in any areas as this can cause discoloration issues further down the line. Let your candles set for about 24 hours before showing them off or gifting them away!
Adding Color Dye to Wax
When deciding to add color dye to your melted wax for candles, the quantity of dye will depend on the shade you are trying to achieve. The amount you need does not need to remain consistent; depending on the color and how intense or bright that shade needs to be, you can adjust the amount of each colorine/dye. As a guide, approximately 1 teaspoon of colorine/dye per 500 ml of melted wax usually produces enough color so once we move above this we start deepening the shading.
It is best to add small amounts of each color at first and then add more if required. Remember less is more! Add too much in one go and it may be difficult or impossible to neutralize an overly bright or deep hue. It could also burn or degrade adding an unpleasant odor which may stick around for some time. Therefore, always start with a small batch and test it against a lighter version if needed when making larger batches later on.
Before melting wax with color, ensure that any excess wick threads have been removed as they will likely discolor as they heat up, leaving behind darker patches in your final product. Also never let your wax exceed 180°F when using significant amounts of dye – higher temperatures can cause discoloring and ruin consistency across a large batch of candles. Lastly, creating vibrant colors usually requires a range of complimentary hues together, so mix different depth’s of shades and hues together to create interesting and beautiful candle coloring inside your home!
Estimating the Amount of Color Dye Needed
When making candles, it is important to estimate how much color dye you will need. Color can have a dramatic effect on the finished looks and quality of your project, so getting the amount right is essential in achieving great results.
One key tip for successful color dyeing is testing in small batches of wax. This allows you to adjust the color level without wasting material. To do that, use a double-boiler method to melt 5-10 ounces of natural wax and pour a sample into a mold or special test container. Only add enough dye to achieve a light-medium shade so it can be adjusted if needed. Let this cool and assess the tint before adding more dye to the main batch of melted wax.
Before beginning, it’s always helpful to research what shades other experienced crafters have achieved with different dyes in order get an idea of what you should shoot for before committing to your project. This starting point will help you devise the measure of dye required for your project, since some brands are more potent than others. Additionally, it’s common knowledge in the candlemaking scene that unexpected mixing might occur when different brands and types of dyes are combined, producing unpredictable tones and pigments – so test at every stage!
Color Dye Combinations
Marbling: A marbling technique involves the creative application of different colors of dye to create a marble effect. One technique is to mix three or more colors together in an eye dropper and drop the mixture onto the surface of warm melted wax. Doing this, you can absorb and swirl various colors together which will form unique looking designs on the candle.
Ombre Effect: An ombre effect also can be achieved with candle dyes. The most popular way to make an ombre effect is through layering with different shades between each layer to achieve a gradual shift in color intensity. Start by pouring three separate batches of wax – one lightest, one middle shade and one darkest – and start layering them into a mold. Once the dye cools down it should give off a nice transition in colors as you move up or down any given layer.
Techniques for Mixing Colors
Creating a custom color wheel can be an exciting and rewarding prospect for those wanting to experiment with making their own candles. Different colors can be achieved by mixing and layering colors, to create unique effects and colors. The more creative you are, the more personalized and beautiful your end product can look.
One way to approach creating a color wheel is to choose three colors which will form the base of the color wheel, such as a primary red, yellow and blue. Then, you can mix and layer these colors together in order to get the desired shades. Accurately measuring out each color dye is important for a successful outcome. Additionally using various tools such as pipettes or syringes are useful for adding small amounts of colors precisely into the wax. You may also add other objects like glitter or foil flakes that once melted form iridescent jewel toned sparks of shine in your finished product.
By experimenting with various combinations of dye ratios, you can create special mixtures of secondary or tertiary colored dyes that make combining several different hues within one candle much easier when made correctly! With enough patience and creativity, a vast array of fun designs can be created that wow all who see them!
Troubleshooting Color Dye Problems
Discoloration is a common issue when using color dyes in candle making. This can occur either immediately or after a few uses of the candle. In order to identify the cause of discoloration, it’s important to consider what kind of wax and other ingredients you’re using – some wax blends are more prone than others to discoloring with certain colors. Additionally, any additives used, such as essential oils, fragrance oils and additives such as glitter may also lead to discoloration. To avoid this issue, try using natural colored dyes instead of artificial colors, stick to dyes that are specifically made for candles and pay close attention to the manufacturer’s recommended curing times.
Fading can also be an issue when using color dye in candle making. This is due to heat exposure the candle has experienced over time. This can be avoided by taking proper precautions such as keeping the wick trimmed before each burn and allowing the melted wax pool to reach maximum area (about 1/4″) prior to extinguishing the flame each time it’s used. If fading occurs even when following these guidelines then a bleaching additive can be used or try switching fragrances – certain fragrances have higher levels of volatile compounds which can accelerate fading over time.
Unexpected consistency issues arise when pouring the mixture into molds or jars that have higher temperatures than what was figured on when composing your recipe – this will cause your mix to cool too quickly resulting in poor adhesion between layers, preventing them from fusing together properly and ultimately leading to inconsistency throughout your batch. The best way to prevent this problem is by factoring in an appropriate temperature for all your equipment during preparation before you begin pouring. Additionally, double-check that your wick is correctly placed and create a uniform surface before you start pouring as these could also affect density levels in your final product if not done correctly.
Conclusion
In conclusion, it is important to remember that when using color dyes in candle making projects, safety should always be the top priority and one must be mindful of the possible risks associated with working with potentially hazardous substances. With the right tools and techniques, however, integrating colorful dyes into candle making can be a great way to add vibrancy and uniqueness to any project. With an array of colors and techniques, these products can help crafters create custom candles they may have never imagined. Whether your goal is to simply add a touch of color or recreate something truly unique, color dye for candle making can help you reach your creative goals.

Welcome to my candle making blog! In this blog, I will be sharing my tips and tricks for making candles. I will also be sharing some of my favorite recipes.


