Introduction
Candle making is a fun and rewarding hobby. Not only can you make stunning pieces of art, but you also get to make something that can give a warm, cozy feeling to your home or be used as custom gifts for friends and family. Candle making involves combining wax and fragrance with a heating element in a controlled environment to create either long burning pillar candles or quick burning tea lights and votives. This guide will provide an overview of the process of making candles as well as all the supplies needed for this unique craft.
In order to get started in candle making, it’s important to purchase the right supplies. This includes waxes (both paraffin and soy), fragrance oils, wicks, dyes and molds. Each of these components has specific roles within the finished product, so it’s important to select the right materials for your desired outcome. Additionally, many candle makers use tools such as double boilers or melting pots to ensure safety when melting down waxes, pourers to easily fill molds, thermometers to get accurate readings on temperatures and wick holders which help hold the wicks in place while pouring molten wax into molds or containers.
Once all your supplies have been purchased it’s time to move onto finding detailed instructions on how-to make your perfect candle. With patience, trial & error and lots of practice anybody can become an expert candle maker! All it takes is dedication and a few tips here and there in order ot learn the best techniques when creating those beautiful pieces of art that everyone desires. As you gain more experience you’ll be able to fine tune your craftsmanship by experimenting with different scents & colors giving each candle its own unique personality.
Materials and Tools Needed
When it comes to candle making, the materials and tools needed are what makes the hobby enjoyable and can lead to a variety of creations. The following items are necessary for most candle making projects:
Wax: Wax is the primary material used when crafting candles. Different types of wax exist – from paraffin, beeswax, soy wax and even vegetable based waxes. Each type serves its own purpose depending on the desired finished product. Paraffin wax is one of the most used types as it is easy to use with many tools and can be colored or scented as desired. Beeswax is used when more natural looking candles are desired and tends to burn longer than most other kinds of wax. Soy wax can be used in many similar ways as paraffin but offering a bit cleaner burn without toxins released as with paraffin. Vegetable/plant-based waxes such as coconut, hemp or palm are also natural options that can create unique candles.
Wicks: Wicks play a major role in any kind of candle making. They allow for an evenly controlled burn so that you get the full usage out of your candle without having too strong or weak flames while burning. Different wicks work best for different types of wax so research should be done before committing to any specific kind of wick for your project.
Scents: The addition of essential oils or artificial fragrance oils add an additional layer of complexity to certain candles being made by hobbyists and provide a complete sensory experience that must be considered during the process
Choosing the Right Wax
Candle making is an enjoyable and deeply rewarding hobby. One of the most important elements of this craft is choosing the right wax to use, as different waxes have different advantages and disadvantages that should be taken into account.
Paraffin wax is one of the most common types of wax used in candle making. It has a low price point, and its properties make it perfect for traditional pillars and tapers, as well as candles with intricate shapes and designs. The biggest downside to paraffin wax is that it creates soot when burned, meaning that these candles cannot be used in smoke-sensitive areas such as bedrooms or hospitals.
Soy wax is another popular choice for candle making enthusiasts. Soy wax produces up to 90% less soot than paraffin-based candles, meaning these candles can be used almost anywhere without creating a mess. In addition, soy’s natural properties make it very easy to work with and clean up afterward. However, soy wax has a higher melting point than paraffin which can make some more advanced designs difficult to produce, and often cost more than other types of waxes due to their fat content.
Beeswax is another great option for candle makers looking to avoid sooty particles being produced when burning their creations – like soy wax, beeswax removes most if not all sooty residue because it is made from pure oils secreted by honeybees. Additionally, beeswax does not require any additional additives or ingredients due to its natural state – however the drawbacks are that Beeswax requires higher temperatures when melting for use in crafting (above 100 degrees Celsius) and it usually costs significantly more than paraffin or soy wax per pound.
Creating a Candle Making Space
For those looking to make candle making a hobby, one of the first things to consider is setting up a work station. A designated space for your candle making projects will maximize efficiency and ensure you have all the supplies you need at your fingertips. Here are some ideas for setting up a candle making work station:
1. Start by gathering the essential tools and supplies needed in order to make candles. Having a dedicated space or workshop with shelves or drawers to store everything will reduce clutter and make it easier to keep track of what’s on hand. Items like wax melting pots, wicks, fragrance oils and containers can be nicely organized into labeled bins, that way when you’re ready to craft – everything is easily accessible.
2. Make sure to position your workspace near an electrical outlet, as most wax melting pots use electricity. This will also allow for easy access to additional lighting, if needed during the creation process.
3. When it comes to crafting a beautiful finished product ” good ventilation is key! Pick a room or area of your home with adequate ventilation such as windows and/or fans nearby for proper air circulation during the curing process and scent testing phase. Avoid shared living spaces like bedrooms, bathrooms, kitchens and garages as strong fragrances may linger after production has ended.
4. Finally, decorate your workspace with items that inspire your creativity such as coloring books, art supplies, pictures or scented candles! Having artwork around can feel invigorating while continuing to cultivate your passion in candle making!
Safety Considerations for Candle Making
Safety should be a priority when you are candle making as this activity involves working with hot wax, wicks, dyes, fragrances and other combustible materials. Always make sure to work with your supplies in a clean, well-ventilated area, away from children and pets. Choose to work in an area that has a flat surface – a kitchen countertop is a good idea – and wear protective gear such as goggles and gloves when appropriate. Additionally, keep all materials away from open flames or sources of heat, as this could result in the wax becoming too hot and could cause burns if touched. Also be sure to take extra care with scented candles since the essential oils used to create them can pose an inhalation hazard if not handled properly. Finally, do not leave burning candles unattended as they can cause fires if left behind without supervision.
Understanding Candle Making Fragrances and Coloring
When it comes to candle making, fragrances and colors play a huge role in determining the look, feel and scent of your finished product. The best part about creating candles is that there are so many possibilities for scent and color combinations. Let’s take a quick look at what you need to know about fragrance and wax dye when making your own candles from home.
One of the most popular components used in homemade candle making is fragrance oil. This type of oil is specifically formulated for use in the creation of scented candles, giving them the rich smells you want without overpowering other ingredients used in their construction. When selecting scents for your candles, be sure to choose ones that will work together singularly or as part of a bouquet. It’s also important to do some research beforehand because not all fragrances will blend well with one another. If you opt to make an unscented candle instead, be aware you may still need to add essential oils just so they don’t have strange aromas caused by certain wax types or materials used in construction.
Wax dyes are also important when it comes to creating beautiful colored candles with your own two hands. Some people elect to go with crayon shavings as it’s easy and cost-effective but this may cause issues if thewick doesn’t burn correctly due to these additives. Professional-grade wax dyes are much cleanerburning than crayon shavings or clumpy pigments – plus they offer more even coverage and smooth textures that won’t affect the burning of your wicks. When using wax dyes it’s recommended that you start with a small amount first; they usually come in concentrated forms which can easily be customized depending on opacity preference. Combining different colors is also possible when using wax dye, allowing you to create custom shades and vibrant mixes no matter what style you prefer!
Different Types of Candle Making Techniques
Candle making is a popular craft that can be turned into a great hobby! There are numerous candle making techniques, materials and creative possibilities to explore. The three main methods of candle making are: hand dipping, by using a pre-made wax blend or with molds.
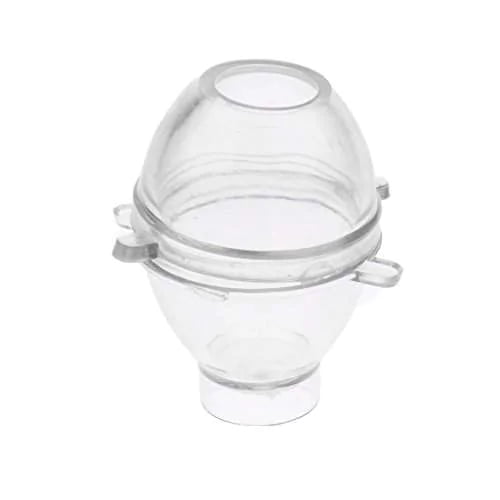
Hand dipping requires melted paraffin wax, wick material, dyes and fragrances along with other supplies depending on the type of candle being made. The process is simple; pouring melted wax into a shallow vessel and repeatedly dipping the wick material in until the desired diameter is achieved. Variations of this method include creating several thin layers on top of each other or adding different colors or textures such as glitter. Pre-made blends are best for beginners as they take away the worry of achieving even melting points and cleanliness during blending. These blends require fewer supplies and can often provide longer burning candles when done properly. Molds are helpful for beginners looking for more advanced shapes such as hearts, columns or detailed animal figures. Candle making molds come in various styles but most require some form of lubrication before use to help prevent sticking when unmolding the finished product.
No matter which method you choose, safety should always be taken into consideration when making candles at home. For example, safety glasses and heatproof gloves should always be worn while handling hot wax or stirring blends; areas should also be kept clear of children or pets to prevent accidental burns or fires. With just a few basic supplies, creativity and a passion for crafting your own unique candles – your journey towards becoming an expert candle maker will begin!
How to Make Different Types of Candles
Candle making is a popular and rewarding hobby. Mastering the basics doesn’t require any prior knowledge or special materials, so even beginners can enjoy creating beautiful candles from the comfort of their own home. There are many different types of candles you can make to brighten up your space or give as meaningful gifts. This guide takes you through a step-by-step illustrated guide for candle making.
Materials: You will need all of the necessary equipment, such as wicks, wax, melting pots, molds or containers for your candle holder, fragrance (optional), dyes (optional). Also, safety gear like gloves and safety eyewear should always be worn when handling hot wax and flame.
Melt the Wax: The first step is to melt your wax in a melting pot on low heat until completely liquid. Add dye if desired in small amounts so that it’s not too overpowering and stir continuously with a wooden spoon or chopstick until it’s evenly distributed. If you’re using fragrance oil, stir it in now as well so that it disperses evenly into the wax..
Add Wicks: Cut the wick beforehand to size and attach them to the base of your mold with glue or tape. For container candles, you may need to create a makeshift tab out of foil so that the wicks stand centered in an upright position inside your container without falling over when wax is added.
Pour Wax: Once everything is set, slowly pour your melted wax into each container and let cool until solidified before taking out. Make sure any tunnels are filled (if using molds or other craft materials).
Finishing Touches: If there are any rough edges on top after pouring wax into containers or molds, try using sandpaper or other tools to even them out. You can also use embellishments like ribbons at this stage; however these should be used sparingly so that they don’t interfere with flames while burning through on your candles!
Enjoy!: Now all that’s left is to light up those creations and bask in their glow! As long as you follow all safety precautions while making candles correctly and carefully lighting them up upon completion, candling should be an enjoyable hobby — go forth with confidence!
Tips and Tricks for Candle Making
If you are looking to take up candle making as a new hobby, there are plenty of tips and tricks that can help you make the most out of your new interest. Before diving into the craft, it is best to do some research and determine what supplies you need and how you plan on making your candles. Some supplies such as wax, wicks, dyes, scents, and molds can be purchased online or in stores if you don’t have them already.
Once you have all the necessary items for candle making, the next step is setting up a work area with supplies. Have a clean and clear table or workspace available for easy access to tools such as scissors, pouring pitcher and stirring spoon. Also having extra paper towels nearby will come in handy for clean-up purposes. Additionally, plan where your candles will dry once they’re done being poured. Having space set aside for this ahead of time will be beneficial when rush of inspiration hits!
After your workspace is all set up, it’s time to start melting wax according to instructions provided with wax package “especially safety instructions! Remembering to never leave melted wax unattended while heating it in microwave can prevent spills or overflowing containers accidents that could destroy the entire work area”not fun! Also depending on type of wax used; use double boiler method or pour directly on stovetop if instructed by package directions. Once desired temperature reached per instructions”it’s near impossible not too breakout into laugh when smelling fragrances created by warming oils”start adding dyes colorants that desired pay attention not too add more than recommended getting dye heavy will cause more harm then good as over saturated colors make unsightly candles that extinguish quickly . Last but not least when pouring is done let cool down before removing from molds to avoid any damage.
Creative Projects with Candles
Whether you’re looking for inspiration or just want to explore the possibilities of candle making at home, there are several fun and creative project ideas that you can use. From scented jars to floating candles and even homemade candle holders, you can create unique projects that enhance your décor or make the perfect gift. Here are some great project ideas with candles:
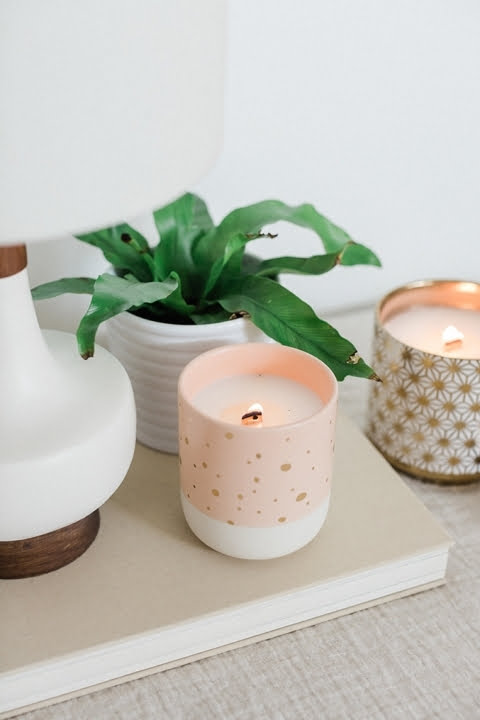
1. Scented Jars: Using different waxes and colorants, you can easily create customized scented jar candles in a variety of sizes, shapes, and fragrances. Start by melting the wax. For extra realism, use crayons and food coloring to tint the wax in a color of your choice. Then pour it into any container ” from mason jars to teacups ” add a wick and scent if desired.
2. Floating Candles: Create dazzling centerpieces using colorful floating tea lights inside glass bowls filled with water or clear oil such as baby oil for a nice sparkle effect. Place one or several tea lights in each bowl depending on their size – check for proper fit first as too many candles may cause them to sink!
3. Layered Candles: Using multiple colors and aromas, you can create layered effects in containers ranging from votive cups to molds shaped like stars, hearts and animals. Just simply melt different colored waxes separately then gently layer them into the mold of your choice. Be sure not to overfill each layer; leave an uneven edge so they stack easier later on!
4. Candle Holders: Personalize any door or window sill with homemade candle holders made out of cans, jars and other appropriate materials such as wood or terracotta pots which have been pre-drilled with holes for holding a wick (or use wire). Glue decorative beads onto the outside for added charm!
Conclusion
Candle making is an enjoyable and rewarding hobby that can also be used to create beautiful decor and gifts. In this guide, we’ve taken a look at the essential equipment, materials and techniques needed to get started in candle making. We discussed the essentials such as wicks, waxes and various types of molds. Additionally, we looked at ideas to help make your candles extra special with different fragrances, coloring agents and even natural decorations. Finally, we explored a few special effects that can give candles an interesting appearance, such as using luster dust or embedding items into the waxes. With these tips and tricks in mind, you are now ready to begin enjoying a fun and creative candle making journey!

Welcome to my candle making blog! In this blog, I will be sharing my tips and tricks for making candles. I will also be sharing some of my favorite recipes.


