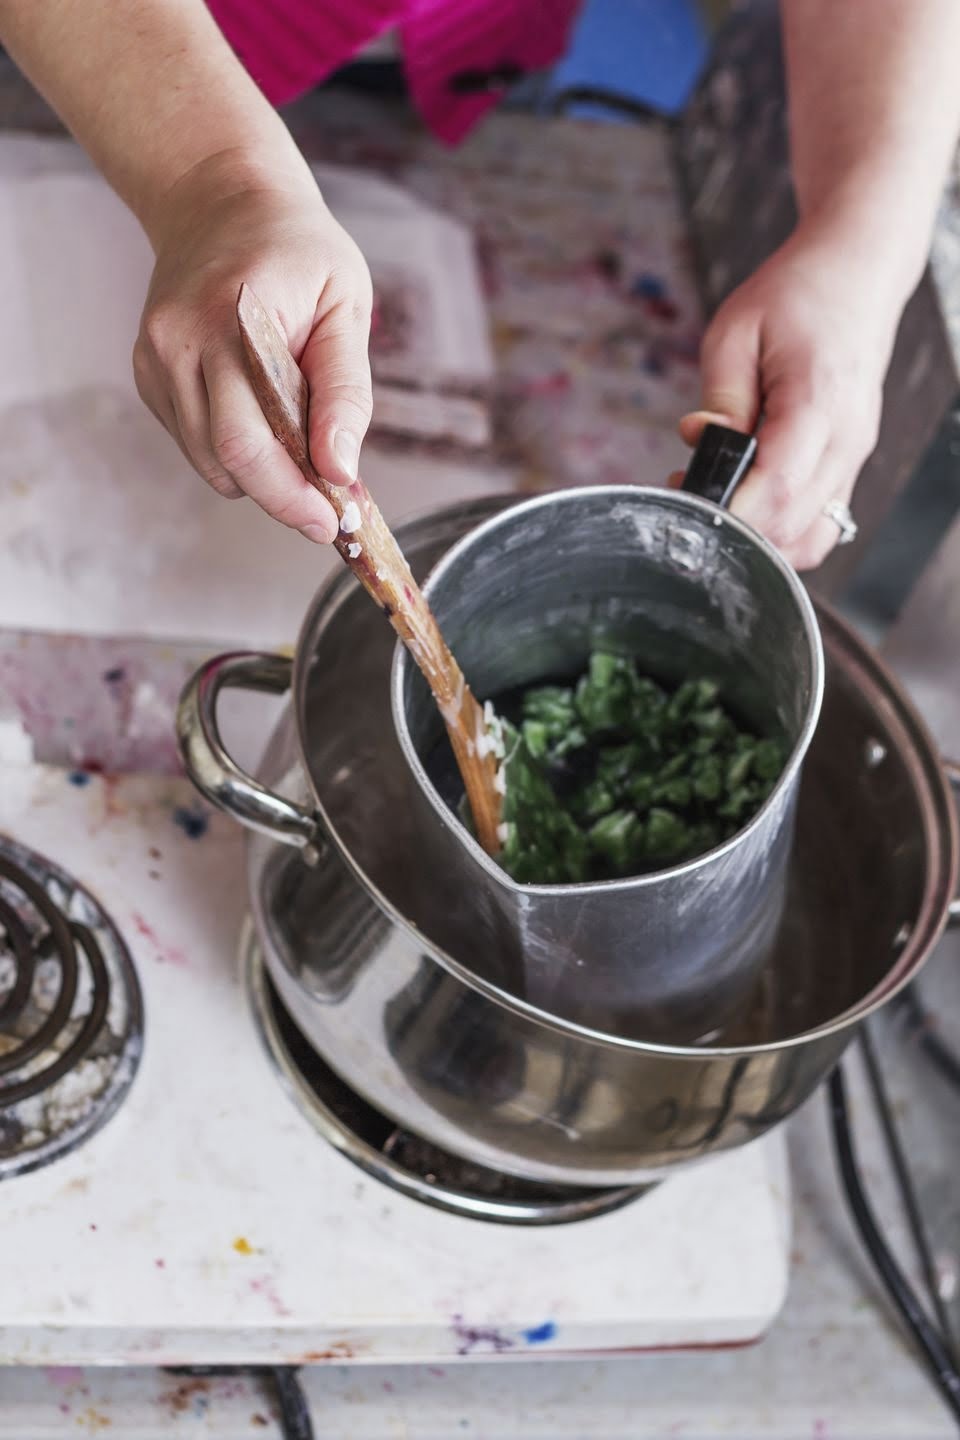
Creating your own candles at home is easier than ever today with the invention of do-it-yourself (DIY) wax melters for candle making. These simple devices make it possible to easily melt wax quickly and safely, allowing even novice crafters to create beautiful homemade candles.
DIY wax melters are designed to heat up wax safely on a burner or in an oven, while providing control over the temperature so that it does not exceed the safest limits for both melting and cooling. This allows crafty individuals to achieve professional-level results with minimal effort.
Types of DIY Wax Melters There are a few different types of DIY wax melters available on the market today, each offering its own advantages and disadvantages for various applications depending on what type of candle is being made. For those looking for a more traditional approach, double boiler melters can be used.
This type of melter uses a separate pot inside a larger pot filled with water; the water acts as insulation around the smaller pot and helps evenly distribute the heat when in use.
Other popular options that many candle makers prefer include hot plates, electric irons, microwaves, and crock pots. Each one works slightly differently but all get the job done efficiently and effectively.
Care and Maintenance Regardless of which type of wax melter you choose, remember that they all require regular cleaning and maintenance in order to perform optimally. To ensure your device remains safe for use every time you break out your crafting supplies, make sure you clean it after every use by evaporating any remaining residue from inside the reservoir using either boiling water or rubbing alcohol.
Additionally, always ensure that temperatures stay within safe ranges according to manufacturer specifications: this will guarantee both safety and excellent results every time you sit down for some creative candle making fun.
Types of DIY Wax Melters Available
Making unique and scented candles at home can be an exciting and enjoyable activity. A wax melter is needed to melt the wax for candle-making projects. There are several do it yourself (DIY) melters available for candle making, made from various materials and with distinct heat settings. Below are some DIY wax melters available for candle making:
- Melting Pots
- Double Boilers
- Heating Trays
- Heat Guns
The melting pot type of wax melter is a large metal container with a spout that melts the candle wax quickly and accurately. The double boiler is another type of DIY wax melter which consists of two containers, one placed within the other. This method helps to maintain a slower cooling rate and prevents burning or charring of the wax.
Heating trays are electric heating coils that are placed in sheet pans filled with paraffin wax to melt it uniformly. Heat guns blow hot air directly onto the molten wax to increase its temperature, though very carefully so as not to overheat it too quickly. The heat gun method works well if there is enough volume of wax being melted on the pan.
Other things like crockpots could also be used as DIY Wax Melters since they provide consistent temperatures over time with no risk of burning or scorching the paraffin due to overheating. However, they do take much longer than traditional ways mentioned above to completely melt the entire batch of candles’ wax.
An improvised version using rice cooker pots is adequate for occasional use but will not provide detailed control compared to proper DIY Melters designed specifically for this purpose. One useful technique when using crockpots is to store pre-dumped paraffin chunks in sealed bags which allows less mess when adding more chunks later on down the line while also speeding up melting times significantly compared to having sustained boiling temperatures over extended periods of time.
Benefits of Using a DIY Wax Melter
Making your own candles is a rewarding and cost effective activity that can help you to save money while having fun. Crafting your own candles has many benefits, including customizing the shape, color, design, and scent of the candle without sacrificing quality. Furthermore, setting up a majority of the materials for DIY wax melters is relatively straightforward and requires minimal effort.
The primary benefit of using a DIY wax melter for candle making is convenience. A DIY wax melter allows you to perfectly melt your wax with minimal effort; all you have to do is fill it with your desired amount of wax and turn it on.
This makes the entire process much faster and more efficient than if you were doing everything manually as well as avoiding any potential issues stemming from human error. Additionally, this type of setup tends to be extremely user friendly so even those just starting out in the craft will quickly be able to perfect their technique with very little practice or guidance.
Another great advantage when it comes to using a DIY wax melter for candle making is cost-effectiveness. By investing in an affordable machine, you can essentially recoup the full costs after just a few batches of candles thanks to huge amounts of time savings throughout production as well as ensuring that every batch is consistent in both appearance and quality.
Furthermore, most machines also come with levels that are adjustable to give you further room for customization when creating an array of unique designs for all types of occasions; some even include temperatures presets if desired for added ease-of-use.
What to Know About Wax Melting Temperatures
The ideal temperatures for melting wax in a candle making process can vary depending on the type of wax you are using. Natural waxes like beeswax and soy wax have relatively low melting points while paraffin waxes have higher melting temperatures. Knowing the appropriate temperature is essential to achieving consistent results when performing candle making tasks. Here are a few basics on understanding melting temperatures:
Melting Point Range
- Beeswax: 145 to 147°F
- Soy Wax: 121 to 125°F
- Paraffin Wax: 145 to 147°F for low-grade; 158 to 162° F for high-grade
Once you know what type of wax you are going to use, it is important to identify the melting point range associated with that specific material. The range will be slightly wider than if you used a specific temperature setting as there can be slight changing in the crystal structure of the wax at different temperatures. This means adjusting slightly higher or lower may result in better performance depending on the exact temperature chosen.
Resistance allows for Higher Temperatures
One way of indirectly controlling melting temperatures is adding resistant ingredients such as stearic acid, lanolin or long chain fatty acids. These substances help reduce surface tension while helping slow down heat transfer from an external heat source like a hot plate, stove top element, double boiler or optional melter unit. This resistance gives more flexibility when choosing which temperature setting to use without having an adverse impact on candle performance or yield.
Melting Temperature Influences Scent Releas
In some cases like using essential oils for scents, certain aromas may evaporate quicker if the melting point is too high due to intense and direct heat exposure over prolonged periods of time. Setting lower melting points may help slow down this apparent loss due to evaporation though users must balance this effect vs those caused by slower cooling times without compromising quality or consistency during each process step.
Tools and Materials Needed to Create a DIY Wax Melter
Making your own wax melter for candle making can be a great way to save money on supplies. With the right tools and materials, it’s easy to make a wax melter that will last and help you create beautiful candles with ease. Here is a list of materials and tools that are needed to create a DIY wax melter:
Wax Heater
This is the main piece of equipment in the wax melter. It is designed specifically to heat up the wax so that it melts evenly and at an ideal temperature. There are several types of wax heaters available depending on your needs, such as electric, gas-powered or even stovetop/campfire-style heaters.
Wax Container
In order to safely contain the heated wax while it melts, you’ll need a container that can withstand high temperatures without breaking or leaking any melted wax. Wax containers come in different shapes and sizes so it’s best to choose one based on how much melted wax you plan on creating each time you use the melter. Glass, stainless steel and ceramic containers are some of the most common options for containing melting wax.
Melting Pot
The melting pot is placed underneath the heater to collect the melted wax when done melting it up. This needs to be able to withstand high temperatures as well as handle any splash back from flowing molten wax. A metal pan or pot works best here as they’re not prone to cracking from overheating like other materials may be.
Thermometer
Most important when making your own diy wax melter is having an accurate thermometer that can measure temperatures between 70°C-178°C (158°F-352°F). This thermometer allows you to know when your melted Wax has reached its correct temperature which ensures for a safe product when using essential oils in conjunction with candle making.
Step-by-Step Guide to Building Your DIY Wax Melter
Making your own wax melter for candle making is a simple yet rewarding task. As with any craft project, it is important to have the right materials before beginning construction. It is best to use an appropriate type of heat source, such as a hot plate or electric coil, as well as a metal bucket and a thermometer for temperature control. Following these steps will help you assemble your DIY wax melter safely and quickly:
- Gather all tools and supplies: necessary materials and safety equipment.
- Measure the size of the metal bucket.
- Cut out two circles from heavy-duty sheet metal or another material of the same size as the measurements obtained in Step 2.
- Crease both holes into the centre of each disc. This will be used to attach each disc to one another at opposite sides of the bucket.
- Affix both discs to the sides of the bucket using small bolt fasteners.
- Place your heat source into one side of the bucket over top of one disc, so that it heats up both discs evenly.
- Insert a thermometer into an air tight hole drilled on top of one side disc.
- Add colorant (optional) and start melting wax either using a double boiler or directly on hot plates/ electric coils. Keep an eye on temperatures using thermometer readings throughout this process.
Safety Considerations When Using DIY Wax Melters
Wax melters can be properly used with great caution to ensure safety when working with the wax. With the basic principles in place, such as using a heat-resistant container, avoiding possible dripping, and supporting extra weight with handlebars or lids, these tips will help to promote safety when utilizing DIY wax melters for candle making.
Using Heat-Resistant Containers
The first and most important tip is to use a heat-resistant container. Most materials that are too thin or weak can melt or even catch fire when exposed to open flames while heated wax melts. Spot check your containers prior to each melting process and determine if they are up for the job. If not, opt for something more suitable like a double boiler or an electric pot designed strictly for wax melting purposes.
Avoiding Possible Dripping
When using a double boiler with the purpose of slowly melting your wax over an open flame on the stove top, ensure that nothing flammable is nearby unless it is absolutely protected from splattering hot liquid wax temperatures nearing 200°F (93°C). To prevent this from happening, always place the double boiler away from other kitchen utensils and do not leave it unattended while boiling anything on the stove top.
Handling Extra Weight Safely
To safely maneuver around fully loaded pots filled with molten wax without spilling any in unwanted places, handlebars are very helpful accessories that fit onto most types of melters. Before beginning any setup process with ample containers full of molten mixtures, attach handlebar extensions across both sides in order to carry and transport heavy loads throughout various stages of production in one single effortless movement without having to wobble them around all cluttered up until you get were you want.
This helps make production much safer by reducing unnecessary risk from accidental slippages due to movings of melters containing hot liquids before they completely solidify again.
Tips and Tricks for Making the Most Out of Your DIY Wax Melter
Making candles has become increasingly popular the past few years, and for many candle makers, a DIY wax melter may be the perfect option. With a DIY wax melter you can create your own custom candles with an array of colors, scents and shapes. However, using a DIY wax melter isn’t quite as simple as it appears, and there are some tips and tricks to help make sure your candles come out great every time.
Heat Setting
When using a DIY wax melter the temperature is key. Too much heat or not enough heat can prevent the candle from setting properly or leaving streaks when poured into a mold. Most experienced DIYers suggest heating in intervals until it reaches the desired temperature to avoid over heating. This will also ensure that any additional additives like colors or fragrances won’t burn off during melting.
Choosing The Right Wax
The type of wax you use in your Candle Making will play a big role in how successful your project turns out. There are plenty of types of waxes available ranging from soy to paraffin to beeswax and each has their own melting point requirements and characteristics. It’s always best practice to work with one type of wax at a time to maintain consistency throughout your batches of candles.
Know Your Fragrance
One of the most exciting parts of having your own DIY Wax Melter is adding different fragrances to customize each batch. Be consistent with the amount of scent oil added since too much can cause overheating leading to poor results or inconsistent burning when lit later on.
Additionally, depending on what type of wax you’re working with you may need different ratios between oil amounts which should be looked into before experimentally adding more and more scent oil to try out new smells with each batch.
Troubleshooting Common Problems with DIY Wax Melters
When making candles with a DIY wax melter, there are several common problems that can occur. The following section will discuss the steps you can take to troubleshoot them.
Burned Wax
If your wax is coming out burned or discolored, it may be due to the temperature of the melter being too high. Make sure that you follow the manufacturer’s instructions for temperature settings and always test the temperature before pouring your candle.
To prevent further burning of your wax, try using a thermometer to monitor the temperatures or adjust your heat source if necessary. If all else fails, consider adding some colorant to your wax to help lessen any discoloration.
Difficulty Pouring
If you have difficulty pouring your wax into molds or containers, then you may want to try adding some soy blend wax or beeswax to make it easier. A soy blend or beeswax will give more lubrication and make it easier for the wax to slide out of its container.
Additionally, Try heating up your mold first if it’s too cold, as cold molds can make pouring more difficult. Make sure that your containers and molds are free from dust and debris before beginning; otherwise this could cause blockages in the pour spout which could impede flow when pouring your candles later on.
Getting Bubbles in Your Candles
Bubble spots in candles are usually caused by air turbulence or condensation in the melting pot when filling up molds or containers with melted wax. The best way to prevent this is by avoiding stirring during pouring.
Additionally, Ensure that you let the hot wax cool down slightly before pouring so that steam isn’t created when mixing with cooler air drafts near an open window or doorframe., Lastly, ensure that no water droplets are present when re-melting existing candle remaining from past projects since melting water inside wax can create a separation effect which leaves visible bubbles throughout finished candles.
Additional Resources for Learning More About DIY Wax Melters
Books and Online Tutorials
There are many resources available online and in books that provide detailed instructions on building a DIY wax melter. The Internet contains tutorials, blogs, message boards, and guides to help complete the project. In addition, craft stores typically carry a variety of supplies needed for building a wax melter.
Books provide readers with written instructions as well as step-by-step images on how to make a wax melter. Additionally, many books offer guidance on safety measures when working with heated wax. For those who prefer more visual learning, several books also include videos or DVD’s with demonstrations on how to make a homemade wax melter.
YouTube Channels
YouTube is an excellent resource for those who want to learn about making their own DIY wax melter. There are several popular YouTube channels such as New Candles that teach viewers how to build their own DIY wax melters.
These channels provide helpful tips on what materials are best for building a quality product and the tricks of the trade which help simplify the process. Additionally, some of these channels use live broadcasts so you can watch along and ask questions as they’re being answered in real-time.
Local Suppliers
Depending on where you live, local suppliers may offer materials needed for making your own DIY wax melter at cheaper rates than big box stores or online purchases. Local suppliers often have close relationships with trusted artisans that specialize in unique materials which increases quality of craftsmanship and activity success rate for projects like this.
Many local suppliers also offer classes to teach people how put together their own wax melters from beginning to end or join an existing workshop with other enthusiasts who are already knowledgeable about candle making processes.
Conclusion
DIY wax melters are the ideal option for candle makers who are starting their own business or hobby. With these types of melters, one can easily create unique and personalized candles for any occasion.
DIY wax melters allow a beginner to get familiar with different types of candles and the creative process of making them without breaking the bank. Furthermore, convenience and safety play key roles in DIY wax melter use as you will not have to worry about expensive equipment or open flame during preparation.
One of the biggest advantages of using a homemade wax melter is that it eliminates laboratory-grade equipment and tools which are expensive for beginners. The process can be done with a few items that would cost much less than what expert candle makers use to craft their product.
Items like heat guns, tongs, and other tools which help make sure that your candles come out perfect can be acquired at minimal cost, leaving you extra money to invest into other things such as wicks and essential oils for different aromas.
While convenience plays an important role in the DIY wax melter choice for candle makers whether newbies or experienced professionals, safety must also be taken into account at all times when dealing with flammable materials like melted wax or fire sources like stoves or microwaves which generate high amounts of heat at once.
By crafting your own wax melts instead of buying ready-made ones, you can ensure that your candle will come out safe from start to finish by avoiding unnecessary accidents throughout the process due to hazardous materials used commercially available which can’t always be regulated in terms of quality control.
In conclusion, DIY wax melting is a great way for novice and veteran candle makers alike to experiment with different techniques without having to invest too much money in professional equipment nor worrying about potential dangers derived from purchasing pre-made materials without proper regulation standards enforcement from authorities.
As long as safety is taken into account throughout all stages involved on the homemade wax melter creation procedures, one should have no issues creating beautiful candles with little cost but an abundance of creativity.

Welcome to my candle making blog! In this blog, I will be sharing my tips and tricks for making candles. I will also be sharing some of my favorite recipes.

