Introduction
Making candles can be an incredibly creative experience! Crafting your own candles can give you the opportunity to customize your own projects. Whether you are a beginner just getting into the world of candle-making, or an experienced artisan working on their newest art piece, this easy candle-making tutorial will set you up for success. With our comprehensive guide, you will have all the tips and tools necessary to make beautiful and unique handmade candles from scratch. Learn about making molds, wax types, wicks, coloring and scents for a custom creation of your own.
This tutorial covers different wax types like paraffin and beeswax used in candle-making. Paraffin wax is the most popular choice for candle-makers because it has a low melting point and produces a steady smokeless flame. Beeswax is another favorite choice due to its natural honey scent and honeycomb appearance when melted down. For both waxes, there are certain additives that can enhance the final product during varying degrees of heating temperatures. Adding baking soda or stearic acid helps in controlling smoke production and giving the wax better texture when casting it into molds; pastilles or pellets add fragrance happily too!
After choosing the right wax for your project there are a variety of wick sizes to consider like flat cotton with paper cores which burn slowly but steadily, zinc core wicks with cotton threads that reduce large smoke production and wooden wick handles which lend itself as well to providing many different shapes of flames once lit.
Choosing various colorants such as oil pastels or liquid dyes allow you to control how white or dark you want your finished product to look like post curing; various types of scented oils also come in different consistencies that are suitable for mixing while keeping stirring times short enough so they don’t become thick globs of goo at the bottom of any container! Finally, pouring your concoction carefully into a pre-prepared mold is essential for achieving even results when cooling down before being made available as room decorations or gifts once trimmed nicely with scissors afterwards~
Gather Your Supplies and Design Tips for Crafting the Perfect Candle
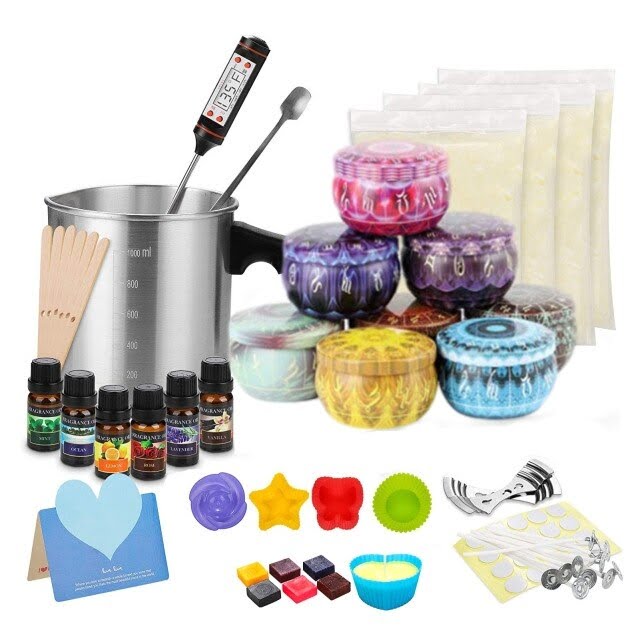
Creating the perfect candle is easy with the right tools and supplies. To get started, you’ll need soy wax, wicks for your desired type of candle, glass containers, thermometers, and a stirring utensil. In addition to these basic materials, there are many accessories that can be added to make your candle unique. These can include fragrances, essential oils, herbs and spices, beads, glitter and sequins etc.
Before making your candles it is important to understand the basics of candle design so that you can craft a finished product that both looks and smells great. Start by deciding on a container size and shape; this will help you decide on the appropriate length of wick needed to ensure steady burning. It is also important to keep in mind proper fragrance blending ratios; make sure not to add more than ten percent essential oil or scent per pound of wax as doing so could result in an overly scented candle. Additionally, plan your color palette ahead of time; this will involve an understanding of the dyes that may influence or change certain fragrances when mixed together. There are also plenty of tutorials available online if you’d like help creating unique formations with your wax such as layering or texturizing for an interesting look.
Step by Step Instructions for Making the Candle
1. Gather the supplies: For this easy candle making project you will need paraffin wax, wicks, dye, a double boiler, molds and/or containers, and some melted shortening or stearic acid.
2. Prepare the wax: Cut the paraffin wax into small chunks and place them in the double boiler. Put it on low to medium heat for about an hour until completely melted. Use the thermometer to make sure it is at the optimal temperature of 125-130 degrees F before adding any of the additives.
3. Add additives: Once your wax is melted properly you can add scent, color or oil to your candle as desired. Add your dye slowly until desired shade is reached; add oils or fragrances drop by drop being careful not to overdo it; add stearic acid or other hardeners bit by bit according to manufacturer’s instructions.
4. Pre-soak wicks: Pre-soak your wicks in a tall container with room-temperature water for at least 30 minutes prior to insertion in the candles to ensure proper burning and longevity of your candles later on.
5. Pour into molds/containers: When you are done adding also additives and pre-soaking your wicks place them inside molds/containers ensuring that they hit he bottom then pour and evenly distribute the hot wax in all areas while trying not to move them around too much so they stay in position inside the mold/container when hardened . Also top up extra wax if needed once toughing process started go cold further down inside container.
6. Allow cooling and hardening: Allow your candles 3 ” 4 hours or even better overnight if possible before attempting removal from molds for complete hardening before using it eventually or packaging for sale/gifting purposes later on as needed as well .
Tips for Creating an Eye-Catching Candle Design
Creating an eye-catching candle design can be a great way to make candles that stand out. Here are some tips for making your own unique, memorable designs:
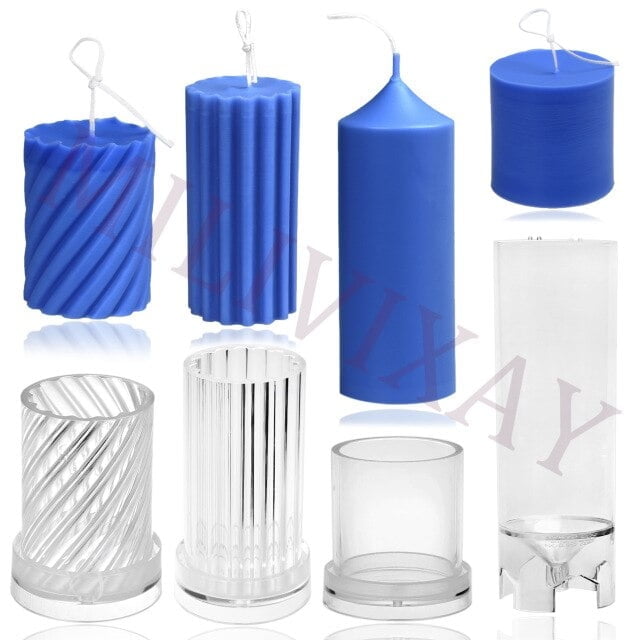
• Choose a unique container or mold. Think outside of the box when it comes to candle containers and molds; consider using mason jars, wine glasses, beer bottles, coffee cans, teacups, and other items that have unusual shapes. It’s important to use materials that are safe and heat-resistant while working with hot wax.
• Use intricate wick techniques. Adding multiple wicks or double-dipping the wick can create interesting patterns or improve the overall burning performance of a candle.
• Incorporate color into yourdesignbyusingdyesortintingwaxwithcolorants.Youcanevencreategradient colors by layering different colors on top of each other or mix two colors together in one container or mold. Adding color can help bring out the special details of your candle design.
• Experiment with different fragrances! Fragrances can help set an ambient mood for any candle display and add a unique twist to traditional designs. Before adding scent to your wax, determine if you are using essential oils or fragrance oils as these will have different scents strengths and baking times. Additionally, some fragrances react adversely to certain types of wax so always take precautions when testing out new candles before you commit to creating an entire batch!
• Get creative with embellishments like glitter, dried flowers petals, hand drawn imagery and more ” these decorative touches can make all the difference when it comes to personalizing your finished candles!
Creative Ways to Present and Display Your Candle
Candle making is a fun and rewarding hobby. It’s relatively inexpensive to start out, and the end product has endless possibilities. Once you have your candle made, there are a variety of ways to present it as a one-of-a-kind gift or decoration.
One popular way to present a candle is by making a decorative box for it. You can use scrapbooking paper to create an interesting pattern and color for the sides that match your candle’s scent and look. Consider adding ribbons or beads around the edges; if you want more structure, use foam board or cardboard boxes with various layers. Keep in mind that box size should be big enough to fit the entire wax pillar but small enough so that there’s no extra space inside – this way your item won’t move and jostle around too much during transport.
If you want something less permanent and you don’t want to commit to decorating a box, wrapping paper is always an excellent option. Use patterned papers like chevron or polka dots along with satin ribbon, lace strips or twine – each will add an extra decorative effect! For larger containers like jars or glass holders, add twigs or dried flowers on top of the lid for an organic appearance. If you’re working with candles in glass containers consider gluing rhinestones directly onto each surface for extra sparkle! Lastly, if you decide not to wrap your candles consider adding tags with personalized messages such as “handmade” or “homemade”.
Necessary Maintenance and Care Tips for Your Candles
In order to keep your candles looking and functioning their best, it is important to follow a few simple maintenance and care tips. After each use, trim the wick of your candle using scissors or nail clippers to about 1/4 inch before relighting it. This will help keep the flame from getting too large. Additionally, always make sure that you keep burning candles in an area that is free from drafts and away from objects like curtains or paper so that they won’t be extinguished. It’s also important to monitor the level the wax has gone down for safety reasons. Never let the wax go all the way down to the bottom of your candle jar because there could be a risk of fire – aim to stop burning when you see 1/2 inch of wax remaining. Lastly, never burn your candles for more than four hours at a time as this can cause sooting, smoke and plenty of other damage! Move your candle around periodically while burning as well, if possible, so that one side stays cool while another side is receiving heat. Doing so evenly distributes the heat over time which helps with even burning and decreases wasted liquid wax.
Closing Thoughts ” Enjoy the Rewards of Crafting Your Own Candles
Making your own candles can be a rewarding experience. In just a few simple steps, you’ve gone from wax chunks to homemade goodies that can add light and joy to any room. The possibilities for candle making are endless and the art of creating something beautiful out of the items you have on hand can be extremely satisfying.
Making candles is not just about the final product – it’s also about savoring all of the small moments along the way. Crafting your own candles allows you to escape into an imaginative world and explore different ideas while perfecting unique color combinations and shapes, as well as spending quality time with yourself or loved ones who might choose to join in on all the fun. When you craft, you’re also putting energy into creating something special that you’ll never forget, making each finished product even more special and meaningful.
Creating your own gorgeous handmade candles doesn’t require too much skill or money – all it takes is a bit of creativity and some determination to make something extraordinary! So don’t be afraid to let your imagination run wild and start exploring different temptations today! Let your scent combinations swirl around endlessly, until your candle oozes style, elegance, and sophistication – whatever design inspirations make sense for you or places delightfully outside of your comfort zone!

Welcome to my candle making blog! In this blog, I will be sharing my tips and tricks for making candles. I will also be sharing some of my favorite recipes.

