Candle making is a versatile and rewarding hobby that allows you to unleash your creativity while also creating beautiful and functional products for yourself or as gifts. Whether you’re looking to create a calming atmosphere in your home, personalize gifts for loved ones, or even start a small business, candle making is an accessible craft that anyone can enjoy.
In this article, we will guide you through an easy step by step process to help you get started on your candle making journey.
One of the major benefits of making your own candles is the ability to customize them exactly to your liking. From choosing the wax type and fragrance to selecting unique molds and adding enhancements like dried flowers or glitter, the possibilities are endless. By following an easy step by step process, you can ensure consistent results and minimize any potential mistakes along the way.
Following a step by step method is essential in candle making because it helps establish proper techniques and ensures safety. Working with hot wax requires caution, but by adhering to a systematic approach, you can confidently navigate each stage of the candle making process.
In the next sections of this article, we will go into more detail on gathering supplies, choosing the right wax and fragrance, preparing molds and wicks, melting and pouring the wax, adding color and enhancements, allowing the candles to set properly, and giving those finishing touches that will make your homemade candles truly special.
Whether you’re a complete beginner or have some experience with candle making, this comprehensive guide will provide useful tips and insights to help you create beautiful candles safely and easily. So gather your supplies, prepare your workspace, and let’s dive into the wonderful world of candle making.
Gathering the Supplies
When it comes to candle making, it is important to gather all the necessary supplies before getting started. Here are some essential materials and tools needed for this DIY project:
- Wax: The main ingredient in candle making is wax. There are different types of wax available, including soy wax, beeswax, and paraffin wax. Each type has its own pros and cons, so it’s important to consider factors such as burn time, scent throw, and ease of use when choosing the right wax for your candles.
- Wicks: A crucial component for any candle is the wick. Wicks come in various sizes and materials, such as cotton or wood. The size of the wick will determine how well your candle burns, so be sure to choose the appropriate size based on the diameter of your container or mold.
- Containers or Molds: Depending on your preference, you can either use containers or molds to shape your candles. Glass jars or tins make great containers for container candles, while silicone molds are versatile options for creating unique shapes.
- Fragrance Oils: Adding fragrance oils to your candles can enhance the overall experience when burning them. There are countless scents available, ranging from floral and fruity to seasonal and musky. Make sure to choose high-quality fragrance oils that are specifically designed for candle making.
- Colorants: If you want to add color to your candles, you’ll need colorants specifically made for candles. These can come in the form of liquid dyes or dye chips which can be melted into the wax.
- Thermometer: To ensure a successful pour and proper bonding of ingredients in your homemade candles, a thermometer is essential. It allows you to monitor the temperature of both the melted wax and fragrance oils before pouring them into containers or molds.
Where to find candle making supplies:
There are several places where you can find the necessary supplies for candle making.
- Craft Stores: Local craft stores often have a variety of candle making supplies available, including wax, wicks, fragrance oils, and colorants. They may also carry molds and containers.
- Online Retailers: One of the easiest ways to find candle making supplies is by browsing online retailers dedicated to arts and crafts. Websites such as Amazon, Etsy, and CandleScience offer a wide range of options to choose from.
- Wholesale Suppliers: If you’re planning on making candles in larger quantities or starting a small business, wholesale suppliers can provide more affordable options for your supplies. They usually require a minimum order quantity but offer discounts for bulk purchases.
Recommended brands and options for beginners:
For beginners in candle making, it can be helpful to start with reliable brands that offer easy-to-use products. Here are some recommended brands:
– Nature’s Garden.
– CandleScience.
– Bramble Berry.
– Peak Candle Supplies.
These brands offer high-quality materials and tools specifically designed for candle making and often include tutorials or guidelines on their websites to help beginners get started.
| Supply | Description |
|---|---|
| Wax | Main ingredient in candle making; different types available |
| Wicks | Essential component for proper burning; different sizes/materials available |
| Containers or Molds | Used to shape candles; glass jars, tins, and silicone molds are common options |
| Fragrance Oils | Adds scent to candles; choose high-quality oils designed for candle making |
| Colorants | Used to add color to candles; liquid dyes or dye chips can be melted into wax |
| Thermometer | Essential for monitoring temperatures of melted wax and fragrance oils |
Choosing the Right Wax
When it comes to candle making, one of the most important decisions you will make is choosing the right wax for your candles. There are several types of wax available in the market, each with its own pros and cons. By understanding the different options and considering your specific needs, you can select the perfect wax to ensure a successful candle making experience.
One common type of wax used in candle making is paraffin wax. Paraffin wax is widely available and affordable, making it a popular choice for beginners. It has a low melting point, which makes it easy to work with and results in quick setting times for your candles. However, it is important to note that paraffin wax is derived from petroleum, so if you prefer a more natural option, you may want to explore other alternatives.
Another popular choice is soy wax. Soy wax is made from soybean oil and is known for its clean burn and eco-friendly properties. It has a longer burning time compared to paraffin wax and also provides better scent throw. If you are looking for a vegan or all-natural option, soy wax may be the perfect choice for you.
Beeswax is another type of wax commonly used in candle making. It offers a natural golden color and emits a subtle honey-like fragrance when burned. Beeswax has a high melting point, which means it burns slower than other waxes and produces less smoke or soot. However, it can be more expensive compared to other options.
Ultimately, the right choice of wax depends on your personal preference, budget, and the type of candles you want to create. Consider factors such as burning time, scent throw, environmental impact, and cost when choosing your ideal wax. Keep in mind that experimentation may be necessary to find the perfect fit for your needs as every type of wax has its own unique characteristics that can enhance or hinder certain aspects of candle making.
Selecting the Perfect Fragrance
Choosing the right fragrance is an essential step in candle making as it greatly contributes to the overall experience and mood created by the candles. The fragrance of a candle can evoke emotions, create ambiance, and even improve one’s well-being. Therefore, it is important to understand the importance of selecting a good fragrance and to learn how to choose the right fragrance for your desired mood.
When selecting a fragrance for your candles, consider the purpose or atmosphere you want to create. Different scents have different effects on our emotions and can help set a particular mood. For example, lavender is known for its calming properties and is often used in candles meant for relaxation or stress relief. On the other hand, citrus scents like lemon or orange are invigorating and energizing, making them ideal for candles used during work or study sessions.
There are countless options when it comes to candle scents, ranging from floral notes such as rose or jasmine to warm and cozy aromas like vanilla or cinnamon. It may be helpful to visit local stores that sell candles or fragrances to smell different scents firsthand and see which ones you are drawn to. Additionally, many websites offer descriptions of popular candle scents along with their effects, which can assist you in making an informed decision.
Popular Candle Scents
| Scent | Effects |
|---|---|
| Lavender | Calming, promotes relaxation |
| Lemon | Energizing, improves focus |
| Vanilla | Warm, comforting |
| Cinnamon | Inviting, cozy |
To choose the right fragrance for your desired mood, consider the purpose of the candle and the ambiance you want to create. If you are making candles as gifts, think about the recipient’s preferences and what scents they might enjoy. Ultimately, it is a personal choice, so trust your instincts and select a fragrance that resonates with you or captures the essence of what you want to achieve with your candles.
Remember that fragrance can be subjective, so what may smell pleasant to one person may not be appealing to another. It is recommended to start with popular candle scents and gradually explore different fragrances as you gain experience in candle making. Don’t be afraid to experiment and mix different scents together to create unique combinations that suit your taste and style. Selecting the perfect fragrance adds another layer of creativity and personalization to your homemade candles.
Preparing the Mold and Wick
Preparing the mold and wick is an important step in the candle making process. Before you begin pouring your melted wax, it is essential to ensure that your mold and wick are properly prepared.
First, let’s discuss preparing the mold. There are different types of molds available for candle making, such as metal molds, plastic molds, silicone molds, and glass containers. Each type of mold has its own advantages and uses.
Metal molds are durable and can withstand high temperatures, while plastic molds are flexible and easy to remove the candle from once it has set. Silicone molds are great for intricate shapes and designs, while glass containers can be used for container candles.
To prepare your mold, start by cleaning it thoroughly to remove any dust or debris. If you’re using a metal or plastic mold, consider applying a thin layer of mold release spray to make it easier to remove the candle later on. This step is not necessary if you’re using a silicone mold or glass container.
Next, let’s discuss preparing the wick. The wick plays a crucial role in how your candle burns, so it is important to choose the right type and prepare it properly. Cotton braided wicks are commonly used for most candles because they burn steadily and produce minimal soot.
Before attaching the wick to the bottom of your mold or container, it is recommended to secure it in place using a wick holder or hot glue gun. This will ensure that the wick remains centered as you pour the wax.
Additionally, trimming the wick before each use will help maintain a steady flame and prevent excessive smoke. It is also important to clean any excess wax or debris off the surface of your candle after each burn for aesthetic purposes.
By following these steps in preparing the mold and wick, you will set yourself up for success when making your own candles. Taking the time to properly prepare these components ensures that your candles will burn evenly and produce the desired results.
Melting and Pouring the Wax
Melting and pouring the wax is a crucial step in candle making that requires careful attention to detail. By following the recommended melting methods and maintaining proper temperature control, you can ensure a successful pouring process.
There are several recommended methods for melting wax, including using a double boiler or a microwave. A double boiler involves placing the wax in a heat-resistant container and then placing it in another pot filled with water. The water gently heats the wax to prevent it from burning or overheating. Alternatively, you can melt the wax in a microwave-safe container by heating it in short bursts and stirring frequently to distribute the heat evenly.
Temperature control is essential when pouring the melted wax into your molds. It is important to pour the wax at the appropriate temperature, as this can affect how well your candles set and their overall quality. Typically, the ideal pouring temperature will vary depending on the type of wax you are using, so be sure to follow the manufacturer’s guidelines for best results.
To avoid common mistakes while pouring, it is crucial to pour slowly and steadily into the mold. This helps prevent air bubbles from forming and ensures an even distribution of wax throughout the mold. Additionally, take care not to overfill or underfill your molds, as this can result in uneven candles that do not burn properly.
In summary, when melting and pouring the wax for your candles, it is important to follow recommended methods such as using a double boiler or microwave. Maintaining proper temperature control and taking care during the pouring process will help you achieve successful results. Remember to pour slowly and steadily into your molds while avoiding overfilling or underfilling them. By following these steps, you are one step closer to creating beautiful homemade candles.
Adding Color and Enhancements
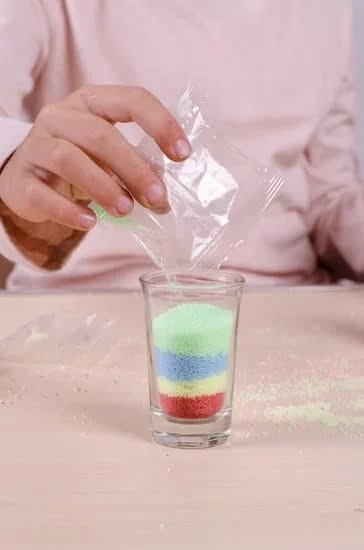
Adding color and enhancements to your candles is a fun and creative step in the candle making process. Not only does it allow you to personalize your candles, but it also adds visual appeal and enhances the overall aesthetic. In this section, we will explore different options for coloring your candles and provide tips for achieving desired shades. Additionally, we will discuss creative ideas for adding enhancements such as dried flowers or glitter.
When it comes to coloring your candles, there are various options to choose from. One popular method is using candle dyes or color blocks specifically designed for candle making. These dyes come in a wide range of colors and can be easily incorporated into melted wax. It is important to follow the recommended guidelines for each specific dye, as the concentration needed may vary.
Another option is using liquid candle colorants that can be mixed directly into the melted wax. These colorants often come in dropper bottles, allowing you to easily control the intensity of the color. This method is especially useful if you prefer more precise color mixing or want to experiment with creating unique shades.
If you prefer natural ingredients, you can even consider using herbs, spices, or natural pigments to add color to your candles. This can create a more rustic or organic look and allows for a more environmentally friendly approach. Be sure to research which natural ingredients are safe for candle use and test them in small quantities before adding them to larger batches.
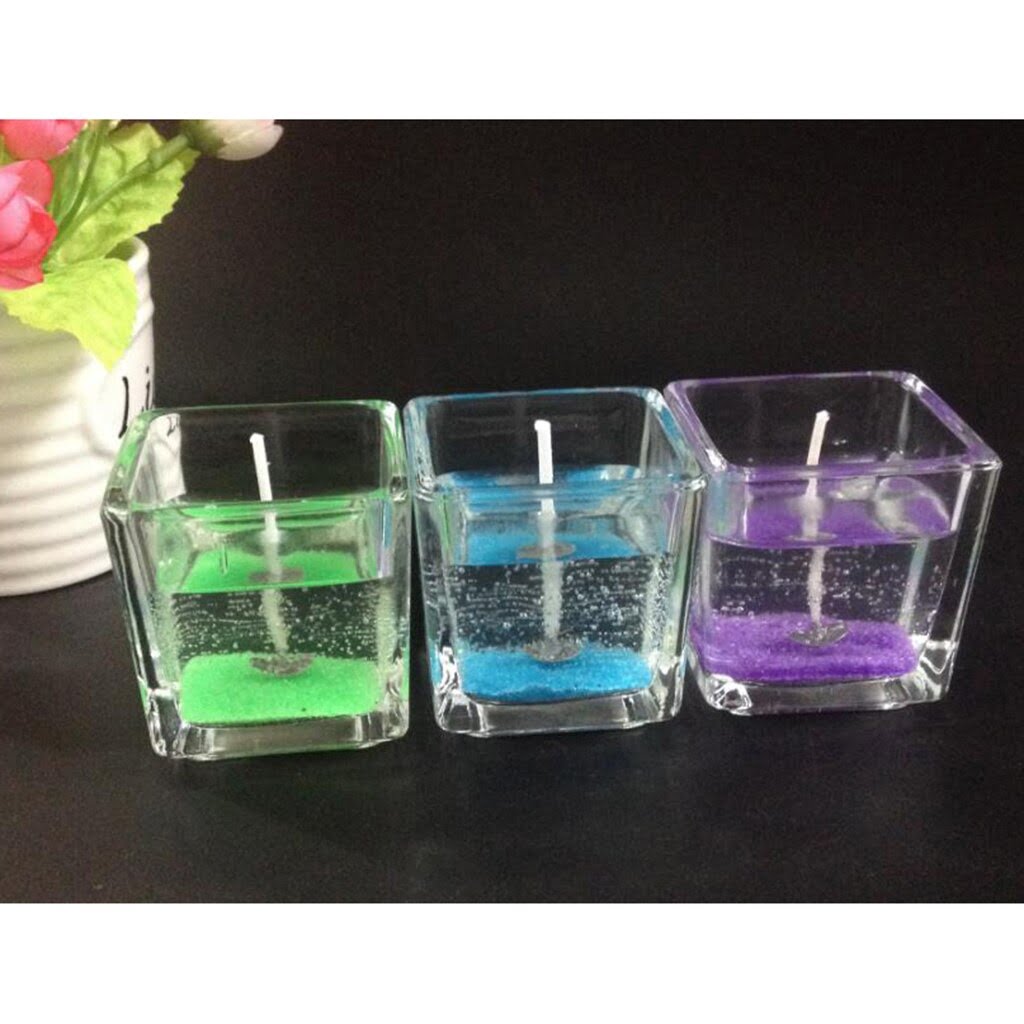
In addition to color, you can enhance your candles by adding various embellishments such as dried flowers or glitter. Dried flowers can add a touch of elegance and beauty to your candles, giving them a botanical feel. Simply press these flowers onto the surface of the softened wax before it fully sets or embed them halfway through pouring for a unique effect.
Glitter is another popular enhancement option that adds sparkle and glamour to your candles. You can either sprinkle it directly onto the top of the candle while still soft or mix it into the melted wax before pouring. Just be cautious with the amount of glitter used, as too much can affect the candle’s burn quality.
Remember to let your creativity shine and experiment with different color combinations and enhancement ideas. This is your opportunity to create candles that reflect your own personal style and taste. However, it is important to keep in mind that some enhancements may affect the way the candle burns or scent throw, so always test them out in small batches before making larger quantities.
By adding color and enhancements to your candles, you can elevate them from simple objects to pieces of art. Whether you choose bold and vibrant colors or subtle pastels, and whether you opt for elegant dried flowers or playful glitter, these additions will make your homemade candles truly unique and special. So don’t be afraid to get creative and have fun with this step in the candle making process.
Allowing the Candles to Set
Ideal setting time and conditions
Once you have poured the wax into the mold and added any desired enhancements or color, it is important to allow the candles to set properly. The ideal setting time will vary depending on the type of wax used, as well as the size and shape of the candles. Generally, most candles will need at least 24 hours to fully set and cure.
During this time, it is crucial to ensure that the candles are undisturbed and kept in a cool, dry place. Avoid placing them in direct sunlight or near any sources of heat as this can cause uneven setting and potential melting.
Common issues and troubleshooting
While allowing your candles to set, you may encounter some common issues that require troubleshooting. One common issue is sinking or dipping in the center of the candle during the cooling process. To fix this, simply melt a small amount of additional wax and pour it into the dip using a dropper or pipette. Allow it to cool completely before trimming the wick.
Another issue you may face is air bubbles forming within your candles while they set. This can be prevented by gently tapping or vibrating the mold after pouring in the wax to release any trapped air bubbles. If air bubbles still occur, use a toothpick or skewer to poke tiny holes around them to release the trapped air.
How to avoid potential problems
To avoid potential problems while allowing your candles to set, ensure that your workspace is clean and free from any drafts that could disturb the setting process. Use quality molds that are specifically designed for candle making and made from materials such as silicone or metal that allow for easy removal once set.
Additionally, carefully read instructions for your specific wax type regarding curing times and conditions as different waxes may require slightly different settings. By following these guidelines and allowing adequate time for your candles to properly set, you can ensure that they will burn evenly and have a smooth finish, ready for the finishing touches.
Finishing Touches
Trimming the Wick
Once your candles have fully set, it is important to give them the finishing touches. One crucial step is trimming the wick. Trimming the wick not only improves the overall appearance of your candle but also ensures a clean and even burn. Use a pair of scissors or a wick trimmer to cut the wick to about ¼ inch in length. This will prevent excessive smoke, soot, and mushrooming of the wick while burning, resulting in a longer-lasting candle.
Cleaning the Candle Surface
Before packaging your homemade candles, it’s essential to clean their surfaces for a polished look. You can remove any imperfections, bumps, or leftover debris using a heat gun or hair dryer on low setting. Gently wave the heat source over the surface of the candle until you see it smooth out. Be careful not to hold it too close or use excessive heat as this may cause melting or damage to the candle.
Labeling and Packaging Your Homemade Candles
The final step in finishing your homemade candles is labeling and packaging them. This adds a professional touch and makes them ready for gifting or selling. Design personalized labels with information like fragrance name, candle size, burn time, and any special instructions or warnings if applicable. Additionally, consider using stylish packaging options such as clear bags, decorative boxes, or organza pouches that will showcase your beautiful creations.
By taking these extra steps in trimming the wick, cleaning the candle surface, and labeling and packaging your homemade candles thoughtfully, you can elevate their appeal and make them stand out as high-quality products that are both visually appealing and functional.
This marks an exciting milestone in your easy step-by-step candle making journey – from gathering supplies to choosing wax types and fragrances – ultimately resulting in beautifully finished candles that you can enjoy yourself or share with others.
Conclusion
In conclusion, candle making is a rewarding and enjoyable hobby or DIY project that offers numerous benefits. By following an easy step by step process, you can create beautiful candles that not only add ambiance to your home but also make thoughtful gifts for loved ones. Throughout this guide, we have covered the essential steps and considerations for successful candle making.
By gathering the necessary supplies and selecting the right wax, fragrance, mold, and wick, you can ensure that your candles turn out exactly how you envision them. From there, it’s all about melting and pouring the wax, adding color and enhancements, allowing the candles to set properly, and finishing them off with trimmings and packaging.
The satisfaction of completing your own homemade candles using this easy step by step process is incomparable. It allows you to unleash your creativity and experiment with different fragrances, colors, and styles. Furthermore, candle making can be a great gift idea for special occasions or even a potential business venture if you find joy in sharing your creations with others.
So don’t hesitate to dive into the world of candle making. Let your imagination run wild as you explore different scents, designs, and techniques. With patience and practice, you’ll be able to craft stunning candles that bring warmth and joy into any space. Happy candle making.

Welcome to my candle making blog! In this blog, I will be sharing my tips and tricks for making candles. I will also be sharing some of my favorite recipes.


