Introduction
Candle wax is often made through a process called “triple-pressing”, which involves melting and refining raw materials, such as paraffin or beeswax, and pressing it through an extruder three times. After each press, the material is passed through a filter to remove impurities. This method produces a high-quality wax with consistent consistency and color. The filtered wax can then be shaped into various forms, most commonly either blocks or pellets. Depending on the desired candle shape, either one of these may be used as-is or mixed together for the final product. This mixture can then be poured or injected into molds to create candles that are tailored to individual needs and preferences. Finally, after cooling in the moulds for several hours, any excess wax can be trimmed away and a wick set in place before the candle is ready for use.
The Different Forms of Wax Used in Candle Making
When it comes to candle wax, there are several different forms that can be used for candle making. These forms include both natural and synthetic materials.
Natural waxes, such as beeswax, vegetable wax, and plant-based waxes are all used in the production of candles. Beeswax produces a wonderfully creamy texture when combined with other natural waxes; it also burns well without smoking or producing sooty residue. Vegetable wax is generally harder than beeswax and is often used as a base component in stearic acid/paraffin blends. Plant-based waxes are usually more expensive but will also provide excellent burning results.
Synthetic materials such as paraffin wax, mineral oils, and microcrystalline waxes may be used in candle making too. Paraffin is a petroleum by-product and gives a good even burn with stable color retention characteristics when used correctly in a blend. Mineral oils are typically added to give stability to soy or palm oil blends while increasing throw distance. Microcrystalline Wax generally adds rigidity to your final product, allowing for pillar candles to hold their shape better than an all-plant based candle would.
The Basics of Wax Refining
To produce candle wax, manufacturers must begin by refining the base material. This can involve either melting the raw material and straining it to get rid of impurities, or it can involve a chemical process to purify the raw material. The quality of the final product depends heavily on how well this refining step is done. In general, any type of oil or fat can be used to make wax. Examples include soybean oil, palm oil, tallow (animal fat), and paraffin wax from petroleum-based sources. After this first step is completed, any remaining color must be removed. This is usually done through a bleaching process that takes out any color pigments in the raw material so that the candle will burn cleanly when lit.
Next, manufacturers need to emulsify their product. This means adding small amounts of an emulsifying agents such as salts and acids that work together with heat to break down the molecules in the wax into smaller pieces which ensures an even distribution throughout the mixture and prevents the formation of a thick waxy surface on top during cooling afterwards. Finally, manufacturers need to add other ingredients such as dyes and scents depending on what kind of candle they are making (scented or colored). This helps give candles their unique characteristics and allows for creative customization when it comes to making different types of candles (e.g., aroma therapy). Once all these steps are taken care of, candle makers can begin pouring their wax mixture into molds thus finishing off their finished product!
Precision Pour Techniques for Avoiding Sagging Candles
Candles are made of wax, and the production of such involves a precise pour technique to prevent candles from sagging. This involves heating up the wax until it reaches liquid form, and it is then poured slowly into the candle mould at an even temperature. The aim of this controlled pour is to ensure that the wax solidifies slowly, so that all of the layers cool at a consistent rate. If too much or too little heat is applied upon pouring, or if the wax is not poured evenly, this can lead to an imbalanced structure in which individual layers will cool differently. This can lead to an uneven surface or even cause sagging in the middle area where hot wax tends to collect. It is important during this process to keep a close eye on consistency, for variations in temperature can change the texture and appearance of a candle dynamically.
Finding the Right Wick for Your Candle
When making any type of candle, it is essential to find the right wick for it. The wick must be made of a material that will not burn too quickly and cause your candle to flicker, or too slowly and leave little wax melted in its place. It should also be able to draw the correct amount of wax into the flame and have enough “memory” so as not to lean off center after initial use.
Choosing a suitable wick is often a matter of trial and error due to variations in wax formulas, temperature, and containers used. Generally speaking, the thicker the wick you select, the larger the candle it can handle. With thinner wicks, you get more scent throw from your candle but it may not have a large melt pool leaving unburned wax around its edge. Soy blends work best when given a round braid or square braid 3-ply coreless flat cotton wick while beeswax needs more support due to its higher melting point so requires a ‘Hot Blended Wick’ such as a zinc cored one with integrated thread count (ITC). If you want to create pillar candles then length & weight should be taken into account such as various pre-tabbed options along with tapered coreless ones specifically designed for use with them.
As technology continues to evolve within this industry, some manufacturers are introducing newer types of sustainable wicks made exclusively from renewable resources that burn cleanly & save on environmental impact which is great news for those looking for sustainability via their choice of materials to complete their project. Ultimately though it can take some experimentation and testing before achieving desired results so be sure to check out all available information available beforehand or seek out professional advice if needed.
Adding Aroma and Aesthetic Appeal to Your Candles
Candle wax is made out of a specifically formulated blend of natural ingredients; some of these can include beeswax, paraffin, soybean oil and other vegetable oils. It is heated until it reaches the right temperature, where it then softens to form a liquid before taking on its solid form when cooled. To make the wax more attractive and fragrant for use in candles, colorants like dye are often added. Essential oils serve as a great way to scent the wax and bring an uplifting feeling to any room in which it’s burned. Shade variations also add aesthetic appeal to candles – from classic white tapers to colorful cocktail-themed options, the wax used helps create the perfect ambience. The level of natural ingredients that go into making the candle’s wax determine how “clean” or smokeless it will burn – this is especially important for those who want to ensure their candles are eco-friendly.
Defined Steps to Creating Layered Candles
1. Begin by melting your wax. The wax used in candles can be made from a variety of materials, such as soy wax, beeswax, paraffin, and even tallow. Depending on the type of candle you’d like to make, different waxes may provide different properties and scents.
2. Once your wax is melted it’s time to dye the candle. To retain the final color of the candle for durability, use liquid dye rather than colored chips to add color to your candles. Be sure not to exceed the recommended amounts as too much dye can significantly weaken the candle’s structure.
3. Now that you have your colored wax it’s time to add scent or fragrance oils to your candles. Fragrance oils are derived from natural or synthetic substances which can create a wide range of smells — from fresh floral notes to sweet food-like fragrances. Use any combination you’d like but be aware that depending on the concentration of essential oils you choose, the scent of one batch could be significantly stronger than another when lit!
4. Pour a small amount (roughly ¼ inch) of melted wax into each mold or container you plan on using — we recommend starting small so that you can easily modify if needed later! Once you’ve done this let it cool and solidify until firm before continuing onto step 5: Pouring more layers!
5. This is where you’ll really get creative with colors and scents! Add additional scented layers by slowly pouring colored wax into containers until desired fullness is achieved — experimenting with designs creates truly stunning layered candles! When finished let them cool down completely before trimming away excess unmelted wax around outer edges (those extra pieces make great tarts!).
Avoiding Common Candle Making Mistakes
When making candles, there are certain mistakes that can spoil an otherwise perfect batch. Below are some of the most common mistakes and tips on how to avoid them.
1. Using an incorrect wick size: It is important to always choose a wick that is appropriate for the type of wax and size of candle you will be making. Too small a wick won’t melt enough wax to create a strong flame, and too large a wick will lead to an excessively large flame which could cause soot buildup or tunneling in the middle of your candle.
2. Poor wax melting technique: When melting your wax, it is important to do so slowly and carefully in order not to overheat it; overheating the wax can result in weak or brittle candles with poor scent release or colors that run together unevenly. To ensure proper melting, use a double boiler or keep your heat source at least 2 inches away from the bottom of your melting container.
3. Not measuring fragrance oil correctly: Over-scented candles will have a strong off-putting smell, and under-scented candidates won’t have much scent at all! Therefore, it is important to measure out fragrance oil accurately using plastic measuring spoons or weighing with a kitchen scale for best results.
4. Improper cooling: After you pour your candles into their containers allow them time to harden undisturbed – if disturbed during cooling they will crack due to temperature changes caused by movement while they cool down – before adding labels or tops if necessary.
Crafting the Ideal Setting for Candle Making
Crafting the ideal setting for candle making requires creating a safe, well-ventilated area. This is especially important if you plan to use wax that has a higher melting point than the traditional paraffin wax. The space should be free of clutter and away from any drafts to avoid any accidents during your project. Additionally, make sure there are no flammable items near the workspace as candles will be lit.
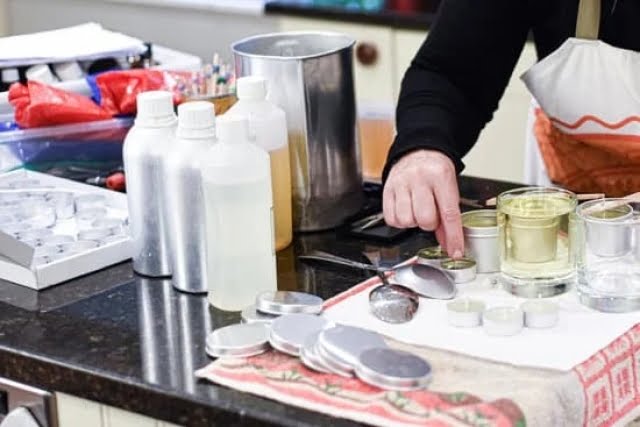
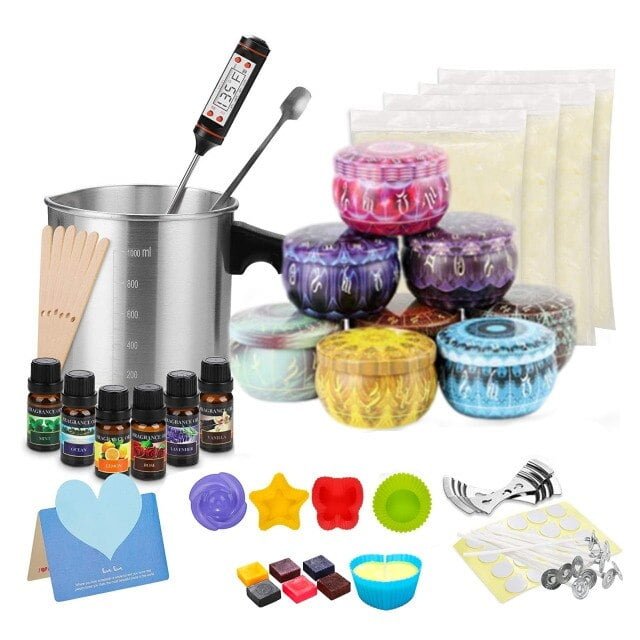
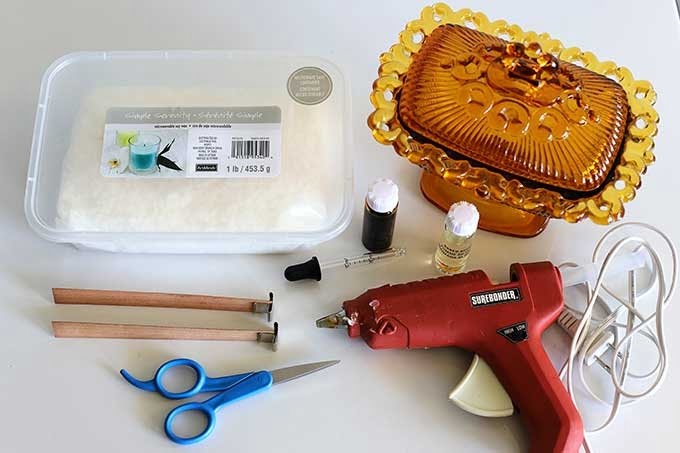
When setting up this workspace, it is important to also have all required materials and tools on hand before beginning. This includes wax, fragrance or coloring additive options, molds, thermometer and wicks. Specific safety items include long oven mitts to keep your hands away from any hot wax. You’ll also need accessories for melting the wax such as double boilers or microwavable vessels or even electric melters specifically designed for candle making. Stirring implements such as chopsticks will also be needed for this activity as well as funnels for pouring the melted wax into each mold with great precision. Lastly, having a timer close by would prove helpful in ensuring proper handling of temperatures with every batch made.
Conclusion
Once all of the steps have been taken to create your perfect candle, a wick can be added to complete the process. Depending on the size and how much color you may want for your desired aesthetic look, adding a wick can further enhance your candle. Wick styles can range from round braids to spiral clips with metal bases. The length also has to be considered since it needs to reach deep enough into the wax container in order for lightening the flame of the candle. Once added, you now possess a lovely homemade candle that is ready for use and enjoyment.

Welcome to my candle making blog! In this blog, I will be sharing my tips and tricks for making candles. I will also be sharing some of my favorite recipes.

