Are you looking to elevate your candle making experience? Learn how to build a candle making counter and create a dedicated space for your craft with this comprehensive guide. A well-designed candle making counter not only enhances the efficiency of the process but also adds a touch of elegance to your workspace.
Having a designated area for your candle making endeavors can boost productivity and creativity. From planning the layout to choosing the right tools and materials, every step contributes to creating a functional and inspiring workstation. Whether you are a seasoned candle maker or just starting out, having a personalized counter can make all the difference in your crafting journey.
In this article, we will delve into the importance and benefits of candle making counters, share creative design ideas, provide essential tips on building your own counter, offer guidance on decorating and organizing your space, as well as tips on maintenance and troubleshooting common issues. Get ready to take your candle making hobby to the next level with a custom-built counter that caters specifically to your needs and preferences.
Planning Your Candle Making Counter
Before jumping into building a candle making counter, it is crucial to consider several key factors to ensure that your workspace is functional and efficient. One of the first things to think about is the size of your counter.
Determine how much space you have available and how many candles you plan to make at once to decide on the appropriate dimensions for your counter. Additionally, consider the height of the counter to ensure that it is ergonomic and comfortable to work at for extended periods.
Another important factor to consider when planning your candle making counter is the layout. Think about how you want to organize your tools, materials, and finished products for easy access during the candle making process. It may be helpful to sketch out a rough design or floor plan to visualize where everything will be placed on the counter before starting construction. This will help streamline your workflow and prevent clutter on the workspace.
In addition to size and layout, it’s essential to think about the material and finish of your candle making counter. Choose a durable material that can withstand heat, spills, and frequent use, such as stainless steel or heat-resistant laminate.
Consider adding a protective finish, like polyurethane, to increase the lifespan of your counter and make it easier to clean. By carefully considering these factors before building, you can create a candle making counter that meets your needs and enhances your crafting experience.
| Factors | Considerations |
|---|---|
| Size | Determine available space and candle production volume. |
| Layout | Organize tools, materials, and products for easy access. |
| Material & Finish | Select durable material resistant finish suitable for heat and spills. |
Design Inspiration
When it comes to building a candle making counter, the design is essential not only for functionality but also for creating an inspiring and inviting space. There are countless creative ideas you can explore to make your candle making counter both practical and visually appealing.
One popular design concept is to incorporate open shelving or storage units above the counter to display your collection of candle-making supplies like wax, wicks, fragrances, and molds. This not only keeps everything within easy reach but also adds a decorative element to your workspace.
Another innovative idea for a candle making counter is to include built-in drawers or cabinets underneath the countertop. This provides extra storage space for tools and equipment while keeping them neatly tucked away when not in use. You can also consider adding a designated area for mixing and pouring candles, complete with a heat-resistant surface and proper ventilation to ensure safety during the candle-making process.
Additionally, don’t underestimate the power of lighting in setting the ambiance of your candle making counter. Consider installing overhead task lighting or adjustable lamps to brighten your workspace while working on intricate details. You can also add decorative elements like plants, artwork, or personal touches that reflect your unique style and inspire creativity while crafting candles.
| Design Idea | Description |
|---|---|
| Open Shelving | Displaying supplies like wax, wicks, fragrances, and molds. |
| Built-in Drawers | Extra storage space for tools and equipment. |
| Lighting | Task lighting or adjustable lamps for brightening the workspace. |
By incorporating these creative ideas into your candle making counter design, you can personalize your workspace and enhance your overall candle-making experience. Remember that functionality should always be at the core of your design decisions, ensuring that your counter serves as a practical workstation where you can unleash your creativity and passion for crafting beautiful candles.
With careful planning and attention to detail, you can build a candle making counter that not only meets your practical needs but also reflects your unique style and aesthetic preferences.
Essential Tools and Materials
Building a candle making counter requires the right tools and materials to ensure a sturdy and functional workspace. Here is a list of essential items you will need to successfully construct your own custom counter:
- Measuring tape: Accurate measurements are crucial for building a well-fitted counter.
- Power drill: Needed for drilling holes, assembling parts, and attaching hardware.
- Saw: Whether it’s a circular saw, jigsaw, or handsaw, you’ll need it to cut wood to the appropriate size.
- Sandpaper: To smoothen any rough edges and surfaces for a polished finish.
- Screws and nails: Essential for securing various components of the counter together.
In addition to tools, you will also require specific materials to bring your candle making counter to life. Here is a list of key materials you will need:
- Wood or countertop material: Choose a durable and easy-to-clean surface for your counter.
- Legs or supports: Depending on the design of your counter, you may need table legs or brackets for support.
- Paint or stain: To add color or protect the wood surface of your counter.
- Bins or containers: For storing candle making supplies like wax, wicks, and fragrance oils.
- Lighting fixtures: Proper lighting is crucial for detail-oriented tasks like candle making.
By ensuring you have the necessary tools and materials on hand, you can start building your candle making counter with confidence. The right equipment will not only make the construction process smoother but also ensure a final product that meets your needs and enhances your crafting experience.
Step-by-Step Guide to Building Your Own Candle Making Counter
Building your own candle making counter can be a fun and rewarding DIY project that adds a personal touch to your creative space. Whether you are a seasoned candle maker or just starting out, having a dedicated workspace can make the process more efficient and enjoyable. In this section, we will guide you through the step-by-step process of building your own candle making counter.
Gather Your Materials and Tools
Before you start building your candle making counter, make sure you have all the necessary tools and materials on hand. You will need items such as wood boards (cut to size for the counter), screws, drill, saw, hammer, sandpaper, measuring tape, level, paint or stain for finishing, and any additional accessories you want to incorporate into your design. Having everything ready before you begin will help streamline the construction process.
Constructing the Frame
Start by constructing the frame of your candle making counter using the wood boards. Measure and cut the boards according to your desired dimensions for the counter. Assemble the frame using screws and a drill for extra support. Make sure each corner is square and use a level to ensure everything is even. This frame will serve as the foundation for your counter, so take your time to get it right.
Adding Countertop and Shelves
Once the frame is in place, it’s time to add the countertop and any shelves or compartments you want to include in your design. Secure these elements to the frame using screws or brackets. Consider adding adjustable shelves for versatility in organizing your supplies.
You can also add hooks or small containers for storing tools like stirring sticks or wicks. Remember to sand down any rough edges and finish with paint or stain to protect the wood from spills during candle making sessions.
Finishing Touches
After successfully constructing your own candle making counter, the next step is to focus on adding the finishing touches to truly make it your own. Decorating and organizing your candle making counter not only enhances the space aesthetically but also contributes to an efficient and enjoyable crafting experience. By carefully planning the layout and choosing decorative elements that inspire you, you can create a workspace that sparks creativity and productivity.
When it comes to decorating your candle making counter, consider incorporating elements that reflect your personal style and preferences. This could include adding shelves for displaying essential oils or jars of wax, hanging motivational quotes or artwork on the walls, or even using decorative lighting to set the mood.
Additionally, organizing your supplies in an accessible and visually appealing manner can streamline your candle making process. Utilize storage containers, baskets, or shelving units to keep everything neatly organized and within reach while you work.
To truly enhance the functionality of your candle making counter, consider implementing organizational systems such as labeling containers, using color-coded tools for different purposes, and creating designated areas for each step of the candle making process. By maintaining a clean and well-organized workspace, you can maximize efficiency and minimize the risk of spills or accidents during crafting sessions.
Remember that the goal is to create a visually pleasing yet functional space that inspires creativity and makes candle making a enjoyable hobby.
Maintenance Tips
Maintaining your candle making counter is essential to ensure that it remains a functional and organized space for crafting your candles. By following these maintenance tips, you can keep your counter in top condition and prolong its lifespan.
To keep your candle making counter clean and free of wax residue, regularly wipe down the surface with a damp cloth. Avoid using harsh chemicals or abrasive cleaners that can damage the countertop material. Additionally, consider placing a protective mat or tray under your melting pot to catch any spills and prevent them from staining or damaging the counter.
Organizing your supplies is key to maintaining an efficient workspace. Utilize storage containers, shelves, and drawers to keep all your candle making tools and materials neatly stored and easily accessible. Creating a designated spot for each item will not only make crafting more efficient but also help prevent clutter on your counter.
Regularly inspect your candle making equipment for any signs of wear or damage. Replace any worn-out tools or parts to ensure that they function properly and safely. It’s also important to check for any loose screws or unstable components in the counter structure itself. By staying proactive with maintenance, you can prevent potential issues before they escalate into bigger problems.
- Wipe down the counter surface with a damp cloth regularly
- Use protective mats or trays under melting pots to catch spills
- Organize supplies with storage containers, shelves, and drawers
- Inspect equipment for wear and tear; replace damaged parts promptly
Troubleshooting Common Issues With Candle Making Counters
Identifying Potential Problems
When it comes to building a candle making counter, there are several common issues that may arise. One of the most frequent problems is inadequate ventilation, which can lead to poor air quality and potential health hazards. Another issue that often arises is lack of space or inefficient layout, making it difficult to work comfortably and efficiently. Additionally, issues with lighting, storage, and access to essential tools and materials can also hinder the candle making process.
How to Address Ventilation Concerns
To ensure proper ventilation in your candle making workspace, consider installing exhaust fans or opening windows to allow for fresh air circulation. You can also use air purifiers or dehumidifiers to improve air quality. It’s important to prioritize safety by following all recommended ventilation guidelines and practices when working with hot wax and fragrances.
Solutions for Space and Layout Challenges
If you’re facing constraints in terms of space or layout when building your candle making counter, consider optimizing vertical space by installing shelves or storage units above your workspace. Utilize drawer organizers and dividers to keep tools and materials within reach while maintaining a clutter-free environment. Additionally, investing in adjustable lighting fixtures can help enhance visibility and create a more conducive work area for candle making.
By addressing these common issues with thoughtful planning and strategic solutions, you can create a functional and efficient candle making counter that enhances your crafting experience. Remember to prioritize safety, organization, and comfort when designing and building your custom counter for an enjoyable candle making process every time.
Conclusion
In conclusion, building your own candle making counter can be a rewarding and fulfilling project that not only enhances your candle making experience but also adds a personal touch to your creative space. By understanding the importance and benefits of a dedicated candle making counter, you can optimize your workflow, improve organization, and create a more efficient workspace.
When planning your candle making counter, consider factors such as the size of your workspace, storage needs, and the type of materials you will be working with. Drawing inspiration from creative design ideas can help you visualize the final look of your custom counter and ensure it reflects your style and preferences.
By following a step-by-step guide and investing in essential tools and materials, you can successfully build a functional and stylish candle making counter that meets your specific requirements. Remember to add finishing touches that personalize your counter and make it both practical and visually appealing.
With proper maintenance and troubleshooting know-how, you can keep your candle making counter in top condition for years to come. Embrace the art of candle making with your own custom counter, and enjoy the convenience and creativity it brings to your craft.
Frequently Asked Questions
What Is the 84 Candle Rule?
The 84 candle rule refers to a guideline for burning candles safely. It suggests that candles should not be burned for more than 4 hours at a time, as this can prevent the container from overheating and potentially causing a fire hazard.
How Profitable Is a Candle Making Business?
A candle making business can be profitable depending on various factors such as quality of products, market demand, pricing strategy, and production costs. With proper planning and marketing efforts, it is possible to generate significant revenue from selling candles.
What Container Can You Melt Wax In?
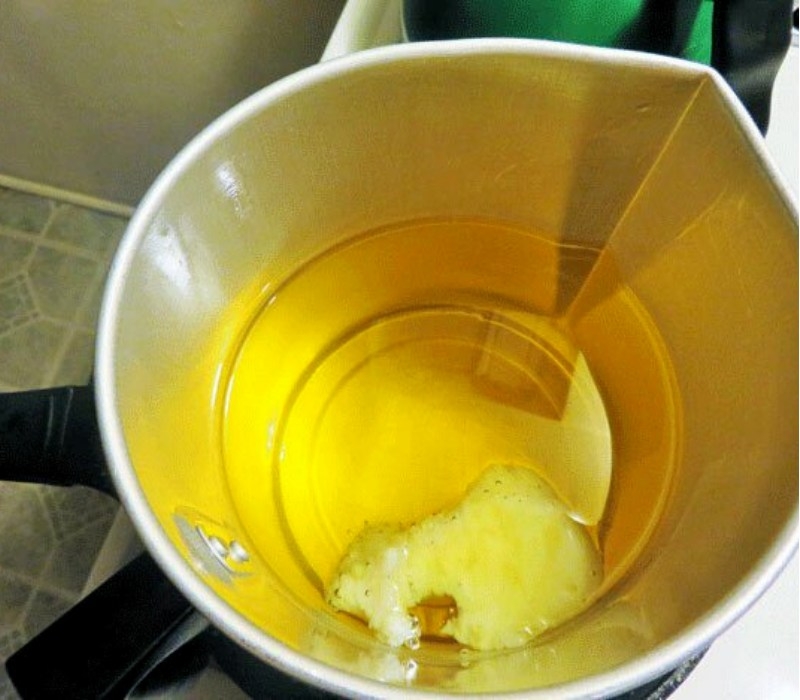
When melting wax for candle making, it is important to use a heat-resistant container that can withstand high temperatures without cracking or breaking. Common containers used for melting wax include glass measuring cups, metal pitchers, or dedicated double boilers specifically designed for candle making.
Using the right container ensures safe and efficient melting of wax for creating high-quality candles.

Welcome to my candle making blog! In this blog, I will be sharing my tips and tricks for making candles. I will also be sharing some of my favorite recipes.


