Introduction
Making your own candle jars is an exciting way to personalize a room in your house or give an extra special gift. With a few simple materials and a bit of creativity, it’s easy to create one-of-a-kind decorative containers for wax candles. Before you begin, it’s important to determine the kind of jar you want to make and gather the necessary supplies.
There are several different types of candle jars available; from mason jars and terracotta pots, to wine bottles and glass cylinders ” there’s something to suit everyone’s style! Mason jars are classic containers that can often be decorated with paint or twine wrapped around the rim. To use a mason jar, cut a wick with enough length that extends past the lid when it is screwed on as this will help avoid smoke buildup when burning. Terracotta pots are great for making natural scented candles as they absorb essential oils quickly, however you will need to seal them first before pouring in your wax ” otherwise your candle won’t burn evenly! Wine bottles can be cut at an angle using glass cutters and then have the rim sealed depending on the size of your wick holder. Finally, glass cylinders provide a simple yet elegant form for packaging candles which can add more personality by being filled with colorful beads instead of wax. When shopping for supplies make sure you purchase a type of wax that doesn’t require you to lend additives for scent or color as these can become expensive. Additionally, be sure it will hold up at higher temperatures since the hotter liquid will start melting parts off if not kept in check ” paraffin is an ideal option due its low cost but watch out – some varieties produce more smoke than others!
With these basics in mind, creating your own candle jar is easy – let’s get started!
Tools & Materials Needed
Making a candle jar involves several steps. First, you must gather the necessary materials and tools needed to make the candle. You will need wax in either block or flake form, wicks that are suitable for the size of your jar, and jars of your desired size, shape and color. To melt and pour the wax you will need a pot/double boiler, stove, thermometer and some type of stirring tool such as a spoon or ladle.
When selecting candles it is important to choose wax that is designed specifically for candle making as this will ensure complete melting of all ingredients such as colorants and fragrances. This usually means choosing a paraffin-based wax but soy waxes have become popular in recent years too. Generally, it is best to buy wicks from suppliers that design them specifically for the types and sizes of candles you are making for optimal burning results. Wicks also come pre-waxed which eliminates the need to manually dip into wax prior to adding them to your jars. As far as jars go there are lots of shapes available; mason jars and other wide mouthed containers are most commonly used because they allow wick movement during burning.
Finally, safety should be considered when using open flames while making candles: keep flammable items such as curtains away from heat sources, don’t leave melted wax unattended on a stovetop or flame source, keep children out of reach while using heated materials, work on an even noncombustible surface such as a nonstick cutting board or trivet. With these tips in mind you can now begin crafting your own beautiful homemade candle jars!
Preparing the Candle Jar
1. Gather your materials: wax, wicks, jars, scissors, a double boiler or pot, stir stick, and thermometer.
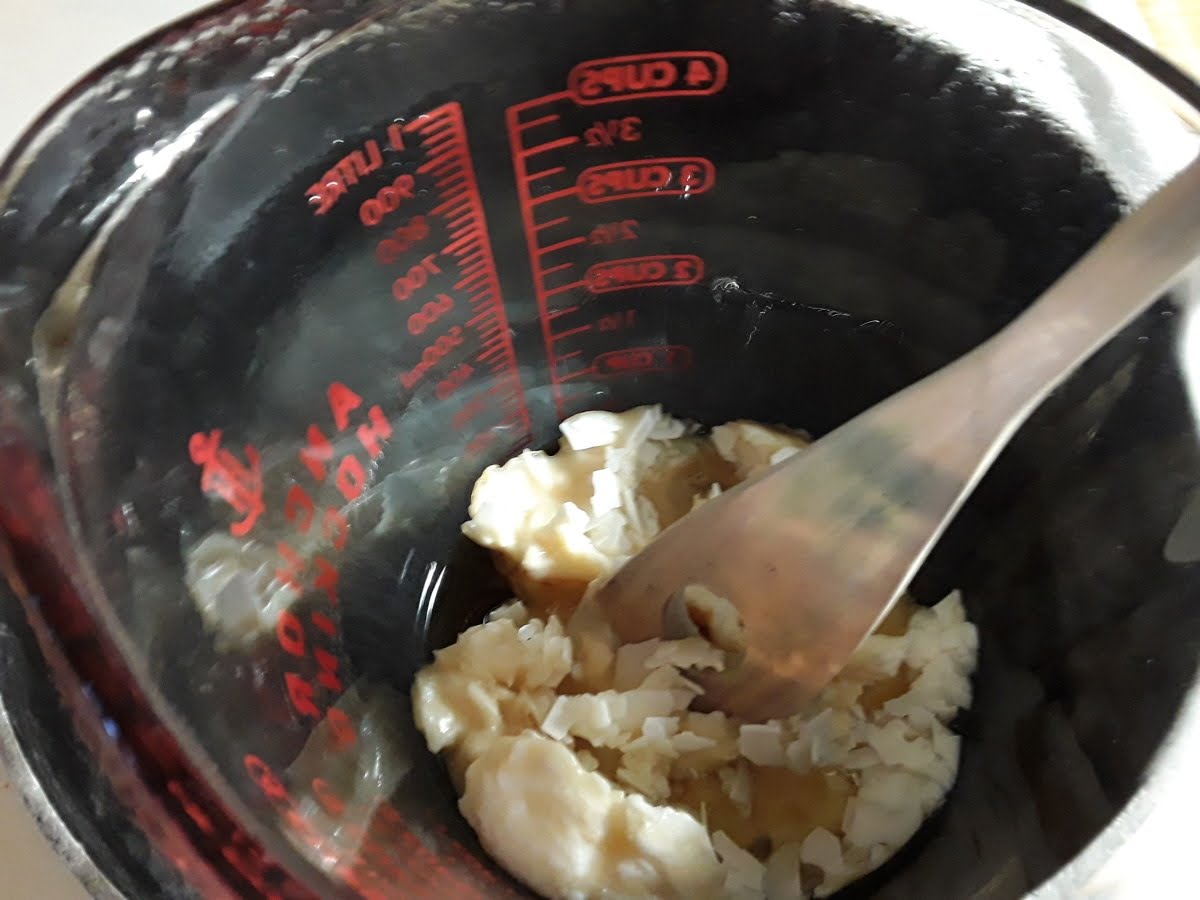
2. Measure the wax into the double boiler or pot. Carefully melt the wax following the manufacturer’s instructions on the package.
3. Use a thermometer to check the temperature of the melted wax – it should reach around 180F (82C).
4. Cut a length of wick for each jar and tie it to a chopstick that will be placed across the top of each jar for support (this is optional). It is wise to add extra length to ensure that when added to the jar there is still an excess wick sticking out from the bottom so you can adjust accordingly before adding any more wax. Secure this in place by wrapping some string around both ends at top of jar tip edge.
5. With your hands protected with rubber gloves, carefully pour the melted wax into each desired container allowing enough space for your desired amount of scent if you want to add any at this stage.
6. Allow candles to cool completely before handling them. If needed you can trim any excess wick after they have cooled off completely by using scissors or a sharp blade but let it be know that some heat may still be present even though they have fully cooled so proceed with caution when handling them after they have cooled down completely
Setting the Wick
Once you have decided the perfect size of your candle jar, it is important to determine the length of your wick ” the metal thread pre-coated with wax. Adjusting the wick placement in the jar is vital as it determines how close or far away from the edges of the jar your flame will be when lit. To measure, tie one end of the wick around a pencil and dip it into melted wax. Then place the other end of the wick on one side at midpoint inside of your candle jar, keeping in mind that if you pull out more than what is necessary, you can always cut off any excess after the candle is poured. When all is said and done, ensure that the wick will stand straight up without having any chance of getting into contact with hot wax or else it might catch fire!
Melting Wax Tips
1. Measure the wax and set it in a double boiler, never pour directly into a pot or pan.
2. Begin by melting the wax on low heat, stirring occasionally to ensure that it melts evenly.
3. Once the wax has completely melted, turn off the heat and allow it to cool just enough that you can stir without burning yourself. This ensures that your candle jar will retain its shape while hardening once you add in the wicks.
4. Once the desired temperature is reached, pour in small amounts at a time into the jars with wicks, ensuring all areas of your jar are done before adding more wax to finish it up.
5. Add fragrance oils, essential oils or any other additives such as glitter at this point if desired; these should be added before pouring too much wax so they don’t settle onto the bottom of the jar and remain suspended within the wax for effect.
6. Allow your candle jars to cool down completely before handling them; this is essential for both their structural integrity and also helps to keep them looking beautiful!
Decorating the Jar
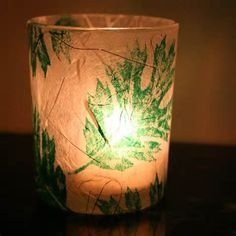
Painting the Jar – If painting, provide tips on prepping the jar and how to get the paint to adhere. Suggest using spray paints and adding a clear sealant at the end for longevity. Give readers ideas for designs; paintingfloral motifs or other fun patterns.
Adding Scent – Guide readers on how to choose a scent for the candles. Provide advice like matching the scent with season or event (such as sweet orange blossom in the summertime). Explain how to use different fragrance oils, or opting for all-natural options like essential oil blends.
Adding Dye – Share advice about using dye blocks versus liquid dye for color consistency. Warn readers about overcoloring and point out it is better to add small amounts of color until achieving desired hues because too much dye can inhibit wax burn time and cause poor hot throw.
Finishing Touches – Offer instructions on wick sizing and correctly embedding wicks into wax when making soy or beeswax candles. Give advice on trimming wick tops after candle is cool before storing. Discuss common risks of crackling in paraffin candles due to moisture, improper cooling, and improper heat control during pouring process.
Finishing Touch and Lighting the Candle
Once the candle is decorated to your liking, it’s time to add the wax and wick. Place the wick in the middle of the jar and hold it in place with a clothespin while pouring the melted wax slowly down into your jar. Once full, use another clothespin to hold the wick upright in place so it can dry. Make sure to leave at least an inch of space for wax at the top of your jar.
When the wax has cooled and hardened, you can now light your candle! To light your candle safely, use a stick match or long lighter that you can keep away from the flame when you’re done. Lighting candles should always be done responsibly with an eye on safety first! Enjoy your finished product!
Troubleshooting
Preventing Wicks from Drowning in the Wax
1. Make sure that your containers can accommodate the amount of wax you’re using. If you pour too much wax, it will drown out the wick and prevent burning.
2. Clip the wick before putting it into the container and make sure that it does not exceed one-half inch above the wax surface.
3. When pouring, tilt your container to create a slope for the melted wax to be held in place so that it is not just pooled on top of your wick (which can cause drowning).
4. Insert your prepared wick in an anchor base or firmly press with your finger across the surface of heated melted wax if not using a base. This helps secure the wick so that it won’t float away when you add more wax or change its position inadvertently when cooling.
Preventing Spills
1. Use a double boiler melting technique to melt small batches of waxes before pouring it into larger containers or moulds – this will help contain any leaks or spills while easily controlling temperature, amount, and speed at which the ingredients are mixed together thus reducing risk of mishaps caused by rapid changes in temperatures or air pockets formed in large quantities at once causing spills and splatters over a work table due to heat differences between wax batch volumes being added at different times etc
2. Find appropriate candle holders and vessels for whatever size candle jar you have prepared as this will ensure good stability for when lit as well as preventing accidental damage/spills through movement or jarring when trying to move them from A-B etc
Conclusion
Making a candle jar is an enjoyable and rewarding way to create something unique and special. Not only is it budget-friendly, but it also allows you to transform a plain or recycled jar into something useful. Plus, you can experiment with color, scents, and styles to make the most of your candle project. When shopping for supplies and materials, be sure to purchase high quality items that are appropriate for making candles in jars. And be sure to follow instructions carefully and practice safe practices when burning your candles in order to prevent fires. With patience and creativity, you’ll have a beautiful homemade candle that will last for many years and bring you great joy. So why not give it a try today? Get creative with your own designs and build something truly special – the perfect addition to any home decor or gift!

Welcome to my candle making blog! In this blog, I will be sharing my tips and tricks for making candles. I will also be sharing some of my favorite recipes.

