Candle making has become a popular and rewarding hobby in recent years, as more and more people discover the joy of creating their own personalized candles. In this article, we will explore why candle making has gained such widespread appeal, as well as the satisfying aspects of this craft.
The rise of do-it-yourself (DIY) crafts has undoubtedly contributed to the growing interest in candle making. In an era of mass-produced goods, there is a certain allure in being able to create something unique and handmade.
Homemade candles allow individuals to exercise their creativity and produce one-of-a-kind creations that cannot be found in stores. Whether it’s a beautifully sculpted pillar candle or an intricately layered votive, crafting handmade candles provides a sense of fulfillment unlike any other.
Moreover, candle making offers a wide range of possibilities for customization. From choosing the scent and color to experimenting with different wax types and techniques, the process allows for endless creativity. By creating personalized candles, individuals can tailor them to match their home decor or create heartfelt gifts for loved ones. The ability to infuse sentimentality into every aspect of the candle-making process adds another layer of satisfaction and connection to this hobby.
In the following sections of this article, we will delve deeper into the world of candle making by exploring essential supplies needed, comparing different wax types, providing step-by-step instructions for beginners, discussing various techniques and styles, sharing tips for adding fragrance, troubleshooting common issues, and offering advice on proper candle care. So roll up your sleeves, grab your materials, and let’s embark on a journey through the art of candle making.
Essential Candle Making Supplies
Making your own candles can be a fun and rewarding hobby, but before you get started, it’s important to gather all the necessary supplies. Having the right tools and materials on hand will not only make the candle making process easier but also help you achieve professional-looking results. Here are the essential candle making supplies you’ll need:
Double Boiler
A double boiler is a must-have tool for melting wax safely and evenly. It consists of two pots, one larger than the other, that fit together snugly. The smaller pot holds the wax while the larger pot is filled with water. This indirect heat source prevents overheating or scorching of the wax.
Thermometer
To ensure your candles turn out perfectly every time, a thermometer is crucial. It allows you to monitor and maintain the temperature of your melted wax accurately. Different waxes have specific temperature requirements for fragrance and dye incorporation and pouring into molds.
Molds
Candle molds come in various shapes and sizes, giving you endless possibilities for creativity. You can choose from silicone molds, metal molds, or even repurpose containers like jars or teacups as molds for container candles.
Wax
There are several types of wax available for candle making, each with its unique characteristics and benefits:
- Soy Wax: A popular choice among eco-conscious crafters due to its renewable nature.
- Beeswax: Known for its natural honey-like scent and long burn time.
- Paraffin Wax: A budget-friendly option that’s easy to work with and produces vibrant colors.
- Gel Wax: Allows you to create transparent or translucent candles with embedded objects.
Wicks
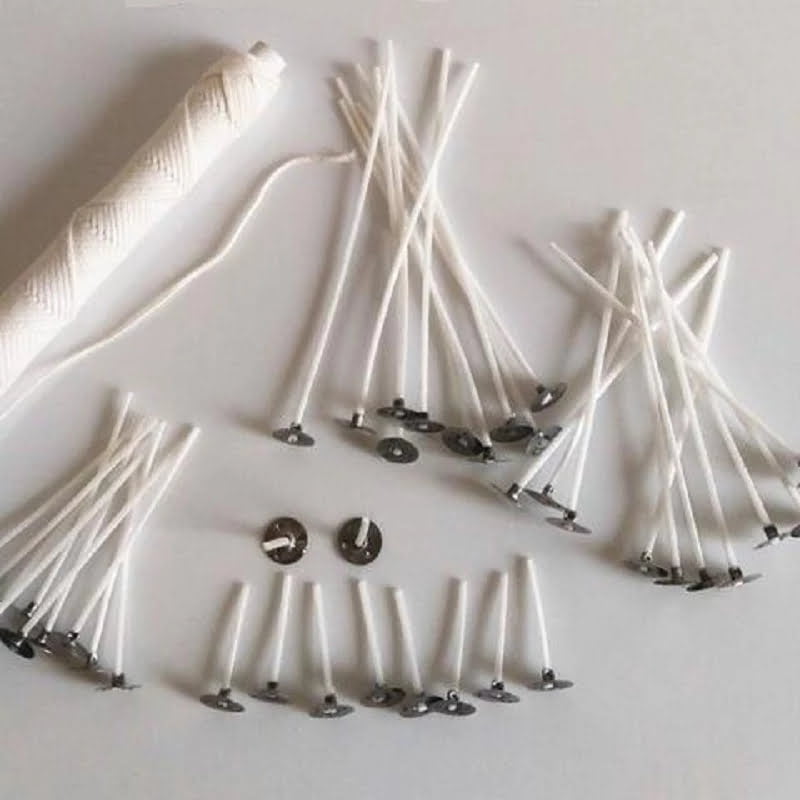
Wicks are an essential component in candle making as they provide the flame needed for combustion. They come in various sizes and materials, such as cotton, paper, or wood. The size and type of wick you choose will depend on the wax type, container size, and desired burn time.
Fragrances and Dyes
To add a personal touch to your candles, consider using fragrance oils or essential oils for a delightful scent. There are countless options available, from floral and fruity to warm and cozy scents. Additionally, dyes can be used to color your candles, allowing you to create vibrant or subtle hues to complement any decor.
By having these essential candle making supplies ready, you’ll be well equipped to delve into the art of candle making. So gather your tools and materials and get ready to unleash your creativity by making personalized candles that will fill your space with beauty and fragrance.
Choosing the Right Wax
When it comes to candle making, choosing the right wax is crucial as it can greatly impact the burning time, scent throw, and appearance of your candles. There are several popular wax options available, each with its own pros and cons. Understanding the differences between these waxes will help you make an informed decision and create candles that meet your desired specifications.
- Soy Wax: Soy wax is a natural vegetable wax made from soybean oil. It is becoming increasingly popular among candle makers due to its eco-friendly nature and excellent scent throw. Soy wax candles tend to burn longer than other types of candles and have a clean and even burn. However, it may have more limited options when it comes to creating intricate designs or achieving strong colors.
- Beeswax: Beeswax is another natural option that has been used in candle making for centuries. It has a naturally sweet aroma and produces a warm, golden glow when burned. Beeswax candles have a long burn time and emit negative ions that can purify the air. However, beeswax tends to be more expensive compared to other waxes, making it less commonly used for everyday candle making.
- Paraffin Wax: Paraffin wax is derived from petroleum and is one of the most widely used waxes in candle making due to its affordability and versatility. It offers a wide range of melting points, which makes it suitable for different types of candles like pillars or taper candles. While paraffin wax may have shorter burn times compared to soy or beeswax, it allows for vibrant colors and intricate designs.
| Wax Type | Burning Time | Scent Throw | Appearance |
|---|---|---|---|
| Soy Wax | Longer burn time compared to other waxes. | Excellent scent throw. | May have limited options for intricate designs or strong colors. |
| Beeswax | Long burn time with a warm, golden glow. | Naturally sweet aroma. | Tends to be more expensive than other waxes. Less commonly used for everyday candle making. |
| Paraffin Wax | Varies depending on the specific formula and application of the wax. | Allows for vibrant colors and intricate designs. | Petroleum-derived wax which some people may prefer to avoid due to environmental concerns. |
Remember, choosing the right wax is just one aspect of candle making. Other factors such as the type of wicks, fragrances, and dyes used also contribute to the overall quality of your candles. Experimenting with different combinations will help you find what works best for your preferences and style. So go ahead, get creative, and enjoy the process of making your own beautiful candles.
Step-by-Step Guide
Gathering Your Supplies
Before you begin making candles, it’s important to gather all the necessary supplies. Here is a list of items you will need:
- Wax: Choose the type of wax that suits your preferences and needs. Popular options include soy wax, beeswax, and paraffin.
- Wicks: Select wicks that are appropriate for the size and type of candle you want to create. It’s essential to choose wicks that are properly sized for optimal burning.
- Fragrance: Decide on the scent or combination of fragrances you want to use in your candles. There are various fragrance oils and essential oils available specifically for candle making.
- Dyes: If you wish to add color to your candles, select dyes that are safe for candle making. Consider experimenting with different shades to create unique and appealing designs.
- Double Boiler or Melting Pot: To melt the wax safely and evenly, use a double boiler or a dedicated melting pot designed for candle making.
- Thermometer: A thermometer is essential for ensuring that the wax reaches the proper temperature during melting and pouring.
- Molds: Depending on the type of candle you want to make, choose molds that suit your design preferences. There are various options available, including cylinder molds, container molds, and novelty-shaped molds.
Step-by-Step Candle Making Instructions
- Prepare your workspace: Ensure that your work area is clean, well-ventilated, and free from any flammable materials.
- Measure and melt the wax: Weigh out the desired amount of wax according to your chosen recipe or instructions provided with the wax product. Melt the wax using a double boiler or melting pot over low heat until it reaches the recommended temperature specified by the manufacturer.
- Add fragrance and color: Once the wax reaches the correct temperature, remove it from the heat source and stir in the chosen fragrance oil or essential oil. Add dye if you wish to color your candles, stirring gently until the color is evenly distributed.
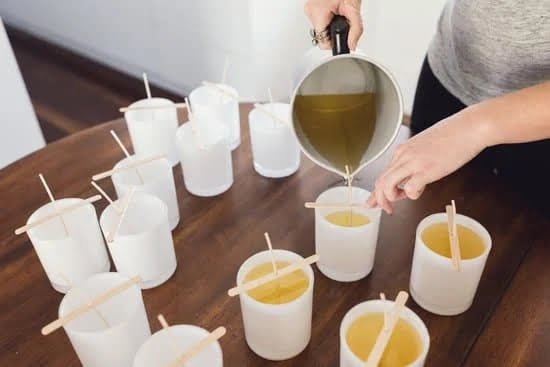
- Prepare your molds and wicks: Place pre-cut wicks into the center of each mold, ensuring that they are held firmly in place. If necessary, use a pencil or chopstick to keep the wick centered.
- Pour the wax: Carefully pour the melted wax into each mold, making sure not to disturb the wick. Fill each mold to the desired level, leaving a small amount of space at the top.
- Let it cool and solidify: Allow the candles to cool and solidify completely before attempting to remove them from the molds. This process typically takes a few hours, but it can vary depending on the size and type of candle.
- Trim and enjoy: Once your candles are fully hardened, trim the wicks to about ¼ inch above the wax surface. Your homemade candles are now ready to be enjoyed or gifted.
Remember to always follow safety precautions when working with hot wax and open flames. Conduct thorough research and practice candle making techniques carefully for optimal results.
Getting Creative
Candle making offers endless opportunities for creativity, allowing you to experiment with different techniques and styles to create truly unique candles. Whether you prefer a simple, elegant design or a more intricate, eye-catching masterpiece, there are numerous ways to unleash your artistic flair in this craft.
One popular technique in candle making is layering. This involves pouring different colored wax layers into your mold to create beautiful striped or gradient effects. To achieve this look, simply pour a thin layer of melted wax into the bottom of the mold and allow it to cool and harden slightly.
Then, pour another layer of a different colored wax on top of the first layer, repeating the process until your mold is filled. The result is a vibrant and visually appealing candle that adds a touch of elegance to any space.
Marbleizing is another technique that can elevate the aesthetic appeal of your candles. To achieve this effect, mix together two or more colors of melted wax in a container until they form swirls or patterns. Carefully pour the marbled wax into your mold and allow it to harden. The end result is a unique candle with mesmerizing patterns that are reminiscent of marble stone.
If you want to add an extra element of surprise to your candles, consider embedding objects within them. This involves placing small trinkets or decorative elements such as dried flowers, seashells, or gemstones at strategic points within the mold before pouring in the melted wax. As the wax sets and solidifies around these objects, they become beautifully suspended within the candle, creating an intriguing visual display when the candle burns.
When it comes to styles, there are several options you can explore in candle making. Pillar candles are cylindrical in shape and can be made by pouring melted wax into pillar molds or by hand-rolling sheets of beeswax together tightly around a wick.
Votives are smaller candles that fit perfectly into votive holders and are typically made by pouring melted wax into pre-made votive molds. Container candles are made by pouring melted wax into containers such as jars, cans, or teacups, which adds an element of versatility as you can choose from various container shapes and sizes.
With these different techniques and styles in candle making, you have the freedom to create candles that reflect your personal style and preferences. Experiment with various combinations of colors, scents, and decorative elements to produce candles that truly stand out. Let your imagination run wild and enjoy the artistic process of designing and crafting candles that bring beauty and ambiance to any space.
Adding Fragrance
In the world of candle making, adding fragrance is an essential step to create a truly captivating experience. The right scent can transport you to different places, evoke memories, or simply create a pleasant atmosphere in your home. In this section, we will explore some tips and tricks for adding fragrances to your homemade candles.
Choosing the Right Fragrance
When it comes to selecting fragrance oils or essential oils for your candles, quality is key. Look for reputable suppliers that offer a wide range of scents and ensure that the oils are specifically designed for candle making. It’s important to note that not all fragrance oils are safe to be used in candles, so always check their compatibility.
Experimenting with different combinations of scents can be fun and allow you to create unique fragrances. However, remember that less is often more when it comes to candle scents. Overloading your candle with too much fragrance oil can result in an overpowering scent or even affect the performance of the wax.
Optimizing Fragrance Throw
To make sure your scented candles produce a noticeable fragrance when burned, there are a few tricks you can employ. Firstly, choose fragrances with strong throw characteristics. Some scents naturally have a stronger presence than others, so do some research before selecting your fragrance oils.
Another way to enhance fragrance throw is by using additives called “fragrance boosters.” These substances help to increase the diffusion of the scent throughout the room when the candle is lit. Some examples include polyethylene beads or granules, which can be added to the melted wax before pouring it into molds.
Creating Unique Scent Combinations
One of the joys of making scented candles is experimenting with different scent combinations and creating your own signature aromas. You can start by blending different fragrance oils together to create custom scents or try combining fragrance oils with essential oils for added complexity.
Consider the theme or purpose of your candle when choosing scent combinations. For example, citrus and herbal fragrances are often energizing and refreshing, making them great choices for candles used in the morning or during work hours. Floral scents, on the other hand, can create a calming and relaxing ambiance, perfect for winding down at night.
Troubleshooting Common Candle Making Issues
Candle making can be a rewarding and enjoyable hobby, but it doesn’t come without its challenges. In this section, we will address some of the common issues that candle makers may encounter and provide practical solutions and troubleshooting tips to help beginners overcome these obstacles.
One of the most frustrating problems that candle makers face is sinkholes. Sinkholes are depressions or indentations that form on the surface of a candle during cooling. They can be caused by various factors, such as air trapped in the wax, temperature fluctuations, or pouring the wax at too high of a temperature.
To prevent sinkholes, it’s important to ensure that your wax is fully melted and free from air bubbles before pouring. Additionally, allowing your candles to cool slowly and at a consistent temperature can help minimize sinkholes.
Tunneling is another issue that candle makers often encounter. Tunneling refers to when a candle burns straight down in the center, leaving a thick rim of unmelted wax around the edges.
This can be caused by using a wick that is too small for the diameter of the candle or not burning it long enough during the initial lighting. To avoid tunneling, make sure to choose an appropriate wick size for your candle and allow it to burn long enough for the entire top layer to melt and pool evenly before extinguishing.
Wick posture is also an important factor in creating well-functioning candles. The position of the wick within the candle affects how it burns and how efficiently it releases fragrance. If your wick is leaning or bending towards one side, it may cause uneven burning or poor scent throw. To correct this issue, you can try straightening the wick with tweezers while the wax is still warm but not fully hardened.
Lastly, frosting is a common aesthetic problem that many candle makers encounter. Frosting refers to when your candles develop a white or grayish coating on the surface.
While frosting is a natural characteristic of soy wax and doesn’t affect the function of the candle, it can be undesirable for those seeking a smooth and polished finish. To reduce frosting, you can try pouring your wax at a slightly higher temperature or using a heat gun to gently melt the frosting on the surface after the candle has cooled.
By addressing these common candle making issues and implementing these troubleshooting tips, beginners can overcome obstacles and create beautiful and functional candles. Remember that practice makes perfect, and with time and experience, you will become more adept at troubleshooting any challenges that come your way.
Candle Care and Burning Tips for Maximum Enjoyment
Once you have created your beautiful homemade candles, it is important to properly care for them and optimize their burning experience. Taking proper care of your candles not only ensures their longevity but also enhances the ambiance they create in your space. Here are some candle care and burning tips to help you get the most out of your homemade creations.
One crucial aspect of candle care is trimming the wick before each use. This helps prevent excessive smoke, soot, and uneven burning. Ideally, you should trim the wick to about ¼ inch before lighting the candle. This will ensure a clean burn and minimize potential safety hazards.
Another essential tip is to avoid drafts when burning your candles. Drafts can cause uneven burning, so it’s best to place your candles in a draft-free area. This means avoiding open windows or high traffic areas with heavy air circulation. By doing so, you can maintain an even melt pool and extend the life of your candles.
To prolong the burn time of your candles, it is important to allow them to burn until the entire surface has melted into a pool of liquid wax. This process is known as “memory burn” and helps prevent tunneling – when a hole forms in the middle of the candle while the outer edges remain untouched by heat. By allowing this complete melt pool during each use, you can extend the lifespan of your candle.
In addition to proper care techniques, there are ways to enhance the fragrance throw of your scented candles. One effective tip is to position multiple candles throughout a room or space rather than relying on one candle alone. The combined scent from multiple sources will create a more noticeable aroma and achieve better fragrance distribution.
By following these simple tips and caring for your homemade candles properly, you can enjoy maximum enjoyment from each burn session and preserve their beauty for longer periods. Remember that making candles is an art form that goes beyond the creation process, as proper care and burning techniques will allow you to fully appreciate the fruits of your labor.
Conclusion
In conclusion, candle making is a truly rewarding and fulfilling hobby that allows individuals to tap into their creativity and produce beautiful, personalized candles. As DIY crafts continue to gain popularity, there has been a surge in interest in homemade candles. The appeal of candle making lies not only in the ability to create customized scents and designs but also in the sense of accomplishment that comes from making something by hand.
Throughout this article, we have explored the essential supplies needed for candle making, from tools like double boilers and thermometers to different types of wax, wicks, fragrances, and dyes. We have also provided a step-by-step guide for beginners, along with safety precautions and tips for achieving a professional finish. Additionally, we’ve delved into various techniques and styles in candle making, including layering, marbleizing, and embedding objects.
When it comes to scenting candles, we emphasized the importance of selecting high-quality fragrance oils and essential oils to create unique scent combinations. We even addressed common issues that beginners may encounter during candle making and provided practical solutions to overcome these challenges. Lastly, we discussed proper candle care and burning tips to maximize enjoyment.
In essence, embracing the art of candle making allows individuals to unleash their creativity while enjoying the fruits of their labor. The joy derived from creating one’s own candles is unparalleled. So gather your supplies, let your imagination run wild, and immerse yourself in this wonderful craft. You’ll be amazed at what you can achieve with your own two hands – beautiful and personalized candles that will bring warmth and ambiance into any space.

Welcome to my candle making blog! In this blog, I will be sharing my tips and tricks for making candles. I will also be sharing some of my favorite recipes.

