Introduction
Candle making has a long and interesting history that dates back over 6,000 years. Candles were used in religious ceremonies and as a light source before the creation of electric lighting options. Ancient cultures used animal fat, beeswax, and rushes to make their own primitive versions of what we recognize now as candles. In the 15th century, beeswax was replaced by paraffin wax as the primary material for candle-making. This discovery marked a revolution in candle-making practices and techniques that we still use today!
Making Candles With Wax:
When making a candle with wax, you’ll need the following materials: wax, wicks, dye, molds and scents (optional). Begin by melting your desired type of wax in an old pan or double boiler over low heat. Make sure to keep the stove at its lowest possible setting to avoid burning your wax. Once the melted wax reaches 150-180°F, add dyes and/or scents if desired. Then remove from heat and let cool slightly—but not completely! Next, dip the wick into the melted wax and set aside while it hardens. If you have pre-made molds available, pour your molten wax into them immediately after removing from heat. Wait at least 30 minutes before unmolding your candles. Lastly you can decorate your candle with embellishments such as glitter or fabric strips. Congratulations on completing your very own handmade candle!
Gather Your Materials and Choose the Right Wax
Making a candle with wax is easy and can be fun! Before you start, however, you will need to gather your materials. You’ll need some wax, either beeswax or paraffin work best. You’ll also need some wicks and a container. If you don’t have containers, an old jar can be used instead. Once your materials are gathered, decide what type of wax you would like to use. Beeswax is ideal for making candles but paraffin can also be used for those on a budget or who do not have access to beeswax.
Melt the Wax
Now that the materials have been chosen, it’s time to melt the wax. This can be done in one of two ways: either in a double boiler or directly on the stovetop in a container. If using direct heat, just make sure not to overheat the wax as it should not reach temperatures higher than 150 degrees Fahrenheit for optimal results.
Prepare The Containers
Next prepare any containers you may be using by wiping them down with rubbing alcohol and allow them to dry completely before continuing. Be sure to check and make sure that no residues are left behind as these could interfere with the burning of the candle once it has been completed. Any containers that do not have lids should also be lined with parchment paper which will help keep contaminants out and make maintaining even wick lengths easier later on.
Attach Wicks To Container Bottoms And Fill With Wax
Using sticky dots or other adhesive options available in stores, attach each Wick securely to the center bottom of each container where they will remain while filling them with melted wax. Once all wicks are secured, carefully fill each container with desired amounts of melted wax taking care to ensure no air bubbles become trapped at the base of each container as these too could interfere with successful burning later on. Allow for cooling before trimming wicks if necessary-this will help maintain an even burn throughout its lifetime when lit correctly. After cooling, carefully remove any air bubbles gently using a toothpick or knife if necessary and then enjoy!
Preparing the Container and Wick for Candle Making
Making a candle with wax requires some preparation in order to make sure your final product is a beautifully crafted and sturdy candle. Before you can begin pouring the melted wax, there are several steps that you need to take to properly prepare your container and wick for candle making.
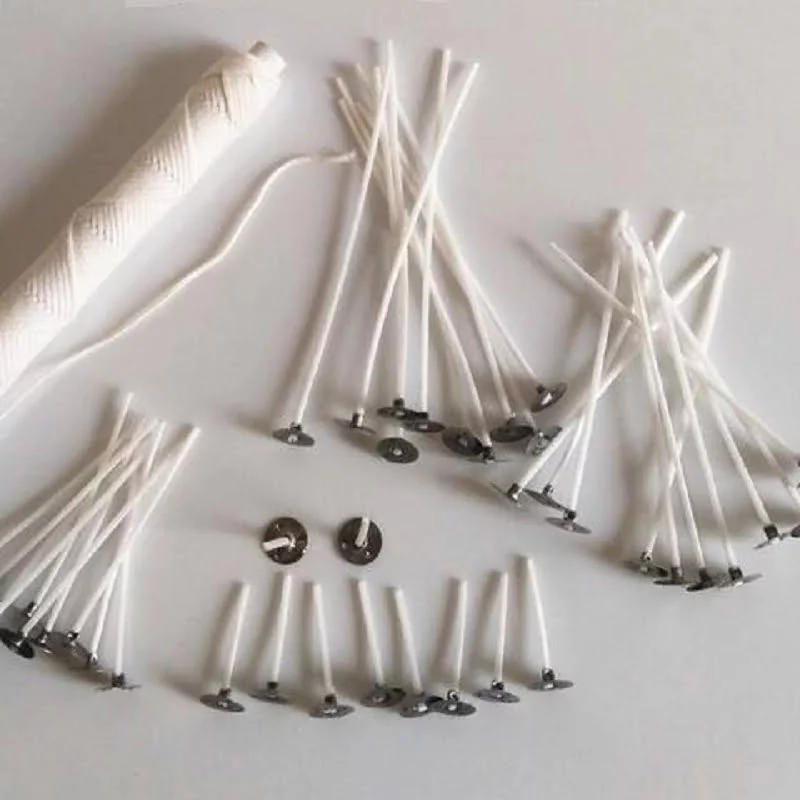
One of the first steps before making a candle with wax is to make sure your chosen container is clean, dry and free of any dust or debris. It’s also important to choose a container with an opening wide enough to fit your desired wick size so it has ample space for it to be secured properly. To prepare the wick, cut it according to the height required by your container. Secure one end of the wick in either the metal tab provided or at the bottom of your container using a dab of hot wax. Make sure whatever technique you use holds the wick securely in place; otherwise, it won’t be straight when you pour the molten wax. If using an essential oil based scent for fragrance, pre-mix this into any melted sustainer beads or discarded wax chips prior to pouring it into your container – this ensures that your desired scent will remain consistent throughout the life of the candle. Finally, use glue or sticky circles on each side of your wick if necessary to keep its position firmly in place after being poured into the container – this will prevent any deviation of its flame once lit later on. Following all these preparatory steps should ensure that you get optimal results from burning your freshly made beeswax candle!
Adding Color Blocks or Liquid Dyes to Your Candle
If you would like to add color blocks or liquid dyes to your candle, this is a great way to customize the look. Color blocks are available in a variety of colors and sizes and can be melted by following the manufacturer’s instructions. If using liquid dyes, use them sparingly as adding too much can lead to cloudy wax. For each 4 ounces of wax use 1/8 teaspoon of dye. Stir thoroughly until fully blended and then test in a small cup before pouring into your mold. The output color may change due to different types of wax being used, so make sure that you check your results before you add more dye. If the desired shade is not achieved, add more dye in small increments until you get the right color that you want. Don’t forget to leave extra room in your mold for the color blocks/dye solution since they will take up some space once they’re added.
Melting and Pouring the Wax in the Container Step-by-Step
1. Gather all the necessary materials: wax, a metal container to melt the wax and a wick (cotton string).
2. Place your metal container filled with wax on a heat-safe surface and put it on the stovetop on low heat.
3. As the wax begins to melt it is important to constantly stir it so that it does not burn or break down.
4. When the wax has completely melted and is at an even temperature, carefully move over the container from the heat source to an environmentally friendly material such as a tablecloth or cardboard placemat so as to avoid any accidents.
5. Cut off any excess wick before you submerge it inside of your melted wax. Use something heavy like tape or paper clip to ensure that the bottom of your wick stays in place within the metal container filled with melted wax and make sure you tie it up with some string at around where you want your candle to end when done cooling.
6. Pour your liquid hot candle wax into whatever vessel you are using for your candle making project and blow gently into the liquid wax after pouring, this will help clear away potentially formed air bubbles which make cause your wick to be unevenly placed as well as other potential imperfections in finished product when hardening occurs later on down in process! So make sure you do not skip that step!
7. Be patient when waiting for any candle making project because they must solidify at room temperature otherwise they can crack or become brittle overtime which may lead them breaking apart easily during handling its use later on – which we do not want!
Creating Unique Candle Shapes with Molds
Making your own candles with wax can be a fun and creative way to express yourself! The basic components of any candle are wax, wick, and color. You can determine how thick or thin you want the candle to be by using either a pre-made mold or by rolling it into shape. Molds come in all sorts of shapes and sizes and allow you to create intricate figures like ships, stars, hearts – anything your imagination desires! With a few simple supplies, such as wax melting pots, thermometers and molds, you can make enchanting candles in no time.
To begin, melt the wax over low heat in a pot. If you’re looking for specific colors add pigment or dyes to the melted wax at this point. As the wax melts pay attention to the temperature being sure not to exceed about 165 degrees F (73 C). Once melted use an appropriate length of cotton wicking that’s been pre-waxed then dip it into your molten paraffin several times until it becomes stiff enough to stand up on its own. Position each wick in what will become the center core of each candle before pouring in the paraffin. Use any necessary supports or weights to hold them steady during filling process. Now place filled molds into refrigerator for 15 minutes or freezer for 5 minutes just until they cool enough to remove them from their molds without deforming. Finally trim down excess wick and enjoy your new creation!
Adding Fragrances to Increase Aroma
Once you’ve melted your wax, you can add fragrances to increase the aroma of your candle. The most popular used are essential oils because they deliver a more intense aroma and tend to last longer. Add anywhere from 10-20 drops depending on how strong of a scent you want. If you don’t have access to essential oils, you can use fragrance oils as well. These are sometimes available at craft stores or online retailers and they offer a larger variety of different scents. You may have to experiment to find what works best but typically 7-15 drops offers a nice scent level. Before pouring your wax into the desired container, be sure to stir it properly with a bamboo skewer or similar item in order for the fragrance oil to completely mix into the wax.
Finishing Off Your Candle with Decorative Touches
When your candle is finished, you can add some decorative touches to give it a unique look. One idea is to wrap the candle in ribbon at the base. You can use any type of fabric or paper to make a wrap for your candle and make coordinating ribbons to tie around it. You can also embellish it with charms, buttons, or beads suspended on strings, producing a trendy look. Another option is glitter; adding some metallic sparkle will turn your candle into an eye-catching piece of craftsmanship! Once you’ve completed these steps, your DIY wax candle is ready to burn and brighten up any room with its glorious glow!
Tips for Storing, Lighting and Discarding Your Candle
Storing your candle is important to get the most out of it. It should be stored in a cool, dark place away from direct sunlight and heat sources. This will help prevent the wax from softening and making your candle more difficult to light.
To light your candle, always use a wick trimmer to keep wicks short before lighting. This will ensure even burning! When lighting with a match or lighter, make sure you keep it at least three inches away from the wax to prevent the risk of fire. Also make sure that any bare skin is kept away from the flame such as wisps of hair or clothing material.
When your candle starts getting low and there is not enough valuable wax left, discard responsibly! Most communities have outdoor recycle bins for candles so you can find a place to drop off your old used-up candles rather than throwing them in the trash. In some cases you can also reuse used containers; just make sure everything is clean first before filling with new wax!
Conclusion
Making your own candle with wax is not only a great way to save money, but it also allows you to customize the size, scent and color of your candle. Many different types of wax can be used for this project, depending on the type of candle you would like to make. Using essential oils or specialty waxes will help create unique candles that are specific to you and the occasion or person you plan to give the candle as a gift. Regardless of what method or materials you decide to use when making your own candle, completing this DIY project will provide a sense of accomplishment both in terms of cost savings and pride in the creation itself. Take some time out this weekend and craft up a beautiful waxed-work of art today!

Welcome to my candle making blog! In this blog, I will be sharing my tips and tricks for making candles. I will also be sharing some of my favorite recipes.


