Candle making is a captivating art form that allows you to ignite your creativity and unleash endless possibilities. Whether you are a seasoned crafter or just starting out, learning how to make candles can be a fulfilling and enjoyable experience. Not only does it provide you with the opportunity to create personalized pieces for your home or as heartfelt gifts, but it also offers non-toxic alternatives to commercially made candles.
In this article, we will delve into the world of candle making, explore the benefits of crafting handmade candles, and guide you through the step-by-step process of creating your own beautiful and fragrant creations. From gathering the necessary materials to troubleshooting common issues, we will cover everything you need to know to embark on your candle making journey.
One of the appealing aspects of candle making is its versatility. With an array of waxes, fragrances, colors, and decorative elements at your disposal, you have the power to unleash your imagination and bring your vision to life. Whether you prefer elegant and sophisticated candles for special occasions or whimsical and unique designs for everyday use, the art of candle making opens up countless opportunities for self-expression.
So get ready to immerse yourself in the art and craft of candle making as we walk you through each step along the way. Prepare to discover new techniques, experiment with different scents and colors, and elevate your skills with bonus tips and tricks. Your candle making journey awaits – let’s ignite that creativity.
Understanding the Benefits of Handmade Candles
The benefits of making handmade candles extend beyond just the satisfaction of creating something beautiful with your own hands. By making your own candles, you have the opportunity to personalize them and create unique scents that cater to your preferences. Additionally, homemade candles offer a non-toxic alternative to commercially available ones, allowing you to enjoy the ambiance and fragrance without worrying about harmful chemicals.
One of the main advantages of handmade candles is the ability to personalize them according to your style and taste. Whether you prefer a minimalist design or love experimenting with vibrant colors, you have complete control over how your candles look.
You can choose from a variety of containers, such as mason jars or vintage tea cups, and decorate them with ribbons, dried flowers, or other embellishments. This customization adds a personal touch and makes each candle a reflection of your creativity.
In addition to aesthetics, handmade candles also offer a healthier option compared to store-bought ones. Many commercial candles contain synthetic fragrances and additives that can release harmful toxins when burned. By making your own candles using natural waxes like soy or beeswax, you eliminate exposure to these potentially harmful substances.
You can also choose from a wide range of essential oils for fragrance instead of relying on synthetic options. This allows you to create an inviting atmosphere in your home while maintaining air quality.
| Benefits | Handmade Candles |
|---|---|
| Personalization | Customize candles to reflect your style and taste |
| Non-toxic | Avoid harmful chemicals found in commercial candles |
Gathering Your Materials
Gathering all the necessary materials is a crucial step in candle making. Having a comprehensive list of supplies ensures that you have everything at hand before you start, avoiding any unnecessary interruptions or delays during the process. Here is a breakdown of the essential candle making supplies you will need:
Wax
The choice of wax is fundamental to candle making as it determines the quality and characteristics of your candles. There are various types of wax available, including soy wax, beeswax, paraffin wax, and palm wax. Each type has its unique features and benefits, so it’s important to research and choose the one that aligns with your preferences.
Wicks
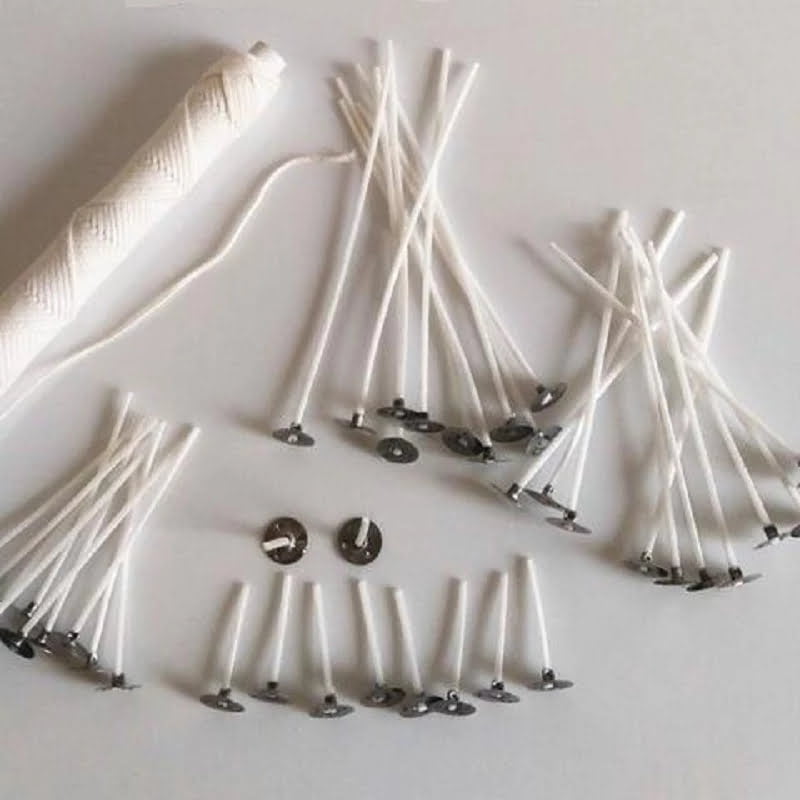
Wicks are responsible for carrying the flame and ensuring an even burn throughout the candle’s lifespan. When selecting wicks, consider their size in relation to the diameter of your container or mold. Cotton or braided wicks are popular options due to their clean burn and minimal smoke production.
Containers or Molds
To give your candles shape and structure, you’ll need containers or molds. The choice depends on your desired candle design and whether you want reusable containers or one-time use molds. Glass jars, tins, ceramic vessels, silicone molds, and aluminum molds are popular choices for candles.
Thermometer
Maintaining proper temperature control is essential for achieving optimal results in candle making. A thermometer helps ensure that the wax does not overheat or cool too quickly during melting or pouring.
Double Boiler or Melting Pot
To melt the wax safely and evenly, a double boiler setup is recommended. Alternatively, a melting pot specifically designed for candle making can be used.
Fragrance Oils/Essential Oils
Adding scents to your candles enhances the overall sensory experience. There is a wide range of fragrance oils and essential oils available in various scents and strengths. It’s important to choose high-quality oils that are safe for candle making and properly measure the amount recommended by the manufacturer.
Dyes or Colorants
If you want colored candles, you will need dyes or colorants designed specifically for candle making. Liquid dyes, color chips, or powder dyes are commonly used to achieve desired hues.
Molds Release/Holding Agent
To ensure easy removal of candles from molds, a mold release agent such as petrolatum jelly or silicone spray can be applied before pouring the wax.
Heat-Resistant Utensils
You will need heat-resistant utensils such as a stirring spoon or whisk, a pouring pot, and a heat-resistant measuring cup for accurate measurements when working with hot wax.
By gathering all these materials beforehand, you will be well-prepared to embark on your candle-making journey with confidence and ease.
Step-by-Step Guide
Preparing and melting the wax is a crucial step in candle making that sets the foundation for a successful final product. By following these step-by-step instructions, you can ensure that your candles have a smooth and even burn.
- Choose the Right Type of Wax: There are various types of wax available for candle making, such as soy wax, beeswax, and paraffin wax. Consider factors like burn time, fragrance retention, and eco-friendliness when selecting the wax for your candles.
- Measure and Weigh the Wax: To achieve consistent results, it’s essential to measure the wax accurately. Use a kitchen scale to weigh the required amount of wax according to your recipe or desired candle size.
- Prepare Your Workspace: Before you start melting the wax, ensure that your workspace is clean and organized. Place newspaper or a drop cloth on your work surface to protect it from any potential spills.
- Set Up Double Boiler System: Using a double boiler system is recommended when melting wax to prevent direct heat exposure and reduce the risk of fire hazards. Fill a larger pot with water and place a smaller pot inside it. Heat the water on low to medium heat.
- Melt the Wax: Once your double boiler system is set up, put the measured wax into the smaller pot inside the larger one. Stir occasionally with a metal spoon or spatula until the wax is completely melted and reached its recommended temperature (usually mentioned in your candle making instructions or recipe).
- Add Fragrance Oil (Optional): If you want scented candles, this is when you should add fragrance oil to your melted wax. Follow the recommended ratio of fragrance oil to melted wax for best results.
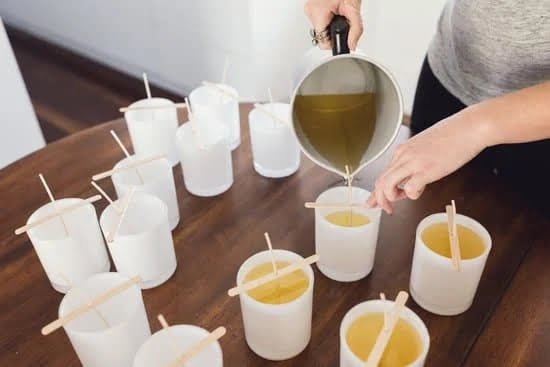
- Pouring Into Containers: Now that your wax is melted and fragranced (if desired), carefully pour it into your chosen containers while ensuring that you leave some space at the top for wick placement later on. Use a heat-resistant pouring pitcher or a ladle to pour the wax for more precision.
By following these step-by-step instructions, you can efficiently prepare and melt the wax for your handmade candles. This process lays the foundation for creating beautiful, fragrant candles that are perfect for gift-giving or personal use. Experiment with different types of wax and fragrances to explore the endless possibilities of candle making.
Choosing the Perfect Fragrance
Choosing the right fragrance for your handmade candles is an important step in candle making. The scent is what makes a candle truly special and can evoke different moods and emotions. With a wide variety of scent options available, you can create unique and personalized candles that match any occasion or preference.
There are two main types of fragrance options for candles: essential oils and fragrance oils. Essential oils are made from natural plant extracts and offer a more subtle and natural scent. They are great for those who prefer a more organic and therapeutic experience.
On the other hand, fragrance oils are synthetic blends that offer a wider array of scents, including those that are not found in nature. Fragrance oils tend to have a stronger throw, meaning they fill the space with scent more intensely.
When choosing fragrances for your candles, consider the purpose or theme of the candle. For example, if you want to create a relaxing atmosphere, opt for scents such as lavender or chamomile. If you’re making candles as gifts, think about the recipient’s preferences and choose scents that align with their taste.
It’s also worth experimenting with combinations of fragrances to create unique blends. Mixing different scents can result in unexpected yet delightful aromas. Keep track of your experiments by documenting the ratios and notes on how they turned out for future reference.
| Fragrance Type | Description |
|---|---|
| Vanilla | A sweet, warm, and comforting scent |
| Sandalwood | An earthy and calming fragrance |
| Citrus | Bright and refreshing scents such as lemon, orange, or grapefruit |
| Floral | A wide range of floral scents like rose, jasmine, or lavender |
| Spices | Warm and comforting scents like cinnamon, clove, or nutmeg |
Adding Some Color
When it comes to candle making, adding color to your creations can take them to the next level. Whether you prefer vibrant hues or subtle tones, using dyes allows for endless possibilities in creating customized candles that suit your taste and home decor. In this section, we will explore different techniques and tips for dyeing your candles.
One popular method for adding color to candles is using liquid candle dyes. These dyes are specially formulated to mix easily with wax and provide a consistent and vibrant color result. To use liquid candle dyes, simply add a few drops to the melted wax and stir well until the color is fully incorporated. You can experiment with different combinations of colors to achieve unique shades that reflect your personal style.
Another option for coloring candles is using candle dye blocks or chips. These solid forms of dye are melted along with the wax during the candle making process. Candle dye blocks come in a variety of colors and can be shaved or cut into smaller pieces before adding them to the wax. This allows for more precise control over the intensity of color in your candles.
Techniques for Dyeing Candles
- Dip-Dye Technique: This technique involves partially dipping the bottom half of the candle into a container of colored wax. As you pull the candle out, you will create a gradient effect where the color gradually fades towards the top. Experiment with different colors and dip depths to achieve stunning visual results.
- Layered Technique: Create multi-colored candles by pouring layers of differently colored waxes into your containers one at a time, allowing each layer to cool and harden before adding the next one. This method allows you to create beautiful patterns and effects within your finished candles.
- Marbling Technique: To achieve a marbled effect, melt multiple colors of wax separately, then pour them together into your container and swirl gently with a skewer or toothpick. The colors will blend together in unique patterns, creating a visually striking marbled effect throughout the candle.
Remember to always follow safety precautions when working with dyes and hot wax, and consider testing your chosen dye colors on a small sample before applying them to the entire batch of candles. With these techniques and tips, you can add a burst of color to your handmade candles and make them truly one-of-a-kind.
The Art of Wick Placement
The wick placement in a candle plays a significant role in ensuring a perfect burn. Improper wick positioning can lead to issues such as uneven burning, tunneling, and excessive smoke. To achieve an optimal burn, it is essential to understand the different factors that affect wick placement and how to properly position the wick in your handmade candles.
Choosing the Right Wick Size
Selecting the appropriate wick size for your candle is crucial for achieving an even and consistent burn. The size of the wick will depend on factors like the diameter of your candle, the type of wax used, and any additives or fragrances included. It is recommended to follow the guidelines provided by the manufacturer or conduct test burns to determine the most suitable wick size.
Positioning the Wick in Container Candles
For container candles, it is important to center the wick at the bottom of the container before pouring in the melted wax. You can use tools such as wick stickers or hot glue dots to hold the wick in place. Make sure that there is enough tension on the wick to keep it upright during pouring and cooling.
Wick Maintenance and Trimming
To ensure a clean burn and avoid issues like mushrooming or excessive soot, regular wick maintenance is necessary. Trim your candle’s wick to around ¼ inch before each lighting session. This allows for a controlled flame height and prevents debris from accumulating on top of the candle.
By paying attention to proper wick placement, you can ensure that your candles burn evenly, create an inviting ambiance, and release their captivating fragrance throughout their lifespan. Remember that experimenting with different wicks and alternative materials can also enhance your experience and help you achieve unique results with your handmade candles.
The Finishing Touch
Decorating and packaging your handmade candles is the final step in the candle making process that adds a personal touch and enhances the overall aesthetic appeal of your creations. It not only makes your candles visually appealing but also provides an opportunity to showcase your creativity and make them perfect for gifting. Here are some techniques, tips, and ideas to help you add the finishing touch to your handmade candles:
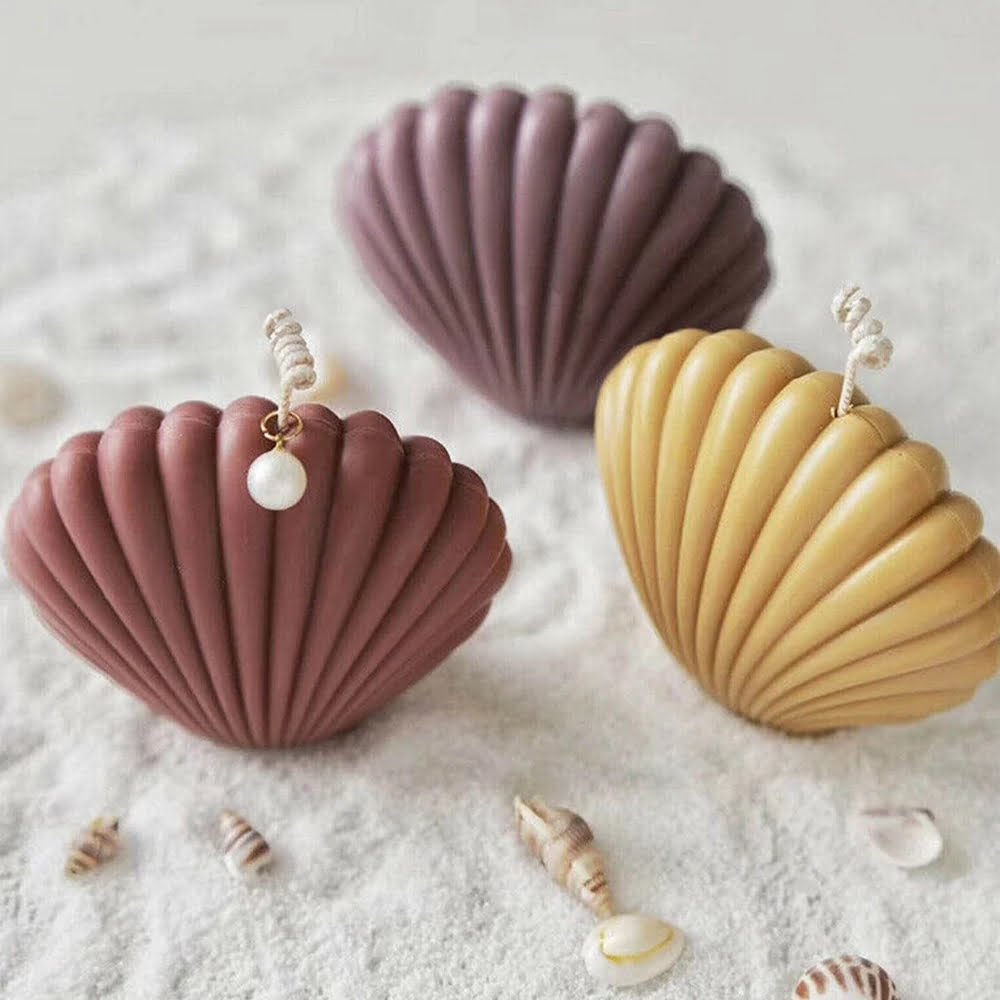
- Decorative Additions: There are countless ways to decorate your candles, depending on your personal style and preference. You can use various decorative items such as dried flowers, herbs, glitter, ribbons, lace, or even seashells to adorn the surface of the candles. Consider using non-toxic materials that won’t create a fire hazard when exposed to flames.
- Embedding Objects: Another creative way to decorate your candles is by embedding objects within the wax. This technique involves placing small items like beads, gemstones, charms, or even small figurines inside the container before pouring in the melted wax. As the candle burns down, these hidden treasures will gradually reveal themselves.
- Custom Labels: Packaging plays a crucial role in presenting your handmade candles as a professional product or gift item. Design custom labels that reflect your brand or simply add a personal touch with handwritten tags or labels that mention fragrance details and burning instructions.
When it comes to packaging, consider these options:
- Gift Boxes: Placing your finished candle in a stylish gift box not only protects it during transportation but also adds an elegant touch.
- Mason Jars: If you’ve made container candles using mason jars or any other type of glass containers, tie a ribbon around its neck or attach a personalized tag for added charm.
- Organza Bags: For smaller votive or tealight candles, consider placing them in organza bags tied with colorful ribbons.
- Tins or Pouches: If you prefer a more rustic look for your candles, package them in small tin containers or drawstring pouches made from natural fabrics.
Remember to pay attention to safety when decorating and packaging your candles. Avoid using flammable materials that could catch fire when the candle burns, and always place warning labels on your products if necessary. With these finishing touches, your handmade candles are ready to be enjoyed or gifted for a touch of warmth and ambiance.
Curing and Storing Your Candles
Once you have finished making your beautiful handmade candles, it is important to properly cure and store them to ensure optimal scent throw and longevity. Here are some tips to help you preserve the fragrance and quality of your candles:
- Cure Time: Just like a fine wine, candles need time to “cure” or mature after they have been poured. This is the period when the fragrance fully develops and the wax sets completely. The recommended cure time for most candles is at least 1-2 weeks, but some scents may require longer. During this time, be patient and resist the temptation to burn them right away.
- Proper Storage: To maintain the scent of your cured candles, it is crucial to store them in a cool, dry place away from direct sunlight. Excessive heat can cause the fragrance oil to evaporate quickly. Consider using airtight containers or wrapping with plastic wrap to protect them from dust and moisture.
- Avoid Scent Mixing: If you have a variety of scented candles, make sure to separate them during storage to prevent their fragrances from blending together. An effective way to do this is by storing each candle in its individual container or bag.
- Longevity Tips: To extend the lifespan of your candles, there are a few things you can do. Firstly, trim the wick before each burn session to prevent excessive smoking and soot formation that can potentially affect the fragrance quality. Secondly, allow the candle’s melt pool to reach all edges of the container before extinguishing it; this helps prevent tunneling and ensures an even burn.
By following these tips for curing and storing your candles properly, you can enjoy their delightful scents for longer periods while maintaining their high-quality appearance.
Troubleshooting Common Candle Making Issues
Cracked wax, sooty flames, and other common candle making issues can be frustrating for beginners. However, with a little troubleshooting and problem-solving, these issues can be easily resolved, allowing you to create beautiful and high-quality candles.
One common issue that candle makers encounter is cracked wax. Cracks can occur when the wax cools too quickly or when the container used for the candle is not suitable for the type of wax being used. To prevent cracks, it is important to ensure that you are using the correct type of container for your chosen wax.
For example, some waxes require heat-resistant containers to avoid cracking. Additionally, make sure to allow the candles enough time to cool slowly and evenly before moving or packaging them.
Sooty flames are another common problem in candle making. This occurs when there is an imbalance between the amount of fragrance oil used and the size of the wick. An oversized wick can produce a larger flame that results in excessive smoke and soot.
To avoid sooty flames, carefully follow fragrance oil recommendations for each specific type of wax. If you notice excessive smoking or sooting during burning, consider using a smaller wick or reducing the amount of fragrance oil in future batches.
Another issue that often arises is poor scent throw in candles. Scent throw refers to how well a candle’s fragrance fills a room when it is burning. To improve scent throw, ensure that you have added sufficient fragrance oil during the candle-making process according to recommended guidelines.
Additionally, proper curing time allows the fragrance to fully blend with the wax and optimize scent throw. It is generally recommended to cure candles for at least 48 hours before burning them.
| Issue | Cause | Solution |
|---|---|---|
| Cracked Wax | Cooling too quickly or using the wrong container | Use appropriate containers and allow sufficient cooling time |
| Sooty Flames | Imbalance between fragrance oil and wick size | Follow fragrance oil recommendations and adjust wick size if needed |
| Poor Scent Throw | Inadequate amount of fragrance oil or insufficient curing time | Add recommended amount of fragrance oil and cure candles for at least 48 hours before burning |
Bonus Tips and Tricks
Experiment with Different Wax Types and Blends
One of the best ways to enhance your candle making skills is to experiment with different types and blends of wax. There are various options available, such as soy wax, beeswax, coconut wax, and paraffin wax. Each type of wax has its own unique qualities and characteristics that can affect the appearance and performance of your candles.
For example, soy wax is known for its clean burn and ability to hold fragrance well. Beeswax, on the other hand, creates a beautiful natural scent when burned and has a longer burn time. Coconut wax has a smooth texture and excellent scent throw. Paraffin wax is often used in container candles due to its ability to hold shape well.
You can also experiment with blending different types of wax together to create custom combinations. This can allow you to tailor the characteristics of your candles to your specific preferences. Mixing beeswax with soy wax, for instance, can produce a candle that combines the long burn time of beeswax with the strong fragrance throw of soy wax.
Utilize Essential Oils for Natural Fragrance
While commercial fragrance oils are commonly used in candle making, another way to enhance your skills is by incorporating essential oils into your candle scents. Essential oils are derived from natural plant sources and offer a wide range of aromatic options. They not only provide pleasant scents but also offer additional therapeutic benefits depending on the oil used.
When using essential oils in candle making, it’s important to pay attention to their flashpoint – which refers to the temperature at which they can ignite – as some essential oils have lower flashpoints than others. It’s recommended that you add essential oils at a lower temperature during the candle making process or consider using them as a top scent layer after pouring your base scented candle.
Some popular essential oil options for candles include lavender for relaxation, citrus oils for energizing scents, and eucalyptus for creating a refreshing atmosphere. Experimenting with different essential oil combinations can lead to unique and personalized fragrance blends that add depth and complexity to your candles.
Adding Unique Decorative Elements
Enhancing your candle making skills extends beyond the actual process of creating the candle. Adding unique decorative elements to your candles can really make them stand out and give them a professional touch. Consider exploring different ways to decorate your candles, such as:
- Embedding dried flowers or herbs into the wax before it hardens.
- Creating swirl patterns by using colored wax or by gently swirling the candle while the wax is still liquid.
- Using molds to create interesting shapes, such as stars or hearts.
- Adding glitter or mica powder to the melted wax for a sparkly effect.
These decorative elements can elevate the aesthetic appeal of your candles and make them more visually appealing. They also provide an opportunity for you to showcase your creativity and personal style in your candle making projects.
By incorporating these bonus tips and tricks into your candle making journey, you can further enhance your skills and create truly unique and high-quality handmade candles that impress both yourself and others. Remember, practice makes perfect, so don’t be afraid to experiment, try new techniques, and let your creativity soar in this art form.
Conclusion
In conclusion, embarking on a candle making journey opens up a spectrum of creativity and scentful enjoyment. The art of candle making allows you to personalize your candles, creating unique pieces that reflect your style and preferences. Additionally, by making your own candles, you can ensure they are non-toxic alternatives compared to store-bought ones.
Throughout this article, we have explored the different aspects of candle making, from understanding the benefits of handmade candles to gathering the necessary materials and choosing the perfect fragrance. We have also delved into techniques for adding color, ensuring proper wick placement, and decorating and packaging your creations beautifully.
By following the step-by-step guide provided, you can confidently embark on your candle making journey. Remember to allow your candles to cure properly for optimal scent and longevity. Should any issues arise along the way, refer back to our troubleshooting section for solutions.
As you continue honing your candle making skills, don’t be afraid to try new techniques and experiment with different fragrances and colors. Let your creativity shine through as you create beautiful handcrafted candles that will bring warmth and ambiance into any space.
So light that first wick and ignite your passion for candle making – a rewarding hobby that offers endless possibilities for self-expression and relaxation. Enjoy the process of seeing wax transform into art while enveloping yourself in wonderful scents that bring comfort and joy.
Frequently Asked Questions
How to make a candle step by step?
Making a candle involves several steps that can be followed to create a beautiful and functional piece. Firstly, gather all the necessary materials, such as wax, wicks, containers, fragrance oils (optional), and coloring agents (optional). Next, melt the wax in a double boiler until it reaches the desired temperature. This will ensure that it melts evenly without scorching. While waiting for the wax to melt, prepare the containers by securing the wick at the bottom using a wick sticker or hot glue gun.
Once the wax has melted completely, remove it from heat and add any fragrance oil or coloring agent if desired. Stir well to distribute them evenly throughout the wax. Now carefully pour the melted wax into each container while holding the wick upright using a pencil or clothespin. Allow sufficient time for the candles to cool and solidify completely before trimming the wick to an appropriate length. Finally, your homemade candles are ready to light up any space with warmth and coziness.
How do you start making candles?
To begin making candles, it is essential first to gather all necessary materials and equipment. This includes wax, wicks, containers, a double boiler or melting pot to melt the wax evenly, a thermometer to monitor temperatures accurately, fragrance oils (if desired), coloring agents (if desired), and tools like pencils or clothespins for keeping wicks in place while pouring wax.
Once prepared with these items readily available, set up a safe and clean workspace where you can comfortably work on your candle-making project without any potential hazards or distractions.
What are the ingredients of making a candle?
The ingredients required for making candles mainly consist of wax, wicks, containers, fragrance oils (optionally used), and coloring agents (also optional). Wax is a fundamental ingredient needed as it provides fuel for burning while holding together other components of the candle. Commonly used types of candle wax include soy wax, beeswax, paraffin wax, or a combination of these. Wicks are another crucial component that carries the flame and ensures a steady burn.
They are typically constructed from braided cotton fibers, sometimes with a metal core for stability. Containers come in various shapes and sizes, serving as the vessel to hold the melted wax and provide structure to the candle. Fragrance oils or essential oils can be used to add pleasant scents to the candles, while coloring agents like liquid or solid dyes can be added for aesthetic appeal. However, it is important to note that both fragrance oils and coloring agents are optional and can be excluded depending on personal preference or desired outcome.

Welcome to my candle making blog! In this blog, I will be sharing my tips and tricks for making candles. I will also be sharing some of my favorite recipes.

