Introduction
Making your own candle wax at home can provide a variety of benefits to those who are passionate about their hobby or profession. Candle wax has been used in rituals and ceremonies throughout history, so it is easy to understand why many people have an emotional attachment to the craft. Creating candles out of homemade wax gives you complete control over the type of product used, thus ensuring that your candles are of the highest quality and are tailored to fit any desired aesthetic or fragrance needs. Beyond this, creating your own candle wax allows for a creative process where you can explore various colors and mixtures without breaking the bank. Furthermore, it also ensures that there will always be a supply available when needed as well as a way to make use of scrap materials from different projects. Ultimately, making your own candle wax provides an opportunity for great self-expression as well as added control over one’s hobby or profession.
Gather the Materials and Tools Needed for Making Candle Wax
Before you start making your own candle wax, it is important to gather the necessary tools and materials. The following items are typically what you will need:
• Wax – You’ll need either paraffin, soy or beeswax (or a combination of the three).
• Container – Something sturdy to melt your wax in over low heat.
• Thermometer – Keeping an eye on the temperature can help ensure that you do not end up with overheated wax or soot buildup in your container.
• Wax Additives – Depending on what type of look or texture you desire for your candle, additives such as scent oils, dyes, mica coloring, and pigment should be considered.
• Pouring Pot – A pouring pot makes it easier to pour the molten wax into molds or containers without spilling or burning yourself.
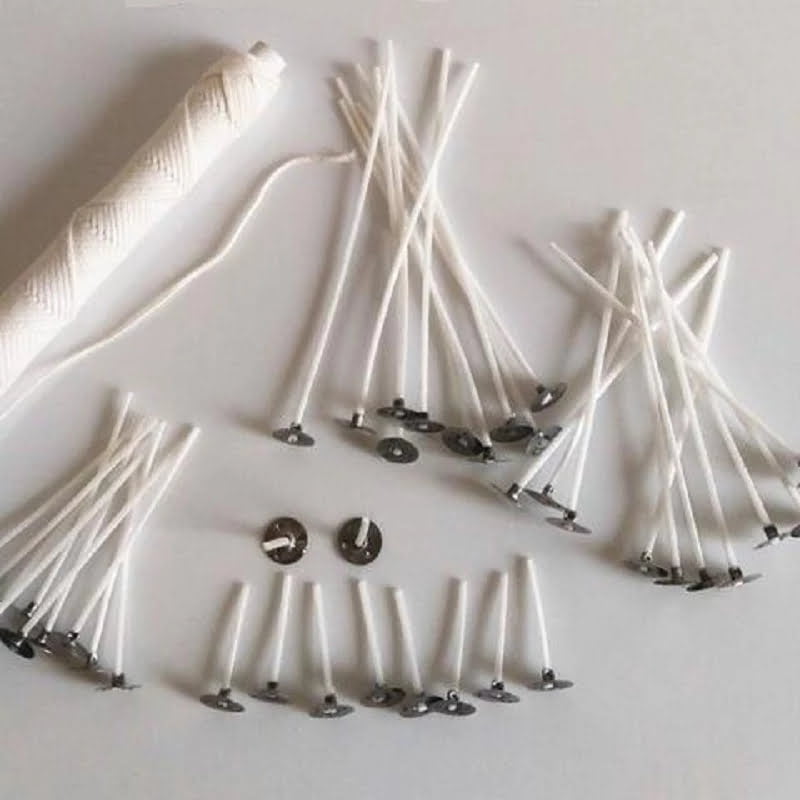
• Wicks and Wick Tabs- You will need wicks with tabbing that match the size of your candles. Pre-tabbed wicks are available to make this process easier if needed.
• Molds and Containers- Depending on what type of candle holder you’re using for your wax, make sure to have an appropriate mold before beginning your process.
Once all the necessary tools and materials have been gathered together, it’s time to begin making candle wax!
Safety Considerations for Working with Candle Wax
Working with candle wax can be a fun, relaxing activity. Before you begin, it’s important to consider the safety risks that come with working with open flames and hot liquids. Make sure you protect yourself by:
• Not wearing loose clothing or long hair while melting wax;
• Making sure there is adequate ventilation in the room;
• Placing the melting pot of wax on a fireproof surface;
• Keeping any flammable liquids (including wax) away from heat sources;
• Extinguishing all candles when done.
While working with candle wax, additional safety precautions should be taken depending on the type of wax used. Paraffin wax is safe to use indoors, however if soy or beeswax are being used, a well-ventilated area must be used as they may produce fumes when melted. Prior to heating up any kind of wax, ensure that you measure out the correct amounts and double check them before beginning so that they do not overflow while melting. Once the melting process begins it should always be supervised until completion. If generating smoke is a concern while melting candles, many brands offer what is known as “low smoke” wick options which generate less smoke. Finally, avoid using metal objects around open flames as this could create sparks and ignite an accidental fire. By following these tips when making your own candle wax creations you’ll have peace of mind knowing that your workspace is safe and efficient for completing your unique projects!
Basic Candle Wax Making Method Described
Making candle wax is a simple process that requires the right equipment and some melted wax. Most waxes used for candles are blend of paraffin and stearic acid, which are blended in various ratios to achieve different consistencies. Here is a basic overview of the method for making candle wax:
1. Start by adding the desired amount of paraffin wax and stearic acid into a double boiler set up. The ratio for these two ingredients will depend on your preferences but generally three parts paraffin to one part stearic acid is a good starting point.
2. Heat the mixture until it reaches 70°C.
3. While your wax is heating, you can add any special additives or fragrances you would like into your container. These may include dyes, essential oils, or other additives like beeswax or emulsifying materials such as carnauba wax to create unique scents and colors in your candle wax mix.
4. Stir your mixture until all the ingredients are fully incorporated together and then let the mixture cool down before handling it further with your hands protected by oven gloves or heavy-duty gloves suitable for high temperatures.
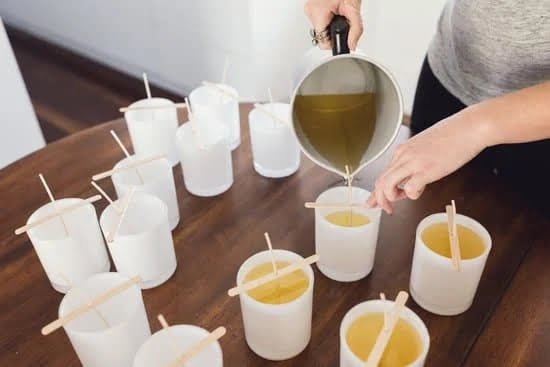
5. Pour the cooled liquid candle wax into molds or containers of your choice–these can be anything from glass jars, tin cans, block moldsor votive cups; take caution as pouring molten hot liquids can still cause burns even when cooled somewhat so use protection at all times when making candles Wax!
6. Let your newly poured batch cool completely overnight before releasing from mold if necessary and trimming any excess wick that may have drooped over edges of container during cooling process (if using container candles).
7 .Your freshly made batch of candle wax should last about 2 years when stored properly in airtight containers away from direct sunlight, heat sources & moisture to prevent oxidation whilst keeping its scent intact! Enjoy your homemade candle creations!
Step by Step Guidance for Making Candle Wax
1. Gather the materials you need: bee’s wax, coconut oil, essential oils (optional), a double boiler and wick.
2. Cut your bee’s wax into small chunks and place them in the top of the double boiler.
3. Add two tablespoons of coconut oil for every cup of bee’s wax and melt them together over low heat for about 20 minutes until the mixture is smooth and liquid.
4. Take the double boiler off of the heat and stir in several drops of essential oils if so desired (lavender, lemon, eucalyptus etc).
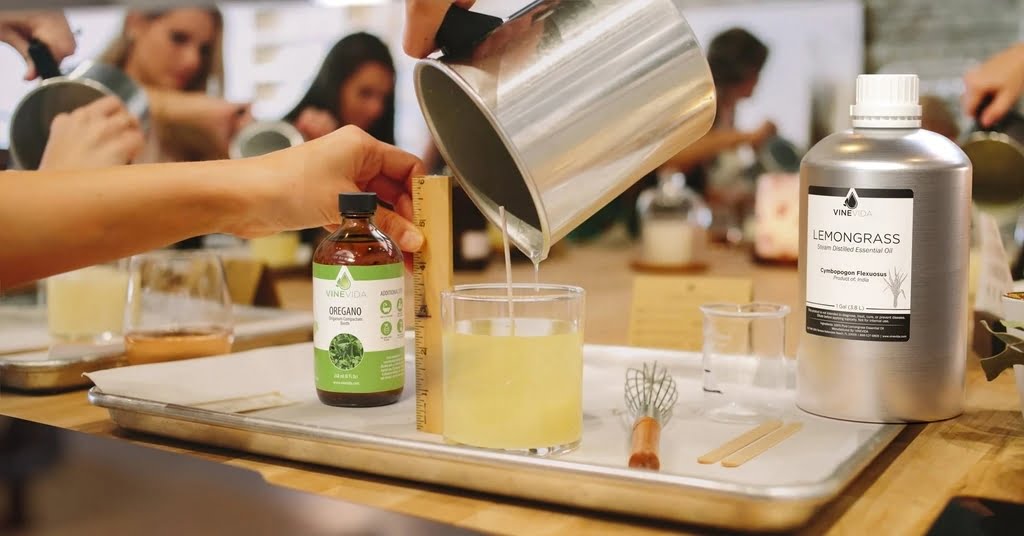
5. Place your wick into a pre-made candle holder or tin can and carefully pour in the melted wax – keep a steady hand while doing this!
6. Allow the candle to cool overnight at room temperature before burning it or gifting it to someone special!
Common Problems and Solutions for Making Candle Wax
One of the most common problems when making candle wax is achieving an even wax layer when pouring into a mold. This can be remedied by using a slow, steady pouring motion while constantly rotating the molds. It is also important to make sure that the pouring temperature is not too high, as this can cause unevenness in the wax layer and even bubbling or cracking. Additionally, ensuring your wicks are correctly placed will bring additional stability to your candles and prevent the wax from spilling out.
Another issue with making candle wax is achieving a consistent texture and color throughout all of your finished products. This can be solved by regularly stirring your molten wax during the cooling process and ensuring each batch’s temperature remains consistent. If you notice variation in coloring between different batches of wax, try tweaking variables like heat levels and cooling times until you’ve found a set of parameters which yield consistently desirable results. Finally, keeping your melting pots clean will help produce better quality candles as any residue left behind may interfere with the homogeneity of your product.
Creative Uses for Your Candle Wax
Candle wax has various uses both in and outside of the home. One popular use for it is for making DIY candles. To make candles using your used wax, start by cleaning any remaining wick from the wax you have. Using a wick that has been taped to a pencil or skewer stick, dip the wick into the melted wax and carefully lift it up once the desired amount of wax has been added onto the wick. Be sure to not cover the top of your already created candle with too much wax or else this could result in an unevenly burning flame ” or worse ” a fire hazard! After allowing any newly formed candles to dry and harden, you can light them to enjoy their soft illumination.
Besides being used for creating new candles, there are some other creative ways you can repurpose your candle wax. Try making projects such such as chalkboard paint or soy crayons with your extra wax. For these activities in particular all you will need is old crayons (which can be from any type of hardwax), some sort of cooking oil like vegetable oil or coconut oil, and a teaspoon of beeswax if desired for strength purposes. By melting these ingredients together and pouring in a mold (or on a surface where you want your product applied) you can repurpose wax left over from tapers, votives, floor candles, jar candles etc., into another item to use around your home!
Conclusion
Making candle wax is a rewarding and engaging activity that can be enjoyed by anyone. Whether you’re an experienced craftsman or someone who just wants to try their hand at a new art form, candle wax making can bring satisfaction when done right. A fun and creative project, it involves melting down wax chips or beads, combining them with dye if desired and then pouring into a candle mold before it cools. Depending on the type of wax used, the finished product may be tinted or have distinct layers. After curing the candle in a cool area, wicks may be inserted and your candle is ready for use! Candle-making can serve as an enjoyable hobby or even become a profitable business if you choose to make and sell your homemade candles. Whatever the reason for creating them, making candles will always be an engaging and rewarding activity in its own right!

Welcome to my candle making blog! In this blog, I will be sharing my tips and tricks for making candles. I will also be sharing some of my favorite recipes.


