Introduction
Candle making is an art that is enjoyed by people from all walks of life. It’s a creative expression that allows you to use your imagination and create something beautiful. Whether it’s your first time or you’re an experienced candle maker, take the time to go through the steps with care and enjoy the fun process of creating homemade candles!
To make your own candles, you will need several supplies including wax, wick, containers (for pouring the melted wax in), a double boiler or pot with water/heat source (for melting the wax) plus safety items such as protective gloves and eyewear. In order to achieve a successful project without problems, reading through all of the directions before beginning is recommended. After having collected all materials and tools, let’s begin with some tips on how to make great candles!
The very first step in candle making is to pick out your type of wax; beeswax, paraffin, palm oil and soybean are common options. Each type of wax has its own advantages so deciding which one works best for your intended purpose is important. For instance, if you plan on using essential oils, beeswax may be the best choice over other types due to its higher melting point and superior fragrance release ability.
After selecting a wax type for your project it’s time to get started with actual candle making. Begin by preparing and measuring out all necessary ingredients such as wax chips or cubes evenly into a large heat-safe container such as a double boiler or stainless steel pot. A good tip when melting wax is to turn off heat once melted because excessive temperature can cause discoloration in finished product. Once wax is completely melted, add dyes and any scents desired at this time. Wicks should be fitted into each prepped container for pouring before papering or taping down corners for stability after adding hot partially melted wax onto them slowly–taking care not to get burned while doing so–and ensuring even spreading throughout length of base while going up sides of vessel if applicable at same pace. Finally allow cooling overnight then trim off any excess wick before lighting.
Happy Candle Crafting!
Required Tools for Candle Making
To make candles at home, you will need to gather some essential tools and materials in order to have the best experience. The most common items needed for candle making are:
1. Melting Pot/Plate/Double Boiler: This is used to melt wax before adding your scent and color, as well as other additives. You can also use this to warm up containers while pouring.
2. Thermometer: Temperature is important when making candles to ensure that everything melts evenly and cures correctly. Ideally, utilize a thermometer that reads from 90-200 degrees Fahrenheit with a clip to easily attach it to pots or jars.
3. Pouring Pot/Ladle: To scoop melted wax from the melting pot and pour into the container or mold of choice for your candle, a wooden ladle with a long handle works best since plastic may warp or melt.
4. Wax Sticks Lighter: Establishing a wick in your container can be tricky without this tool! It looks like a giant pencil with metal clips on both ends which release molten wax onto each side of the wick body, securing it in place.
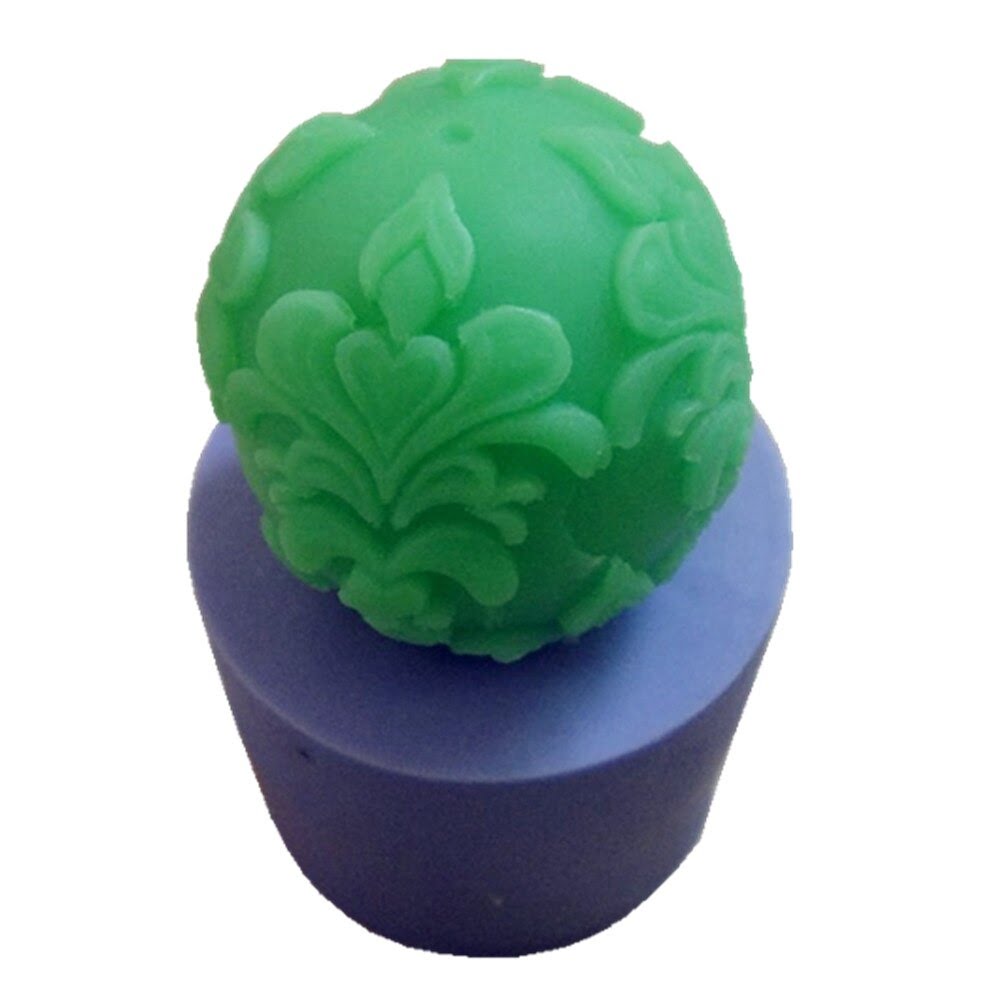
5. Containers/Molds: Your options are limitless here – wax melts look great in teacups, mason jars for jar candles, glasses for votive candles, or silicone molds for stars, animals and hearts! Ensure any containers you use are heatproof (unless specifically intended for candle making).
6. Wicks/Tabs: Keeping wick centered and upright can be tough without tabs! A metal base locks it in place so that the top isn’t pulled out of position when melting down more wax is added over time (a requirement in pillar and jar candles). Wicks come in various sizes depending on the diameter of whatever container you’re using – make sure they’re made of cotton fiber only – no synthetic fibers mixed in!
Setting Up a Safe and Efficient Candle Making Space
Creating a safe and efficient candle making space is an essential part of any candle making project. The first thing to consider is the surface you’re working on – it should be stable and far away from any potential sources of fire, like a stove or heater. A sturdy desk or table with plenty of room for supplies is generally best suited for this purpose. Additionally, ensure that the area around the table is free from clutter so that your movements are not hindered during the process of candle making.
Safety should be your number one priority when it comes to candle making. Make sure you have adequate ventilation in the work area, as well as protective gear such as safety glasses and gloves. In order to protect skin and surfaces, always use heat resistant mats underneath your wax containers, plus multiple layers of newspaper on either side of them – this will prevent unwanted spills if something goes wrong. Finally, get a working fire extinguisher in case of fire emergencies.
Once these safety concerns are taken care of, you can start setting up your actual workspace. Begin by gathering all the necessary supplies ” wax, wicks, embeds (optional), jars/holders, thermometer/timer ” and placing them nearby your work station. Next arrange all tools such as pour pots and spoons in easy reachable positions so they don’t interfere with each other while you’re making candles. Finally don’t forget to prepare an area for storing finished candles ” make sure it’s far away enough from possible sources if temperature change or flammability such as furnaces or stoves. After everything is set up you can begin creating beautiful candles with peace of mind!
Selecting the Right Candle Wax for Your Project
The type of wax you use to make your candles will depend on the end product you are hoping to create. Each type of wax has its own characteristics and advantages, so it’s important to pick the right wax for your project.
Paraffin Wax: This is the most common candle-making wax and is relatively inexpensive. Paraffin burns cleanly with good scent throw and makes a nice, hard pillar candle. On its own, paraffin can sometimes be too brittle for some projects, but blended with other waxes can help achieve desired results.
Soy Wax: Soy candles burn cleaner than traditional paraffin-based candles, plus they are renewable, biodegradable and affordable! Soy wax yields more fragrance per ounce than paraffin and produces less visible smoke when burning. Instead of a glossy finish like typical paraffin candles, soy wax has a more ivory or matte look to it. But keep in mind that some fragrances may not stick too well in soy candles, so testing before you start making larger batches is advised.
Gel Wax: If you’re looking for something unique or even see-through, then gel wax may be your best choice. It is much more expensive than paraffin or soy but very forgiving to work with”gel melts slowly so there’s a lot of time to add colors and scent before it cools down again. These types of candles also last longer than standard ones because the melted candle pools out away from the wick without evaporating quickly (which dispels the fragrance). Gel candles should always be kept covered in storage since their strength comes from ultraviolet light inhibiting them from melting excessively; too much exposure will make your candle turn into a puddle!
Heating and Melting the Wax for Candle Making
Making candles can be a rewarding and calming activity. After you have decided what type of wax, wick, and scent you are interested in using for your candle making project, the next step is to heat and melt the wax. This can be accomplished in several ways, including using a double boiler or an electric hot plate.
A double boiler is typically used with vegetable or soy-based waxes as they require a lower temperature to melt than paraffin waxes. If using this method, you will need two pots of similar size ” one small enough to fit inside the other ” and water. Fill the outside pot about halfway with water, place it over medium heat and wait for a light simmer to form. Next, place your wax into the smaller pot then place it within the larger pot. Now simply stir until your wax has completely melted. It is important to keep stirring continuously as this prevents burning or clumping of your wax mixture.
Alternatively, an electric hot plate is typically used for paraffin wax but can also work well for other types of wax if done properly. Put all desired ingredients together in the vessel that fits on top of the hot plate and turn it up to low or medium heat setting (never high). Once again it is important that you continuously stir while melting — this is necessary because different molecules within candle making materials will melt at various temperatures causing an uneven burn if not mixed thoroughly before being poured into molds. Once everything has blended together well and completely melted remove from heat source before transferring into molds or pouring directly onto canvases or candle holders that have been lined with parchment paper.
Types of Candle Containers and How to Prepare Them
Candles can be made in a variety of containers. Some of the most common types of candle containers include jars, tins, teacups and votives. You need to properly prepare your chosen candle container before you begin.
If you are using glass or tin containers, these should be washed in hot, soapy water and dried thoroughly before beginning. This will help ensure that no residue from labels, oils or lotions remains on the surface that could inhibit the wax from adhering smoothly. There are also specially formulated detergents available for cleaning Candle Containers with stubborn residues left behind. If you choose to use a walled teacup or votive as a container, make sure the bottom is wide enough that it will stand securely on its own when the candle has been poured in it. If not, consider adding adhesive felt circles to the bottom that have been treated with parting powder to provide extra stability and prevent sticking once cooled. You may also want to place all your containers on an old cookie sheet – this helps them stay in place during the pouring process and makes any post-pour clean up much easier!
Achieving the Perfect Scent, Color and Embellishments
Making homemade candles is a fun, creative activity that allows you to experiment with a variety of scents, colors and embellishments. To ensure the perfect candle for as many people as possible, start by choosing the type of wax that you will use. The most popular types of wax used in candle-making are paraffin and soy wax, both of which burn cleanly and hold scent well.
Once you have chosen your wax type, it’s time to decide on your fragrances. Start by gathering some essential oils or candle fragrances. Candle fragrances come in a variety of scents such as vanilla, cinnamon, rose and sandalwood, so explore different combinations until you are satisfied with the scent blend. Experimenting with multiple fragrances can give the perfect combination for a beautifully scented candle!
Next comes color selection. If your wax is paraffin based, you can use liquid dyes to give them their desired hue without changing the texture of the wax too much. keep in mind that liquid dyes will not work for extremely light colors and other tinting products must be used instead. Soy candles, however, require no dye at all due to their natural creamy off-white Honeycomb appearance when lit.
Lastly, consider any eye-catching design elements such as crushed herbs or delicate shapes embedded into the sides or tops of your candles like hearts or stars! Embellishing your candles gives them an individualized touch; however if done improperly they won’t look as good as they should so make sure you experiment with a few first before committing to one style!
Cooling and Properly Curing Your Candle
Once your candle is completely finished and cooled, you must correctly cure it for the longest lasting burn time. Curing involves allowing the wax to dry and set properly, as well as giving off its fumes properly. To do this, you need to store your candle away in a cool and dark place for 24 hours before use. This allows the wick to absorb enough wax so that it will stay lit while the scent and additives are dispersed evenly throughout the wax ensuring uniform performance. Make sure that when storing your candle away it is in an air tight container so other fragrances or smells do not affect your wax. Once cured, trim the wick shorter than 1/4 inch long every time you want to relight your candle to ensure a steady flame.
Finishing Touches
Making labels and packaging your candles is the last step in making the perfect candle! This can be done after your candles have cooled; however, it’s important to note that labeling and packaging should happen before you start selling your products. It not only adds an extra touch of class to your candle creations but also ensures that customers are informed about what goes into their purchase.
When labeling and packaging your candles, first decide if you would like to create custom labels or buy pre-made labels from a craft store or supplier. Custom labels can give your candles a more professional look and help add the finishing touches that many retailers and consumers require for their products. If you choose to make them yourself, print them on label paper and affix them with hot glue, double-sided tape, or adhesive spray.
When it comes to packaging your handmade candles, there are multiple options available depending on the product line you create (such as small jars or tins). You may choose to package each candle individually or put several pieces in a beautiful box or basket to showcase your product collection. Using tissue paper, shredded paper, ribbon bows, etc., add visual appeal and provide another layer of protection while transporting these fragile items. Don’t forget safety instructions as well which must be included in the package ” things like burning times and warning labels are essential for any candle company!
Troubleshooting Tips and Techniques for Candle Making
In candle making, there is a tremendous amount of troubleshooting and techniques used to ensure success. Here are some tips for ensuring that your candle making project goes smoothly:
1. Invest in quality materials: The key to successful candle making is using good quality supplies “from wax to wicks, fragrance oils, dyes, molds, etc. Choose professional grade products whenever possible.
2. Read instructions/tutorials carefully: Avoid mistakes by taking time to carefully read all instructions before starting your project. Learn as much as you can about the process before attempting it on your own.
3. Check temperatures: Wax should be heated to specific temperatures in order to achieve desired results and consistency when pouring into the molds. Use a thermometer to double-check wax temperature and adjust accordingly if needed.
4. Experiment with different methods: Different types of candles require different approaches and techniques for best results – from types of container options, proper wicking size/length, scent strength combinations, finishings such as painting or dipping…it’s best to practice on smaller batches first until you’re comfortable enough in experimenting with more intricate designs and styles!
5. Properly condition the wax for storage: Properly melt and cool wax prior to storage in an air-tight container at room temperature in order to preserve color and scent retention over time
Conclusion
Making your own candles can be a rewarding experience. Not only is it a creative and fun craft, but in the end you have something tangible to show for it”beautiful handmade candles you can use or give away. Candle making can even become a pleasant routine, helping relieve stress and unwind after a long day at work. It is also important to remember to always follow the safety guidelines when working with wax and open flames.
When you reflect on the process of candle making, it’s easy to appreciate the craftsmanship involved in creating something so unique. Candle making involves artistry, engineering, and chemistry. As a way of celebrating the time spent creating handmade candles, why not set aside some of your finished work to admire? Displaying them in your home will give your living space an extra special touch as well as serve as an invaluable reminder of what you are capable of creating with your own two hands.

Welcome to my candle making blog! In this blog, I will be sharing my tips and tricks for making candles. I will also be sharing some of my favorite recipes.


