Introduction
Smelling good is one of the major benefits of making your candles smell good. Good smelling candles can create a pleasant atmosphere in any room, home or office. Additionally, scented candles have many psychological and emotional benefits as well. They can stimulate pleasant memories, bring an individual to a relaxed state, and evoke feelings of joy or hope depending on the scent. Moreover, scents also have a way of calming and soothing people who may be feeling anxious or stressed. Therefore, by making your candles smell good you can create a tranquil environment without resorting to sedatives or drugs. Furthermore, having your own custom-made candle can give rise to unique sense of pride in creativity and craftsmanship!
Comparing Different Types of Wax, Fragrances, and Essential Oils
When making candles that smell good, one of the most important factors to consider is the type of wax you purchase. The type of wax you choose will determine how long your candle smells and burns. Paraffin is a popular choice for candlemaking because it’s economical, readily available, and easily moldable. However, if you’re looking for a more natural option, beeswax and soy wax are both excellent alternatives.
The next factor to determine is what fragrance or essential oil you want your candle to carry with it. Premium fragrances are concentrated enough that you can use a small amount and still achieve good scent throw from your candles. If you prefer essential oils, they won’t be as strong as synthetic fragrances but they provide wonderful natural scents to candles made with them. It’s best to stick with between 6-10% of fragrance or oil when calculating the right amount for your project.
Lastly, there are several types of additives that can enhance the scent of your candle such as glitter or flakes that create shimmering effects when melted in combination with the wax base. You can also add different colors for a unique look and texture too! Just remember to account for any colorants when selecting the proper amount of fragrance or essential oil as certain colorants may interfere with scent saturation. With a combination of premium materials and proper measurement techniques, anyone can enjoy their homemade candles filled with beautiful aroma!
Understanding the Candle Making Process
The candle making process involves several key steps. First, the wax must be melted and dyed to whatever color you choose. Once the wax has been melted, dye added and cooled to a workable temperature, you can add your desired fragrance to the wax. Most fragrances are made from either paraffin or soy-based oils, both of which can be found at many craft stores or online. Fragrance oil is measured in weight rather than volume, so make sure to get a scale if this is the first time using it for candle making.
Next, once the wax has been given your desired scent and color, it’s time to start pouring into your mold. The container you use will depend on what type of candle you’re making. You should pour slowly and carefully so as not to overflow or cause air bubbles while pouring it in. Be sure to let each layer cool before pouring another layer; this will ensure that your candles smell good throughout its entirety.
After all of the layers have been poured and cooled off, the last step is usually adding decorations if desired (e.g., dried flowers). Once these decorations are complete and secure, it’s time to trim off any excess wax around the top of your candle with scissors or craft knife. Finally, you can light your homemade scented candles! It’s important when lighting them that you note how quickly they burn; adding more oils to increase aroma may result in a quicker burn time or decreasing scent strength overtime due to excessive heat from burning wicks. Enjoy!
Incorporating Fragrance & Essential Oils for Maximum Aroma
Adding fragrance or essential oils to your homemade candles will help them smell amazing. To achieve optimal aromatic benefits, you should add the oils a few days after your candle has hardened. This allows time for the scent to spread throughout. Start by heating up a combination of wax and oil (approximately 1 to 2 teaspoons for each 1 cup of melted wax) before pouring it into your mold. If it’s too thick, gradually add more ingredients until you reach the right consistency and adjust as necessary. You’ll want to experiment with different ratios and ingredients before settling on one that suits your needs and preferences. Additionally, if possible, use a double boiler to evenly disperse the heat while combining all of the components. An electric hot plate can also be used in lieu of a stove top”just make sure it’s turned off when not in use! Afterward, allow the heated mixture to sit undisturbed for 24 hours so that the fragrance can settle and integrate with the melted wax; this ensures maximum aroma diffusion when burning the finished candles. Lastly, check again for needed adjustments prior to pouring into molds or jars.
Finding the Best Candles for a Delightful Scented Room
When shopping for a candle to make your room smell nice, there are a few important things to consider. Firstly, be sure you understand the type of scent that you prefer. Do you like fresh clean scents, floral fragrances or deep musky aromas? Once you have identified the type of scent that fits your preference you can begin searching for candles based on these criteria. Remember, not all candles will fill an entire room with fragrance; some may need more than one lit in order to create a powerful aroma. Secondly, pay attention to the candle’s wax type and wick size when determining how long it will last and how much smoke will be produced while burning. Wax such as beeswax or soy creates a longer lasting and slower burning candle, reducing the amount of black soot-like residue decorating walls and furniture surfaces; whereas paraffin wax emits a stronger aroma but creates more smoke as it is burned, even with minimal air circulation in the room. Finally, research ingredient lists for any toxins or harmful chemicals present in your potential candle choice. Choose candles made from natural materials free from any chemical additives so there is no concern over fumes lingering in the air while enjoying the pleasant aroma they produce. After choosing a safe and quality-made candle with just thed right scent you’ll find yourself surrounded by an enjoyable ambiance that brings relaxation after every light up session!
Choosing the Right Candle Container for the Job
When it comes to making candles that smell good, one of the most important steps is choosing the right candle container for your creation. The type of container you use can hugely impact the overall scent and quality of your candle, as well as its ability to stay lit and burn evenly. It’s important to pick a container that is specifically designed for candle-making, or else it won’t hold the wax correctly, resulting in an uneven burn or weak fragrance. The size and shape of your container should also be taken into consideration when selecting one for your candle; choose a size that will give you more control over the shape of your finished product and allow you to obtain a nice even burning candle. Additionally, if you are making scented candles make sure that the material used in constructing the vessel won’t leach any smells once heated up. That way, you won’t end up with any weird off-smells merging together when the wax melts with the material of the jar itself. Lastly, it’s important to make sure that whatever shape or style of container you choose has enough heat tolerance to protect it from hazards during pouring and cooling process.
Highlighting Tips for Making Your Candles Last Longer
When making candles that smell good, it is important to keep them properly maintained so they will last longer. Here are a few tips for ensuring your candles give off their pleasant scent for as long as possible:
• If you are using a wax warmer, replace your wax melts regularly to keep the scent fresh.
• Clean out any debris or gunk that builds up in containers or molds before pouring the new candle wax in. This will help prevent clogs and air pockets within the candle, which can reduce its scent.
• When extinguishing a candle, make sure you dip it right into the melted wax to achieve an even burn. Incomplete burns can create cold spots on the surface of the wax, inhibiting its fragrance.
• If a flame gets too hot, use a longer wick or move the candle away from sources of heat like windows and vents. Flames should always be burning 1-2 inches tall for optimal results.
• Keep wicks trimmed to ¼ inch long and always ensure their base is centered within in your container or mold when pouring new wax over them. Longer wicks tend to smoke and carry more impurities into the smoking flame, decreasing its longevity and weakening fragrance throw.
• Finally, consider experimenting with essential oils or other natural ingredients like dried flowers & herbs when making your candles, as they often add a subtle touch of aroma while also improving burning results!
Avoiding Common Mistakes & Potential Pitfalls
We’ve all been in a situation where we buy a scented candle, only to find that we can barely detect its scent once lit. This could be due to several reasons, from errors made in the candle-making process to problems with the wax and wicks used. To ensure a stronger scent when your candles are burning, here are some tips for avoiding common mistakes and potential pitfalls:
1. Use high-quality wax: Low-grade wax or oil does not hold scent well and the fragrance won’t be as strong. High-grade paraffin or soy candles will work best for making fragrant candles and ensuring an enjoyable scent when lit!
2. Don’t skimp on fragrance: Using too little essential oil can cause weak scents while using too much can result in an overwhelming, unpleasant aroma when burned. Finding the right balance is key – try starting with a ratio of 7 ounces of essential oil per pound of wax and adjust accordingly until it’s just right!
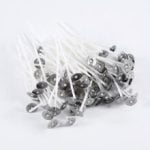
3. Select the right type of wick: The wrong type of wick may make your candle burn unevenly, so make sure you use one that is compatible with your wax type and fragrance concentrations. Metal core braided cotton wicks are often recommended for container candles with essential oils as they provide good flame strength, yet don’t smoke excessively.
4. Use proper amounts of fragrance: Too much fragrance oil can cause tunneling or overheating as it prevents liquid wax from reaching the edges of the jar or other container during burning. Likewise, too little diluted fragrance may result in poor throw causing virtually no smell when lit! When adding essential oils to your candle make sure you follow recommended ratios based on current temperature/humidity levels and test throw before finishing up any batch.
5. Properly cool & cure the candle: Once your candles have cooled to room temperature begin a 3-4 day curing process by storing them away from sunlight or heat sources such as radiators, this helps develop maximum scent throw potential & even burning qualities! Keep in mind these tips will help get optimum results but also practice patience ” don’t rush into testing until they’ve had time to fully cure otherwise you’re setting yourself up for disappointment!
Summary
Making candles with pleasant smells is an easy and rewarding craft. Here are some tips to create candles that look great, and smell even better:
1. Select the Right Wax – The first step to making scented candles is to select a wax that will hold the fragrance properly. Soy wax and beeswax are popular choices for sun-scented candles as they’re known for their excellent scent throw – meaning the wax melts at a lower temperature without overtaking the scent of your candle.
2. Pickout the Perfect Fragrance Oil – After selecting your wax, you should then pick out a high-quality fragrance oil of your choice. Try experimenting with fragrances until you find one that you love, or mix different oils together to create unique combinations. Keep in mind, the stronger the scent, the better: sometimes it can be difficult to detect faint scents once your candle is poured and set!
3. Adjust Your Wick Size – Following centuries of trial and error, determining wick size has become an exact science. You should choose a wick size that is appropriate to maintain correct burning cycles while keeping soot buildup to a minimum.
4. Consider Coloring Your Candle – Did you know that adding coloring can create consistent shade throughout your candle? While not necessary, adding colorant will bring a sense of personalization and uniqueness to any homemade project!
5. Follow Safety Guidelines When Burning – Even after taking all safety precautions when crafting your candle, it’s important to respect basic rules when burning them indoors such as keeping them away from furniture edges, flammables (sprays etc.), drapes/curtains and using an appropriate fire source like votive cups or tea light holders depending on how large your candle jar ).
Keep these tips in mind when crafting candles from home; by following these steps you should have no problem creating aromatic pieces of art fit for any home décor!

Welcome to my candle making blog! In this blog, I will be sharing my tips and tricks for making candles. I will also be sharing some of my favorite recipes.

