The art of making candles at home is a delightful and rewarding craft. There’s great joy in creating beautiful, custom-made candles that fill our living spaces with warmth and ambiance. However, one aspect of candle making that can often deter beginners is the potential mess involved, particularly when it comes to melting the wax. That’s why finding a method for melting wax candle making with no mess is essential.
When it comes to gathering the essentials for making no-mess wax candles, there are a few key items you’ll need. High-quality wax is crucial for achieving clean and consistent results, so be sure to invest in premium options. Additionally, having suitable candle molds is important for achieving the desired shape and look of your finished candles. Alongside these essentials, there are optional items that can enhance the overall experience and outcomes of your candle making journey.
Creating a mess-free workspace is vital to ensure an enjoyable and safe candle-making experience. Choosing a suitable area where you have ample space and minimal risks of spills or accidents is essential. Organizing the workspace efficiently can help minimize any potential messes while ensuring easy access to all necessary tools and equipment.
By utilizing specific techniques and following proven methods, melting wax without any mess becomes achievable. Whether using a double boiler technique or utilizing a microwave method, step-by-step instructions will guide you through the process with ease. Furthermore, alternatives like crockpots or electric wax melters offer additional options for achieving clean and hassle-free results.
With these strategies in place for melting wax without creating any messes, you can embark on your candle-making endeavors with confidence and excitement. The following sections will delve into more detail about gathering supplies, prepping the workspace, choosing the right wax type for cleanliness efficiency, as well as providing additional tips to troubleshoot any potential messy situations that may arise along the way.
So let’s dive in and discover how to master the art of no-mess wax candle making.
Gathering the Essentials
Gathering the essentials is an important step in creating mess-free wax candles. To ensure a successful and enjoyable candle-making experience, it is crucial to have all the necessary supplies at hand. This section will provide a detailed list of what you’ll need and discuss the importance of high-quality wax and candle molds. Additionally, we will explore optional items that can enhance both the process and results of your candle-making endeavor.
Necessary Supplies
To make no-mess wax candles, there are a few essential items you will need:
- High-Quality Wax: Invest in quality wax specifically designed for candle making. Beeswax, soy wax, and paraffin wax are popular options with different benefits such as clean burn or natural properties.
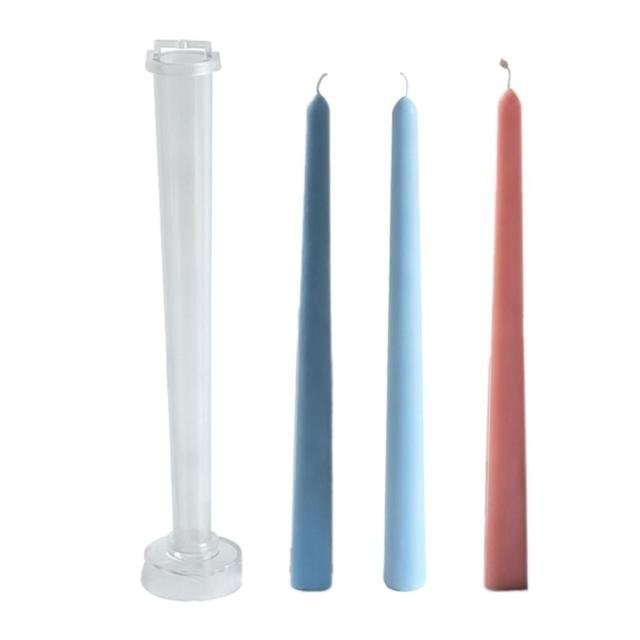
- Candle Molds: Choose molds made of durable materials like silicone or metal, ensuring they are suitable for the specific type of wax you’re using.
- Wick: Select wicks specially designed for the type of candle you plan to make; cotton wicks are commonly used.
- Thermometer: Opt for a thermometer to accurately monitor the temperature during the melting process.
- Double Boiler or Melting Pot: If using a double boiler method, acquire a heat-resistant bowl that fits securely over a pot filled with water. Alternatively, consider purchasing an electric wax melter if preferred.
- Heat Source: Prepare a stove or microwave as a heat source for melting your wax.
- Pouring Pitcher: Obtain a heat-resistant pouring pitcher with a spout for easy and controlled pouring.
Importance of Quality Wax and Candle Molds
Investing in high-quality wax is crucial for creating mess-free candles that burn cleanly and evenly without excessive dripping or soot build-up. Lower-quality waxes may contain impurities that can affect the melting process and compromise the overall quality of your candles.
Similarly, choosing suitable candle molds is essential. High-quality molds will have smooth interiors and provide a sturdy structure for the melted wax to set without any leaks or deformities. They should also be easy to clean, ensuring efficient reuse for future candle-making projects.
Optional Items
While not essential, these optional items can enhance your candle-making experience and the final results:
- Fragrance Oils: Add fragrance oils to your melted wax for scented candles that fill the room with delightful aromas.
- Dyes or Colorants: Incorporate dyes or colorants to create beautiful, colored candles.
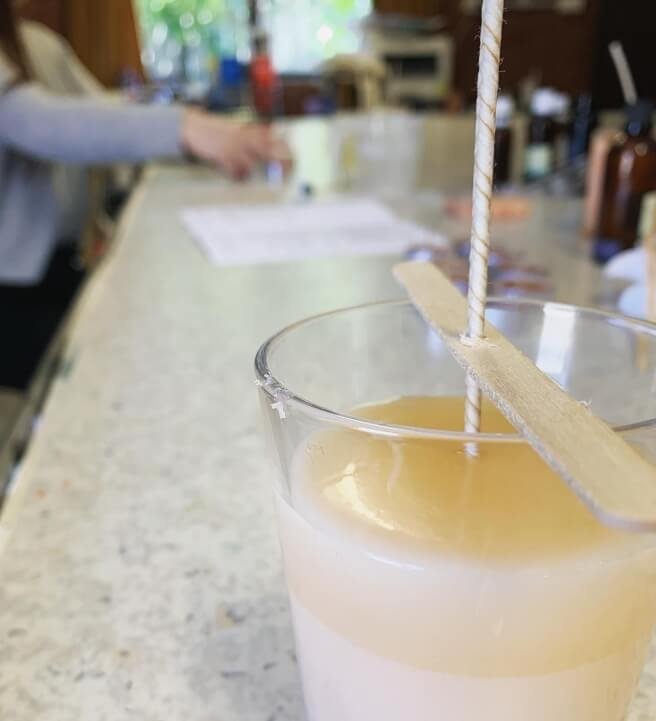
- Wick Centering Device: If using a container for your candles, a wick centering device can help ensure the wick remains centered during pouring and setting.
- Candle Labels or Packaging Materials: Consider labels or packaging materials to personalize and enhance the presentation of your finished candles.
By gathering all the necessary supplies and opting for high-quality wax and candle molds, you are setting yourself up for success in creating mess-free wax candles that you can enjoy with pride.
Prepping the Workspace
When it comes to melting wax for candle making, having a well-prepared workspace is essential for a successful and mess-free experience. Prepping the workspace not only helps minimize the chances of accidents but also ensures efficiency during the melting process. Here are some tips on setting up your workspace for wax melting success:
Choose a Suitable Workspace
First and foremost, choose a designated area that is well-ventilated and away from any flammable materials. A kitchen counter or table with easy access to an electrical outlet is ideal. Consider covering the workspace with newspapers or wax paper to protect the surface from any potential spills or drips.
Organize for Minimized Mess
Creating an organized space will help you stay focused and prevent unnecessary messes. Keep all your supplies within reach, including your chosen wax, molds, thermometer, stirring utensils, and a heat-resistant container or double boiler setup. Set up a designated area where you can place hot items safely to cool down after use.
Ensure Safety First
Safety should always be a priority when working with hot wax. Before starting, have fire extinguishers nearby in case of emergencies. Additionally, wearing protective gear such as gloves and aprons can prevent accidental burns or spills on your clothes.
Consider Temperature Control
Maintaining the right temperature is crucial for successful wax melting. If using a double boiler method, make sure the water level in the bottom pot is sufficient but does not overflow when heated. If using a microwave, start with short intervals and gradually increase until the wax reaches its desired temperature.
By taking these steps to prep your workspace before beginning the wax melting process, you are setting yourself up for success and ensuring a mess-free candle making experience. With an organized and safe environment, you can focus on crafting beautiful candles without worrying about any unnecessary messes along the way.
Choosing the Right Wax for a No-Mess Melt
When it comes to making no-mess wax candles, selecting the right type of wax is crucial. The type of wax you choose will greatly impact the cleanliness and ease of the melting process. Here are some different types of waxes available for candle making along with their benefits in terms of cleanliness and ease of use:
- Paraffin Wax: Paraffin wax is the most common and affordable option for candle making. It has a low melting point, which makes it easy to work with. However, paraffin can release toxins when burning, so it may not be the cleanest option.
- Soy Wax: Soy wax is a natural alternative to paraffin and is considered more environmentally friendly. It has a lower melting point than paraffin, making it easier to melt without creating a mess. Soy wax also burns cleaner, producing less soot and smoke than other waxes.
- Beeswax: Beeswax is another natural option that burns cleanly and releases a faint honey scent when melted. It has a higher melting point compared to paraffin and soy wax, so it requires more heat and time to melt properly.
When choosing the right wax for your no-mess melt, consider factors such as burn time, scent throw, and overall candle appearance. Each type of wax has its own unique attributes that can enhance your candle-making experience.
To further ensure a mess-free melt, opt for high-quality wax from reputable suppliers. This will ensure that your wax melts evenly and efficiently without any impurities or debris that could cause mess or affect the final appearance of your candles.
Remember, investing in high-quality materials will not only make the melting process mess-free but also produce beautiful and long-lasting candles that you can enjoy for hours on end.
Proven Techniques
Melting wax can sometimes be a messy process, but with the right techniques, it doesn’t have to be. In this section, we will explore some proven methods for melting wax without any mess involved.
One popular method for melting wax without creating a mess is by using a double boiler. This technique involves placing a heat-resistant container filled with wax into a larger pot of boiling water. The steam from the boiling water heats the container and melts the wax inside. This method ensures that the wax melts evenly and prevents any direct contact between the heat source and the wax, reducing the chances of spills or splatters.
Another mess-free wax melting method is using a microwave. To do this, you will need to melt your wax in a microwave-safe container in short bursts of time, stirring in between until completely melted. It’s important to use low power settings and monitor the process closely to avoid overheating or causing the wax to bubble over. This method allows for quick and easy melting without any extra pots or pans.
For those who prefer not to use stovetop or microwave methods, there are alternative options such as using a crockpot or an electric wax melter. Both of these methods provide consistent heat that melts the wax gradually without creating any messes. With a crockpot, you can simply place your container of wax into the crockpot and let it melt slowly over time. An electric wax melter works similarly but is specifically designed for melting candle waxes efficiently.
By utilizing these proven techniques, you can ensure that your experience with melting wax is hassle-free and mess-free. Whether you choose to use a double boiler, microwave, crockpot, or electric wax melter, you’ll be able to enjoy the process of making candles at home without worrying about any unwanted spills or drips during the melting stage.
Secrets to Clean Pouring
Pouring melted wax into molds is a crucial step in candle making, and ensuring a clean and precise pouring process can help you avoid spills and overflows. Here are some secrets to achieving a mess-free pouring experience:
- Prepare Your Molds: Before pouring melted wax, make sure your molds are clean and dry. Any moisture or debris can disrupt the pouring process and create messes. Consider using silicone molds, as they are flexible and non-stick, making it easier to remove the candles later without causing any damage.
- Use a Pouring Pitcher or Container: To pour melted wax without mess, use a pitcher or container specifically designed for candle making. These containers often have narrow spouts or pour spouts that allow for controlled pouring and minimize the chances of spills.
- Slow and Steady Wins the Race: When pouring melted wax into molds, take your time and pour slowly and steadily instead of rushing. Gradually fill each mold until it reaches your desired level, ensuring even distribution of the wax. Avoid overflowing by leaving some space at the top of the mold to account for any expansion during cooling.
- Consider Using a Funnel: For increased precision, especially when working with smaller molds or intricate designs, consider using a funnel. A funnel can help direct the flow of melted wax into tight spots, reducing the risk of spills and overflow.
- Clean Up Drips Immediately: If you do encounter any drips or spills during the pouring process, it’s essential to clean them up immediately before they harden. Use paper towels or cotton swabs to carefully wipe away any excess wax from your workspace or mold surfaces.
By following these secrets to clean pouring, you can enjoy a mess-free candle-making experience with beautiful results. Remember that practice makes perfect, so don’t be discouraged if you encounter some minor spills along the way – with time and experience, you’ll become an expert at creating pristine, mess-free wax candles.
Neat and Tidy Clean-Up
Now that you have successfully melted your wax and poured it into the molds to create your beautiful candles, it’s time to clean up and maintain a neat and tidy workspace. Proper post-melting maintenance is essential for a hassle-free candle making experience in the future. In this section, we will provide guidance on cleaning up after melting the wax, proper disposal methods, and tips for easy maintenance.
Cleaning up the workspace after melting the wax is essential to ensure a clean and organized environment for future candle making projects. Start by allowing any leftover wax to cool and solidify. Once hardened, it can be easily scraped off surfaces using a plastic scraper or spatula. It’s important not to pour leftover wax down the drain as it can cause clogs. Instead, collect it in a disposable container or plastic bag for proper disposal.
In addition to removing any residue from surfaces, it’s also important to clean your tools and equipment thoroughly. Wipe down your double boiler or microwave-safe container with paper towels or disposable wipes to remove any residual wax. Wash them with warm soapy water for a more thorough cleaning, ensuring that all traces of wax are removed. If using an electric wax melter or crockpot, follow the manufacturer’s instructions for cleaning.
| Cleaning Supplies | Description |
|---|---|
| Plastic scraper/spatula | Used for scraping off hardened wax from surfaces. |
| Disposable container/plastic bag | For collecting leftover wax for proper disposal. |
| Paper towels/disposable wipes | To wipe down surfaces and remove residual wax. |
Proper disposal of leftover wax and debris is an important aspect of post-melting maintenance. Depending on the type of wax used, there are different ways to dispose of it safely. Paraffin wax can be melted down, strained to remove any impurities, and reused for future candle making projects.
Soy or beeswax can be composted if they are free from any additives or fragrance oils. If you’re unsure about the proper disposal method for your specific wax, check with your local waste management regulations.
Maintaining a neat and tidy workspace is not only aesthetically pleasing but also ensures a smoother candle making process in the future. Clean surfaces allow for better adhesion of molds and prevent unexpected messes or spills when working with melted wax. Consider investing in storage containers or organizers to keep your tools, molds, and supplies neatly arranged and easily accessible. Regularly wipe down surfaces with warm soapy water to keep them clean and ready for your next candle making adventure.
By following these tips for post-melting maintenance, you can enjoy a clean and organized workspace that is ready for your next batch of beautiful candles. Taking the time to properly clean up and maintain your candle making area will save you time and effort in the long run while ensuring a more enjoyable experience every time you embark on a new project.
Troubleshooting
When it comes to candle making, there may be times when things don’t go as smoothly as planned and messy situations arise. However, with the right knowledge and solutions at hand, you can tackle these challenges and continue creating your mess-free wax candles with confidence.
One common issue that may occur during the wax melting process is accidental spills, splatters, or drips. To prevent this from happening, always make sure your workspace is clean and clutter-free before starting. Additionally, consider using a double boiler or microwave method for melting wax since these techniques provide more control over the pouring process.
If an accidental spill does happen, don’t panic. The key is to act quickly. Use absorbent materials such as paper towels or cloth to soak up the spilled wax immediately. Be cautious not to spread the mess further by wiping in large motions; instead, gently blot the area to absorb as much wax as possible. For any remaining residue, use a commercial wax remover or rubbing alcohol to clean it up effectively.
Another potential messy situation could involve overflow and drips during the pouring stage. To avoid this, it’s crucial to pour slowly and keep an eye on the level of melted wax in your mold.
If you notice it getting too high or reaching the edge of the mold, pause pouring and allow the excess wax to cool slightly before continuing. Taking breaks during the pouring process will help prevent overflow and allow you better control over keeping things neat and tidy.
In addition to troubleshooting spills and overflows, it’s essential to be prepared for unexpected situations that may arise during your candle making journey. One expert tip is always having extra supplies on hand – including extra wax, wicks, molds, or even spare containers for melted wax in case of emergencies. Being well-prepared will enable you to handle any mishaps efficiently without compromising your no-mess candle-making experience.
By learning how to troubleshoot potential messy situations, you can approach your wax melting process with confidence and peace of mind. Remember that mistakes happen, but they shouldn’t discourage you from continuing your candle making journey. Embrace the learning experience and use these troubleshooting techniques to overcome any obstacles that may come your way.
Celebrate Your Success
Now that you have successfully melted your wax without any mess, it’s time to add the final touches and start enjoying your beautiful candles. In this section, we will explore different ways to personalize and decorate your finished candles, as well as provide tips on removing them from the molds with minimal mess and damage.
Personalizing and decorating your candles is a fun way to make them unique and fit your personal style. There are various options for adding a touch of creativity to your candles. One popular method is using candle dyes or pigments to create vibrant colors.
You can mix different colors to achieve custom shades or use a single color for a more elegant look. Additionally, consider experimenting with different fragrances by adding scented oils or essential oils to the melted wax. This will not only enhance the ambiance but also make your candles smell delightful.
When it comes to removing candles from the molds, it’s important to do so carefully to avoid any mess or damage. Start by ensuring that the wax has completely cooled and solidified before attempting to remove it from the mold. Gently tap on the mold’s sides or invert it and give it a light shake to loosen the candle.
If necessary, use a small spatula or butter knife to carefully pry the edges of the candle away from the mold. Take your time during this process to prevent any mishaps that could result in broken or misshapen candles.
Finally, after putting in all the effort into creating your no-mess wax candles, take a moment to enjoy their beauty and calming glow. Illuminate them during quiet evenings at home, place them in decorative holders for special occasions or give them as heartfelt homemade gifts. The satisfaction you’ll derive from creating beautiful, mess-free candles will make every step of the process worth it.
| Decoration Tips | Candle Removal Process |
|---|---|
| – Use candle dyes or pigments to create vibrant colors | – Ensure the wax has completely cooled and solidified before removing |
| – Experiment with different fragrances using scented oils or essential oils | – Tap the sides of the mold to loosen the candle |
| – Customize your candles to fit your personal style and taste | – Invert the mold and give it a light shake |
Conclusion
In conclusion, mastering the art of wax melting is essential for creating beautiful and mess-free candles with confidence. Throughout this article, we have explored the various aspects of making no-mess wax candles, from gathering the necessary supplies to troubleshooting potential messy situations. By following the tips and techniques provided, readers can embrace candle making as a joyful and satisfying craft without fear of creating a mess.
One of the key takeaways from this blog post is the importance of proper preparation and organization. By setting up a suitable workspace and having all tools and equipment readily available, you can minimize mess and ensure safety during the wax melting process. Additionally, choosing high-quality wax and utilizing proven melting methods such as using a double boiler or microwave can further contribute to a mess-free experience.
Furthermore, this article emphasizes the significance of clean pouring techniques to avoid spills and overflows. By following the step-by-step instructions provided and being mindful during the pouring stage, readers can achieve precise and clean outcomes when filling their candle molds.
Lastly, it is important to celebrate your success in creating no-mess candles by personalizing and decorating them according to your preferences. Whether it’s adding unique scents or incorporating decorative elements, taking pride in your finished candles enhances your overall satisfaction with the craft.
In summary, with proper knowledge and practice, anyone can become adept at melting wax to create exquisite candles without any mess. Don’t let fears of spills or drips deter you from exploring this enjoyable hobby. Embrace candle making with confidence, knowing that you have learned valuable techniques for achieving cleanliness throughout every step of the process. So go ahead, unleash your creativity, and enjoy the beauty of crafting beautifully crafted, mess-free wax candles.
Frequently Asked Questions
How do you make candles without making a mess?
Making candles without making a mess requires careful planning and preparation. Start by setting up your workspace with protective coverings, such as newspapers or plastic sheets, to catch any spills. Use a dedicated area that is not near any flammable materials. To minimize mess, choose high-quality candles making supplies, like pre-tabbed wicks and easy-to-handle molds or containers.
Additionally, ensure that the wax is at the right temperature before pouring to avoid splatters. Slowly and steadily pour the melted wax into the containers or molds, using a funnel if needed. Finally, clean any spills immediately with hot soapy water to prevent them from hardening and becoming difficult to remove.
What is the best way to melt wax for candle making?
The best way to melt wax for candle making depends on the type of wax being used. For most waxes, a double boiler method is recommended as it provides gentle heat and reduces the risk of scorching or overheating the wax. To melt wax using this method, fill a larger pot about halfway with water and place it on low-medium heat.
Then, place a smaller pot or heatproof container with wax inside the larger pot so that it sits above the water level. Allow the steam from simmering water below to gently heat and melt the wax in the smaller container. Stir occasionally until all the wax has melted thoroughly.
How do you melt candle wax without breaking glass?
When melting candle wax without breaking glass, it’s essential to use proper caution and techniques to prevent accidents and damage to glass containers or jars.
One key method is ensuring you are using appropriate glassware designed for candle making that can withstand high temperatures without shattering easily—heat-resistant glassware specifically made for candle-making purposes can be purchased online or at craft stores.

Welcome to my candle making blog! In this blog, I will be sharing my tips and tricks for making candles. I will also be sharing some of my favorite recipes.


