Introduction
Pouring your own candles is a great way to create unique pieces of art for your home. Not only are you able to select the type of wax and fragrance, but you can also customize the sizes and shapes of your candles. With the right tools and ingredients, pouring your own candles is simple and enjoyable. Plus, it will save you time and money so that you can make beautiful decorations with minimal effort. Here’s how to get started:
Step 1: Gather Your Supplies. You will need wax (paraffin or soy), wicks, pour containers, dyes, fragrances, molds (optional), a double boiler or melting pot, ratio calculator (optional), thermometer, spoon, and glass measuring cups for melted wax.
Step 2: Prepare Your Area for Pouring. Clear a workspace that is free from debris and distractions. Then set up all of the materials in easy reach”this includes safety items like oven mitts, goggles and face masks if desired.
Step 3: Calculate Ratios. If using a ratio calculator or pre-made pour container measurements then use those as guidelines on how much wax to melt together at once. Otherwise you’ll want to mix together about two parts of hard wax with one part soft wax for optimal stiffness when hardened. Always check the specific ratios given with whichever type of wax and wick you select as these will vary by brand.
Step 4: Melt Your Wax On Low Heat Using Double Boiler Method or Melting Pot According to Manufacturer Directions (if Available). Stir Occasionally to Ensure Even Melting Throughout the Batch while Monitoring Temperature Carefully; Once Reached Desired Temps Add Any Colorants, Fragrances & Wicks To Container Before Wax Cools Down Too Low For Wicking To Bond With Wax Effectively..
Step 5: Pour Candles Into Molds Or Containers ” Allow For Cooling Time Of Approximately 30 Minutes Before Removing From Mold And An Additional 60-120 Minutes Till Fully Hardened
Step 6: Trim Wick & Enjoy! – Once Fully Cooled it’s Time To Try Out Our Candle-Making Skills; Trim The Wick To About A Quarter Of An Inch Above The Surface Of The Candle & Light Up! Make Sure Everyone Says Wow At How Talented You Are!
Gathering the Appropriate Tools and Materials
In order to pour your own candles, you’ll need certain tools and materials. First, you’ll need wax ” either paraffin or beeswax. You’ll also need an appropriate wax melting pot and thermometer for melting the wax and ensuring it doesn’t become too hot. To create your candles, you’ll need molds as well as wicks, wick anchors, and wick holders. Depending on the type of candle you’re making, you may also require fragrance oils or dye chips to give your creation a unique scent or color. Lastly, safety is key; make sure to wear long sleeves and protective eyewear such as goggles throughout the whole process.
Preparing Your Molds
Before pouring molten wax into your molds, it’s important to prepare them first. Begin by cleaning any dirt off of the mold with a damp cloth, then apply a layer of vegetable-based release agent with a soft brush in order to make removal easier when taking them candle out once it has been poured and cooled down afterward. Additionally, insert the wick through the bottom of each mold using either a wick sticker or wooden dowel; be sure that the entire length of wick is secured before proceeding further.
Melting The Wax
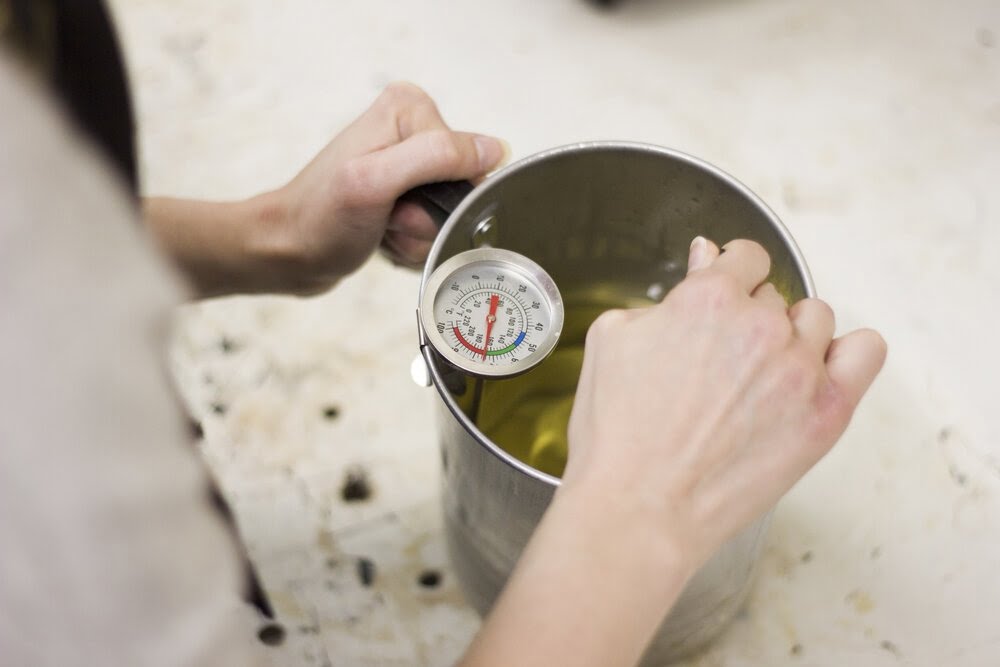
Once your tools and molds are prepped and ready to go, you can begin melting your wax in its respective melting pot on top of stove over medium heat while stirring often. As it melts use the thermometer to ensure that its temperature does not exceed 200°F (93°C). Once completely melted, add any oil fragrances or dye chips for desired effects before pouring it into prepared candle molds. Allow enough time for both cooling and hardening before attempting remove each candle from their respective molds. Finally, snip off any excess parts of wick lingering above the candles before giving them away as gifts or simply keeping them for personal enjoyment!
Preparing to Pour the Candle
Calculating Pour Time:
To calculate the correct pour time for your candle, you need to know the depth of your jar and the temperature of your melted wax. At around 150 degrees Fahrenheit, it takes 3.2 minutes per inch of depth for a candle to cool properly.
Proper Temperature:
It is important to keep an eye on the temperature of your melted wax as it needs to be at a consistent temperature in order to achieve successful pours. If it is too hot, there is a danger that your candles will warp or crack in the jar; if it is too cold, they may not completely fill the area where they are poured. Aim for an optimal pouring temperature between 135-145 degrees Fahrenheit.
Proper Environment Setup:
Before you start pouring, ensure that you have good lighting and ventilation, as hot wax fumes can irritate the eyes and lungs and make this activity uncomfortable or hazardous if proper precautions are not taken. Make sure to have all safety equipment (e.g., safety glasses, protective gloves) nearby just in case of accidental spills or splashes of hot wax during the process.
Step-by-Step Explanation of How to Pour the Candle
1. Ensure that the desired wick type is chosen for the container size and candle scent ” this often depends on how much fragrance has been used in a candle as a certain wickscann can only hold so much.
2. Measure out and melt the wax using either a double boiler or a melting pot on low heat until it reaches about 185-200 degrees Fahrenheit. Soy wax should reach around 180 degrees F before pouring.
3. To reduce air bubbles, add liquid dye to the melted wax from a dropper, according to desired result.
4. Utilize a thermometer to check for temperature accuracy and maintain a consistent temperature throughout the pouring process by stirring gently with an appropriate vented stainless steel spoon or wooden chopstick.
5. Once everything is ready, attach the chosen wick to the bottom of your vessel with either hot glue or wick sticker tabs, then place it onto an appropriate surface such as wax paper, ensuring that it sits securely with tabs maintaining their adhesion even after pouring starts (some containers have pre-drilled holes).
6. Pour slowly over the wick while holding an angle towards your intended pour line and not splashing any alongside nearby walls or edges of vessels (avoid excessive filling).
7. Allow adequate time for cooling, as this is important for air bubble removal/release and solidification/solid bond of itself once poured correctly – usually about 30-45 minutes depending on environmental temperatures but closer to two hours if particularly cold outsides.)
8 .Tidy up drips once cooled by carefully melted them off from sides if needed – use minor additional drops of melted wax where required &repeat steps 3&2 respectively as stated above when doing so; ensure all other steps are followed similarly just as before.
Finishing Up
Once your candles have cooled, you will need to prepare them for use. Start by sealing the wax. You can do this with a heat gun or by using a sealant specifically made for sealing wax. This prevents air bubbles from forming on the top of the candle, giving it a smooth finish.
Next, check to make sure the wick is still in place and properly trimmed to about ¼ inch. Once trimmed, you’ll need to wrap a piece of thread around the bottom of your wick and pull it tight to keep the wick centered in the container.
Finally, store the candles in a cool, dry place so they don’t become too hot or start melting during storage. Keep them out of sunlight too as this can vaporize or evaporate fragrance oils used in some candles to give them their scent and change their color over time.
Understanding the Necessity of Properly Pouring Candles
For people who make candles, understanding the necessity of properly pouring candles is key to creating a successful end-product. When pouring wax into mold or jar, the heat of the liquid wax should be poured slowly at an even rate. Otherwise, any changes in temperature could cause the wax to crack and discolor, resulting in an uneven surface. Moreover, following proper pouring technique enables candles to burn evenly and slowly, making them last longer.
When it comes to successfully pouring candles, temperatures and timing also come into play. The wax should be kept in a double boiler until it reaches its optimal pouring temperature, usually between 185-200 degrees Fahrenheit for soy or paraffin waxes. Poorly cooled wax can lead to uneven burns and shrinkage. Once heated up, the candle can be poured quickly but carefully before it begins to harden again; this will help ensure even distribution of wax throughout space of mold or jar container. Additionally, immediately after pouring into container anointing wand can be used if desired to rectify imperfections on candle surface caused by hardened drips or bubbles around sides of tube when using tube as candle holder. Lastly do not forget that inserting wick into newly poured wax right away helps wick stay centered and prevents any warping over time due to potential shifts in weights incurred due to cooling process.
Troubleshooting Common Issues
Pouring candles can be tricky and problems often arise during the process. The wax needs to be heated to a specific temperature, and pouring at the wrong degree can ruin the final product. Some common troubleshooting issues may include improper wicking, tunnels appearing in the wax after it has cooled, or uneven colors throughout the finished candle.
To prevent improper wicking, ensure that you are using a high quality cotton wick and trimming it to the proper length for your container size before melting the wax. Tighten up any loose ends that you may find when assembling your candle and make sure to use a glue stick or some other adhesive if needed so that your wick is not floating in the melted wax before you pour.
Tunnels can also appear once your candle is finally cooled if there was too much wax poured at one time or an insufficient level of heat when pouring. When filling up containers with candles, make sure that you avoid rush pours or waiting so long between pours that the heat dissipates from remaining melted wax. Doing several small batches of pouring can also help to prevent this issue.
If you want an evenly colored finished product, use color blocks when dyeing your melted wax instead of trying to mix various color chips together yourself as hand-mixing results can create unwanted streaks in the items produced. Carefully measure out the exact amounts of dye chip per vessel using whatever ratio suggested by what type of paraffin you have chosen so you will get consistent saturation levels without pooling or streaking
Additional Tips and Tricks for the Best Results
1. Make sure to clean the candle jars and wicks with rubbing alcohol before pouring. This will ensure that nothing is left in the jars or on the wicks that may interfere with how the candles burn.
2. As you pour, start in the middle of your candle jar and slowly fill outwards. This will create uniform layers of wax without pockets or gaps of air, leading to increased burning time and a stronger scent throw when lit.
3. When you can see the wax starts to cool and thicken around the outer edges, break up any air bubbles you see by mixing with a metal spoon or chopstick.
4. If any wax spills over onto our molds, quickly wipe them down with a paper towel before removing once fully cooled.
5. To cure for best results, leave candles for 24 hours before burning them for longer lasting use.
6. Use an essential oil blend for added scent strength when pouring into smaller containers. Reapply drops of oils after 24 hours after curing if extra fragrance is desired later on.
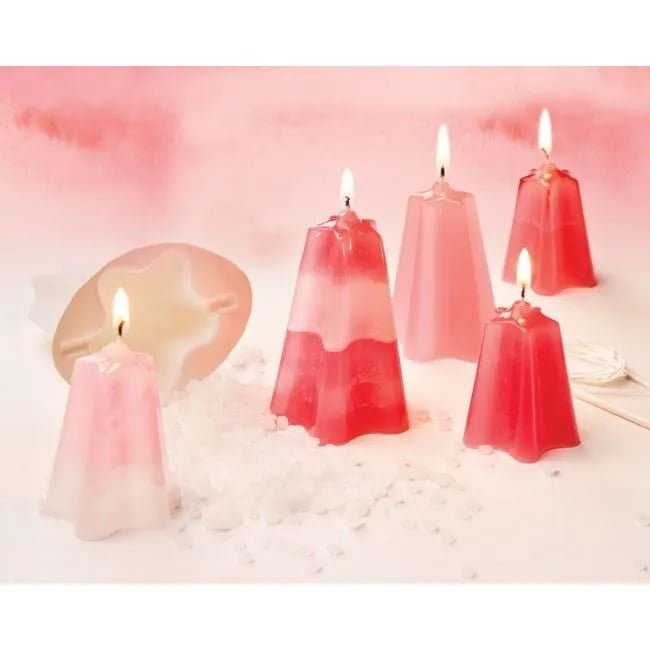
7. Consider layering different colors together when pouring containers such as glass teacups or cups – experiment with pour temperatures and color combinations to get unique looks each time!
8. Try using a tamper-proof lid to give each candle a finished look as well as keep dust/ dirt away from it when not in use – this is especially helpful when selling your creations! 9. Use crayons to add fun and colorful swirls, marble effects or marbling coloring before adding wicks into molds – remember to break up any large chunks while stirring barely heated paraffin waxes so they don’t clump together!
Conclusion
Creating and pouring candles can be a fun and rewarding experience. Once the melted wax has been poured into the containers, it is important to allow the candles to cool properly before moving them. Let them sit undisturbed for at least 24 hours. If not cooled fully, your candles could still be settling and cause soft spots or even cracking in the finished product. After your candles have set, you may want to trim any uneven edges with a wick trimmer or sharp scissors before they are lit and enjoyed! Following these simple steps will give you a quality candle that looks beautiful and smells great!

Welcome to my candle making blog! In this blog, I will be sharing my tips and tricks for making candles. I will also be sharing some of my favorite recipes.

