Candle making enthusiasts know the importance of using the right tools and equipment to create beautiful, high-quality candles. One essential tool in candle making is the pouring pot, which plays a crucial role in the melting and pouring of wax. In this article, we will explore how to use a pouring pot for candle making, covering everything from selecting the right pouring pot to safety precautions and proper maintenance.
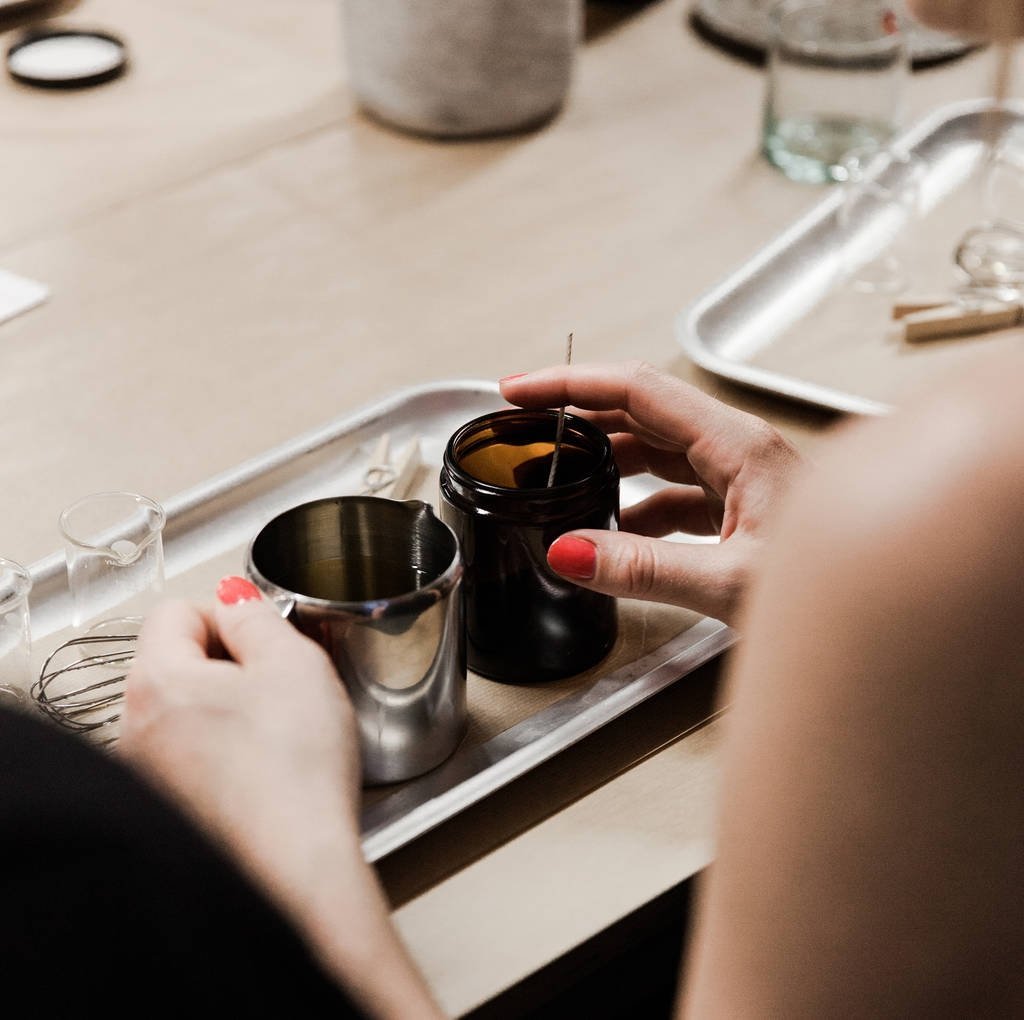
A pouring pot is specifically designed for melting wax and safely pouring it into molds to create candles. Its narrow spout allows for precise pouring, ensuring that you can fill your molds with ease and accuracy. Whether you are a beginner or experienced candle maker, a quality pouring pot is an invaluable asset in your candle making arsenal.
When choosing a pouring pot for candle making, there are various factors to consider such as material, size, and handle design. The right pouring pot can make a significant difference in the efficiency and outcome of your candle making process.
Additionally, using a pouring pot helps prevent spills and maintains a clean workspace, ensuring that your candle making experience is both enjoyable and productive. Stay tuned as we delve deeper into the world of pouring pots and discover how they can elevate your candle making craft.
Choosing the Right Pouring Pot
When it comes to candle making, using a pouring pot is essential for ensuring a smooth and efficient process. Choosing the right pouring pot can make a significant difference in the quality of your candles. There are several factors to consider when selecting the best pouring pot for your candle making needs:
- Material: Pouring pots come in various materials such as aluminum, stainless steel, or heat-resistant plastic. Stainless steel pouring pots are durable and easy to clean, while aluminum pots heat up quickly and evenly.
- Size: Consider the size of your candle making projects when choosing a pouring pot. A larger pouring pot allows you to melt more wax at once, which can be beneficial for large-scale production.
- Spout Design: Look for a pouring pot with a spout that is designed for precise pouring. A narrow spout helps control the flow of melted wax into molds, preventing spills and mess.
Taking these factors into account will help you select the best pouring pot for your specific candle making needs. Investing in a high-quality pouring pot will not only make the candle making process easier but also ensure consistent results each time.
Now that you have chosen the right pouring pot for your candle making endeavors, it’s important to also consider safety precautions while using it. Let’s dive into some vital safety measures you should follow when using a pouring pot:
- Always use caution when handling hot wax and never leave it unattended on heat sources.
- Wear protective gear such as gloves and goggles to prevent burns or splashes while working with melted wax.
- Keep children and pets away from your workspace to avoid accidents or injuries.
By selecting the appropriate pouring pot and following essential safety precautions, you’ll be well-equipped to create beautiful candles safely and efficiently.
Safety Precautions
When it comes to candle making, safety should always be a top priority. Using a pouring pot for melting wax is a common practice, but it is essential to follow certain safety precautions to prevent accidents and ensure a smooth candle making process. One of the most important safety measures when using a pouring pot is to never leave it unattended while the wax is melting. It is crucial to monitor the melting process closely to avoid any potential hazards.
Another key safety precaution when using a pouring pot for candle making is to never heat the wax directly on an open flame. Always use a double boiler or a dedicated wax melter to melt the wax in the pouring pot.
Directly heating the wax on a flame can lead to fire hazards and should be avoided at all costs. Additionally, make sure to keep flammable materials away from the heat source and never pour water into hot wax as it can cause splattering and lead to burns.
Proper ventilation is also crucial when working with melted wax in a pouring pot. Ensure that your workspace is well-ventilated to prevent inhaling harmful fumes released during the melting process. It is recommended to use a mask or respirator if working with large quantities of wax for an extended period. By following these safety precautions, you can create beautiful candles safely and enjoy the process without any worries about potential risks.
| Safety Measure | Importance |
|---|---|
| Never leave the pouring pot unattended | To prevent accidents and hazards |
| Avoid heating wax directly on an open flame | To prevent fire hazards |
| Ensure proper ventilation in the workspace | To prevent inhaling harmful fumes |
Preparing Your Workspace
When it comes to candle making, having a well-prepared workspace is crucial for efficiency and safety. Setting up your work area properly can help streamline the process and ensure that your candles turn out exactly as planned. In this section, we will provide you with some valuable tips on how to set up your workspace for efficient candle making using a pouring pot.
Organize Your Materials and Tools
Before you start melting wax in your pouring pot, it’s essential to have all your materials and tools within reach. Make sure you have your fragrance oils, color dyes, wicks, molds, and any other supplies you’ll need laid out neatly on your work surface. This will prevent any unnecessary distractions or delays while you’re in the middle of the candle making process.
Ensure Proper Ventilation
Since you’ll be working with melted wax and fragrance oils, it’s important to have adequate ventilation in your workspace. Open a window or use a fan to help disperse any fumes that may arise during the melting process. Proper ventilation not only keeps the air in your workspace fresh but also helps minimize any potential health risks associated with inhaling fumes from melting wax.
Protect Your Work Surface
To avoid any messes or damage to your work surface, consider covering it with aluminum foil, parchment paper, or a heat-resistant mat. This will make cleanup easier after you’re finished making candles using the pouring pot. Additionally, having a designated area for placing hot pots and tools can help prevent accidental burns or spills on other surfaces in your workspace.
By following these tips on setting up your work area for efficient candle making using a pouring pot, you’ll be able to create beautiful candles safely and smoothly. A well-organized and ventilated workspace not only enhances productivity but also contributes to an enjoyable and successful candle making experience.
Melting Wax in the Pouring Pot
When it comes to creating candles, melting wax is a crucial step in the process. Using a pouring pot makes melting wax much easier and more efficient. Here is a step-by-step guide on how to properly melt wax in a pouring pot for candle making:
- Gather your materials: Before you begin melting the wax, make sure you have all the necessary materials ready. This includes your pouring pot, double boiler or hot plate, thermometer, fragrance oils or essential oils, dyes or colorants, and of course, the wax you will be melting.
- Fill your pouring pot with the desired amount of wax: Place your pouring pot in the double boiler or on the hot plate and add the desired amount of wax into the pot. Make sure not to overfill the pot as the wax will expand when melted.
- Heat up the wax: Turn on your heat source (double boiler or hot plate) and allow the wax to melt slowly. It is important to monitor the temperature of the wax using a thermometer to ensure that it does not overheat.
- Stir occasionally: As the wax melts, stir it occasionally using a stirring stick to promote even heating and melting. This also helps distribute any added fragrance or colors throughout the wax.
- Once fully melted, your wax is now ready for adding fragrance and color before pouring it into molds for candle making.
By following these steps on how to use a pouring pot for candle making, you can efficiently melt wax and create beautiful candles with ease. Remember to always follow safety precautions when working with hot wax and never leave it unattended while melting.
Adding Fragrance and Color
When it comes to candle making, adding fragrance and color to your wax can really elevate the final product. Using a pouring pot for this step is essential as it allows you to accurately measure and mix in these additional elements without creating a mess.
To start, make sure you have your desired fragrance oil and candle dye ready before you begin melting your wax in the pouring pot. Once your wax is fully melted, remove it from the heat source and let it cool slightly to around 180-185°F (82-85°C). This temperature range is ideal for incorporating fragrance and color into your wax as it allows them to disperse evenly.
When adding fragrance oil, carefully measure out the amount needed according to the manufacturer’s recommendations. Typically, 1 ounce (30 ml) of fragrance oil per pound of wax is a common ratio, but always refer to the specific guidelines for best results. Slowly pour the measured fragrance oil into the melted wax in the pouring pot while stirring gently but consistently. This ensures that the fragrance is evenly distributed throughout the wax.
Next, if you wish to add color to your candles, follow a similar process by measuring out the appropriate amount of candle dye according to the instructions provided. Slowly incorporate the dye into the melted wax in the pouring pot, stirring continuously until you achieve your desired hue. Remember that a little goes a long way with candle dye, so start with a small amount and gradually add more until you reach your preferred color intensity.
| Steps | Instructions |
|---|---|
| 1 | Measure out desired fragrance oil according to guidelines. |
| 2 | Pour fragrance oil slowly into melted wax while stirring gently. |
| 3 | If using candle dye, measure out desired amount and incorporate into wax while stirring continuously. |
Pouring Wax Into Molds
When it comes to candle making, pouring wax into molds is a crucial step that requires precision and care to ensure the final product turns out just right. Using a pouring pot for this task can make the process much more manageable and help you achieve professional-looking results.
To begin, make sure your pouring pot is securely placed on a heat-resistant surface and that you have prepared your candle molds in advance. Once your wax is fully melted according to the instructions in the previous sections, carefully pour it from the pouring pot into the candle mold. It’s essential to pour slowly and steadily to avoid spills or air bubbles forming in the wax.
One technique to prevent air pockets from forming in your candles is called double-pouring. This method involves filling the mold halfway with melted wax, allowing it to cool slightly, then topping it off with more melted wax. By using this technique, you can create smoother and more even candles without any unsightly holes or gaps.
Remember to leave a small amount of space at the top of each mold to allow for shrinkage as the wax cools and solidifies. With practice and patience, you’ll soon master the art of pouring wax into molds using a pouring pot for candle making.
Cleaning and Maintenance
In conclusion, the key to successful candle making with a pouring pot lies not only in knowing how to use it effectively but also in proper cleaning and maintenance. By following the tips provided in this article, you can ensure that your pouring pot remains in top condition for many more candle-making sessions to come.
Regularly cleaning your pouring pot after each use is crucial to prevent any residual wax from affecting the quality of your next batch of candles. Using hot, soapy water and a soft cloth can help remove any leftover wax and maintain the integrity of the pot. Additionally, make sure to dry the pouring pot thoroughly before storing it away to prevent rust or damage.
Proper maintenance of your pouring pot includes checking for any signs of wear and tear, such as cracks or discoloration, which may indicate that it’s time for a replacement. Investing in a high-quality pouring pot and taking care of it will not only prolong its lifespan but also ensure that you continue to produce beautifully crafted candles. Remember, a well-maintained pouring pot is essential for achieving consistent results in your candle making endeavors.
Frequently Asked Questions
How Do You Make Candles With a Pouring Pot?
Making candles with a pouring pot involves melting the wax using a double boiler method, where you place the pouring pot in hot water until the wax is completely melted. Once melted, you can add color and fragrance oils before pouring the wax into candle molds.
How Do You Use a Melting Pot for Candles?
Using a melting pot for candles is similar to using a pouring pot but with some differences. A melting pot is typically electric and helps maintain a consistent temperature for the wax as it melts. This makes it easier to control the melting process and ensure a smooth consistency for your candles.
What Is a Candle Pouring Pot?
A candle pouring pot is a specialized tool designed specifically for candle making. It usually has a long handle and a spout that makes it easy to pour melted wax into candle molds without spilling. These pots come in different sizes to accommodate various batch sizes of candles being made.

Welcome to my candle making blog! In this blog, I will be sharing my tips and tricks for making candles. I will also be sharing some of my favorite recipes.


