Introduction
Ice cream candle making is an exciting and creative activity that anybody, of any age, can do! It involves mixing, melting, pouring and transforming wax into your own one-of-a-kind candle. The method of ice cream candle making uses the same principles as regular candle making but with a unique twist ” by using wax cubes in the shape of ice cream scoops. For every cube used to create a scent combination, you get layers of colors that blend together seamlessly to provide a beautiful, multi-colored work of art. You will be amazed by the creative possibilities when it comes to this type of candle making – layering colors or adding glitter for an extra sparkle or shaping your melted wax around wicks or other objects such as pinecones or seashells ” are all fun ways you can customize your experience and create something truly remarkable. Ice cream candles make lovely decorations for the home, thoughtful DIY gifts for friends and family and are also often used in rituals and ceremonies to bring peace, calmness and relaxation. So whether you’re a teenager enjoying some creative downtime at home or an adult looking for a new way to de-stress, ice cream candle making is the perfect activity for anyone who wants to get crafty!
Supplies and How to Get Them
If you want to make an ice cream candle, then there are some supplies that you need in order to do so. The following list contains all the necessary materials and recommended places to purchase them:
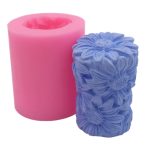
Molds (Required): silicone molds can be found in craft or speciality shops or online. You may even choose to design and 3D print molds yourself.
Wax (Required): paraffin wax or beeswax can be purchased from your local home improvement store or craft shop, as well as many online retailers that provide specialty items like this.
Fragrance Oils (Optional but Recommended): fragrances are added to candles to give them scent and can be purchased along with the wax at a variety of stores including craft shops, specialty stores, and online retailers.
Wick (Required): a wick is used as the source of heat to melt the wax and create the candle shape. This can be purchased at craft stores as well as online retailers in both natural fibers like cotton or synthetic fibers like nylon.
Coloring Pigments (Optional but Recommended): if you wish to add more colour to your candle, pigment powders will come in handy for this task. They can be bought from craft stores such as Michaels, larger department stores such as Walmart, specialty shops such as Indigo, and from online retailers like Amazon.
Thermometer (Recommended): a thermometer is useful when melting the wax in order to ensure it reaches a safe temperature before adding ingredients or pouring into the mold. Choose one with an appropriate range for your needs; these tools can typically be found at hardware stores/department stores such as Home Depot as well as drugstores/pharmacies such general chains like CVS Pharmacy or Walgreens.
Step-by-Step Instructions
Step 1: Gather your materials. To make an ice cream candle you will need a selection of waxes, a suitable container, a suitable wick, a thermometer and some sort of ice cream topping or decoration.
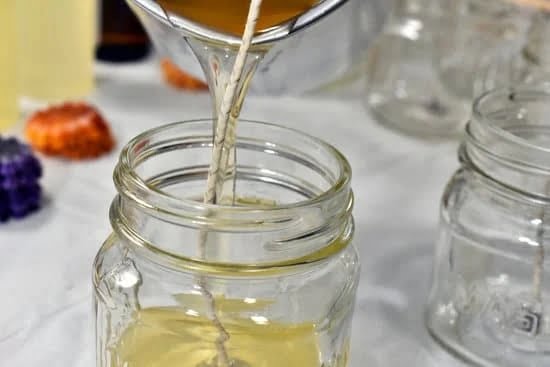
Step 2: Melt the wax. You can use either paraffin or beeswax depending on your preference. Heat the wax in a double boiler or microwave until it reaches between 160-180ºF (71-82ºC).
Step 3: Place the wick in the mould and secure with tape. Make sure that the wick is centered and firmly in place, as this will ensure that your candle has even burning performance.
Step 4: Pour the melted wax into the mould carefully. If needed, you can use a skewer to hold the wick in place so that it does not move accidentally when you are pouring the wax into the mold. Let cool for about 10 minutes to ensure that the wax has solidified and is ready for any toppings.
Step 5: Add your decorations. Sprinkle your preferred topping onto the cooled melted wax, making sure to keep an even coverage throughout (so it looks like real ice cream). Alternatively, you could also try mixing pieces of soap with essential oil scents to give your candles a unique scent and flavor.
Step 6: Cut away excess wick and enjoy! After all is said and done, carefully cut away any excess length off of your wicks using scissors or wire cutters if needed. Trim off any hard edges around holes where candles are poured too if desired to give it a more unified look then sit back and admire all your hard work!
Creative Tips
Mixing Scents – There are so many amazing scents available to use when making an ice cream candle at home which makes it a great opportunity to customize your project even more. You can mix and match different scents by either melting chunks of wax that are each a different scent, or infusing oil into the wax for a stronger smell. Some popular combination scents for ice cream candles include chocolate-peppermint, strawberries and cream, and butterscotch-vanilla.
Using Different Waxes – Wax is the most integral part of candle making, as it determines how long the candle will burn, how fragrant it will be, and how much it sets you back financially. When making an ice cream candle you have plenty of options depending on what you’re looking for in terms of performance. Common wax picks for this type of project include paraffin wax, soy wax, beeswax, vegetable wax blends and dye chips.
Incorporating Decorations – Ice cream candles are designed to look like delicious frozen treats which means you need to get creative with decorations! Sprinkle molds can be used to make multicolored “sprinkles” on top of the candles while fudge swirls or crushed cookies can lend texture to the sides. Airbrush techniques can also add dimension with printed images or other decorations while glitter adds extra sparkle if desired.
Safety Considerations
When making candles with flammable materials, it is important to exercise specific safety considerations. Firstly, when working with melted wax, it is essential to wear protective gloves and eyewear at all times. It is also recommended that a fan or ventilation system is used when melting wax to reduce the risk of inhaling fumes. Secondly, ensure that you melt wax in a safe area away from any heat sources or combustible materials. Lastly, always keep children and pets away from where you are working with the wax.
In addition to these safety considerations for when making your candles, it is important to follow additional tips for safe burning as well. Place your candles on an even non-flammable surface such as metal or ceramic before lighting them. Before leaving a room, blow out the burning candle and never leave an open flame unattended. Make sure to monitor the flame closely and remember to trim the wick regularly for efficient burn time and reduced smoke production.
Projects Showcase
Ice Cream Candle Making is a fun and creative way to make your own homemade candles! Whether you’re just starting out with candle making or looking for a fun new project, this craft is sure to bring hours of enjoyment. Projects can range from simple ice cream-shaped candles to more intricate designs like an upside-down sugar cone or scoops adorned with various toppings. In the Projects Showcase page, you can find examples of beautiful Ice Cream Candle Making projects from different makers along with detailed descriptions of each project. Some makers will provide step-by-step tutorials so that other crafters can easily recreate their projects as well. Try finding inspiration in these handmade creations and use them as guidance for your own unique candles! With the right supplies and some patience, anyone can join in on this delightful trend of Ice Cream Candle Making.
DIY Resources
There are many resources available on the Internet providing advice and tips related to Ice Cream Candle Making. If you want to find out more about DIY Ice Cream Candles, popular sites include:
• Crafts Unleashed – provides helpful instruction on various ice cream candle making ideas, such as embedding gummy worms in a bowl of ice cream candle or adding sprinkles and other decorations to give your candles a unique appearance.
• Instructables – This helpful website offers lots of tutorials for making novelty candles in the shape of an ice cream cone. It discusses several different types of materials and waxes for each project, as well as different methods for melting and pouring the wax.
• DIY Network – For those who are new to candle making in general, this site provides basic step-by-step instructions for easy-to-follow projects such as colourful multicoloured rainbow ice cream cone candles and double cone with toppings candles.
• Pinterest – Here you can find lots of inspirational photos shared by experienced crafty folks who have attempted their own original versions of ice cream candle designs. It’s a great place to explore what’s possible with this type of crafting project.
• Youtube – YouTube is full of inspiring videos showing people creating amazing looking ice cream shaped candles from start to finish. Watching how others construct their icy treats gives you some great ideas for your own creations!
Conclusion
Making candles out of ice cream is a creative way to bring the process of candle making into your home. The process itself is relatively simple and requires few materials. To make a candle, all you will need is an ice cream topping container, wax, wick, and fragrance. To start, melt the wax in a double boiler and add fragrance to it. Next cut the wick to an appropriate length that allows it to sit flatly on the bottom of the container. Place the wick into the melted wax mixture and pour it into the ice cream topping container. Allow time for the candle to cool down and solidify before using it or display it in your household.
While creating these unique candles can be exciting, there are some safety precautions one must take when working with hot wax. First make sure that you are wearing eye protection in case of splatter or spills during pouring/melting. Always keep a fire extinguisher nearby just in case something does catch on fire as molten wax can easily ignite if exposed directly to heat or flames. Additionally, always work at an area where children cannot reach as this project includes multiple items that could cause harm such as hot wax and scissors used for cutting wicks.
These ice cream candles can provide you with an enjoyable experience while offering more space to get creative when adding accents such as different scents or colorful dyes which may help enhance their appearance even further!

Welcome to my candle making blog! In this blog, I will be sharing my tips and tricks for making candles. I will also be sharing some of my favorite recipes.


