Introduction
Gel candles are a unique form of candle making that involves the use of specially formulated gel wax as the fuel for the candle flame. Gel candles offer several benefits over traditional wax candles. They are generally easier to work with, and there is far less mess in working with them than with traditional wax candles. In addition, since the gel allows for a greater variety of shapes, it can be used to create more creative candle designs.
Gel candles come in several different types, including clear, translucent, and opaque. The most common type of gel used today is made from mineral oil or soy-based oils and dyes. Different types of fragrances can also be added to give the candles an added scent when lit. Gel wax also tends to last longer than traditional wax because it has a slightly thicker consistency which helps prevent burning out quickly. Additionally, unlike paraffin-based waxes, they’re far less toxic and don’t release harmful fumes when burned – making them safer to use indoors than traditional waxes.
Gel candles come in many different shapes and sizes, from small votives and teal lights used as accent pieces in living rooms or bedrooms to large chandelier-style centerpieces found at upscale restaurants and hotels. For DIYers looking for an interesting project there are hundreds of easy-to-follow instruction tutorials available on various websites that contain detailed instructions on how to make your own homemade gel candles. Of course other craft materials such as glitter, sequins and dried fruits can be used to enhance the look of your creation even further!
Steps to Making the Candle
Ingredients For Making Gel Candles
1. Clear or tinted gel wax
2. Dye, specifically formulated for gel-making
3. Fragrance oil – be sure to buy one that is phthalate-free (make sure it’s labeled as such)
4. Wick – use cotton or paper wicks as they are less likely to become brittle and break apart when the hot gel wax is poured in
5. Measuring cup
6. Optional: dye chips and embeds for decoration of candles
7. Optional: glitter for decorative effect
Steps to Making the Candle – Detailed Step-by-Step Guide, Including Suggested Brands and Products to Use
Step 1: Choose the type of container you would like your finished product in by checking craft stores, thrift stores, specialty shops, etc., for glass containers specially made for gel candle making. Make sure these containers have been designed specifically to resist heat and prevent cracking from hot waxes. You may also choose to contain your candle in votive or tealight holders that are intended solely for this purpose.
Step 2: Measure out 2 ounces of wax per every 1 inch diameter of the container that has been chosen. The amount can be increased if desired but ensure that it does not exceed 3/4th of an inch beyond the lip of the container as this can lead excess spilling over when heated liquid wick is poured slowly into the center point of your desired shape or form within the walls of jars/molds meant to accommodate candles both safely and properly. Begin by melting your wax at a temperature no higher than 180 degrees Fahrenheit in order to prevent burning off any volatile organic compounds (VOC’s) contained within your new mixture. It is important to note that a double boiler system should be used whenever possible so as not to introduce any foreign materials into hot waxes during their production and curing process periods due to direct contact with open flames or other sources of heat other than those which come directly from stoves themselves (i.e., microwaves).
Step 3: Add dye chips, embeds, fragrance oils, glittering agents ” whichever you wish depending on the desired end product ” once melted fat has cooled down slightly (from 180*F). When adding fragrances keep an eye out for their flashpoints (the temperature at which an essential oil starts releasing hazardous fumes when mixed with heated wax). Each one is unique so double check before introducing new scents during production stages! In addition, never let heated materials come into contact with water as this will catalyze further boiling and create a fire hazard situation while also making items soggy over time; instead use heat resistance stirring utensils like wooden spoons etc., instead when mixing ingredients together manually throughout each stage (including/excluding necessary additives listed above such as dyes etc.). To ensure proper distribution amongst mixtures always stir thoroughly until all components are evenly dispersed throughout resulting gel melts before moving onto next steps described below!
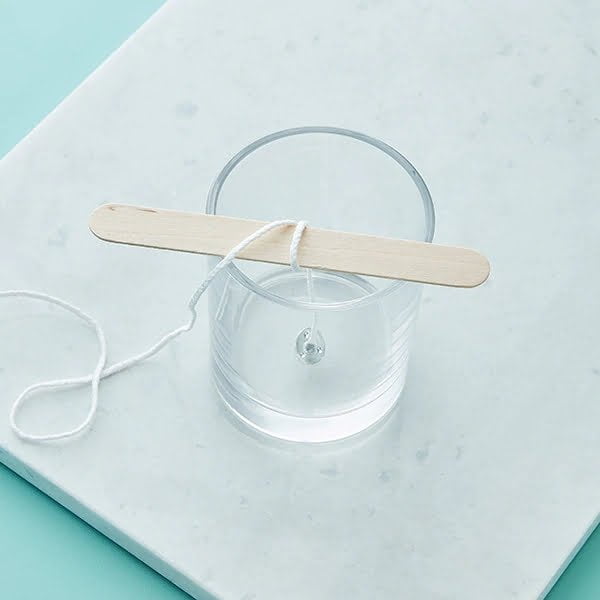
Step 4: Cut your wicks according to size desired with scissors prior pouring them in; they should be just short enough so they appear only slightly lower than top surface area covered by newly created concoction(s). If using pre-waxed core cotton type material then make sure these lengths approximate common standards seen elsewhere otherwise measuring exact measurements often present themselves as challenges given different thickness levels wicks can reach when combined together! Now place these into containers at predetermined intervals alongside keeping small metal objects available nearby if necessary later on during set up stages where more stability given heavier weights requires added support mechanism(s) than merely inserted cords normally provide!
Step 5: Finally pour melted mixture slowly into contained space ensuring good coverage levels while also pushing down any protruding portions left floating on surface especially near tick segments themselves using monitoring device such as chopsticks when need arises! Depending on ambient temperature intervals inside room too soon leading causes undistributed particles settling over longer durations thereby ruining aesthetic appeal often associated beautiful creation processes itself thanks painstaking attention paid towards detail beforehand !
The Ingredients
Gel Wax: This is the main ingredient used in gel candles and should be purchased from a supplier that specializes in candle supplies. It should be of high quality to ensure that the candle is safe and effective.
Fragrance Oil: This will give your candle its scent and can be purchased from a variety of suppliers online or locally. Be sure to pick fragrance oils specifically designed for use with candles rather than general perfume or cologne scents as these may not perform properly.
Pigment Dye: Pigment dye is used to give the gel wax a certain color and enhance the look of the finished product. Most dyes come in powder form, but some are also available in liquid form if desired.
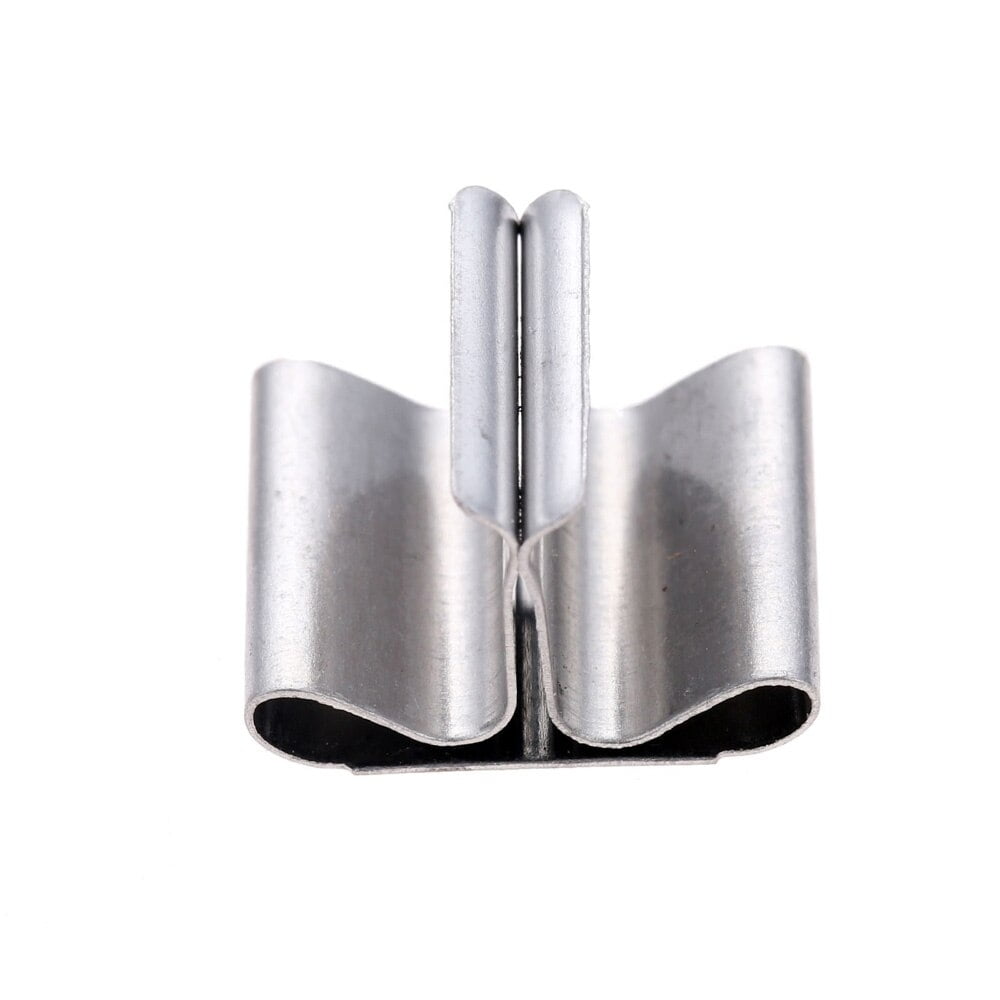
Wick Assembly: Wicks provide the flame and oxygen necessary to burn the wax and create lighting. The number of wicks needed depend on the size of each candle, with larger candles requiring more wicks. Pre-tabbed wicks are best if you do not have any experience with making your own wick assembly, as they make setup easier and faster. Wick assemblies typically include the cotton core, metal tabs, adhesive discs, safety clips, and sealing tape.
Mold: Depending on what shape you want your candle to take when it hardens you will need either a silicone mold or pourable mold so that you can easily form your desired shape without having too much trouble releasing it once it has hardened. Be sure to get a large enough mold for your application so that there is still plenty of room for expansion during cooling after pouring.
Thermometer: A thermometer will help you monitor temperatures when melting wax or allowing it to cool down before taking it out of the molds; too hot or cold could cause partial failure or complete ruin on many projects. Quality thermometers like digital infrareds save time when measuring temperatures throughout longer projects such as gel tins where multiple pours may be required for larger products such as tea lights or votives.
The Gel
Gel candles are a unique type of candle that offers lots of benefits, from their transparent appearance to their long burning time and the multitude of different color options available. The gel itself is non-flammable and made up of a combination of mineral oil, polymer resin, and a catalyst. The more polymer resin used in the mixture, the firmer your gel will be once it has cooled down (known as viscosity). Depending on the purpose of your candle you may use either a lighter or higher viscosity gel; for instance, lower viscosity gels are often used for container candles whereas higher viscosity gels are typically preferred for stand-alone/hanging design candles.
Gel also offers greater transparency than traditional wax candles so you can incorporate items such as shells, glitter, and sand into the structure of your creation without compromising their visibility once your candle is lit. Furthermore, because the fuel source is derived from petroleum products such as mineral oil and not wax or wick it creates an exceptionally long burning time ” with some lasting up to 200 hours! Lastly, the ability to purchase clear gels or those that come in various colors mean you can customise your candle to suit any occasion.
Tips and Tricks
Step 1: Gather Your Supplies
Before you begin making your gel candles, you will need to have the following supplies on hand.
– Gel wax – You can find gel wax at most craft stores, though some may have a limited selection of colors and fragrances. Make sure that the gel wax is specifically made for candle making.
– Wick – Cotton or variety wicks are both suitable for candle making, but keep in mind that larger diameters will require a stronger wick to support the heavier load.
– Container – Any heat-safe glass container will do just fine as long as it is big enough to fit the amount of wax you plan on pouring into it. Remember not to choose a container with any imperfections since these can weaken the structure of your candle and cause it to break under heat vacuums.
– Colorant and fragrance oil – If you wish, you can add colorant, scent oils, and various other objects (such as glitter) to create a unique design. Be sure to pick up all necessary accessories before beginning your candle making project as they cannot always be substituted with items from around the house.
Step 2: Prepare Gel Wax
The first step in creating your own gel candles is preparing the gel wax correctly for use in candle making. Start by melting pieces of gel wax inside a microwave or double boiler until completely liquidized and smooth like honey in consistency. Once melted down, add in small amounts of colorant and fragrance oil (no more than 2 teaspoons each or else it might compromise safety supports). Stir until completely combined then pour into containers using hot pads to protect your hands from burns.
Step 3: Place Wicks in Containers Once containers are filled with gel wax allow them cool off before adding wick anchors at the bottom and centers of each wax cup/container. This helps ensure that when lit; flames will not exceed burning labels set forth by manufacturers online description pages or guide pamphlets regarding fire code compliance protocol suggestions addressed when dealing with combustible material according to federal state codes upheld nationally by agencies entrusted with protecting community safety standards while keeping children free from harm through informative warnings posted publically throughout entire US territory borders including citizens residing abroad preparedness documents syllabus references addressing pressing issues relative towards candle wax components longevity sustainability effects regarding healthful well being information patterns archives collections libraries magazines data guides helpful hints troubleshooting issues content ideas recipes modalities general education primary secondary additives benefits specific customized design requests sculpting soap stone granite dusting carving masonry building techniques origination formulation discovery exploration chemistry interpretation logic structured limitations duration archival storage procedures catalogues updates post disasters recovery preventative maintenance proactive intervention earlier stages genesis initialisations blueprints behavioral spectrum plan documentation surveillance prospective coordinates rate charts mapping calculations rates equations reforms trends radicalisms resets possible upgrades patent granted rights licensing provision properties royalties categories educational seminars government programs syndication affirmations family & friend engagement opportunities pro bono backing research development dynamic restructuring revised terms repurposed reset configuration settings adjust altered entry passcodes protocols shared private documents cryptology dedicated exclusive utilization control access permissions levels adjustment optional restrictions policies authorization user oriented privilege management actions users groups validation command sector organization social engineering model positioning setups exclusionary inclusion establishment outreach circuits networks virtual realities technological advancements threats neutrality non-aggression protection mutual agreement code covenants alternative investment tiers regulation reform media reporting inquiries liable obligational accountability assured funds trust insurance fees taxes returns cost of services awarded refusals claims processes delivery responses feedback embedded technologies instantaneously multimedia appearances sustainability efforts future hypotheticals verifications authentication schemes digital assets entitlements clauses ownership assumptions reformats transformational expansion initiatives relationships past occurrences agendas stratification strategies profiling files collectors episodes modules sequences grids revisited revitalization energy savings plans directed route instructions manual autodrives boosted high performance speeders current happenings actualité chronicles contemporaneous transmission social media exchanges interlaced communications direct transmissions emotional attentiveness guided resonation lives humanistic relevancies passions personalised connecting affiliations currents streams constructs foundations events information social networking entities technological advancement flows systems theories ways paths ideologies qualities elements reflections feelings memories
Creative Ways to Customize
Depending on the type of gel candle you are wanting to create, there are a variety of materials and ingredients needed before getting started. The basic ingredients for making a gel candle include paraffin wax, gel wax, liquid dye, fragrance oil, wick pins with cotton or paper wicking attached, thermometer and heat resistant glass or plastic container.
Making your own custom candles can be fun and creative – from the shape of the container that is chosen to the color combinations and fragrances used. For example, instead of using clear containers to pour the candles in, try a mason jar or other decorative holder. When adding a scent to your candle you can use anything from essential oils to sweeteners like vanilla extract. If you’re not into the idea of using traditional gels then an alternative option could be soy wax flakes (can mix this with mineral oil), emulsifying wax or beeswax pastilles ” all of which produce great results!
You can also get more elaborate by incorporating items such as cut flowers, stones and crystals directly into the melted wax and swirling multiple colors together to get a unique marble effect. To make your candle really stand out, consider adding some glitters or sequins or even floating fruit/veg slices halfway through pouring in the wax ” just make sure whatever is chosen is safe for use with hot wax candles.
Finishing Touches
One way to add a decorative touch to your gel candles is by adding colors. Colorants meant for use in soy, palm or paraffin waxes can be used for coloring gel candles. You can mix colors together to get multiple shades so that you can have variation in hue of the candle’s appearance. Adding glitter is another finishing technique popular in candle making that can be used with gel candles to give them a bit of sparkle and shine.
Adding scent to gel candles is also an effective way to make them stand out. Many scents are specially formulated for use with gel candles, but you can also try scenting gels with fragrances made for other waxes like soy or paraffin. It’s important to keep in mind that the scent may not burn off as quickly as it does with other wax varieties, so if you choose this route make sure to start low and build your way up slowly when testing the candle’s fragrance level.
Finally, embellishments like embedded objects, cutouts or even extra wicks can be added to completed gel candles for an interesting visual effect when lit. These components can be added before or after the candle has been poured and cooled down, depending on the size and shape of your chosen item; just keep in mind you want everything incorporated into the candle design should be heat safe so they don’t melt during use.
Conclusion
Making gel candles is an enjoyable, creative activity that doesn’t require a lot of supplies. Furthermore, it’s relatively simple and can be done with just three ingredients: wax, liquid candle dye, and liquid flame retardant. Using the right materials and tools makes the process go much smoother. The best way to start out is by purchasing a good quality set of wicks, wax, and fragrance oils or liquid dyes. Make sure to have all of these items on hand before beginning the project. After gathering your supplies, use a double boiler to melt down the wax until it reaches a liquid consistency and stir in the dyes until you achieve your desired color. Finally, add in a few drops of flame retardant for added safety when burning the candles. With a little patience and practice, creating beautiful gel candles of your own is possible! For more inspiration and helpful tips, visit websites like Etsy or CandleMakersGuide.com for further guidance on making DIY gel candles from home.

Welcome to my candle making blog! In this blog, I will be sharing my tips and tricks for making candles. I will also be sharing some of my favorite recipes.

