Introduction
Making your own candles is both rewarding and enjoyable. There are numerous benefits, such as: saving money, creating something truly unique and special, and exploring your creative side. Plus, you get all the satisfaction of crafting to your heart’s content! In this guide, we provide step-by-step instructions on making simple candle creations in a fun and easy way.
Before you begin making candles, there are a few supplies that you need to gather together. Firstly, paraffin wax is an ideal material for beginning candle makers due to its ease of use; all-natural beeswax or soy waxes will also work. You will also need molds and wicks that have been treated with wick holders or glue dots; these aid in keeping the wick centered at the base of the candle for a perfect burn line. Additionally, scissors or wick trimmers should be available for trimming excess wick when necessary. Finally, thermometers and safety items such as safety glasses, gloves and aprons should always be used to ensure safe and effective candle making practices.
Once all of the supplies have been gathered, it’s time to begin creating beautiful homemade candles! First pour melted wax into the mold until it has reached approximately one centimeter from the top. Subsequently insert a prepared wick at the center of the mold using either a glue dot or wick holder to keep it in place while pouring in additional wax as needed. To prevent overheating while melting Extra Wax , monitoring temperatures with a thermometer is strongly recommended. When ready remove any excess wax that may have overflowed during pouring before allowing your creation to cool slowly – ideally overnight – before removing from its mold. Once removed trim any excess wick using stainless steel scissors or trimmers before admiring your finished product!
Tools and Materials Needed for Candle Making
Making candles is a fun activity that is enjoyable for everyone. With the right tools and materials, anyone can make beautiful candles in the comfort of their own home. Here’s a list of all the tools and materials you will need before you get started with your candle-making project:
Wax – Wax is the main ingredient used to make all types of candles. You can purchase wax in pellets, blocks, or liquid form from craft stores. Be sure to select a wax type that is suited for your desired project and read up on safety instructions for each type as some require more ventilation than others.
Color Dyes – If your candles are clear, you might decide that adding some color dyes would be nice addition. Candle dyes come in a variety of colors and shades so you can add whatever color you set out to achieve.
Fragrance Oils – Choosing the right fragrance oil can make a huge difference when it comes to creating scented candles. Whether floral, woodsy or fruity, getting creative with scent combinations is easy with this step as there are endless options available on the market today!
Wick – A wick acts as the core component of your candle by helping it stay lit while burning down slowly. Make sure to pick one that corresponds with the size and shape of your container to ensure optimal lighting results!
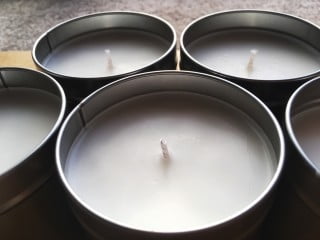
Containers- Containers come in many different shapes and sizes depending on what type of candle look you want to achieve. From traditional glass jars and tins to molds made with silicone or soapstone–you have plenty of choices here too!
Thermometer – Using a thermometer correctly will help you monitor the temperature at which your wax melts so as not to keep it heating beyond its melting point as high temperatures can cause damage or burning hazards if left unattended for too long!
How To Safely Melt Candle Wax
If you would like to make candles, you will need to melt down the wax before you can pour it into a container. To do this safely, there are a few precautions that should be taken.
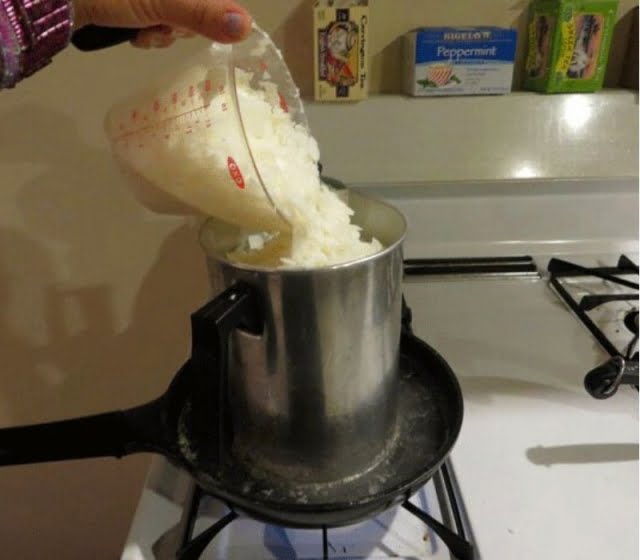
1. Make sure to use a double boiler with two pots of different sizes. While one pot (the bottom pot) remains on the heat source and is filled with water, the other smaller pot (the top pot) will contain the wax or wax chips and sit on top, Here the wax will be melted by the hot water below.
2. You’ll also want to make sure that both pots are covered while heating up the wax – this will help maintain heat and reduce smoke while melting the wax.
3. Finally, avoid using excessively high temperatures as this can cause your candle materials to discolor your candle or release toxic fumes when burning! Aim for a relatively low temperature of 140-160 degrees Fahrenheit for best results – this should speed up melting time without endangering safety or compromising quality!
Choosing Between Paraffin and Beeswax
When it comes to making candles, one of the first decisions you must make is whether to use paraffin or beeswax. Paraffin is a petroleum-based wax that is made from crude oil and can be found in most craft stores. It usually has additives like colorants, fragrances, and softeners added for various desired effects on the finished candle. On the other hand, beeswax is derived from honeycombs collected from hives and also has some natural structure that makes it burn almost soot free. Beeswax has all-natural elements offering a comprehensive range of waxes, carefully produced for optimal performance in candle-making. Although paraffin is cheaper than beeswax, it can produce a lot of gunk when it’s burned which can affect the quality of air in your home or any indoor areas where they are placed while beeswax burns cleanly without releasing any pollutants into the atmosphere. Additionally, depending on your preferences, you may have to pay slightly more for beeswax as compared to paraffin as it produces a higher quality candle both aesthetically and smell wise with its distinct honeycomb aroma and texture when melted correctly using adequate temperature base on its melting point range according to vendors.
How To Choose The Right Candlewick For Your Candle
When choosing the right candlewick for your project, there are several factors to consider. It is important to determine the size of the container you will be working with as this will help you choose the length of waxed cotton that best suits your needs. You should also consider the thickness of your desired outcome; some projects require thick candles such as jar or tea light candles whereas others like votive or pillar candles require a thin wick. Additionally, it is essential to look at the type of wax used in creating the candle – vegetable and beeswax will require different sized wicks compared to paraffin wax and soy. Lastly, you need to account for any additives that may have been combined with the wax such as dyes and fragrances which can affect how much heat they can handle before breaking down so selecting an appropriate size is important. Taking all these factors into consideration when selecting a wick is key in ensuring quality results from your candle making.
How To Properly Measure Out Candle Wax
When working with wax, it is important to accurately measure out the wax in order to achieve desired results. The quantity can be determined by the type of container and size of the candle that you are making.
To measure out a specific amount of wax, begin by using a kitchen scale and putting your container on top. Adjust the reading on the scale to zero if it shows a different weight and press ‘Tare’ which will return the reading put back to zero and account for the weight of the container. Then, scoop up enough wax into a bowl, measuring cup or other vessel to fill the desired amount – set these on the kitchen scale and note down how much has been added before moving onto other ingredients. Once finished adding all components, move everything from atop your kitchen scale into a pot fitted with an immersion blender, stirring constantly until all ingredients are melted together.
It is recommended that if you plan on creating multiplepour candles or large batches at once that you double or even triple measure ingredients separately versus dumping them all together unless accuracy is not important to your outcome.
Step-By-Step Instructions For Making Candles
1. Gather the necessary supplies to make a candle. These would include wax, wicks, melting pot, and a container of your choosing to shape the candle in (such as a jar or mold).
2. Measure out the correct amount of melted wax needed depending on the size of your candle container you chose. To melt the wax, use an appropriate melting pot like one intended for melting chocolate or cheese over low heat. Do not exceed 185F as this can be potentially dangerous.
3. Once your wax has been melted and have reached between 175-185F, add any scented oils or color dyes you may wish to use for coloring and scenting your candles. Mix this evenly throughout the melted wax.
4. Cut off lengths from the wick strand which should be 1 inch longer than the desired finished height of the candle you are making. Use wick tabs with metal discs at each end to hold it upright in its container if marked “included.” If unmarked, then you must purchase them separately and attach them at either end of each length of wick before dipping into pillow melt or dot method pouring after adding soy wax flakes if upgrading normal paraffin wax usage due to health risks with fumes being inhaled when burning it over time -choose whichever method works best for your own skill level!
5. Attach one end of each wick strand into its respective metal disc in order to keep them upright within their containers – so that when melted both: liquid & solid components stay where they should without slumping downwards leaning heavily against sidewalls instead (if too much weight added prematurely)! This is important so doesn’t interfere with overall cooling process afterwards – in turn hampering final look quality achieved after completing task correctly by user’s own hands today!
6. Insert your now-secured wicks into melted wax you prepared earlier at 175-185F (being careful not to scorch yourself), submerging enough for even burning later but leaving about inch out – which will serve as flameable top part once lit during subsequent soldering steps taken shortly afterwards… It’s essential though before continuing on journey forward that all tugged down firmly ensuring no slack left behind when removing from heated liquid soon after so they store adequate energy while still unhardened yet.. Once done with base setup proper layering job begins as next few strategies explained below apply accordingly…
7. Gradually pour additional layers of melted wax around already placed wicks ensuring no air pockets remain since hot cracks appear otherwise speaking nothing good’d come out it! Be sure also pour onto previous layer much slower pace than earlier batches usually do since bottom half cools faster than upper area does given difference thickness wielded craftsmanship required here! Keep repeating same procedure another 3 times until desired height achieved using loving detail expected professional results relied customers expectations again later down line near future debut arrival finally happens though there still remain plenty more tasks left need accomplish course like cutting off little bit burned material off parchment paper preparing post-burning etching detailed labeling engraving heartfelt messages meaningful words someone special daughter granddaughter niece godchild friends family members way saying “thinking you& happy holidays” don’t forget setting aside proper gift wrapping material beautiful bow incase sophisticated wrapping techniques find place fancy… otherwise normal brown cardboard box fit bill quite well said too much words get unnecessary confusing think mother nature gave us best shelter imaginable why shouldn’t follow her lead example design properties our beloved home make perfect sense us meet standards awaited opportunity lifetime indeed!
Tips For Adding Visual and Scentual Appeal To Your Candles
When adding visual appeal to your candles, you can use colors to create a certain look or feel. If you want a bold look, try using bright colors like red and yellow. For a softer look, you could opt for pastels such as light blue and pink. You can also combine colors to create interesting patterns. In addition to colors, you might also want to consider using small decorations such as glitter or beads to add extra sparkle and interest to your candles.
In regards to scentual appeal, there are numerous options available that you can incorporate into your candle making process. Essential oils are an easy way to add fragrance since they come in so many different scents that range from sweet and floral to woodsy and musky. Other fragrances like incense powders or natural waxes can be mixed with the melted wax before it’s poured into the mold, giving your candle more than one layer of scent throughout its life span. Finally, if possible, considering layering your scented candles by pouring different essential oils separately into various layers of the mold before allowing it to solidify. This will give the finished product a multi-dimensional aromatic experience!
Troubleshooting Common Candle Making Problems
If your candles are too soft, this can be caused by a number of different problems. Firstly, it could mean that the wax you have used has a low melting point, so try replacing with a top-grade paraffin wax to achieve better results. Other causes could be that the wick is too thick or there was not enough wax to fill the container. If the wick is too thick it needs to be trimmed down and if you feel like there is not enough wax being used then increase the amount each time you pour.
If your candle isn’t burning properly and keeps going out, one likely cause is that the wick isn’t long enough as it may need more oxygen. Try trimming the wick to 6mm in length before relighting, this should give it sufficient oxygen for a steady flame. It could also mean that there is too much of an impurity or additive in your wax and therefore has blocked up the flame’s path; try using different candle making supplies from various manufacturers to solve this problem.
Finally, if your candles won’t set properly at all then check that you have thoroughly mixed all ingredients together and melted them evenly without overheating them as temperatures above recommended levels can cause waxes not to set correctly. Also check that everything is being blended at a high speed (haud) speed with plenty of air incorporated into the mix which helps avoid air pockets forming in the finished product; try mixing again but with higher speed mixing settings and aim for a creamy yet fluffy consistency rather than runny liquid material when pouring your wax into molds or containers.
Creative Ideas For Making Unique Candles
Making unique candles can be a fun and exciting craft activity. With just a few simple materials, you can create custom candles that are truly one-of-a-kind. Here’s how to get started:
1. Choose your candle wax – Paraffin or beeswax will work best.
2. Prepare your wick – Cut the desired length of wick material and double it over to make a thick strand for stability. Then secure the doubled length with a metal clip or glue specifically made for candle making.
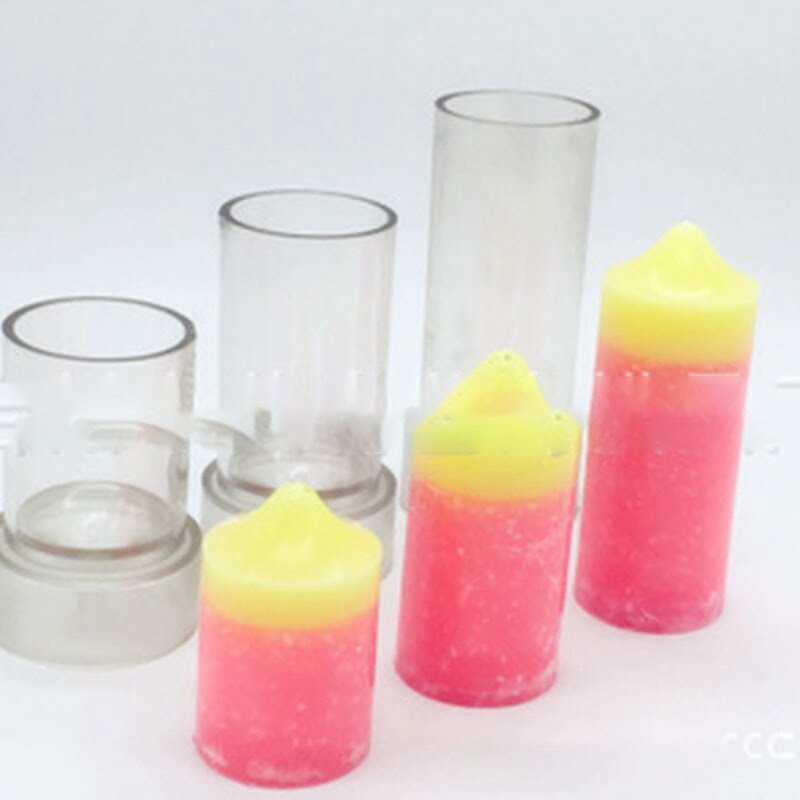
3. Select your mould – You can find moulds in all shapes and sizes at most hobby stores, or you can try using everyday items like mugs, glasses and jars to create different shapes and sizes of candle.
4. Melt the wax – Place the wax in a container over boiling water, stirring constantly until all of it is melted thoroughly. Once melted, remove from heat immediately!
5. Pour the molten wax into your mold – For extra embellishments, add glitter or colouring before pouring to add texture, colour, sparkle and shine! Add in essential oils if you’re creating scented candles as well!
6. Secure the wick – Once you’ve poured all the wax into your moulds and additives have been mixed evenly through them, thread the prepared wick through a washer (or other weight) before attaching it to something that will suspend it above the liquid wax within each mould (e.g., skewer two pencils across the top of an open jar). Allow sufficient time for complete setting overnight before removing from moulds!
7. Trim & enjoy – The final step is to trim any excess wick away from each finished candle so only ½ inch remains protruding after burning for best results! Your unique candles are now ready for display and use!
Conclusion
Candle making is an enjoyable and rewarding activity that involves melting wax, adding wicks, and pouring the molten wax into a mold or container. To get started in candle making, it’s important to have a few key items on hand like a wax warmer, melting container, wicks, molds or vessels to pour the wax into. It’s also helpful to understand what types of candle wax and scents can be used to create different shapes and aromas. Once you’ve acquired all the materials needed, you’re ready to begin.
To conclude this guide on making candles, we’ve reviewed the necessary steps and supplies required to make your own candles at home. We hope that now you feel confident in your ability to create custom candles in various shapes, sizes, colours and scents. If you need more information or would like to further develop your candle-making skills then there are numerous resources available online including tutorials and forums dedicated to candle makers.

Welcome to my candle making blog! In this blog, I will be sharing my tips and tricks for making candles. I will also be sharing some of my favorite recipes.

