Introduction
Organic candles provide a safe way to enjoy a scented environment without the toxic effects of synthetic materials. Organic candles are made from natural ingredients like beeswax, soy wax, and essential oils. These materials can be found at most health food stores and they are typically more affordable than conventional paraffin based candles. Organic candles are better for the environment because they produce no synthetic emissions when burned and do not have additives or petroleum-based materials. Burning organic candles is also a great way to reduce your footprint because these materials are naturally sourced and biodegradable, making them far less damaging than traditional candles. Organic candles have an even burn that typically lasts much longer than conventional waxes, adding to their appeal. Additionally, they come in an array of wonderful scents that are naturally derived from essential oils instead of artificial fragrances. If you’re looking for a healthy, sustainable alternative to conventional candle burning, look no further – here’s how you can make your own beautiful organic candles!
Supplies
Organic candle making requires a few supplies to get started. The following materials are necessary for creating basic organic candles: beeswax, wicks, essential oils (for scent), molds or containers and double boiler or crock-pot. Beeswax can be found in health food stores and organic beekeeping suppliers, as well as online retailers. Make sure to look for 100% pure, unbleached beeswax. Wicks can usually be found near the beeswax at stores and online retailers.
When selecting essential oils for scenting an organic candle, look for oils that are made from 100% natural ingredients with no synthetic scents or fragrances added. Molds or containers can be made out of various materials such as ceramic, glass, stainless steel and silicone; these also come in several sizes depending on the size of the candle you’d like to create. To melt the wax safely (and organically) a double boiler or crock pot should be used – this allows you to control the temperature better while melting the wax. Additionally, safety glasses should be worn when working with hot wax to protect your eyes from splatters and burns. Finally, make sure to have some newspapers laid down on your work surface first; this helps contain any spillage from melted wax.
Preparing the Wick and Setting Up the Molds
Before you start making an organic candle, you will need to prepare the wick and set up the molds. Firstly, measure out the correct length of wick for your desired candle size and attach it to a wax-coated wick tab. Make sure that the wick is centered in the center of your mold as this will ensure optimal burning performance. To hold the wick in place, you can either glue the tab to the bottom of your mold or attach weights such as washers or stones. Alternatively, you can use a pre-made metal clip that holds both ends of the wick away from the sides of your mold. Once all the necessary preparations have been made with your wicks and molds, you are ready to begin candlemaking!
Melting the Wax and Adding Fragrances
Before you begin melting your wax, make sure to prepare a space to work. You will need something that can hold your wax while it melts, like a double boiler or an electric potpourri pot. Make sure you have enough room around the melter so that the melted wax does not spill over. Once your wax is melted, you can use an eye dropper apparatus to add scent. Start with small drops of fragrance and give it some time to blend properly with the candle’s base before adding more. Adding scents can be tricky because different combinations create very different scents and fragrances, so it’s important that you experiment to find what works for you. When mixing more than one type of scent, start by combining small amounts in order to adjust the strength until desired levels are reached.
Customizing the Color and Adding Decorations (for added appeal)
Once you have the essential ingredients for candle making, it is time to start customizing. You can use color dyes and/or wax coloring chips to give your candle a unique hue that perfectly matches the desired ambience of your space. Simply mix and match the colors until you arrive at the perfect tone. Additionally, you can also decorate your candles with embellishments such as ribbons, paper cutouts and herbs for an added appeal. To do so, make sure that whatever item you decide to use is heat resistant before pressing it gently into the still-warm wax at the top of your candle, ensuring that your adornment does not sink down too far and get lost in the wax. If you are using a jar or container for your candle, make sure to personalize it with a special label or wrapping in order to further enhance its presentation.
Pouring the Wax and Ensuring a Clean, Professional Finish
To pour the wax into your candle jars, use a double boiler set up to melt the wax. Alternatively, you can use a crock pot with hot settings instead. Place your wick in the center of the jar and secure it at the bottom with some melted wax. Make sure the wick is centered before you start pouring in the wax to ensure a professional finish with an even burn. When melting the wax, stir often for an even consistency. As you pour it into your jars, do so slowly – otherwise air bubbles could form and ruin your final product. If you can’t get them out, don’t worry too much — they add character! Once all of your jars are filled, let them sit overnight or longer until they have hardened completely before burning.
Letting the Candle Cool and Setting Without Disturbing Your Design
Once you have finished pouring the wax, it is important to let your candle cool completely before touching it. This will ensure that your design will not be disturbed and will have time to fully set up. Depending on the size of the candle, this process can take anywhere from a few minutes to an hour or more. You should also make sure to keep your heat source nearby while pouring, such as a hot plate or warmer, since some kinds of wax must be reheated in order for the candle-making process to remain successful. Once the wax has cooled and set up, carefully remove it from its mold and admire your work!
Finishing Touches
Wicks: Now that your candle is poured and cooled, it’s time to add a wick! Use a lighter to heat up the end of the wick and gently press it onto the surface of the candle. Make sure that the wick is placed slightly off-center to avoid having it drown into the melted wax. You can also use a clothespin or other clip to keep the wick in place while the wax cools.
Labeling: Next, you’ll want to label your handmade product so that customers can tell what type of candle they’re buying. Use acid-free labels or stickers with words like “organic”, “handmade”, or simply print out your own labels with basic information such as scent, color, size, and burn time.
Finishing Edges: To ensure your candle looks professionally finished, take a pair of scissors and gently round off the edges of any hardened wax near where you added your wick. This will give your candle clean lines and make it look professional. Finish by dusting off any remaining wax shavings for a smooth finish.
Lighting Your Candle and(Safety Tips/ Burning Tips)
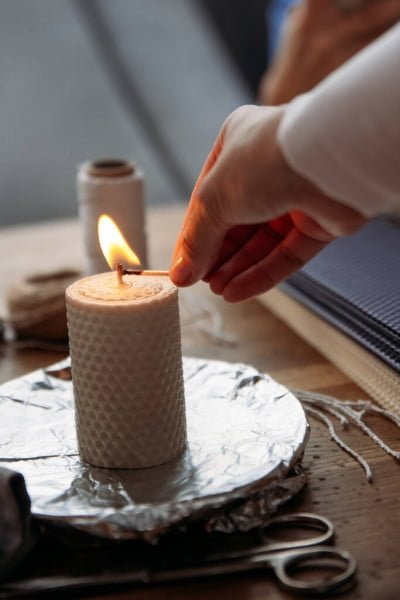
It is important to always follow safety instructions when lighting your organic candle. Always use a candle holder that is stable and does not tip easily, never leave a lit candle unattended, do not move the candle while it is burning and keep the candles away from flammable items . When lighting your candles, keep them in sight at all times. Before lighting the candle, trim the wick to 1/4 inch by using a wick trimmer or scissors. Use long matches or a long stem lighter so you don’t burn yourself while lighting the wick. Allow an even burn of the wax so that it does not melt on one side more than another. To ensure an even burn, you can periodically rotate and adjust the position of your candles from time to time. If you notice black smoke coming from the flame, blow out the flame and trim off any excess charred portions of the wick before re-lighting it again. Once finished extinguish your candles with either a snuffer or by carefully dipping them into its own melted wax pool before disposing of properly as directed in its care instructions.
Conclusion
Once you have completed your organic candle making project, you are sure to be pleased with the results. Not only will the scents of your candles bring a calming and soothing atmosphere to any room they are in, but the fact that you made them from natural, organic ingredients will make everything seem even more special. You can also get creative and make different styles with different color combinations or scents for each candle. You’ll also likely find yourself wanting to make more candles or attempting new designs as you experiment with what works best for you. With these instructions, the possibilities are endless when it comes to creating unique, organic candles. So now that you know how to make your own fragrant and potentially stunning candles, why not give it a try? There’s nothing quite like being able to see the candle take shape—and knowing that it was made purely out of natural ingredients—so take some time soon and make organic candles again and again!

Welcome to my candle making blog! In this blog, I will be sharing my tips and tricks for making candles. I will also be sharing some of my favorite recipes.


