Candle making has experienced a surge in popularity as a creative hobby, but many people are left wondering: is making candles hard? In this blog post, we will delve into the art of candle making, addressing this common question and uncovering the secrets behind creating beautiful and unique candles.
The history of candle making is fascinating, dating back to ancient civilizations. Throughout history, candles have served numerous purposes and held great significance in religious and cultural practices. We will explore the origins of candle making and the diverse types of candles used throughout time.
To understand the process of candle making, it’s essential to familiarize ourselves with the ingredients and materials involved. From different types of wax to selecting the right wick for various candle types, we will unveil the magic behind crafting these captivating creations.
Moreover, we’ll break down the necessary tools and equipment needed for successful candle making. From molds and containers to optional equipment that can enhance your techniques, building your candle making arsenal will ensure smooth and efficient production.
Join us as we embark on a step-by-step candle making guide that unlocks the secrets to creating stunning candles. From melting wax to pouring it into molds or containers, we will provide detailed instructions for each stage of the process. Additionally, we’ll discuss common challenges that may arise during candle making and offer tips on how to overcome them with experience and practice.
Importantly, safety precautions should never be overlooked when undertaking any craft involving heat and open flames. We will emphasize the importance of proper ventilation, fire safety measures, and protecting yourself during candle making.
Finally, we will share insider tips and tricks that can help you master this craft. From achieving professional-looking candles through layering techniques or embedding objects within them to personalizing your creations with decorative touches or unique designs – possibilities are endless in elevating your candle-making skillset.
Overall, this blog post aims to demystify the art of candle making. By exploring its history, delving into the ingredients and materials required, providing a step-by-step guide, and offering valuable tips and tricks, we will prove that creating candles can be both rewarding and fulfilling. Join us on this journey as we answer the age-old question: is making candles hard?
The Fascinating History of Candle Making
Candle making is an ancient art that has been practiced for thousands of years. The origins of candle making can be traced back to various ancient civilizations, including the Egyptians, Romans, and Greeks. In these early societies, candles were primarily made from animal fats and used as a source of light.
Throughout history, candles have played a significant role in religious and cultural practices. In many traditions, candles are used to create an ambiance for prayer or meditation. They are also commonly used during ceremonies and celebrations. For example, in the Christian tradition, candles are often lit during Christmas and Easter to symbolize light overcoming darkness.
Candle making techniques and materials have evolved over time. In ancient times, candles were usually made by dipping a wick into melted wax multiple times until a desired thickness was achieved. Today, there are various types of candles available that cater to different preferences and purposes. From traditional taper candles to scented jar candles, the options are endless.
The art of candle making has stood the test of time and continues to captivate people’s interest today. Whether it’s for relaxation, home decor, or gifting purposes, the popularity of candle making as a creative hobby has been steadily growing. With a rich history spanning centuries, it is no wonder that candle making has become a cherished craft enjoyed by many around the world.
Some interesting facts about the history of candle making include
- Ancient Egyptians used rushlights made from reeds soaked in animal fat.
- The Romans developed the first true dipped candles using tallow.
- Beeswax candles were highly prized in medieval Europe because they burned cleanly with little smoke.
- The introduction of paraffin wax in the 19th century revolutionized candle making by providing an affordable alternative to beeswax.
- In the late 20th century, soy wax emerged as an eco-friendly option for candle making, as it is derived from a renewable resource.
Overall, exploring the fascinating history of candle making can deepen one’s appreciation for this ancient craft and inspire new creative possibilities.
The Ingredients and Materials
Candle making is an art that requires the proper combination of ingredients and materials to achieve a beautiful, functional, and long-lasting candle. Understanding the components of candles is essential for successful candle making. In this section, we will delve into the essential ingredients and materials involved in creating candles.
The primary ingredient in candles is wax, which serves as the fuel source for the flame. Different types of wax can be used to create candles, each with its own unique properties. Soy wax is a popular choice due to its natural, renewable, and eco-friendly nature. Paraffin wax is widely available and offers excellent scent throw. Beeswax is known for its natural aroma and clean burning qualities. Other options include palm wax, gel wax, and coconut wax.
Another crucial component in candle making is the wick. The wick plays a vital role in providing a consistent burn and controlling the size of the flame. When selecting a wick, factors such as diameter, material type (cotton or braided), and coating should be considered. The size of the container or mold also determines what size wick to use for optimal burning.
Additives are often used to improve certain characteristics of candles. These additives can enhance fragrance retention, color appearance, or increase resistance to melting in warmer conditions. Some common additives include stearic acid (for hardness), vybar (for opacity), UV inhibitors (to prevent fading), and vybar 260 (to help with fragrance retention).
Lastly, fragrances are an integral part of many candles as they add ambiance and personalization. Fragrance oils or essential oils can be added during the candle making process to create delightful scents that fill indoor spaces with pleasant aromas.
| Ingredient/Material | Description |
|---|---|
| Wax | The fuel source for the flame; options include soy wax, paraffin wax, beeswax, etc. |
| Wick | Provides a consistent burn and controls the flame size; available in different sizes and materials. |
| Additives | Enhance specific characteristics of candles, such as fragrance retention or color appearance. |
| Fragrances | Add delightful scents to candles using fragrance oils or essential oils. |
By understanding and utilizing these ingredients and materials effectively, candle makers can create a wide variety of beautiful and fragrant candles that are sure to delight. The next section will explore the tools and equipment needed to bring these materials together and transform them into stunning candles.
Tools and Equipment
Necessary Tools for Candle Making
When it comes to candle making, having the right tools is essential for a successful and enjoyable experience. Here are some of the basic tools you will need to build your candle making arsenal:
- Pouring Pot: A pouring pot is a must-have tool for melting your wax. It should have a spout for easy pouring and a handle that stays cool to the touch.
- Thermometer: A thermometer is crucial for monitoring the temperature of your wax. Different types of wax require different melting temperatures, so it’s important to keep an eye on this throughout the process.
- Heat Source: Depending on your preferred method, you can use a stove, double boiler, or a dedicated electric melter as your heat source. Just ensure that you have a safe and stable setup.
- Stirring Utensils: You’ll need heat-resistant stirring utensils, such as wooden spoons or stainless steel spatulas, to mix your melted wax and additives thoroughly.
- Scales: Accurate measuring is crucial in candle making, so having a reliable scale is essential. Look for one with both metric and imperial measurements to accommodate different recipes.
Candle Molds and Containers
Candle molds and containers come in various shapes and sizes, allowing you to create candles with different aesthetics and functionalities. Here are some popular options:
- Metal Molds: Metal molds are durable and can be reused multiple times. They come in various shapes like pillars, tapers, or votives, giving you plenty of options to explore.
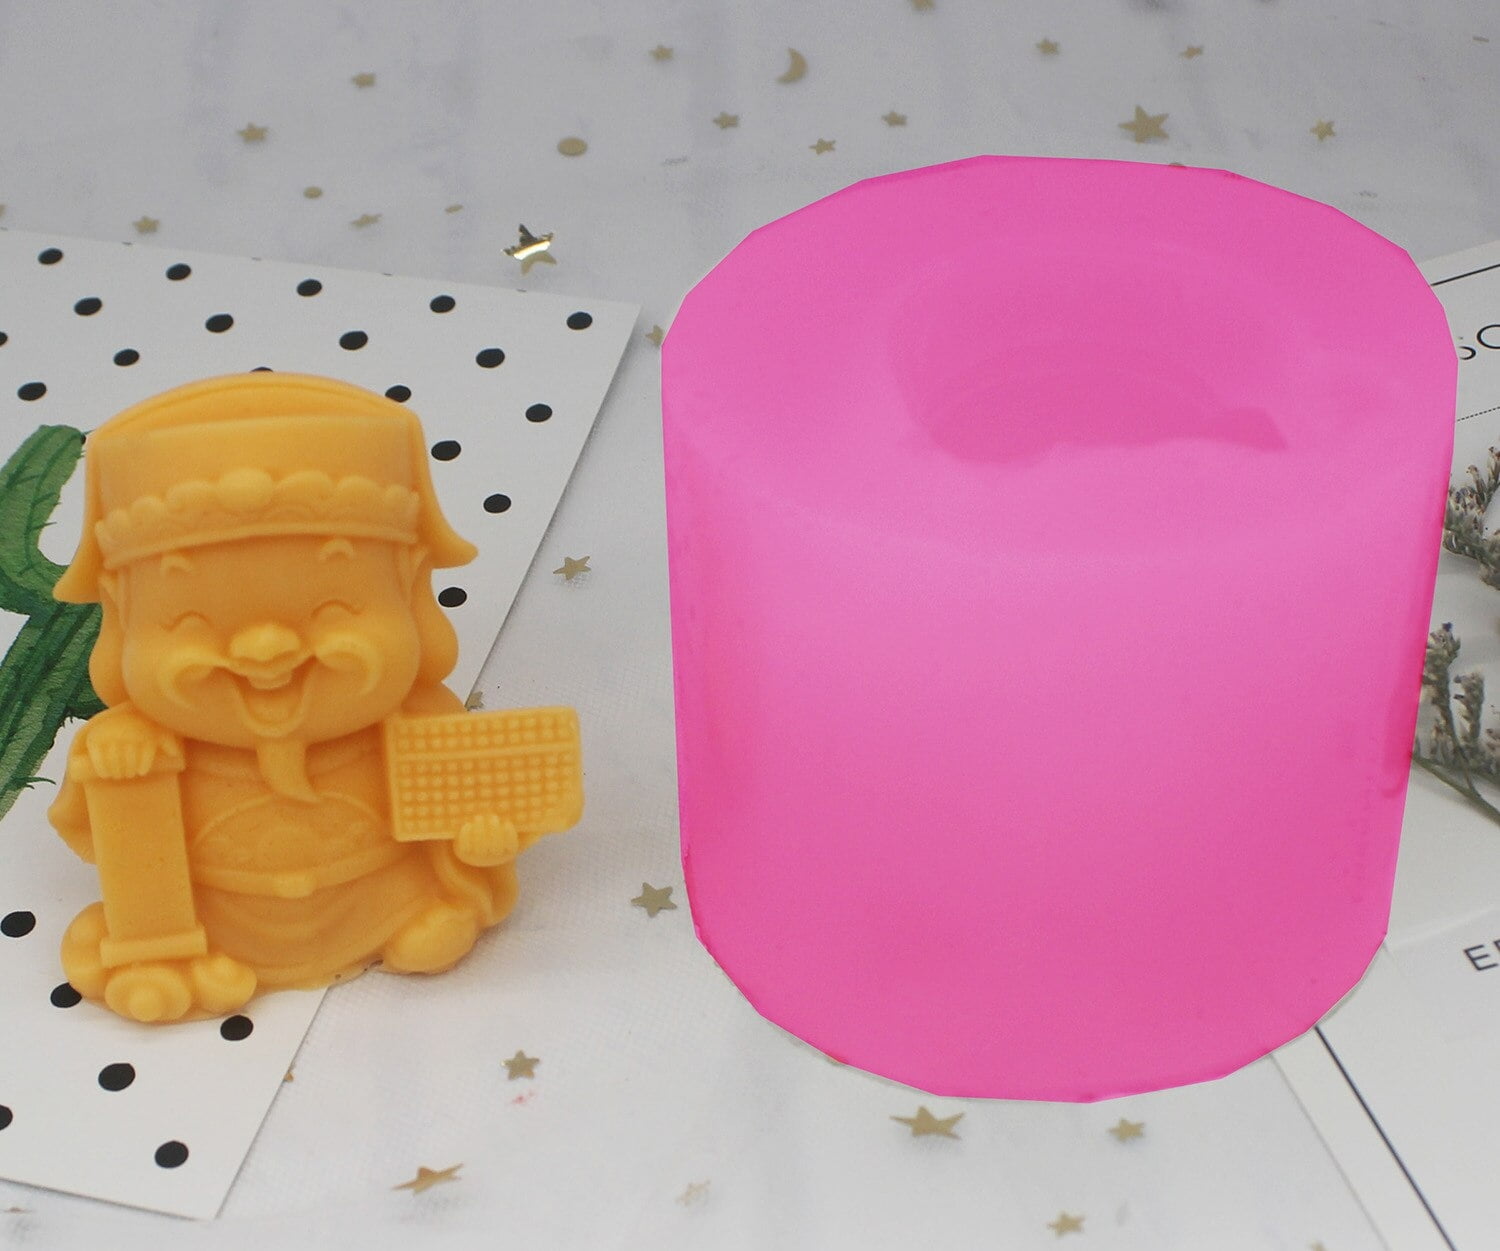
- Silicone Molds: Silicone molds are flexible and easy to release candles from once they have hardened. They often come in intricate designs like flowers or animals.
- Glass Jars or Containers: Glass jars or containers are perfect for making container candles as they provide a translucent glow when lit. They also come in different sizes and designs to suit your preferences.
- Tealight Cups: Tealight cups are small, heat-resistant containers designed specifically for making tealight candles. They are convenient and offer a hassle-free way to create these popular candles.
Optional Equipment for Enhanced Candle Making
While not necessary for beginners, certain optional equipment can enhance your candle making experience and help you achieve professional-looking results:
- Wick Centering Device: A wick centering device is helpful when using containers or molds that don’t have pre-drilled holes for wicks. It ensures that the wick stays centered as the wax cools and solidifies.
- Candle Snuffer: A candle snuffer is a handy tool for extinguishing candles safely and without creating soot or smoke. It also helps prevent hot wax from splattering.
- Fragrance Tester Strips: Fragrance tester strips are useful when experimenting with different scents. They allow you to sample fragrances before adding them to your melted wax, helping you find the perfect scent combinations.
Remember, it’s important to invest in high-quality tools and equipment to ensure safe and efficient candle making. Having the right tools not only makes the process easier but also enhances your ability to create beautiful and long-lasting candles.
Step-by-Step Candle Making Guide
Gathering Your Materials
Before diving into the candle making process, it’s important to gather all the necessary materials and ingredients. The key components of candles include wax, wick, additives (if desired), and fragrance oils. There are various types of wax available in the market, such as soy, paraffin, and beeswax. Each type has its own unique characteristics and benefits.
In addition to wax, selecting the right wick is crucial for successful candle making. The thickness and material of the wick will determine how well the candle burns. It’s essential to match the wick size with the diameter of your container or mold to ensure an even burn.
Other materials you may need include a double boiler or a heat-resistant container for melting wax, a thermometer to monitor temperature, a stirring utensil for mixing additives and fragrance oils into the melted wax, a scale for accurate measurements of ingredients, and a heat source.
Melting and Pouring
Once you have all your materials ready, it’s time to start melting the wax. Fill your double boiler or heat-resistant container with the desired amount of wax and place it on low heat. It’s important to melt the wax slowly and avoid overheating it to prevent any safety hazards.
While waiting for the wax to melt, you can take this time to prepare your containers or molds by placing pre-tabbed wicks securely in them. Make sure they are centered so that they burn evenly.
Once the wax is completely liquefied and reaches the recommended temperature according to the wax type you’re using (around 180-200°F), carefully remove it from heat using oven mitts or gloves. Add any desired additives or fragrance oils at this point while stirring gently but thoroughly.
Carefully pour the melted wax into your prepared containers or molds while holding onto the wick tab. Allow some space at the top to allow for contraction during cooling. It’s important to pour slowly and avoid any abrupt movements that may disrupt the wick’s position.
Cooling and Curing
After pouring the wax, it’s time to let it cool and cure. It’s crucial to ensure that your candles are left undisturbed during this process to prevent any imperfections or uneven burning.
Find a cool, undisturbed area where your candles can be left untouched for several hours or overnight to fully solidify and cure. This will depend on the type of wax used, with soy wax generally requiring a longer curing time than others.
Once fully cooled and cured, you can trim the wick to approximately ¼ inch before lighting. This helps promote a clean burn and prevents excessive smoke or soot.
Remember that each candle making project may have its own specific instructions or variations depending on factors like wax type, additives used, container size, etc. It’s always recommended to follow guidelines from reliable sources or reputable candle making recipes as you embark on your candle making journey. With practice and experience, you’ll soon unlock the secrets of creating beautiful homemade candles.
Common Candle Making Challenges
Candle making, like any craft, can present some challenges along the way. However, with a little knowledge and practice, these hurdles can easily be overcome. In this section, we will address some common candle making challenges and provide tips on how to solve them.
One common challenge in candle making is frosting. Frosting refers to the white crystalline pattern that sometimes appears on the surface of candles as they cool. While it doesn’t affect the quality or performance of the candle, it may not be desired in certain cases.
To minimize frosting, you can try using additives such as stearin or Vybar that help create a smoother finish. Additionally, adding a small amount of fragrance oil after pouring the wax into the mold can also help reduce frosting.
Uneven burning is another issue that candle makers often encounter. This occurs when a candle burns unevenly and leaves some wax unburned on one side while completely consuming wax on the other side. To prevent this, ensure that your wick is properly centered in the container or mold before pouring the wax. Choosing a larger diameter wick or using multiple wicks for larger candles can also help promote even burning.
Another challenge is achieving a strong fragrance throw. The fragrance throw refers to how well a candle fills a space with its scent when burned. If you find that your candles aren’t emitting enough fragrance when burned, consider increasing the amount of fragrance oil used (within safe limits) or trying a different type of fragrance oil with higher potency. Additionally, make sure to follow recommended guidelines for curing time to allow the scent to fully develop in the wax.
Experience and practice are key to overcoming these challenges and becoming more proficient in candle making. Don’t get discouraged if things don’t turn out perfectly the first time – learning from mistakes and experimenting with different techniques and materials will ultimately lead to improvement.
Keep refining your skills, seeking advice from experienced candle makers, and don’t be afraid to try new things. With time and dedication, you’ll be able to create beautiful, high-quality candles that you can be proud of.
Safety Precautions
When engaging in the art of candle making, it is crucial to prioritize safety to ensure a smooth and secure experience. Handling hot wax and open flames can pose risks if not approached with caution. By implementing proper safety precautions, you can minimize potential hazards and enjoy your candle making journey without any accidents or injuries.
One of the most important aspects of candle making safety is proper ventilation. When working with wax, it is crucial to have good air circulation in your workspace. Adequate ventilation helps prevent the buildup of fumes from the melting wax, which can be harmful if inhaled in excessive amounts. It is recommended to work near an open window or use a fan to ensure fresh air flow.
Alongside ventilation, fire safety is paramount when dealing with candles. Never leave melting wax or burning candles unattended, as they can quickly ignite and cause a fire. Always keep a fire extinguisher within reach and know how to use it properly. In case of an emergency, having an extinguisher nearby can save valuable time and reduce potential damage.
In addition to ventilation and fire safety, there are other measures you should take to protect yourself during candle making. Dress appropriately by wearing long sleeves and pants made from natural fibers to minimize the risk of burns caused by hot wax or accidental contact with flames. It is also advisable to wear heat-resistant gloves when handling hot containers or molds.
To avoid spills and accidents, designate a dedicated work area for candle making that is clean, organized, and free from clutter. This will help prevent items from being knocked over or tripping hazards that could result in injuries or damaged property.
By incorporating these safety precautions into your candle making routine, you can enjoy a smooth and secure experience while creating beautiful candles.
| Safety Precautions | Details |
|---|---|
| Ventilation | Ensure good air circulation in the workspace and work near an open window or use a fan. |
| Fire Safety | Never leave melting wax or burning candles unattended, keep a fire extinguisher within reach, and know how to use it properly. |
| Dress Appropriately | Wear long sleeves, pants made from natural fibers, and heat-resistant gloves when handling hot materials. |
| Clean and Organized Workspace | Designate a dedicated work area that is free from clutter to prevent spills and accidents. |
Candle Making Tips and Tricks
Once you have a solid understanding of the candle making process, it’s time to take your skills to the next level. In this section, we will explore some insider tips and tricks that will help you master the art of candle making and create beautiful, professional-looking candles.
- Achieving a Smooth Finish: One common challenge in candle making is achieving a smooth finish on the surface of your candles. To overcome this hurdle, try using a heat gun or blow dryer to gently heat the surface of the candle after pouring. This will help eliminate any air bubbles or imperfections.
- Experiment with Color: Don’t be afraid to get creative with color in your candles. You can use liquid dyes specifically designed for candle making to achieve vibrant hues. Another option is using color blocks or chips which can add depth and texture to your candles. Remember to start with small amounts of colorant and gradually add more until you achieve your desired shade.
- Fragrance Mixing: Creating unique scent combinations can take your candles to a whole new level. When blending fragrances, start by combining similar scents that complement each other well. For instance, floral scents like lavender and rose blend beautifully together. Keep track of your fragrance ratios so you can replicate successful combinations in the future.
- Enhancing Candle Appearance: There are numerous techniques you can use to personalize and elevate the appearance of your candles. Layering different colors or creating gradient effects can give your candles a visually stunning look. Embedding objects such as dried flowers or decorative items can make them truly unique. You can also experiment with marbling techniques by swirling different colored waxes together before pouring them into the mold.
- Safety First: As with any hobby involving hot substances, it’s important to prioritize safety when mastering candle making techniques. Always wear protective gear like gloves and safety goggles when working with hot wax. Make sure your work area is well-ventilated and keep a fire extinguisher nearby. Remember to never leave candles unattended and keep them away from flammable materials.
By following these tips and tricks, you can take your candle making skills to new heights. Don’t be afraid to experiment and let your creativity shine through. With practice and dedication, you’ll be able to create stunning candles that are not only a joy to make but also a pleasure to admire and share with others.
Conclusion
In conclusion, candle making is a hobby that offers both rewards and creativity for those who are willing to explore it. Throughout this article, we have delved into the fascinating history of candle making, uncovering its ancient origins and cultural significance. We have also explored the essential ingredients and materials needed for candle making, as well as the tools and equipment that make the process easier.
By providing a step-by-step guide, we have demystified the process of candle making, breaking it down into easy-to-follow instructions. We have also addressed common challenges that may arise during the candle making process and offered troubleshooting tips to overcome them.
With safety precautions in mind, we emphasized the importance of proper ventilation and fire safety when handling hot wax and open flames. Ensuring a smooth and secure candle making experience is essential for both the enjoyment of the craft and your personal safety.
Ultimately, while there may be some initial difficulties or learning curves associated with candle making, practice and experience will help overcome these challenges. With time, patience, and a bit of creativity, you can master this art form and create beautiful candles that reflect your personal style.
So, is making candles hard? It can be challenging at times but with dedication and passion for the craft, anyone can become skilled in it.
Whether you are looking for a new creative outlet or want to add a personal touch to your home decor or gifts, candle making is an enriching hobby that allows you to express yourself while adding warmth and ambiance to any space. So go ahead, embrace the world of candle making – it’s a journey worth taking.
Frequently Asked Questions
How hard is it to make homemade candles?
Making homemade candles can vary in difficulty depending on the complexity of the candle design and the individual’s experience level. For those starting out, basic container candles are relatively easy to make and require minimal materials and equipment. The process involves melting wax, adding fragrance and color, pouring it into a container with a wick, and allowing it to cool and solidify.
However, more advanced techniques such as making intricate molded or handcrafted candles may require additional skills, knowledge, and specialized tools. With practice and experimentation, anyone willing to invest time and effort can successfully make homemade candles.
Is candle-making profitable?
Whether candle-making is profitable largely depends on various factors such as market demand, product quality, pricing strategy, and production costs. The candle industry is competitive, but there is still potential for profitability if one can differentiate their products from competitors’. Building a customer base and consistent sales might take time in the beginning stages.
It’s important to consider factors like sourcing affordable materials, optimizing production efficiency, effective marketing strategies, and monitoring overhead expenses like packaging or advertising costs. By carefully managing these variables while maintaining a high-quality product that appeals to customers, candle-making can be a profitable venture.
Is candle-making easy or hard?
Candle-making can be considered both easy or hard depending on an individual’s perspective and experience level in crafting or similar activities. Basic candle-making techniques are relatively straightforward to grasp with some initial research or guidance from tutorials or classes available online or in-person workshops. Beginners often start by making simple container candles before moving on to more complex designs involving different types of wax blends or creative molds.
As one gains experience through practice and hands-on learning experiments with different fragrances or colors become easier to manage effectively without sacrificing quality control or safety measures required when dealing with heated wax. While mastering advanced techniques might take time and continuous learning, overall candle-making offers a fulfilling opportunity for creativity regardless of skill level.

Welcome to my candle making blog! In this blog, I will be sharing my tips and tricks for making candles. I will also be sharing some of my favorite recipes.


